Homer Hopper – Introduction
Difficulty: 
Time Required:
One morning or afternoon (For the entire project)
Background:
If you are brewing all-grain and want to gain consistency with your efficiency and want to save money in the long run, you should be milling your own grain (assuming you are buying some grains in bulk). Most grain mills can be purchased without a hopper, which in my opinion is a good thing, because I was not satisfied with most of the hopper designs I have seen.
Posts for this project:
Introduction (this post)
Part 2: Bucket Modifications
Part 3: Wooden Base
Part 4: Mill Box
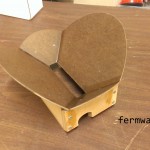
Part 5: Funnel Panels
Part 6: Final Assembly
Part 7: CAD Drawings
Pictures and Stuff:
Affiliate Links
Any links in this post or on this website may link to affiliates, which compensate this website for purchases. All links are provided to help the reader locate items mentioned or used in the post. As an Amazon Associate I earn from qualifying purchases.Cost:
Less than $20 in materials for the hopper assembly. The cost will most likely be less, especially since you probably have scraps of material around your garage that can be used. You’ll also need some mounting hardware that is readily available.
Components:
- Home Depot Homer Bucket (approx $3)
- You may want a lid, which will set you back another $1-2
- 5/8″ plywood, big enough for 14″ diameter. You can go thinner or thicker. Use scrap wood or find a 24″x24″ square for maybe $10 at the hardware store. I used some nice birch, but only because I had it around.
- 4x 1/4-20 x 0.75″ length stainless socket head cap screws or hex head
- 4x washers for 1/4″ bolts ($1-$5 for screws and washers depending on where you shop) *You don’t have to use stainless for the screws or washers, I just got stainless so they didn’t rust while being stored outside in the garage.
- 2x 1/4-20 x 1/2″ long Cup Point Set Screws (to replace the thumb screws on the Monster Mill).
Recommended Tools:
Router with 7/8″ diameter “straight bit” or “end mill” type bit
Jig saw
Oscillating multi-tool (safer cutting into bucket)
Drill with 3/16″ drill bit
Table saw or circular saw
Of course you are probably pretty thrifty, so review the steps laid out and you may have a preference for another tool to get each task done!
Discussion:
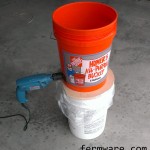
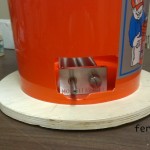
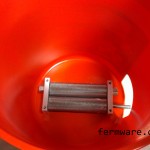
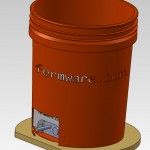
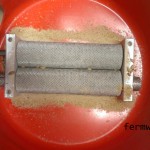
This is a guide to my hopper design using the Monster Mill MM-2 and an Home Depot orange Homer’s bucket. The MM-2 is a great mill, but I did make a few easy modifications that I’ll cover in another post**. This concept could be applied to other mills, but the design would obviously change a little.
I thought I could cover this project in just one post, but it has become clear that it will be a multi-post instruction guide. I will keep this as the master post to keep modifying and add links to the subsequent posts as they are available. The final post will include a package of downloadable CAD files that can be printed and used as cut-out templates.
**Please note: Monster Brewing now has a version 2.0 of the MM-2 that partially addresses some of the modifications that I had made to mine. If you don’t have version 2.0, you’ll want to replace the thumb screws with the set screws I mentioned in the components.
Here are the advantages of this hopper:
- Uses a commonly available bucket
- When you are done, you can put a lid on the bucket and have it all self-contained
- Low dust design while milling
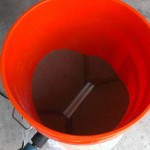
- Design utilizes the entire roller area, instead of just a small section like with funnel based hoppers
- With the mill inside the bucket, it allows the bucket to sit flat and gives more stability
- Allows for using a power drill to drive it
- Holds an entire grain bill for most 5 gallon batches (19-20 lbs)
- Mills that grain in just under 2 minutes*
- Low cost
- No shaking involved to get grain to rollers
How it works:
- Get a fermenting bucket or another HD/Lowe’s bucket as the receiving bucket
- put a bag liner into the bucket (reference post: Fermentation Bucket Liners)
- Place hopper assembly on top of the bucket and connect your drill*
- Pour grain into the hopper and get milling
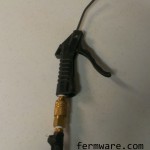
- For clean up, I usually just use my shop air and blow all of the dust and uncrushed grain out. OUTSIDE OF COURSE! AND CLOSE YOUR EYES!
*Drill Power:
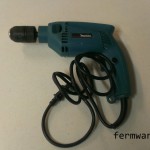
I personally chose a corded drill due to the higher torque they generally have. My only corded drill however was a Makita hammer drill and it is definitely overkill, but I used it on normal drill mode. DO NOT USE HAMMER DRILL MODE! The speed of this drill is pretty fast, so when I mill, I pretty much have to modulate it to the lowest speed possible. I can’t tell you exactly what that speed is in RPM, but it is the slowest I can go without stalling the motor.
Action Sequence:
Here is my Homer Hopper in action. This particular batch was for my Rye PA and consisted of 17.66 pounds which took 94 seconds (5.3 seconds / pound)
Since I utilize the BIAB technique and don’t have to worry about stuck sparges, I use a smaller gap of 0.035″.
Cleanup of the hopper is simple. Especially if you have compressed air.
I’ll be breaking the construction into a few posts:
Introduction (This post)
Part 2: Bucket Modifications
Part 3: Wooden Base
Part 4: Mill Box
Part 5: Hopper Panels
Part 6: Final Assembly
Part 7: CAD Drawings
Thanks for your interest in this project!
All files have a 2″x2″ square on the print so that when you print out on paper, you can measure to make sure your printer was printing to scale and at the correct aspect ratio.
The intention in making these files downloadable and free is for people to make this themselves or modify/improve the design to suit them.
This download is available through the Creative Commons Attribution-Non-Commercial license.
If you are interested in this for commercial purposes (i.e. you want to make money on my effort), I’m flattered, but please contact me first.
Be excellent to everyone!
Click on the download icon to agree to these terms and enjoy!
[wpdm_package id=’781′]




can I get a link or something where I can print the plans?
Yes, on the last post for this series there are instructions for what to do with the prints and a download link to get the prints.
http://fermware.com/download/homer-hopper-cut-out-templates/