Category Archives: Organization

Managing Your Brewing Schedule

In order to brew good beer, you need good preparation.  You’ve probably heard a coach, parent or teacher tell you the 5 P’s.
Prior
Preparation
Prevents
Poor
Performance
Or some variation on that theme…
I’ll show you how I plan out my brewing to make best use of my time, equipment and yeast.

Difficulty: level_2

This just requires a quick read and downloading of the Excel file or creating your own.  What you do from here is up to you.  You’ll be able to download my file at the end of this post.

Affiliate Links

Background:

I really love Gantt charts and how they can help you to be organized. Microsoft Project is either a really good or really bad tool to use (depending on who you ask). I actually like it for projects that I manage at work, but I don’t get into the fine details. I just use it for basic timelines, since it really helps me see the big picture. I started looking at using it for my fermentation schedules, but in brewing, your yeast are on a 24/7 schedule and I was finding all sorts of roadblocks in using 24 hour schedules in Project.

WarningSign

I ultimately decided to go back to my old trusted Excel spreadsheets for this task. This format has served me well for the last two years. I don’t claim that this is the ultimate way to do it, but it might at least serve as inspiration for someone else to create something grander.

Hover or click on each section to learn how I use this sheet.

Sorry, image map is currently out of order.  Please use the descriptions below to see how each section is used.

[imagemap id=”1206″]

Conclusions:

Like I said, I hope that this helps a fellow brewer out for mapping out their schedule or inspires another to build on this or create their own.  Happy Brewing!!

Download the spreadsheet by subscribing:

Creative Commons License
This work is licensed under a Creative Commons Attribution-NonCommercial-ShareAlike 3.0 Unported License.

By clicking on the download, you agree to the terms of this license and to be added to the awesome fermware.com subscriber list. Don’t worry, you won’t receive a bunch of trub in your inbox.

All info below is a repeat for those whose browsers or mobile devices don’t like the image map format.

Beer Description and Basics:

014-Beer Descriptions and Basics

These columns simply denote the batch number, size, name and the yeast to use.  I just added yeast this year so I can manage my yeast more efficiently with re-use and/or racking onto yeast cakes.

Yeast Color Codes:

014-Yeast color codes

I heard on one of the brewing podcasts that you can actually go 8+ generations with really healthy yeast, but since I’m not in any kind of production capacity, I’m usually at the third generation before I’ve reached the end of my step ups.

Dates:

014-Dates

Since I typically brew on Saturdays, I just chose the Saturday date preceding the next week as my column headers.  I then highlight the weekends where we were either out of town, that weekend was off limits to brewing or maybe a weekend for a school break for the kids.

Very Top Row:

014-Top_Row

I didn’t enter any beers for NHC this year, but I did enter some in the Indiana Brewers Cup.  I had a week highlighted for the due date for entries and then the actual awards banquet.

Gantt Chart:

014-Schedule

014-Schedule_Key

This is really the core of my schedule, since it helps manage the timing of your brews along with your equipment capacity. As you can see in my schedule, I typically brew two batches at a time (as mentioned in the ABOUT MY BREWING).  When pairs of three are shown, I’ve started messing with maxing out my kettles with 1.5x the grain bill and reducing the water a little during the mash and boil, so that I get 3 batches (~15 gallons for me) out of one brew session.
Since most of my fermentations just follow a similarly timed schedule, all I do is just cut & paste (CNTL-X & CNTL-V for those like-minded keyboard shortcut preferring keyboard jockeys).  You may notice that I plan to try out the condensed lagering schedule later this year that is getting some attention lately.  Here is a link to Brulosophy’s Lager Method.

Conclusions:

Like I said, I hope that this helps a fellow brewer out for mapping out their schedule or inspires another to build on this or create their own.  Happy Brewing!!


Refrigerator Conversion Part 6 – Finishing up and other observations

Here are some final thoughts on my refrigerator conversion and other related observations.
If you missed the first post, start here: Part 1: Introduction
That post has a run down of most of the materials, tools and supplies needed for this project.

Difficulty: level_4

This project requires a few inexpensive special tools, but will most likely take an entire weekend, lots of improvisation, some thorough cleaning and the cost of the fridge takes it to level 4.

Posts for this Project:

Part 1: Introduction
Part 2: Clean up
Part 3: Disassembly
Part 4: Door modification
Part 5: Shelf building
Part 6: Finishing up and other observations (this post)

Affiliate Links

Pros and Cons of other setups I’ve seen:

A/C units to cool down a fermentation chamber

I had serious reservations about the ability of a window air conditioner to maintain 34 degF in a cabinet of sufficient size in the middle of summer, let alone have enough capacity to lower the temperature of your fermenting beer at any reasonable speed

Dorm fridge powered fermentation chamber

I know this seems to be all the rage with fermentation chambers, but again, I didn’t see how it would be able to handle the cooling needs of a chamber of the size that I needed.

Gutting a full size fridge and re-installing those components in a customer insulated chamber

This was my “ultimate” plan from the beginning, but when I planned out the costs of the wood, the insulation and the FRP panels to line the inside, I was close to double or tripel (see what I did there) the cost of the fridge itself.  I then had the realization that if I found a fridge large enough, the capacity of the freezer alone would be enough to serve my needs.

Temperature Controller:

A temperature controller is a MUST for any fermentation cabinet.  My first controller for my keezer was the Ranco ETC-111000 single stage temperature controller.  I’ll have a post about my wiring at some point.

There are plenty of options out there.  For this lagering fridge as well as my other two converted dorm fridges, I actually made a simple Arduino based temperature controller.  There isn’t really anything novel about them, except that I wanted the challenge of designing my own system.  Below is a picture of the controller setup I’ve got on this lagering cabinet that I just built.  Basically the Arduino controller has a temperature probe inside the fridge to detect temperature and it cycles the fridge on and off through a relay box to maintain temperature.  The display on the box shows 3434.  It’s my simplified way of showing a setpoint of 34 degF and a cabinet temperature of 34 degF.

012 - Temperature Controller

Google search for Arduino Temperature Controller


I do however have a Raspberry Pi and am looking at going to the BrewPi setup or some derivative.  I really geek out on that stuff and it gets me really excited when I think about that possibility.  Here are some good links:

Official BrewPi

Home Brew Talk thread on using all the BrewPi code, but a standard Arduino

Small Tip for the Newbie

If you are new to temperature control, note that for best results, you need to set your fridge or freezer to maximum cold and let the temperature controller do the rest.  All of these temperature controllers basically power cycle the fridge/freezer on or off to control the temperature.

How to move a fridge from point A to point B:

You’ll hear many times that you can’t lay a fridge on it’s back or it will ruin the compressor.  This is half-true.  You can lay a fridge on it’s back to transport it, BUT when you get it to your house, you just need to get it upright so that the compressor fluid drains back into the compressor before it is powered on again.  I generally just get it to my garage, get it upright again and let it sit overnight.  I’ve done this 4 times with no dead fridges.

As an FYI, we’ve got a 2005 Honda Odyssey and with the middle seats taken out and the back seats folded into the floor, it has fit all 4 of those fridges inside with the tailgate all the way closed.  If you have a trailer, more power to you.

Oh, another important tip.  Remove all of the shelves from the fridge before laying it on it’s side.  All of those things are meant for gravity to hold them in place and when you put the fridge on it’s back, they all usually fall out of their slots.

What I tried to do with another fridge (drilling FAIL):

I was always under the impression that every important mechanical component was either at the back or underneath.  I was proven wrong one time when attempting to install a draw catch latch to a fridge.  I started drilling the pilot hole in the side of the fridge for the screws and the psssssssshhhhhh of the magic refrigerant came blowing out.  RIP fridge.

Simplified explanation of how a refrigerator works:

A refrigerator is simply a mechanical system that removes heat from an insulated cabinet.  That’s as far as I’m going with that.

You may also hear someone tell you that a refrigerator won’t work in a garage.  The reason behind this is that when the ambient temperature gets below the internal temperature of the freezer or close to it, the temperature difference gets closer to zero (T_ambient – T_freezer).  An A/C compressor or refrigerator compressor system relies on a temperature difference to function, so if you take away this difference, it won’t function properly.

Having said that, we live in central Indiana and have 3 refrigerators and one deep freezer in our garage.  We only have a problem with our primary overflow fridge with the ice maker in deep winter, where it doesn’t produce enough ice.  Except during long cold spells (where it can get close to freezing), our garage is usually about 55 degrees in the areas directly adjacent to a living space and in our bump out (furthest away) it is maybe low 40’s.

The more unknown part is that almost all top and bottom refrigerators are essentially a freezer on top that does all the work and bleeds cold air to the refrigerator compartment.  If you get to tearing one apart, you’ll see this.  Also if you’ve ever had a fridge with weak magnetic seals, you may notice that when you slam one of the doors, the other one pops open.  That’s because they are linked.

That’s all folks…Thanks for reading!


DIY Locker Shelf

Do you need a locker shelf, but can’t stomach paying $15 for a flimsy shelf?  Well it’s back to school time here and my daughter needed a locker shelf, so I did what any Tim Taylor type would do and build one myself.
As I stated in my About – This Blog page, I would have some posts that were non-beer related.  Well this is one of them.
I made one last year for my daughter and it screwed together once inside the locker.  I had assumed that they would take them out of their lockers on the last day of school, but they surprised me and did it the day before and I felt like a jerk, because the teacher didn’t have a screwdriver to take the thing apart.  This year, I decided to go with a design that was tool-less.

Difficulty: level_2

If you are even a novice woodworker, this should be a piece of cake.  Actual work time was probably about 15 minutes.  Gathering materials and your tools will add whatever time it generally takes you.

Affiliate Links

Supplies Needed:

  • 48″ section of shelving
    • 11″ to 12″ is a typical depth
    • I used a melamine board, because I had it on hand, but any shelving material should do
  • Scrap strip of wood for some supports
    • Again, I had a piece that was 3/4″ x 3/4″, but I’ll let you decide
    • something on the order of 40″-44″ should be close enough
  • Wood or drywall screws
    • They need to be shorter than the stackup of your shelf and wood strip (you’ll see later what I mean)

Tools Needed:

  • Drill
    • I’ve got a Makita drill and driver kit that is used in 95% of any of my projects.  If you don’t have a set, you need to.  Bosch, Makita and DeWalt all make good stuff.  A drill is, well, a drill.  But I love the impact drivers.  They make it effortless to run screws into anything.
  • Tape measure
  • Circular Saw
  • Clamps (for securing the wood to your work surface when cutting)

The Build:

Alright, lets get to it.  Measure twice, cut once.  Right??

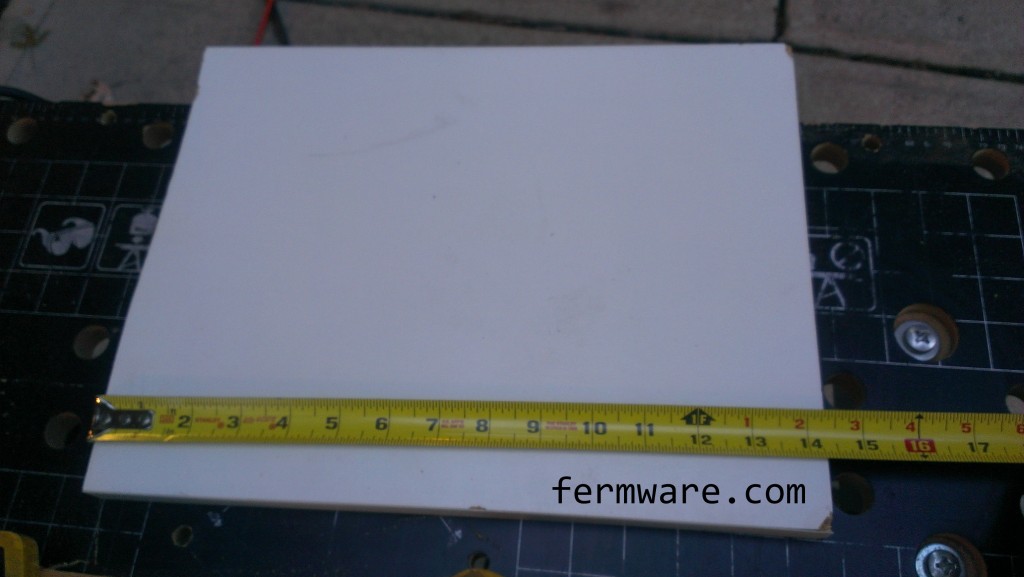
You should have the interior dimensions of the locker in hand.  Many schools provide this information on their website.  Ours were 13-1/2″ wide, by 11″ deep.  I went just a bit under on width at 13-3/8″.  You don’t want too much free play however, because if there is too much movement, the shelf could collapse on itself.  You’ll know how sturdy it is when you install it in the locker.  The 11″ standard shelf depth worked out well, but I still had to trim a little off due to the frame of the door.

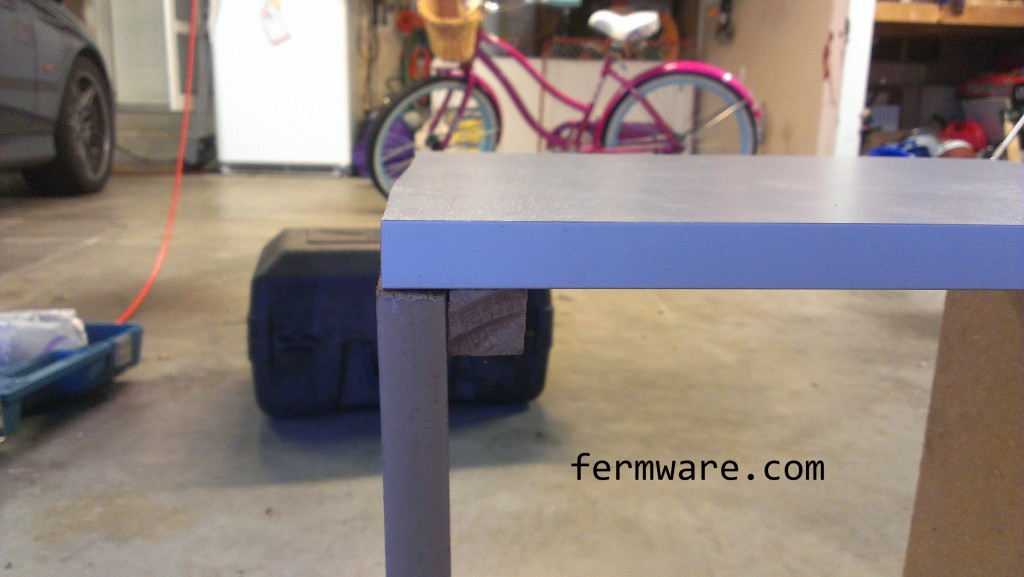
To help you visualize how this is going to go together, here is what each corner will look like.  You can see that the uprights support the weight of the shelf.  Then the stops that are screwed to the shelf basically prevent the uprights from leaning in.  The interior wall of the locker prevents the uprights from falling out.  Easy right?

locker shelf - shelf - how it works

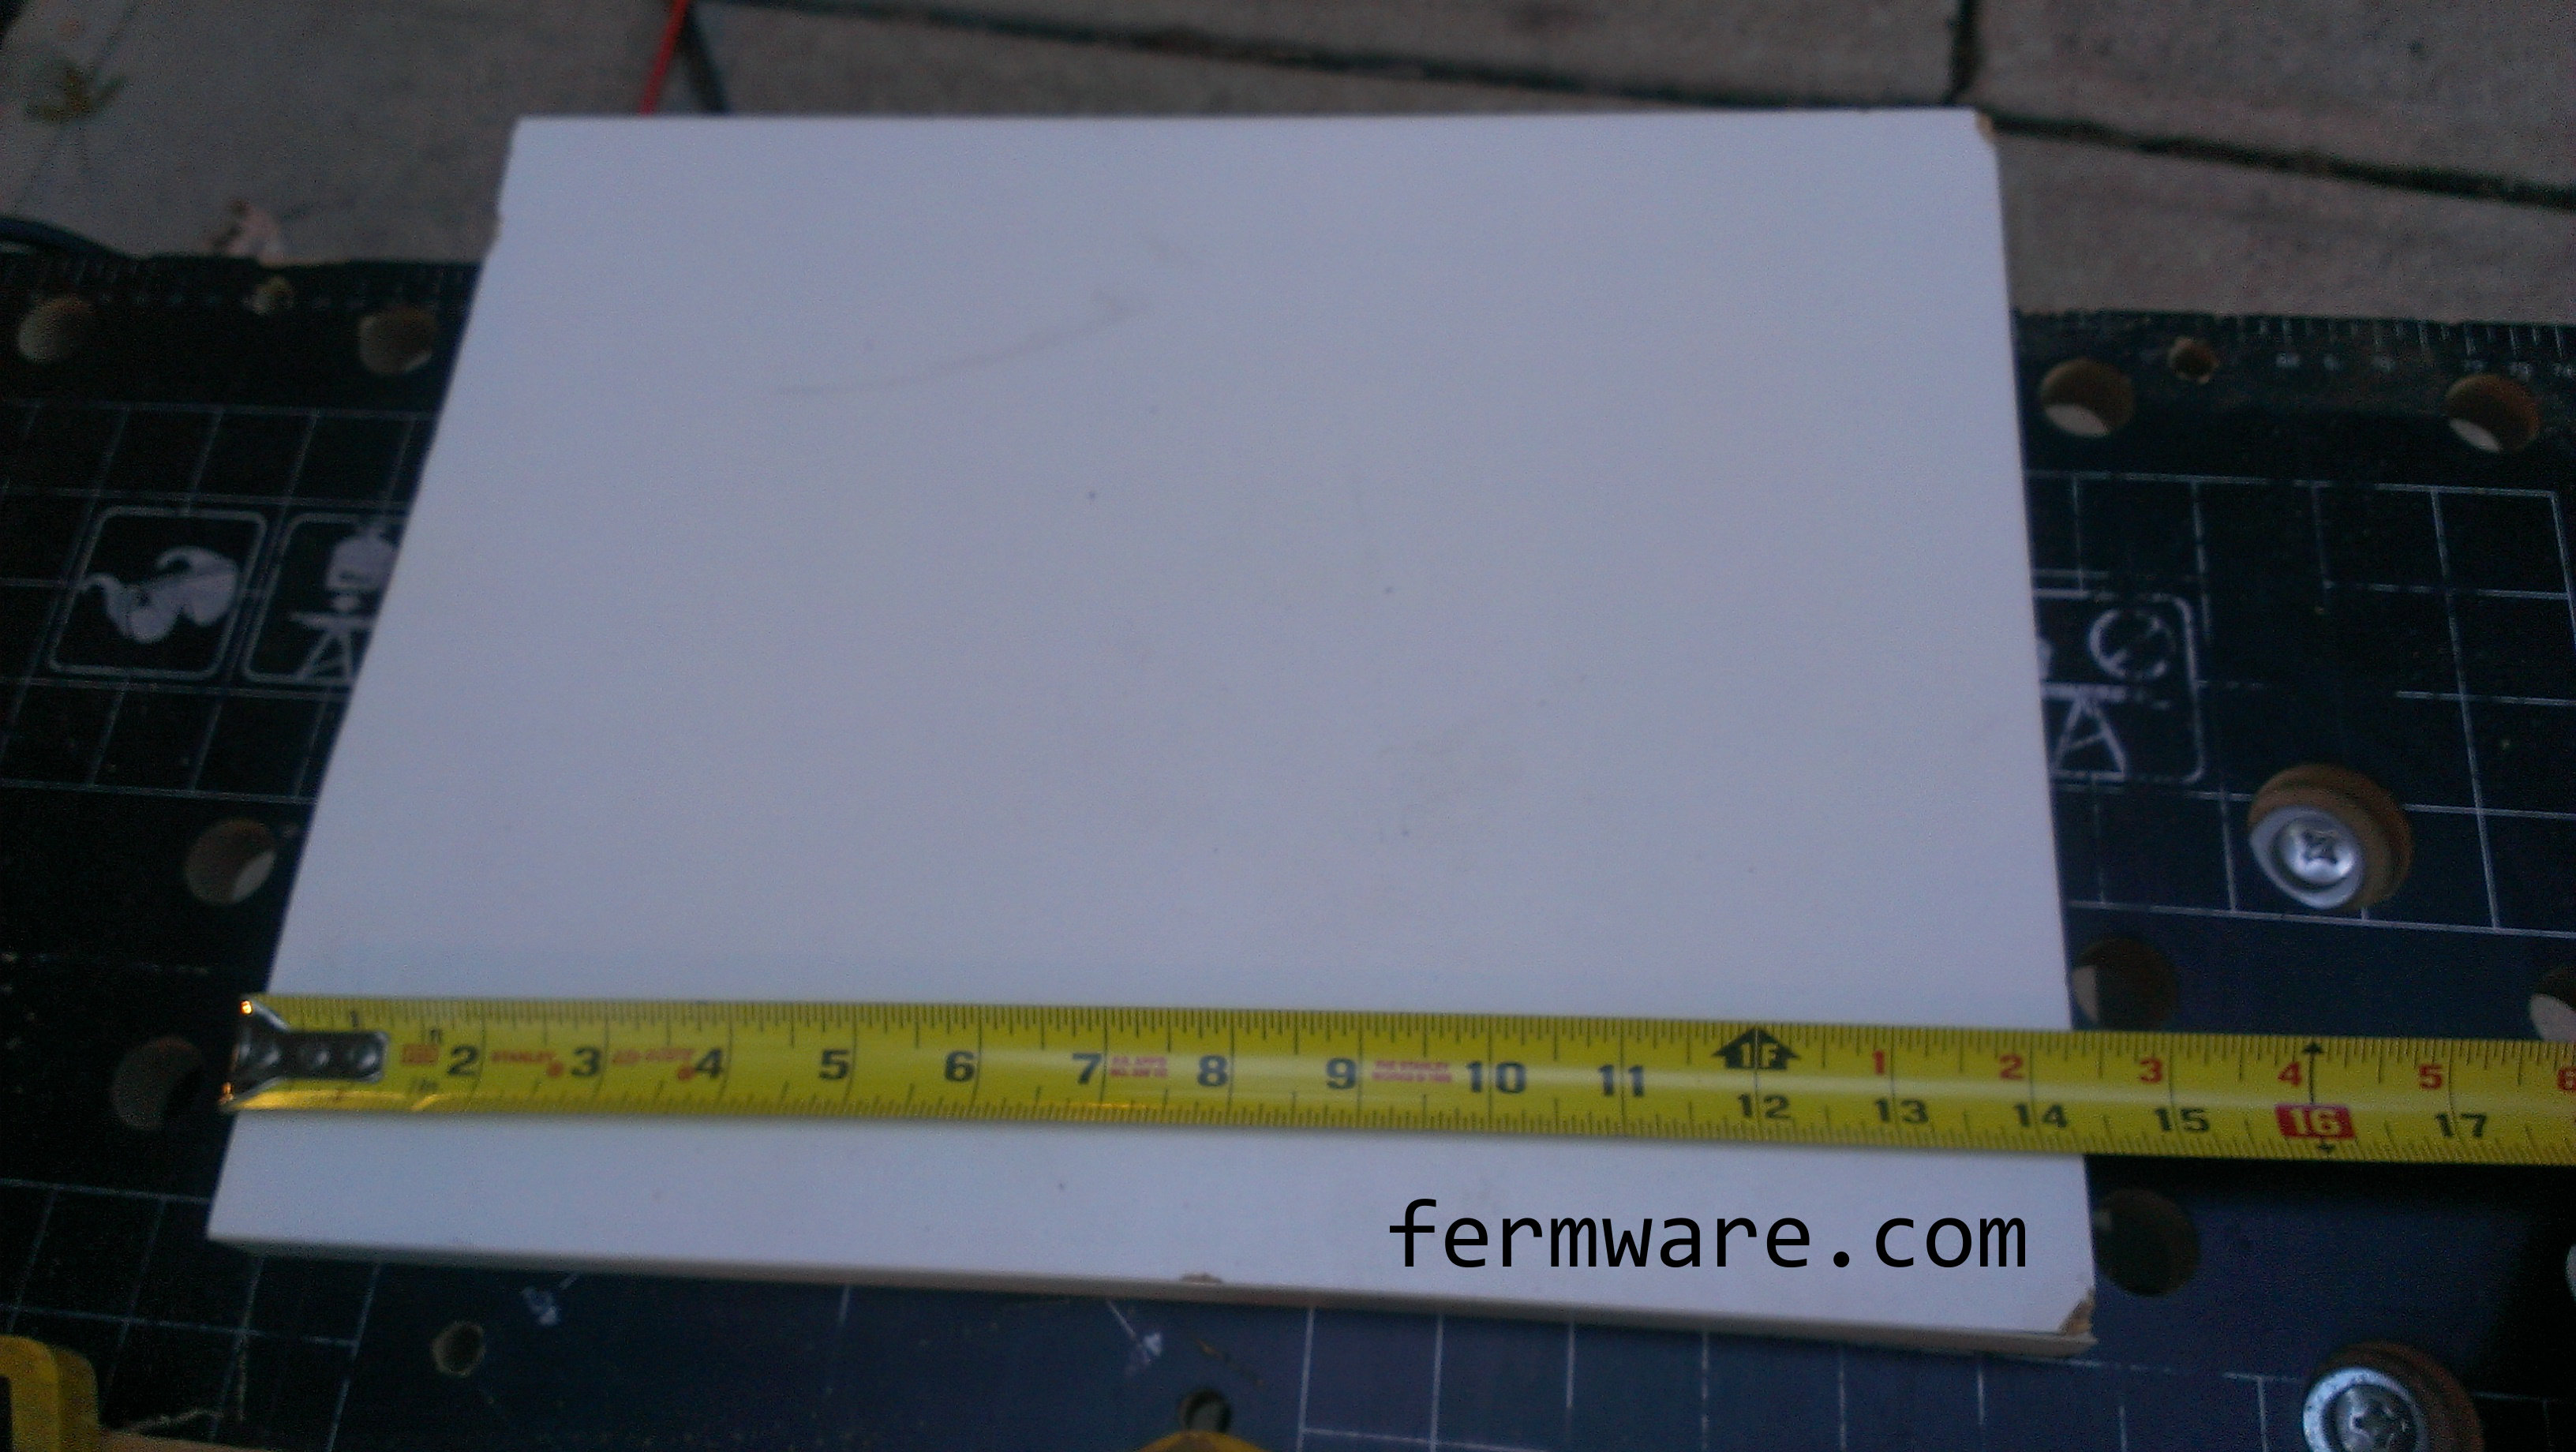
Cut the top shelf piece to length.

locker shelf - Measurement - width

Then decide how tall you want it.  If you got a 48″ section, you should have enough wood to make something around 16″ tall at the most.  That should be sufficient for most books and notebooks.  Remember your total height will be the length of each upright, plus the thickness of the shelf.  And the underneath height will be the length of the uprights.

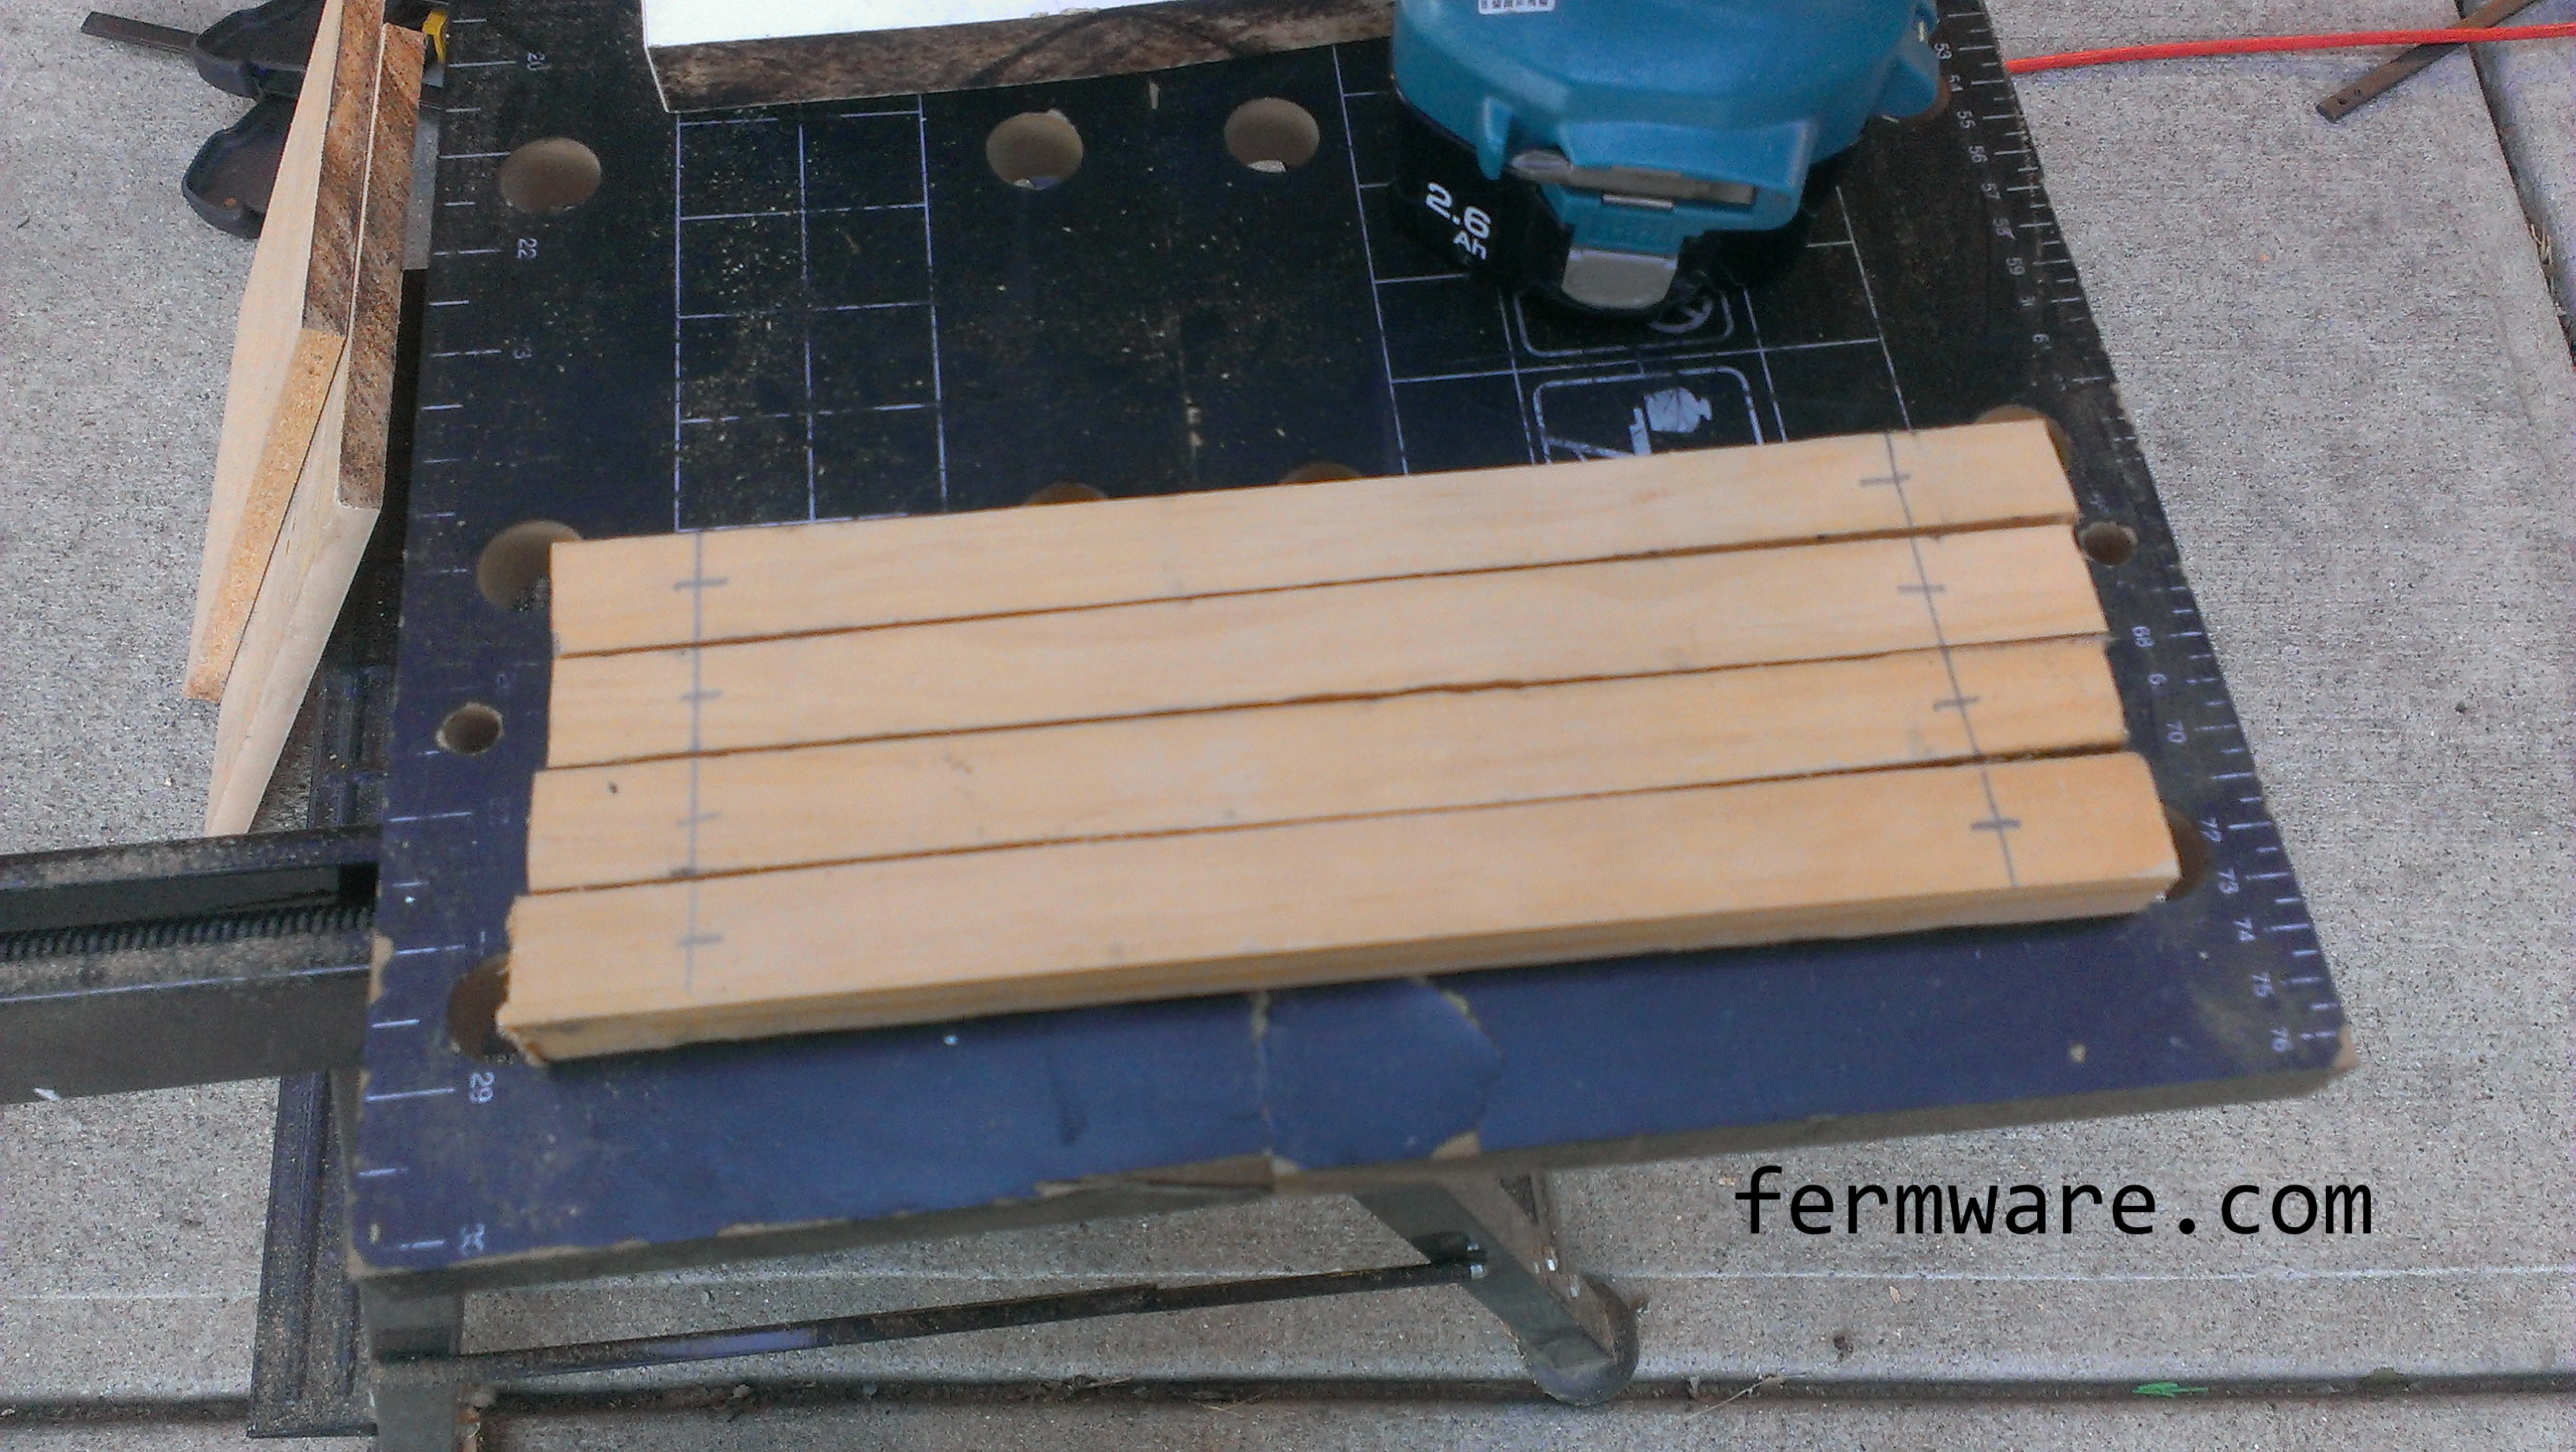
Now cut the uprights, just as you did for the top.

Next will be the strips that keep the uprights from moving.  These should be shorter than the depth of the shelf.  They will be fastened to the shelf top with screws.  You’ll need two strips per shelf.  I’m building two shelves here (one for each daughter needing one), hence a total of 4.

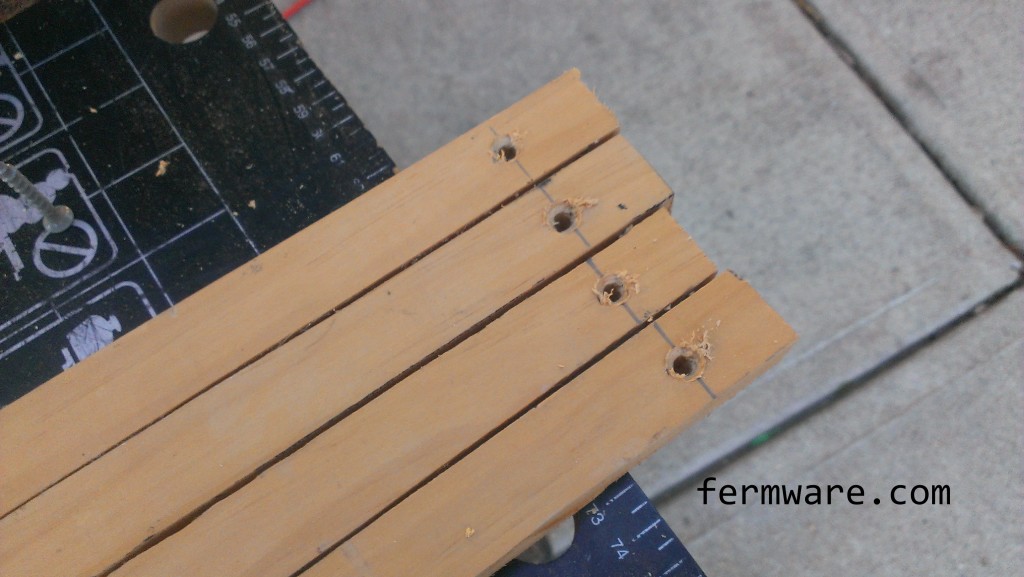
Mark out a line approximately 1″ from each end and then eyeballing the center should be good enough.

locker shelf - strips - marked for drilling

Pre-drill vs. Through Hole

You’ll want to drill “through holes” in the strips and “pre-drill” the shelf.

A through hole is just that, it allows the fastener to go through a material without actually gripping it and is larger than the major (or maximum) diameter of the fastener.

A pre-drill is used to reduce the risk of the wood splitting when you drive the screw in.  An appropriate pre-drill size for wood is right at the minor diameter or slightly under.  You can measure these dimensions if you have a pair of calipers, but I’m using my “eyechrometer” for these.

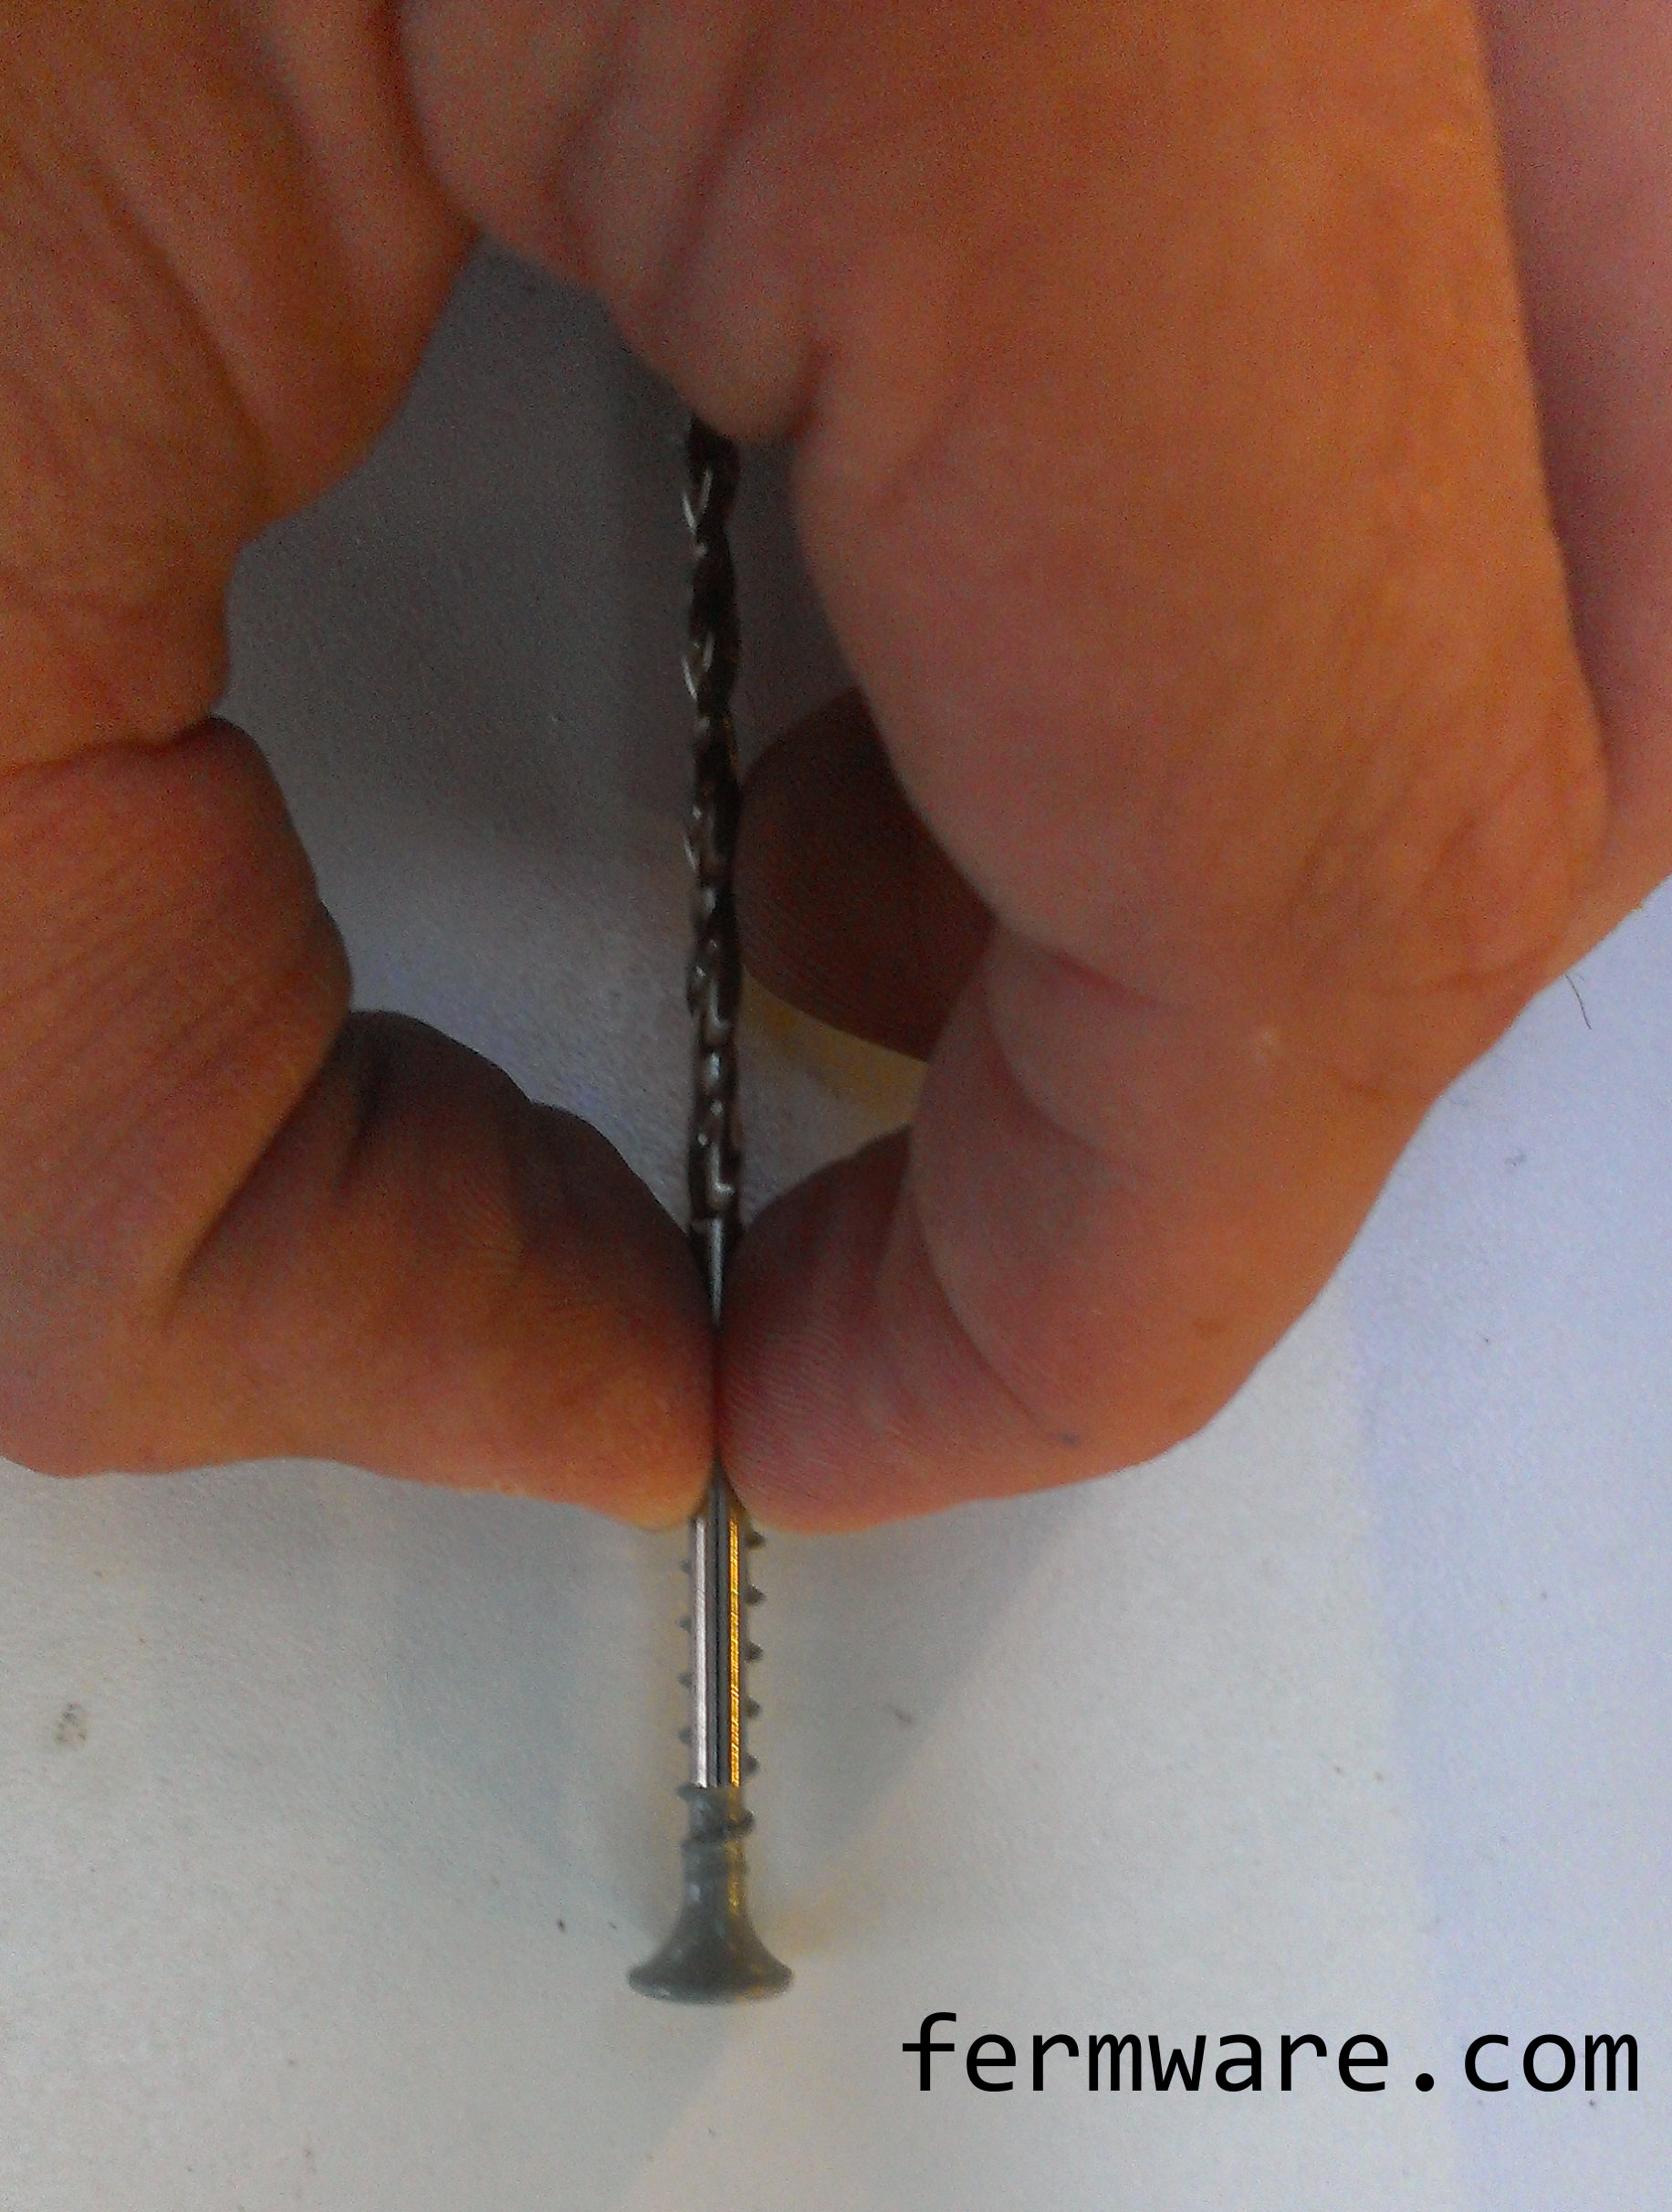
You can see below that the drill bit is slightly larger than the screw.  This is what I will use to drill the through holes in the wood support strips.

locker shelf - holes - predrill size

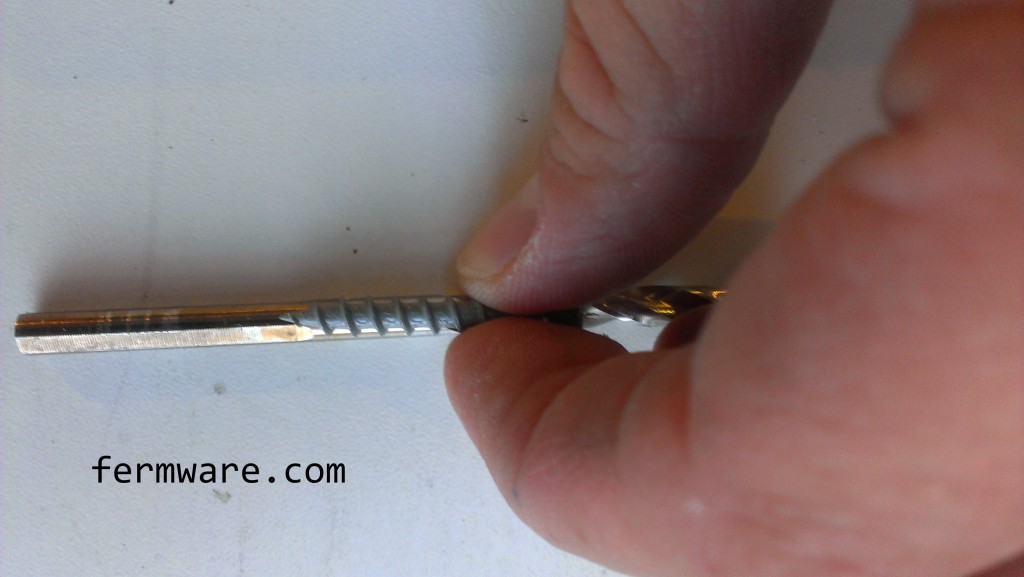
This next image shows selecting the pre-drill size for the shelf.  Notice that the drill diameter is approximately the same as the root diameter of the screw.

locker shelf - holes - through hole size

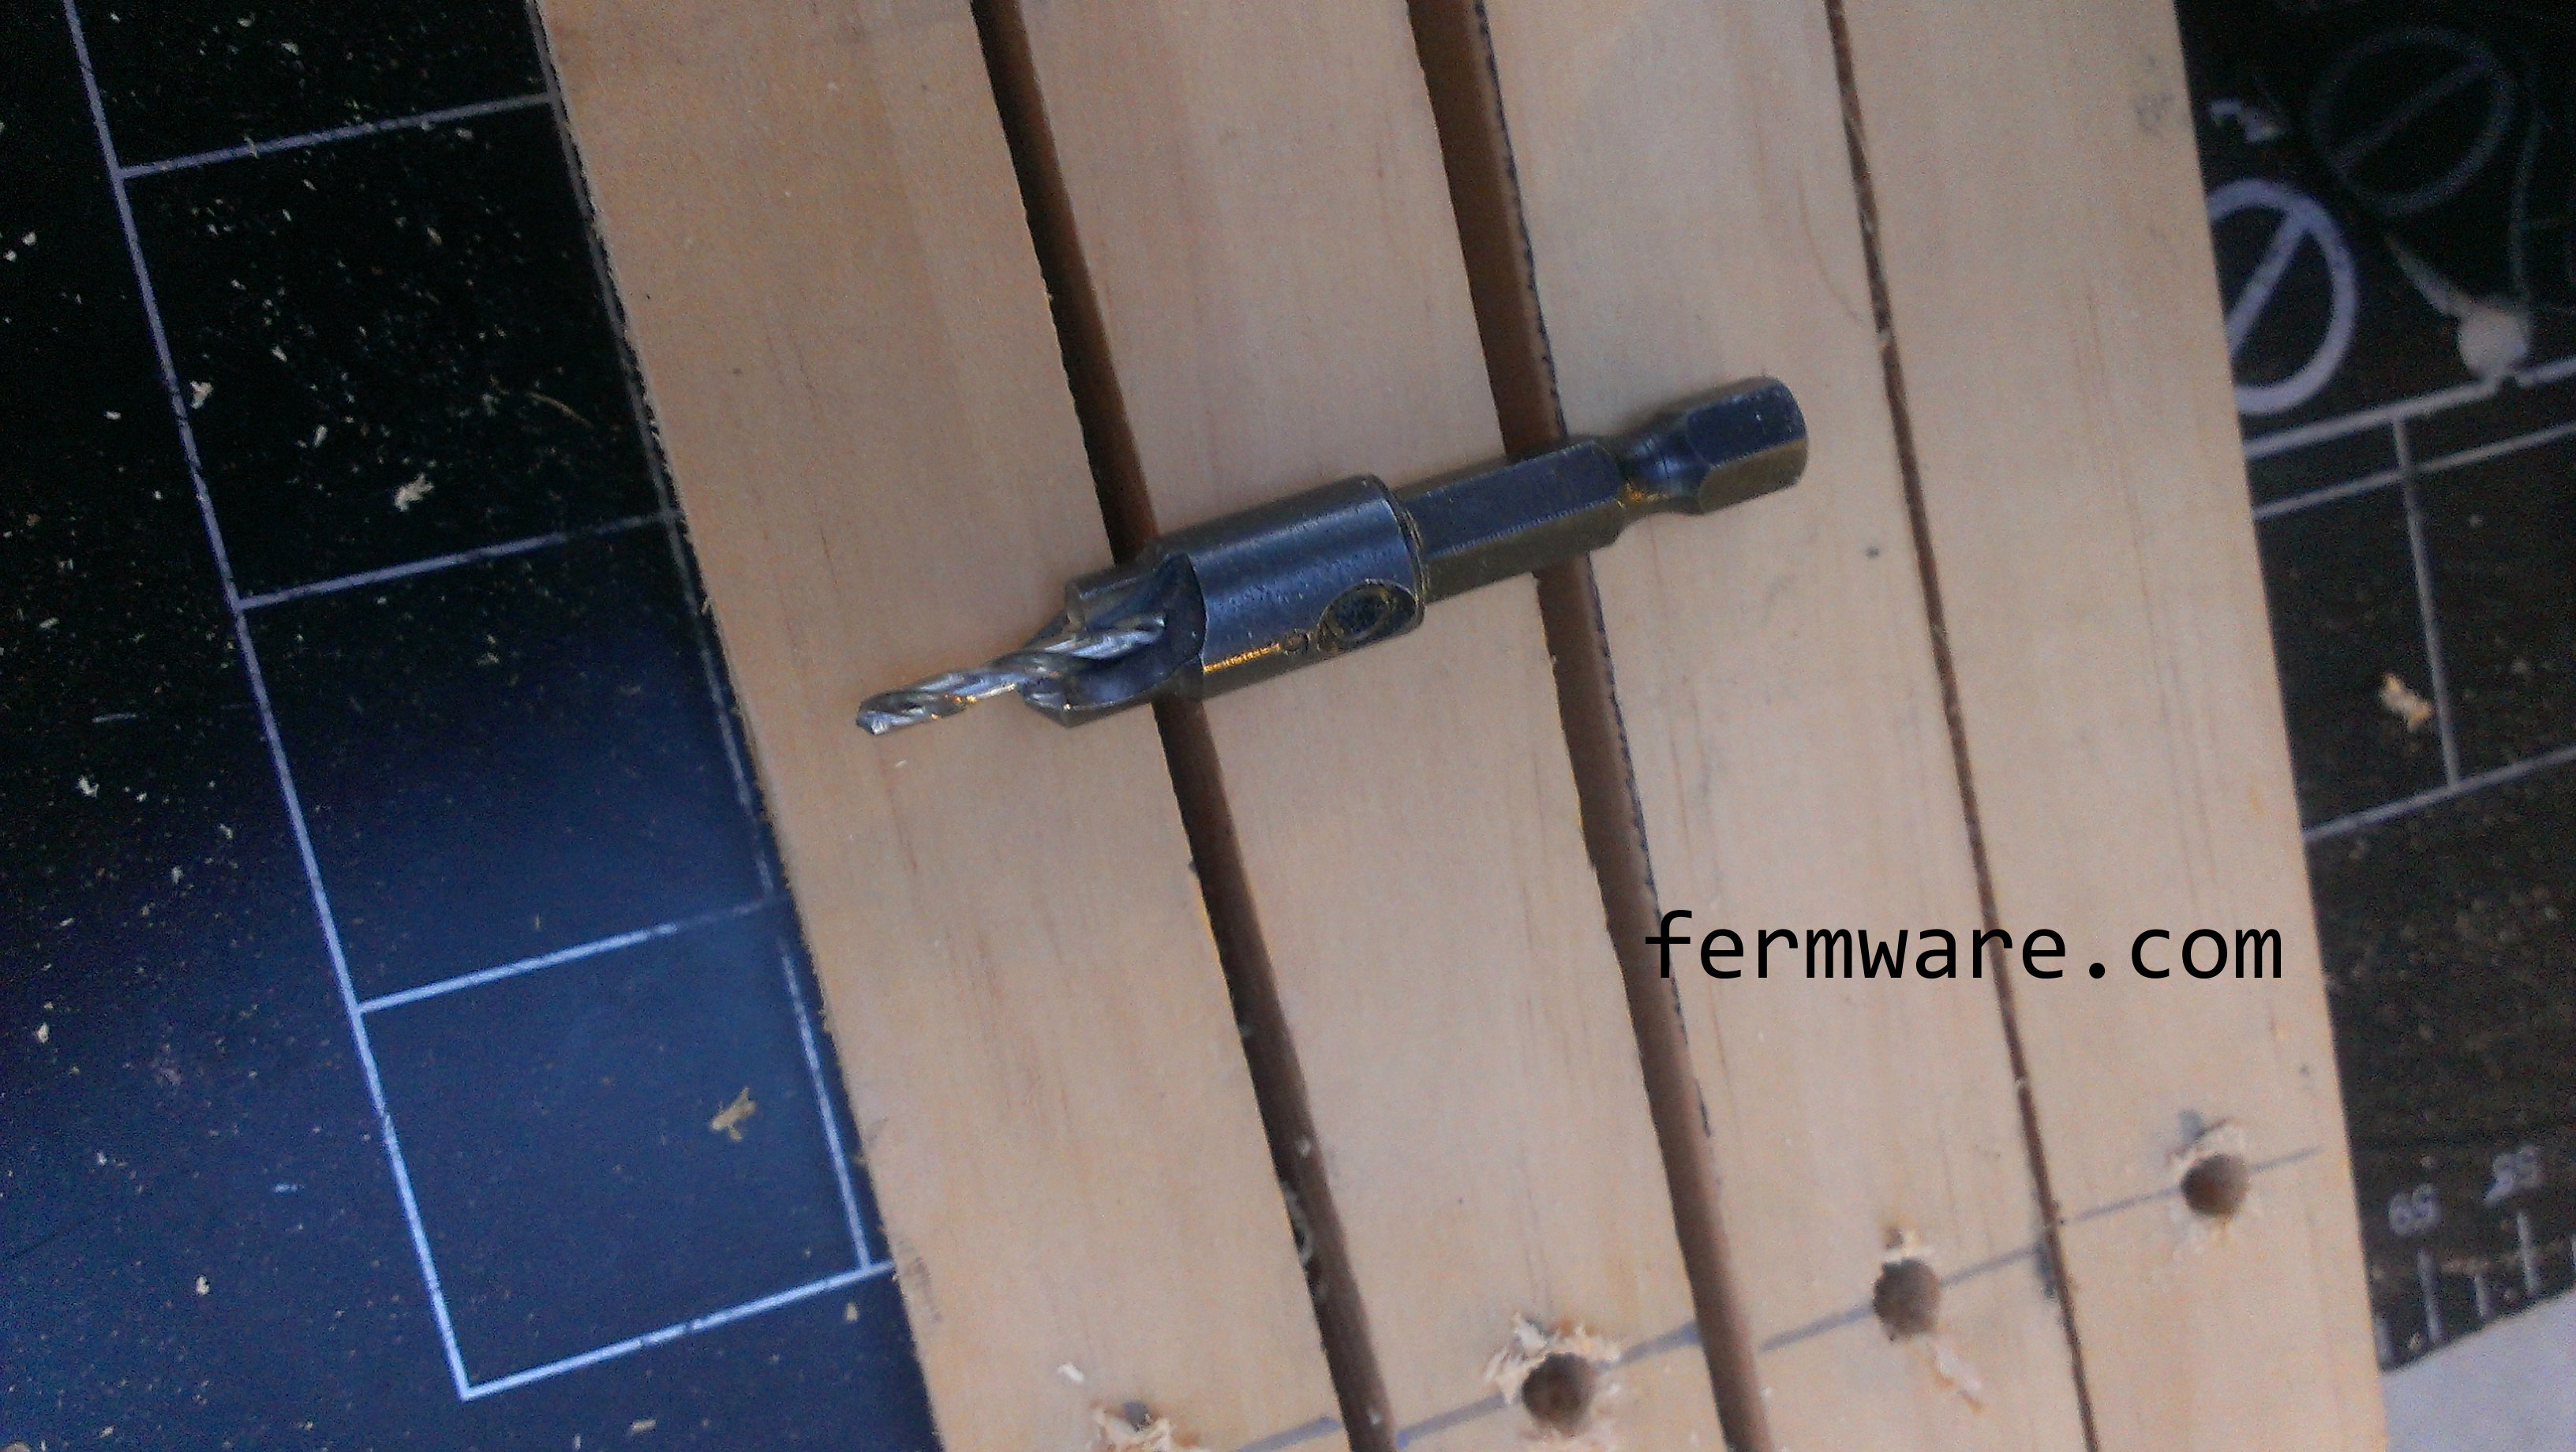
This next step is optional.  I used a counter-sink kit to allow the screws to sit flush with the top of the wood when fully secured.  Sometimes in harder woods, you’d end up splitting the wood if you ran the screws hard enough into the wood to make them flush.  They basically create a cone shape for the head of the fastener to sit in.

locker shelf - holes - countersink

See, nice pretty countersunk holes.

locker shelf - holes - countersinks completed

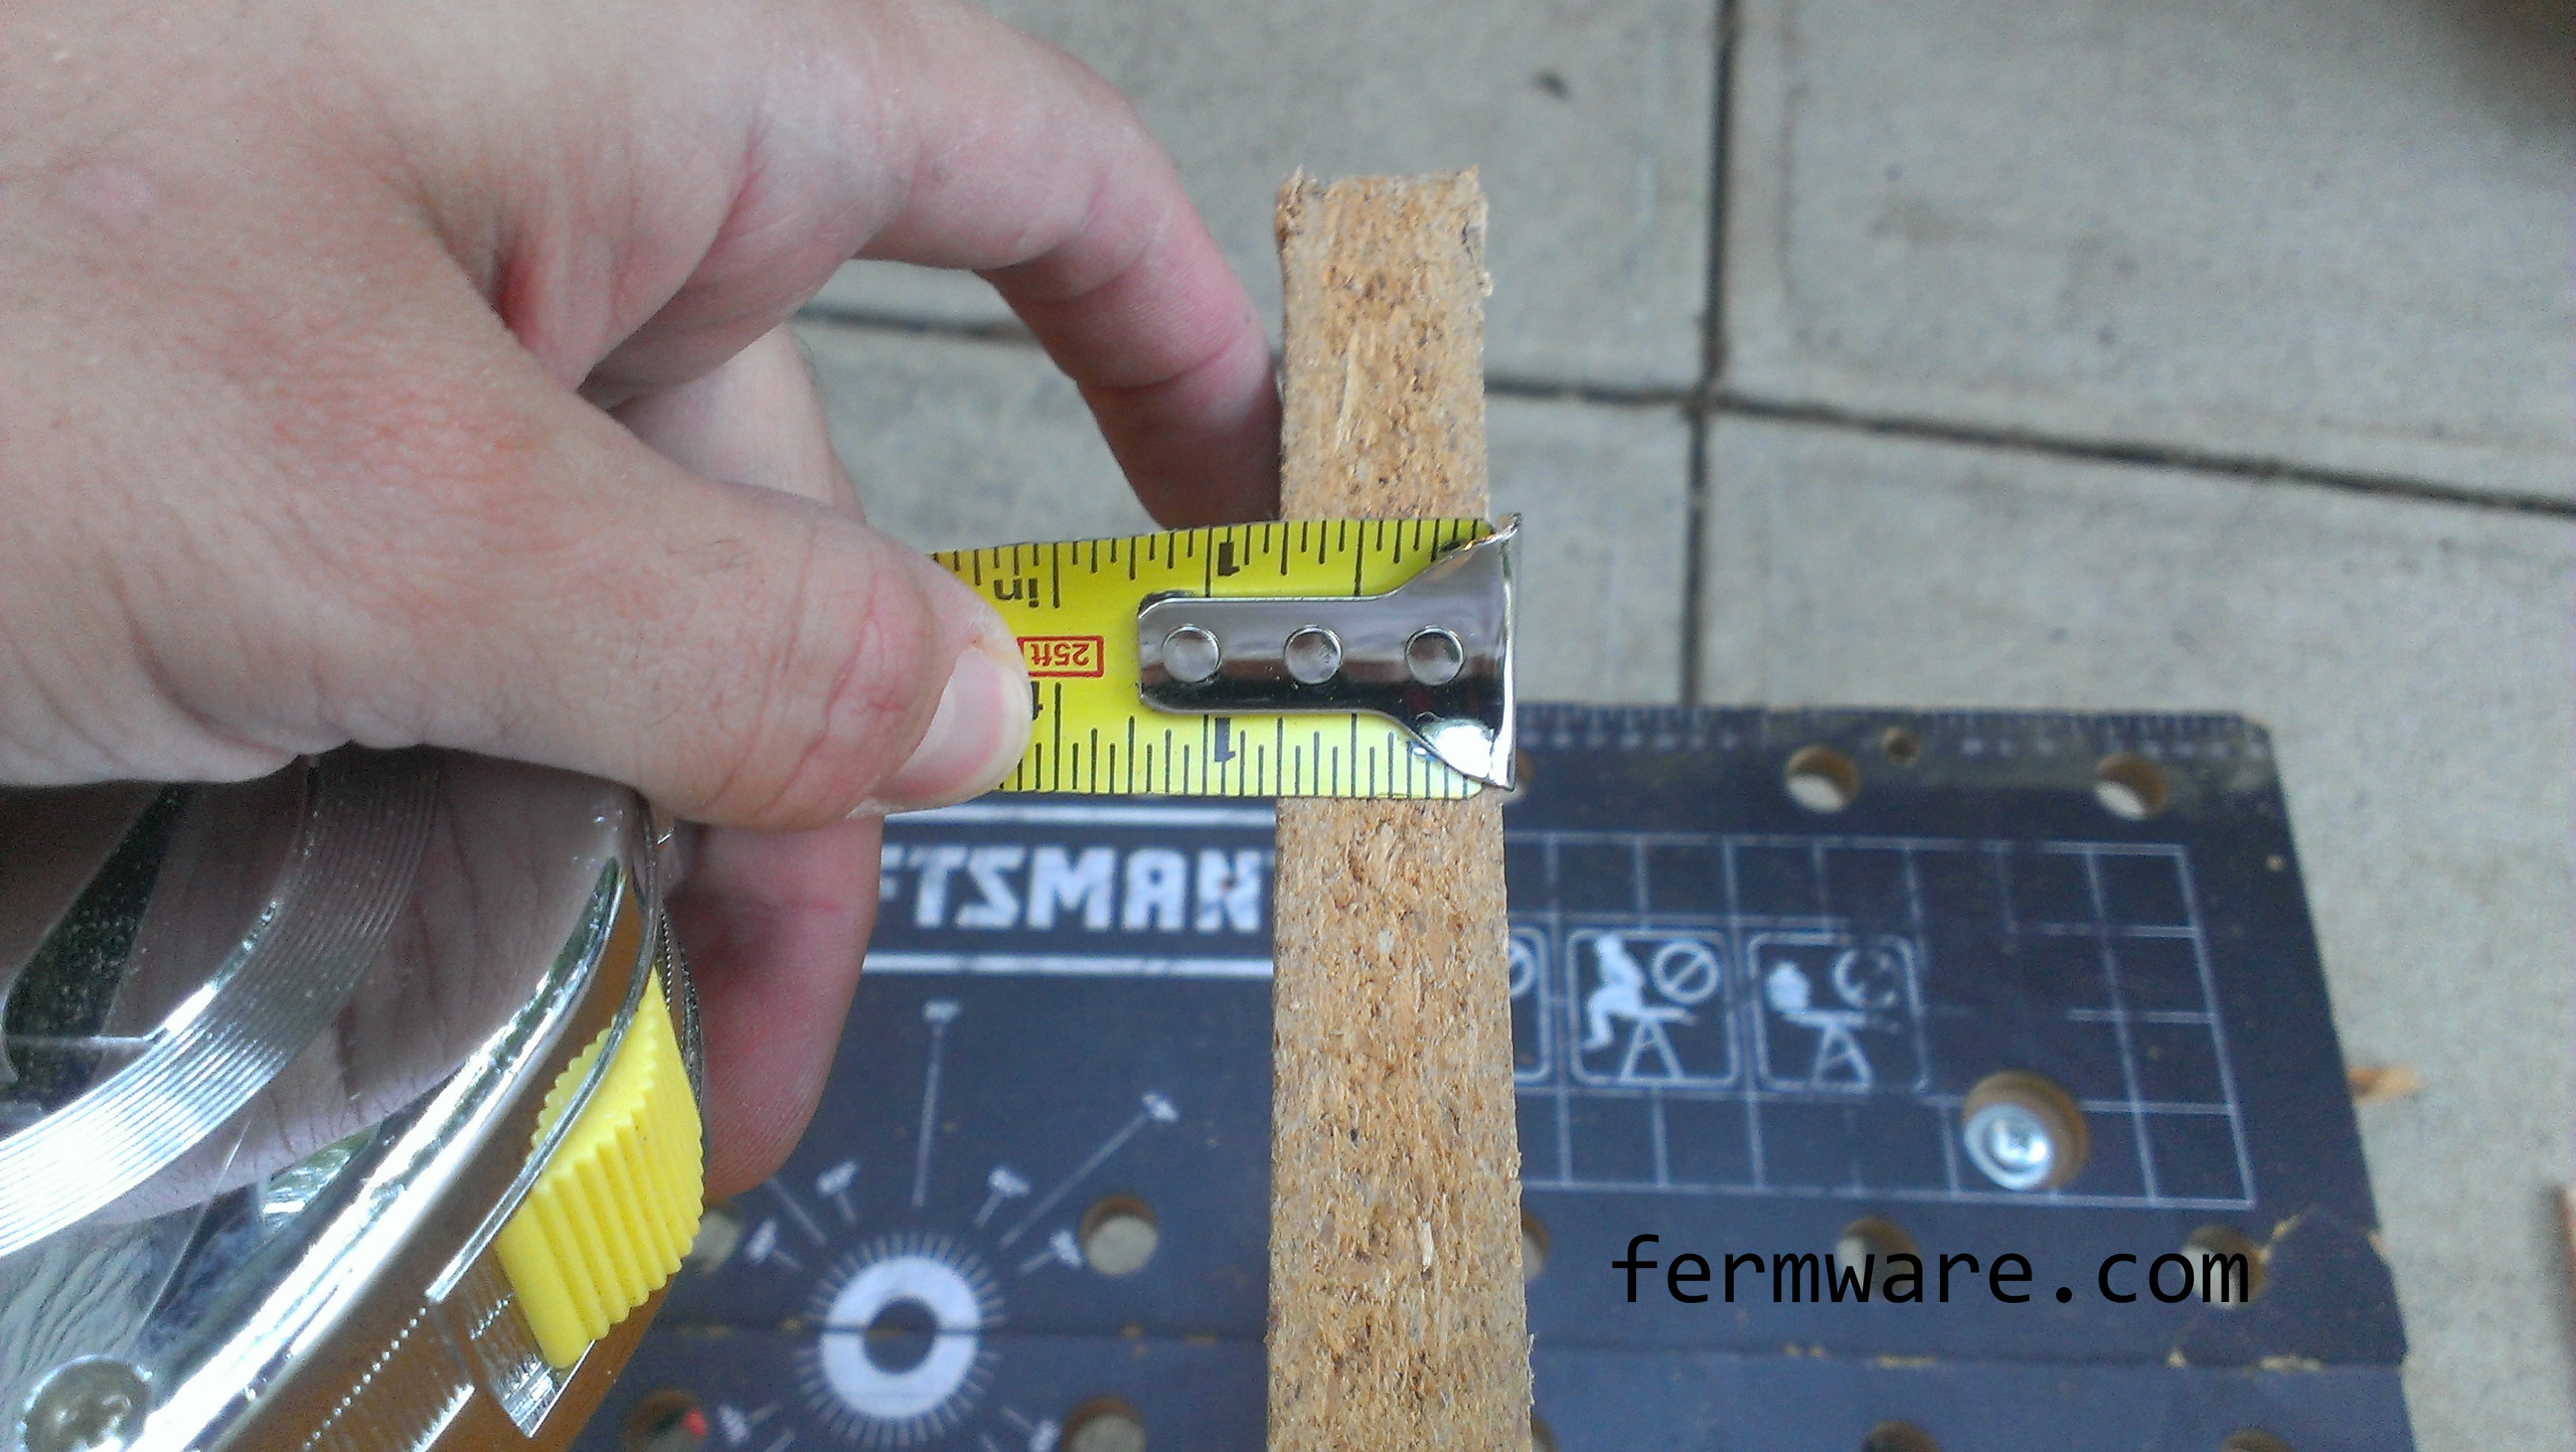
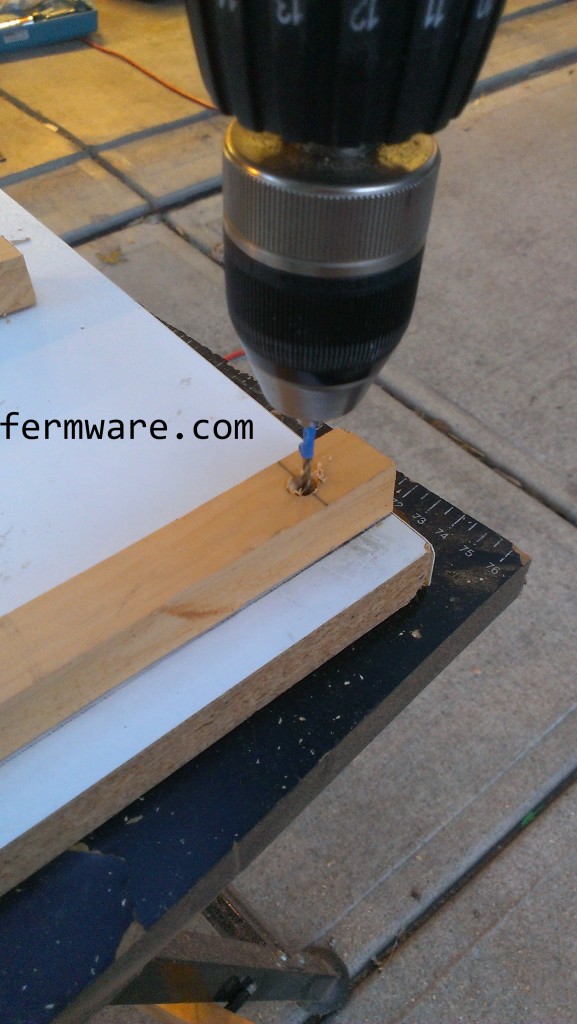
Now we need to pre-drill the shelf to attach the support strips.  You’ll need to measure the thickness of your upright.

locker shelf - measurement - shelf thickness

Then use that measurement to determine the spacing from the edge of the shelf to the location of the support strip.

locker shelf - measurement - stop offset

Mark a line so you know if anything moves when you are drilling the holes.

You’ll need screws that are shorter than the thickness of the shelf and the support strips.

locker shelf - holes - evaluating depth

You’ll also want to be careful to not drill all the way through the shelf.  Pointy screws poking out tend to rip books and cut hands!  I’ll sometimes use a short section of masking tape wrapped around the drill bit to mark the proper depth of the drill bit.

locker shelf - holes - drill depth marker

Now take your pre-drill size and use the holes in the support strips as a location guide.

locker shelf - holes - drilling

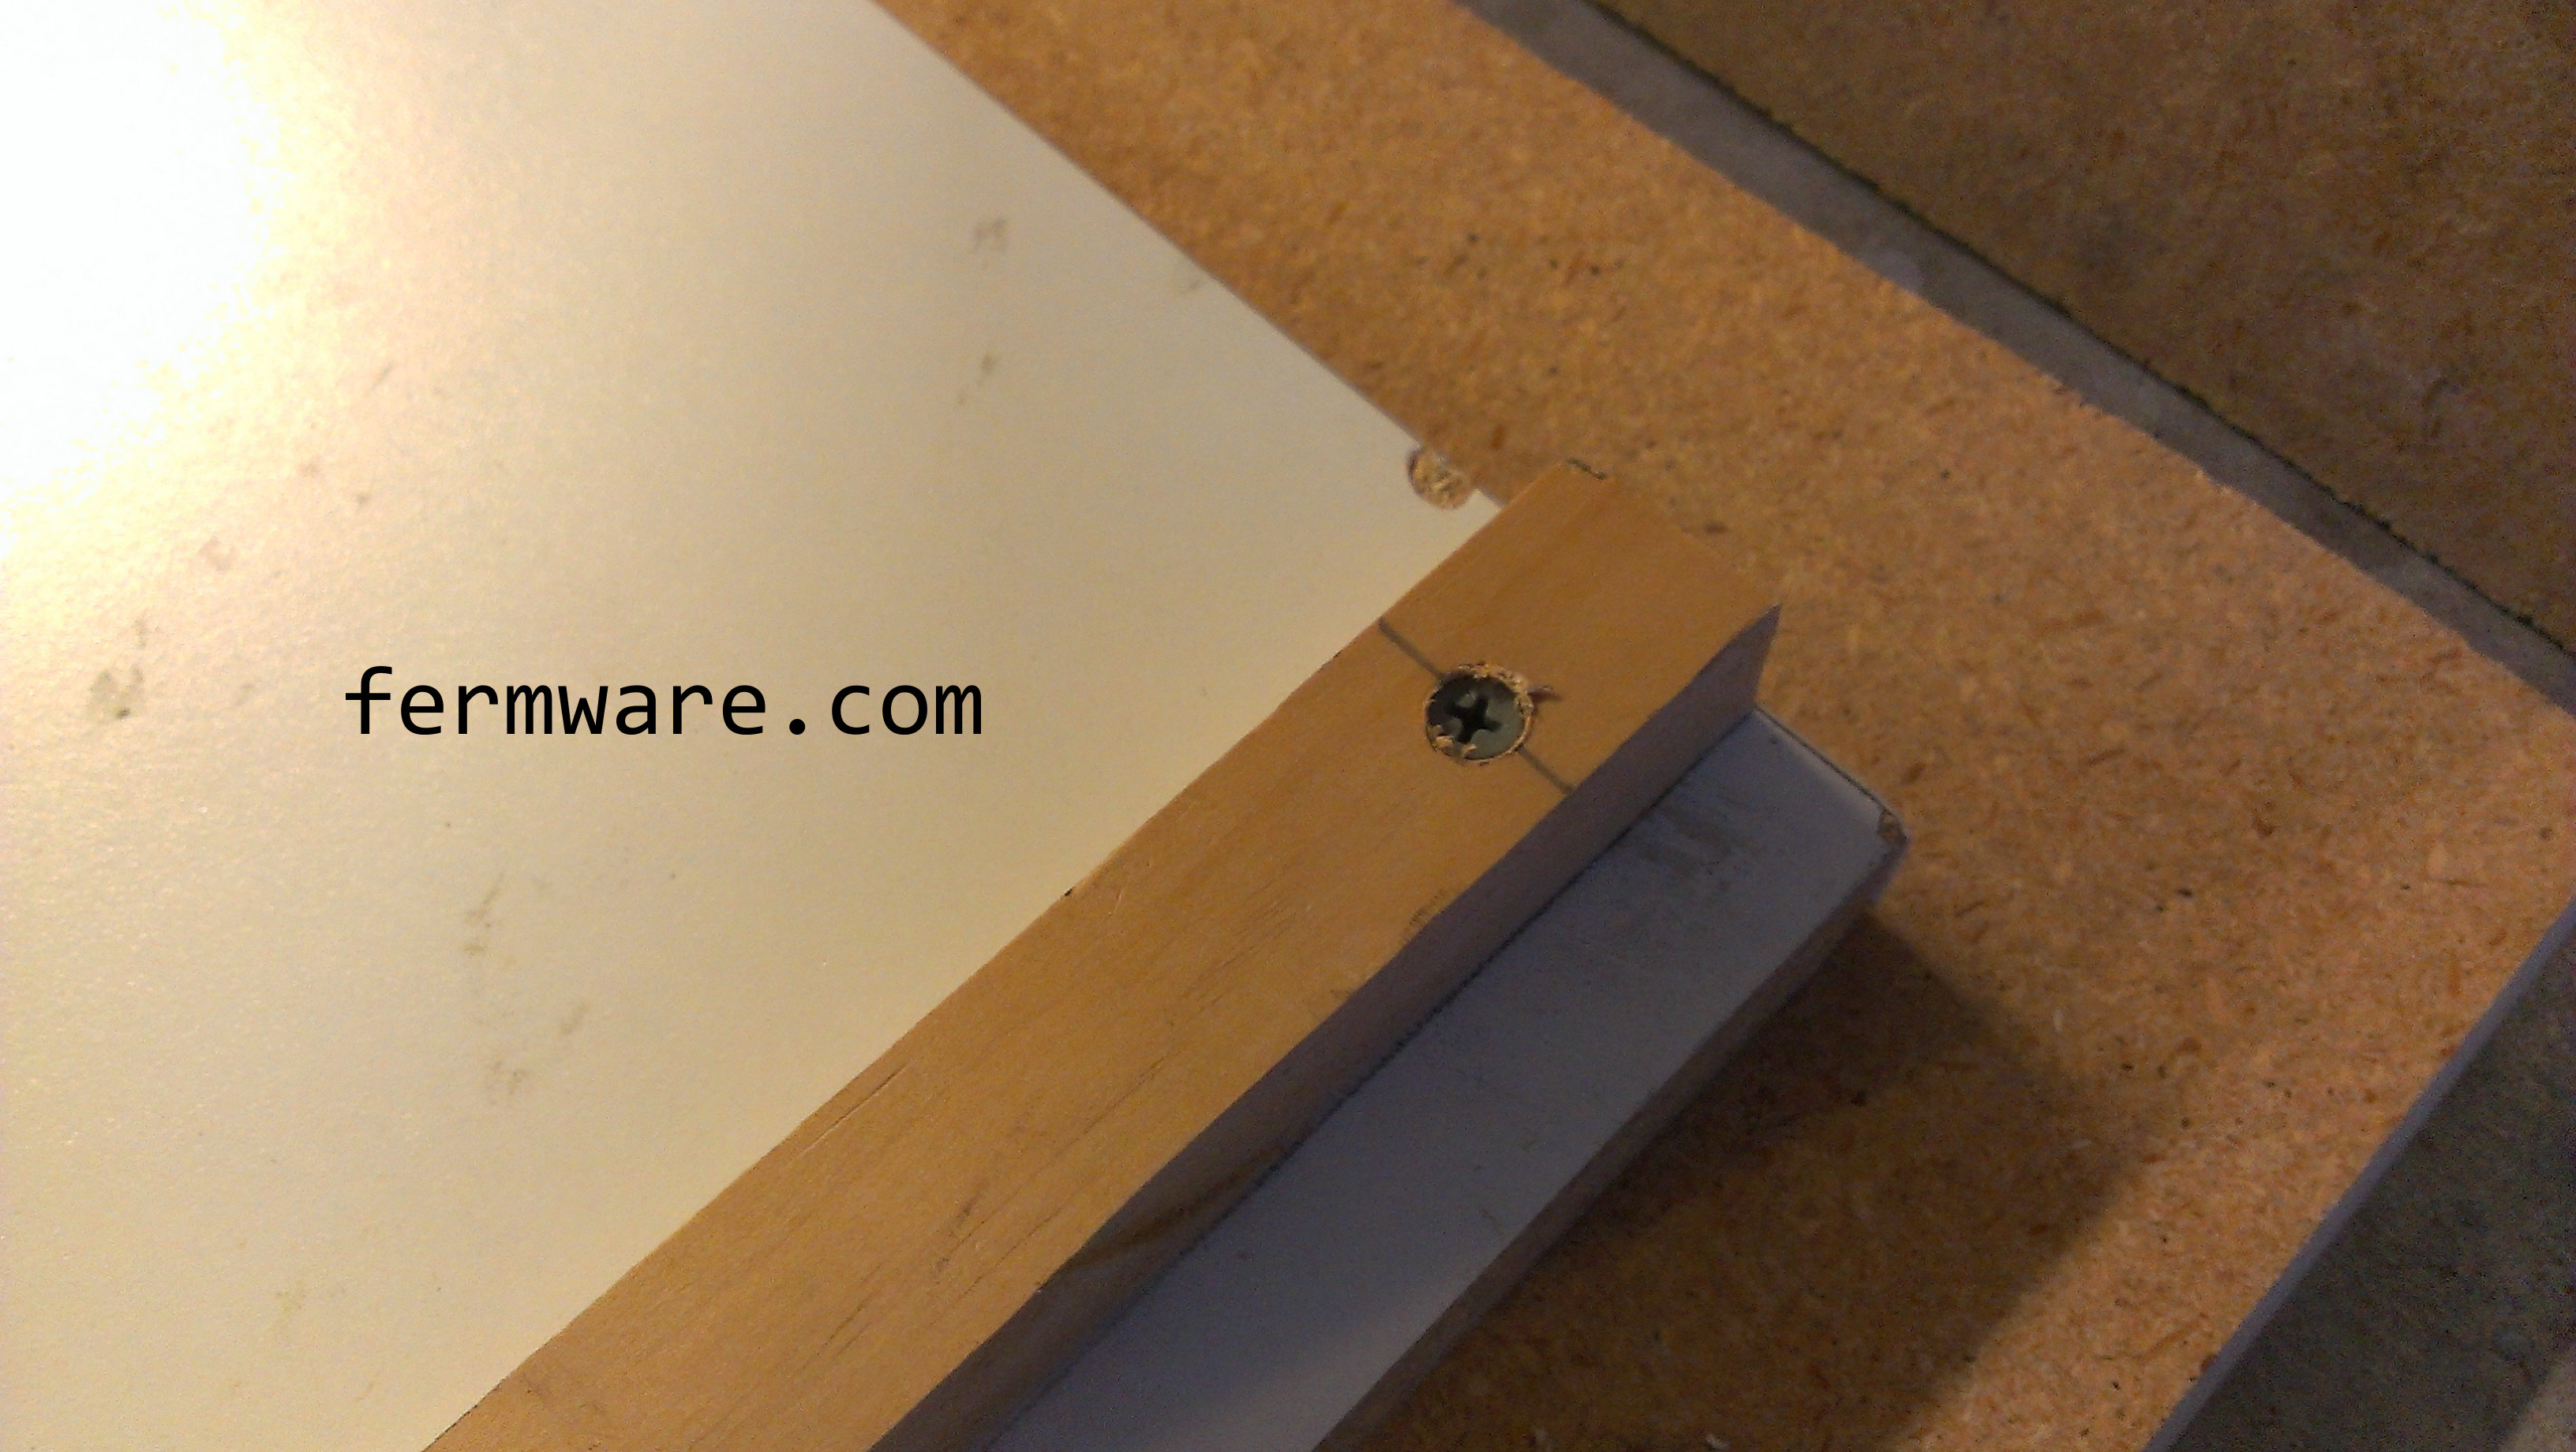
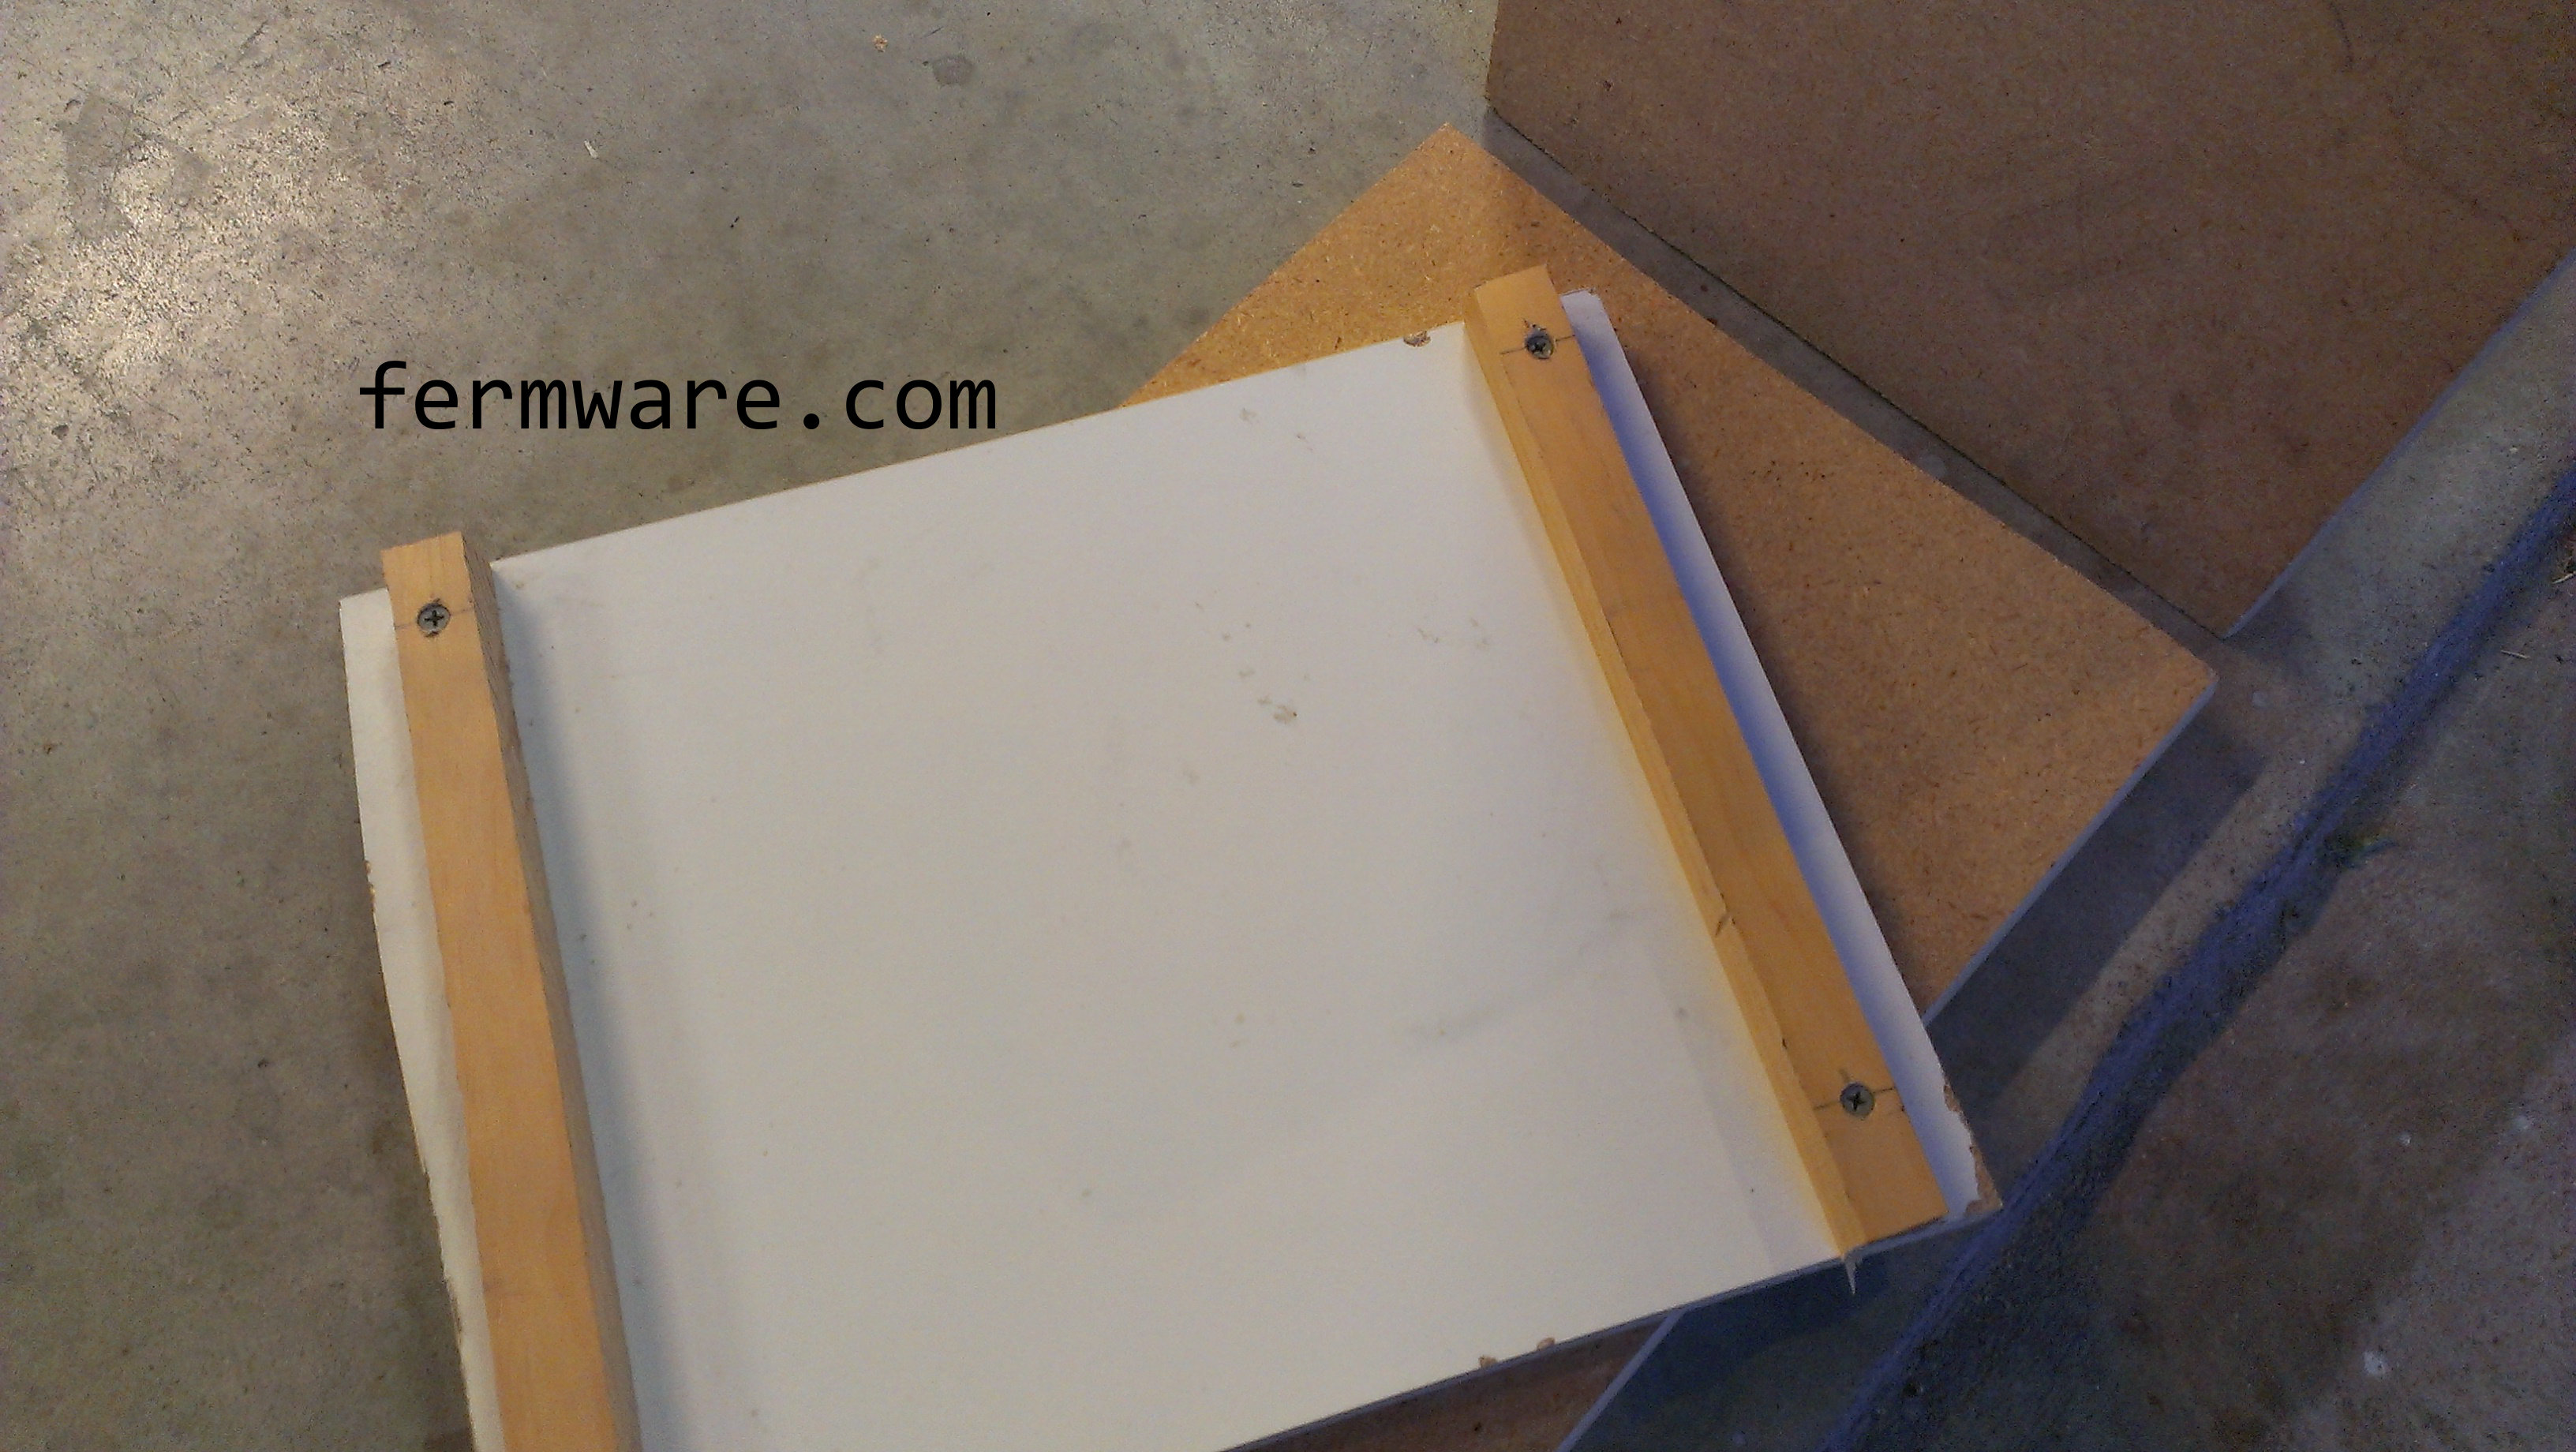
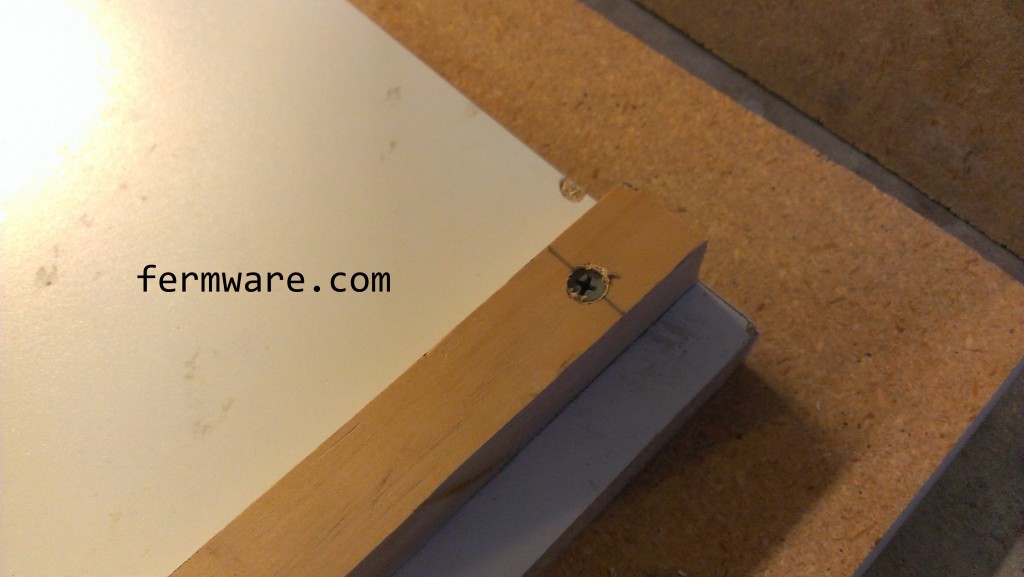
Once you have everything pre-drilled, it’s time to secure them to the shelf.  Nice and flush!

locker shelf - strips - attached and countersunk

locker shelf - top - with strips attached

Here is the completed shelf sitting up against the screwed together version 1 from last school year.

locker shelf - shelf - assembled and tested

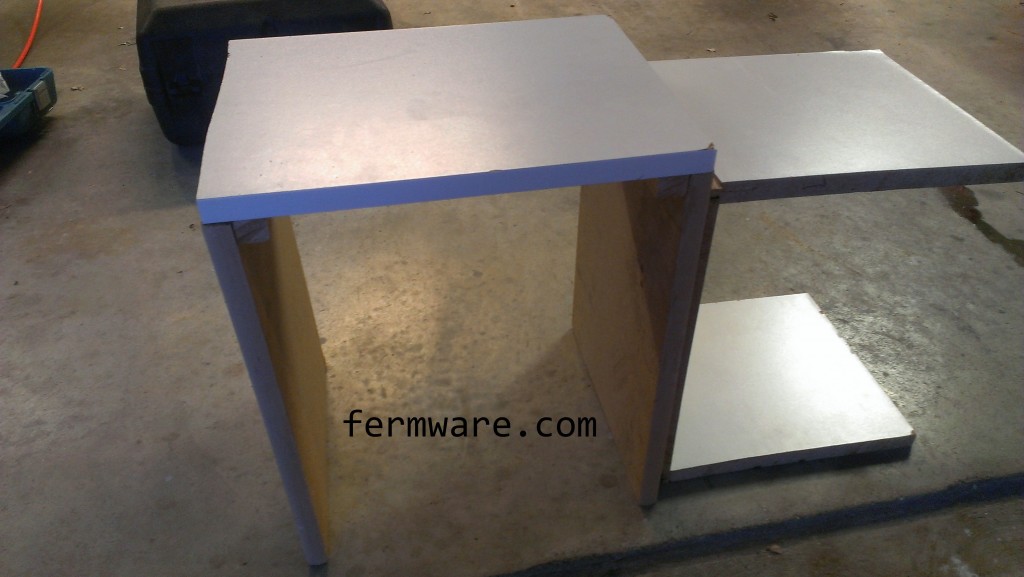
Besides getting it to the locker, you’re DONE!

Getting it into the locker:

  • Set the uprights on the sides of the locker floor
  • Place the shelf on top, ensuring that the support strips fit in between the uprights

Not into brewing, but like to make stuff?  Check out these posts:

Making Belgian Candi Sugar
Rolling Deep Freezer Dolly

Are you curious about making your own beer and would like to learn more?   Try out a beginning brewing kit:

Choosing a Starting Brewing Kit