DIY Candi Sugar Made Easy
Difficulty: 
Time Required:
one to two hours, depending on how dark you plan to make your candi sugar
Background:
If you are planning on making a potent Belgian beer such as a Dubbel, Tripel or a Home Run (just kidding!), you are going to need Belgian Candi Sugar. If you have already purchased some, you know that it can make the cost of your batch of beer skyrocket. It typically runs about $6/lb! My Tripel recipe uses a modest 3 lb. You can however make your own Belgian Candi Sugar at home with just a few simple things, some time and some regular table sugar that you can get for about $2.50/4 lb. bag ($0.63/lb). As I write this Christmas season is just around the corner and thus the reason I’m preparing some candi sugar. I’m preparing to brew one of my favorite and most interesting beers I’ve ever had. It is based on a Northern Brewer recipe Saison de Noel. Mine is identical, but I use homemade dark candi sugar instead of the candi syrup. If you want the quick instructions, just read the headings.
Oh, and this recipe could be used to create windows for a gingerbread house too!
Affiliate Links
Equipment / Ingredients Required:
- Table Sugar (1 lb. sugar yields approximately 1 lb. candi sugar)
- Lemon Juice (addition of approximately 1 tsp. / lb.)
- Used to “invert” the sugar
- Candy thermometer
- This one had the best reviews. They indicated that the temperature markings would come off of others
- I like the coded indicators for different crack temperatures
- These are good, because they keep the bulb off of the bottom of the pot, which will help to prevent false readings
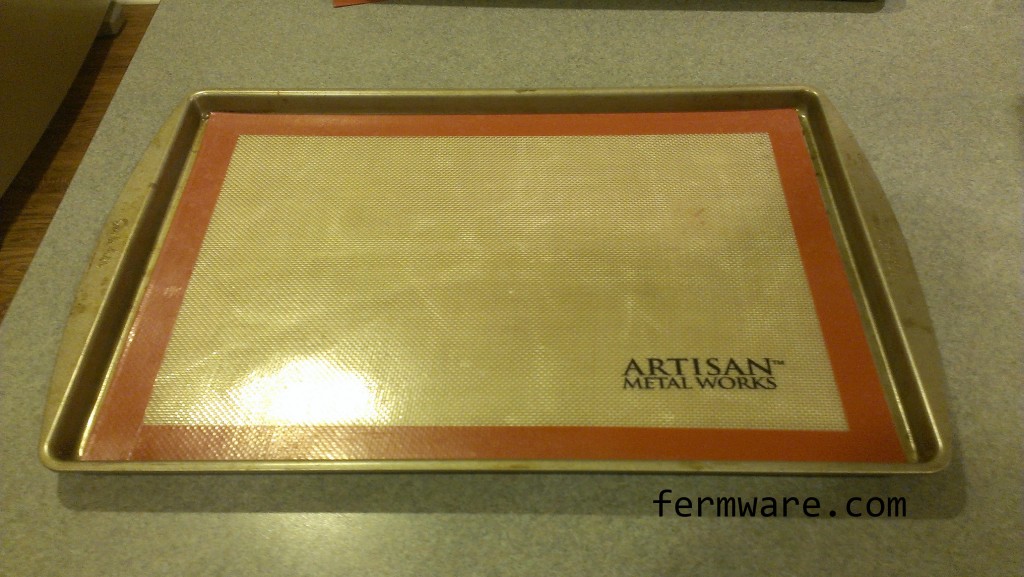
- Silicone baking mat (Trust me, this is the best way to do it)
- Less expensive that actual Silpat brand
- Fit our inventory of baking pans better
- We’ve had ours for almost a year now and they get used often. Still no staining or degradation in the material.
- My wife is a great baker, so this was an easy sell on why we “needed” them
- SRM color chart (for consistency)
- These are the best I’ve found
-
Why I recommend the silicone mats? Past fails…
- Non-stick baking pan
- Yes, they are non-stick, as long as it isn’t Candi Sugar you are making on them
- You can warp the baking sheet to pop it off, but quite a bit still sticks.
- Wax paper
- Stuck to the hardened Candi Sugar
- I ended up with bits of wax paper floating in the boil
- I did catch it with a colander when I poured into my fermenter, but just a pain
- Foil
- Just learn from my mistakes and buy some silicone mats!
Procedure:

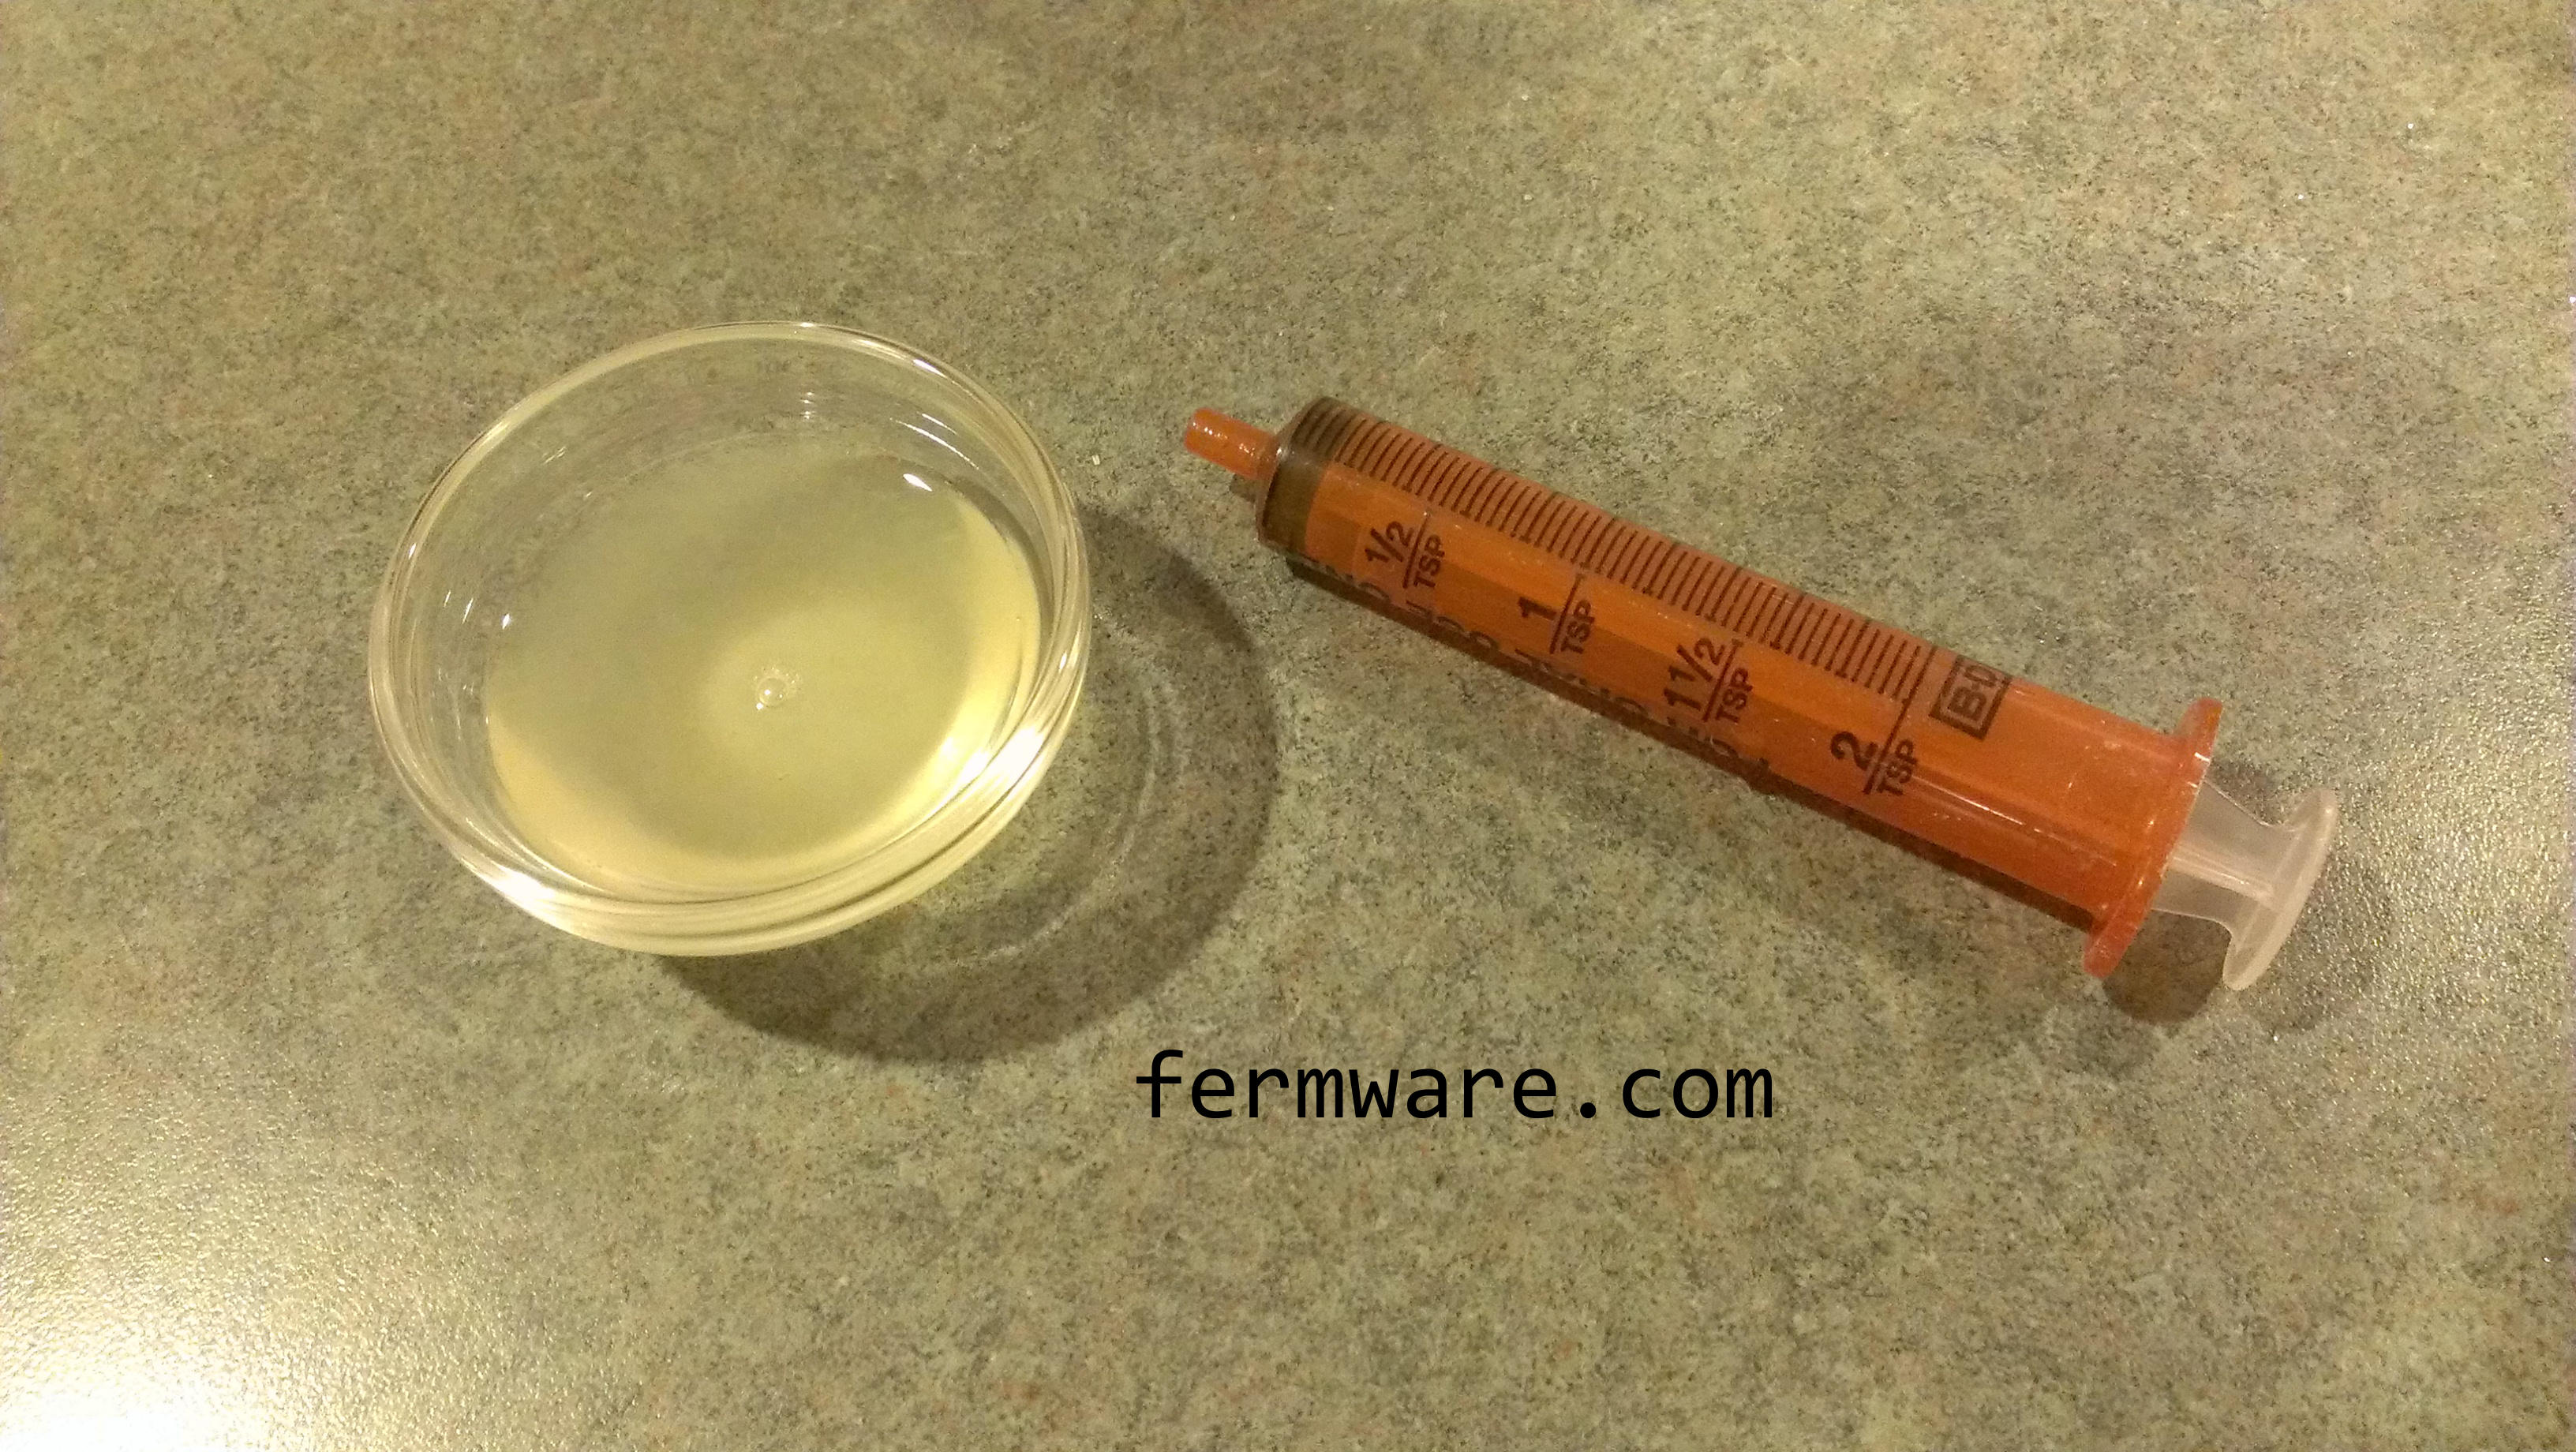
Get your lemon juice ready
As I mentioned before, you need about 1 tsp. per pound of sugar. I love using syringes for liquid measurement. We have 3 kids, and so we’ve got about a bunch of these from all the prescriptions they’ve needed. I just used lemon juice. Fresh squeezed or the pre-bottled stuff will work.

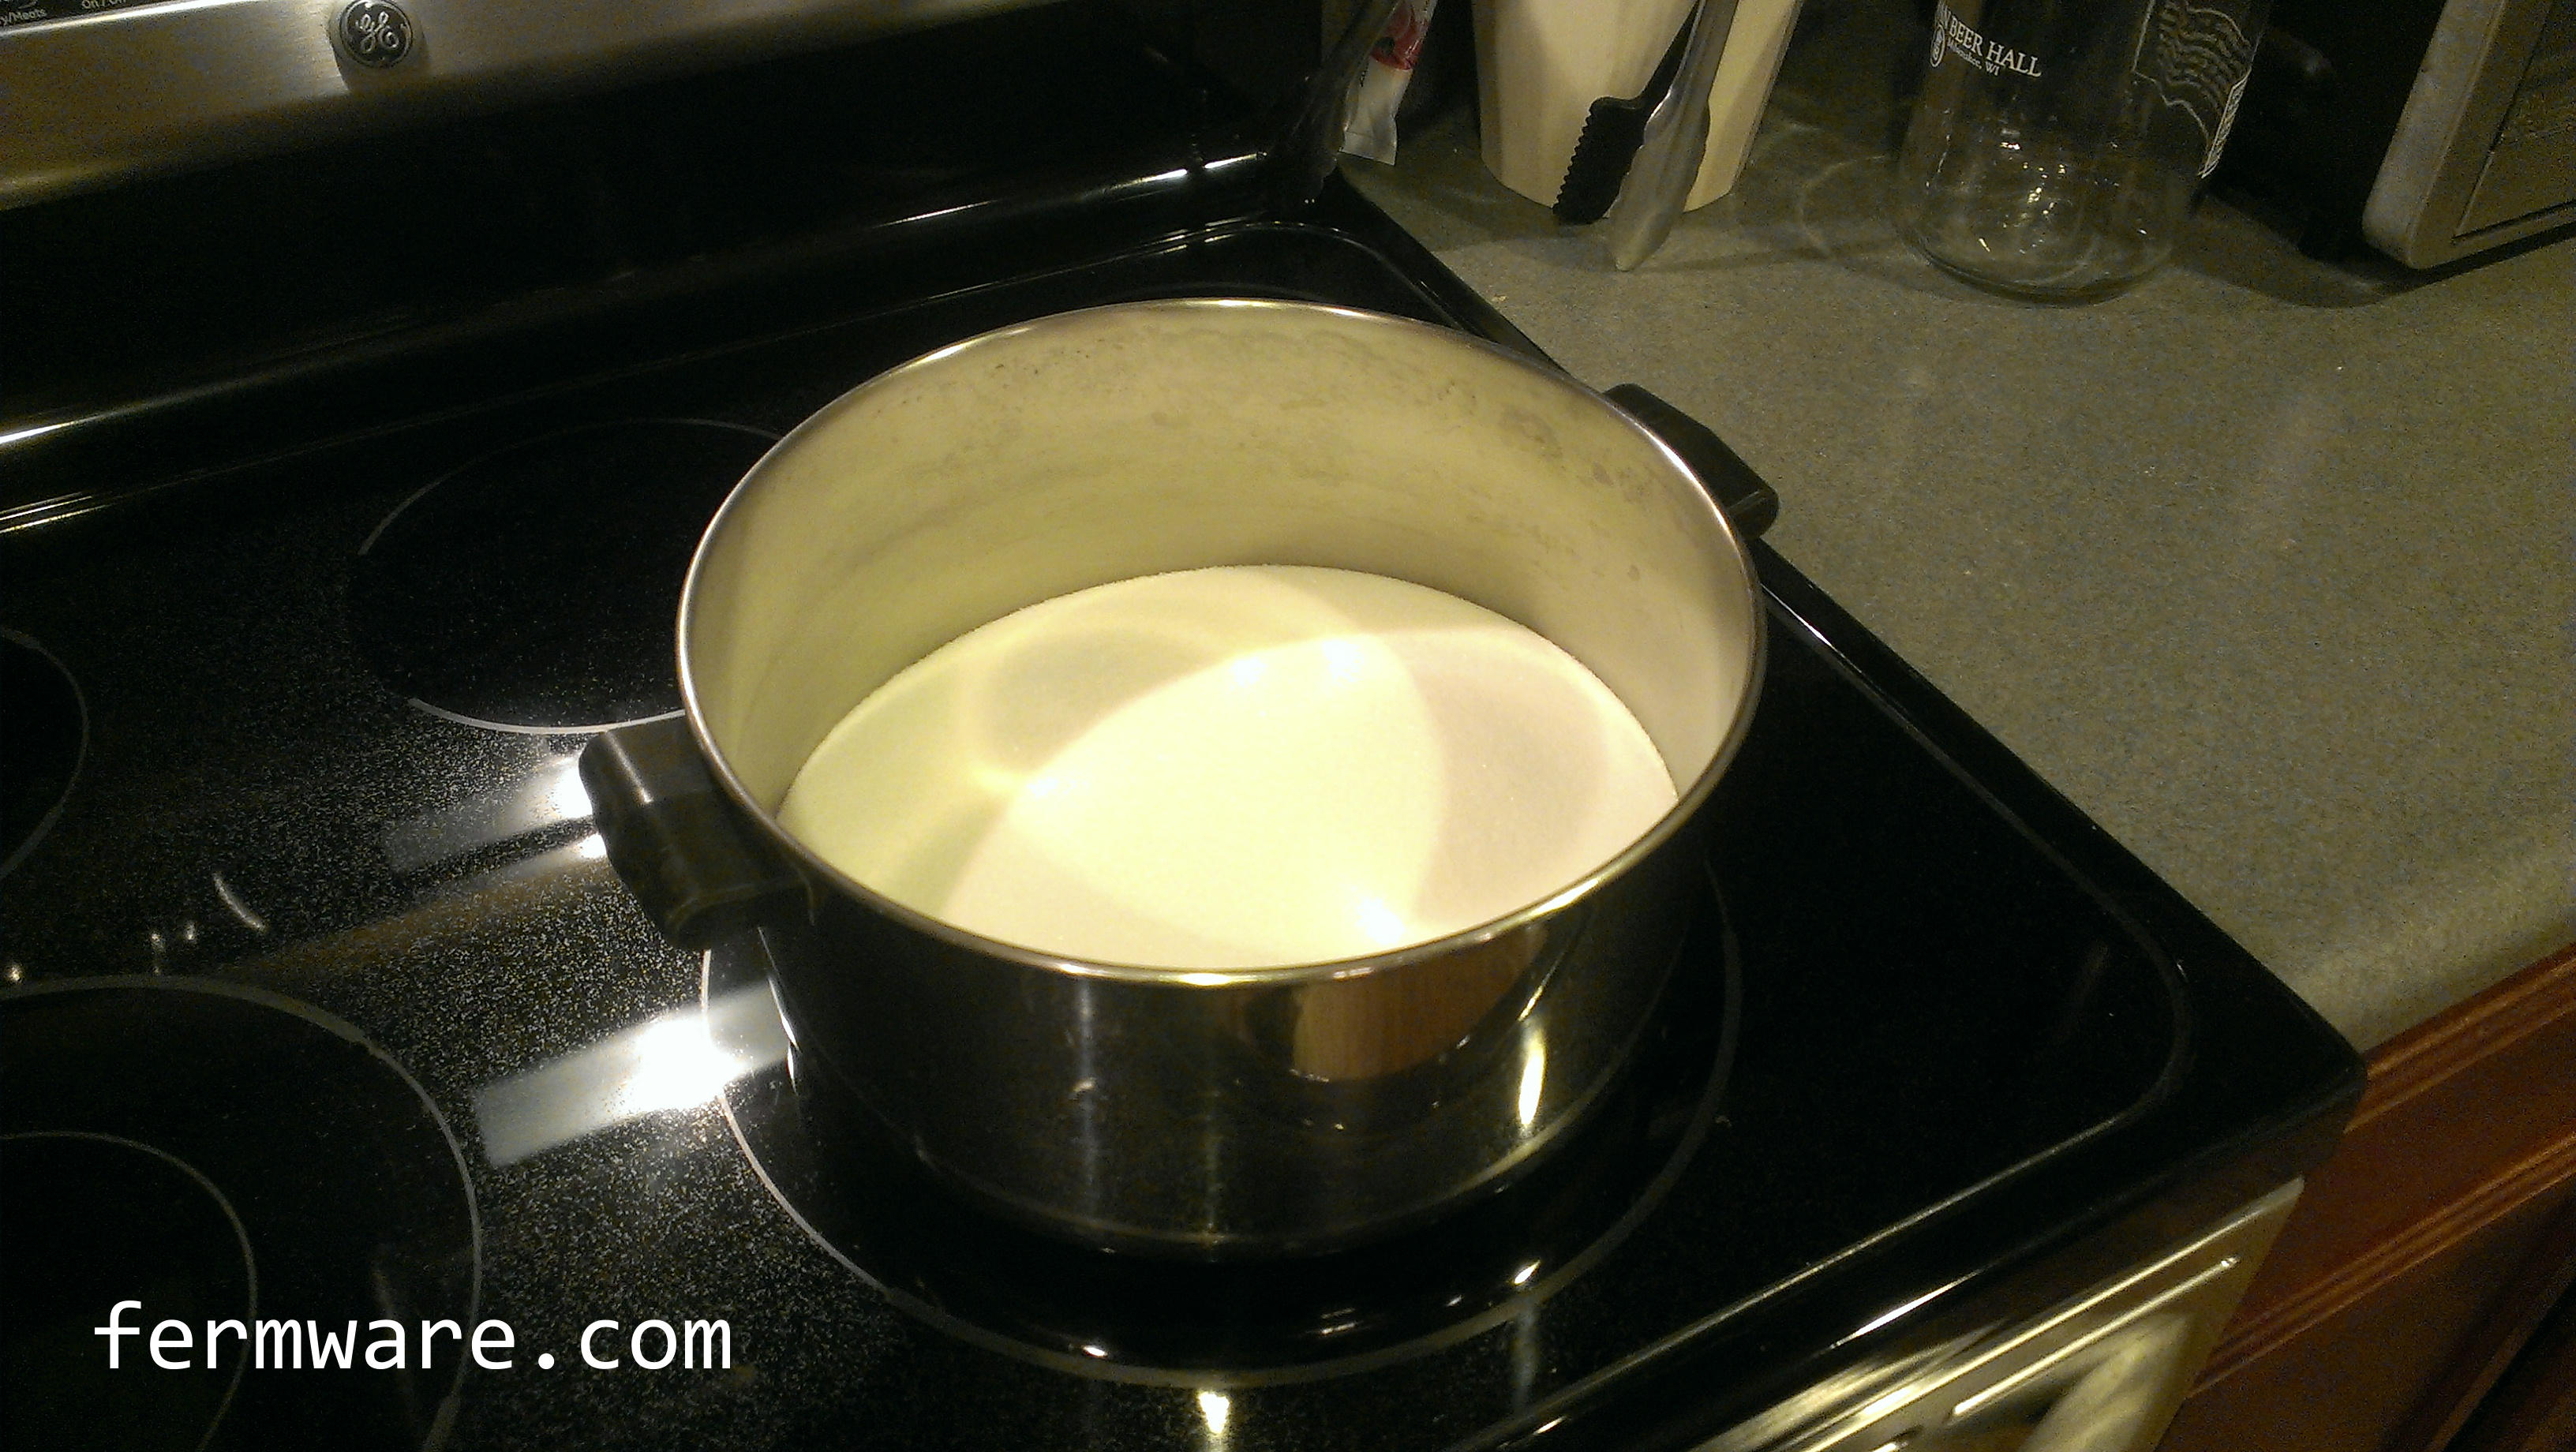
Pour the sugar into a pot
With candi sugar, you put in a pound of sugar, you pretty much end up with a pound of candi sugar. I recommend putting in a little extra to account for some sticking to the pot when you pour it and some of it ending up in your mouth when you are done. It’s so good it tastes like candy! Oh wait..
Add just enough water to saturate the sugar
If you add more water than necessary, it won’t ruin it. You’ll just be waiting longer for the water to boil off. You’ll be surprised at how little water you need.

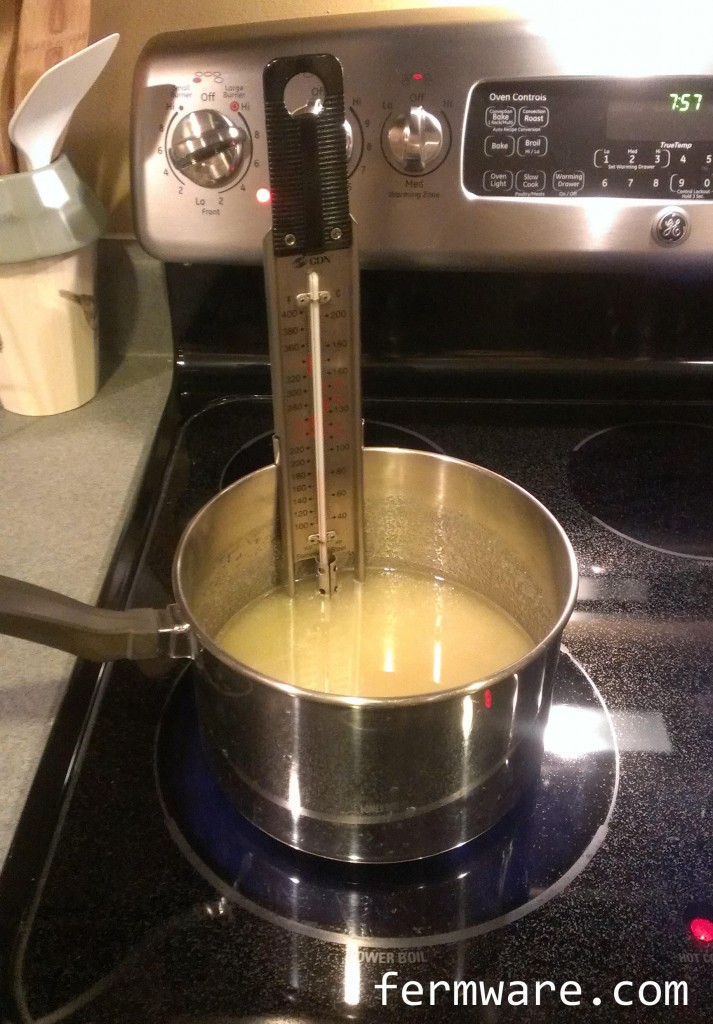
Add lemon juice and warm up to temperature (260-275 degF)
Pour in your lemon juice and you want to warm to between 260-275 degF. This is right between “Hard Ball” and “Soft Crack”. It will take a bit of time to get the sugar dissolved and boil the water off.
Maintain temperature for about 20 minutes
Once you get the mixture into the temperature range, you want to dial back the heat on your cooktop. I took it down to about 4/10 and was able to maintain with just 2 large spoonfuls of room temperature water at a time. This is just like a boiling kettle, in that if you walk away, you could come back to a mixture that has overheated and made a mess or cooled too much. I fluctuated through the range, but was averaging about 270 degF throughout the initial 20 minutes and on into the darkening period.
After 20 minutes, keep at temperature and decide how dark you want it to get
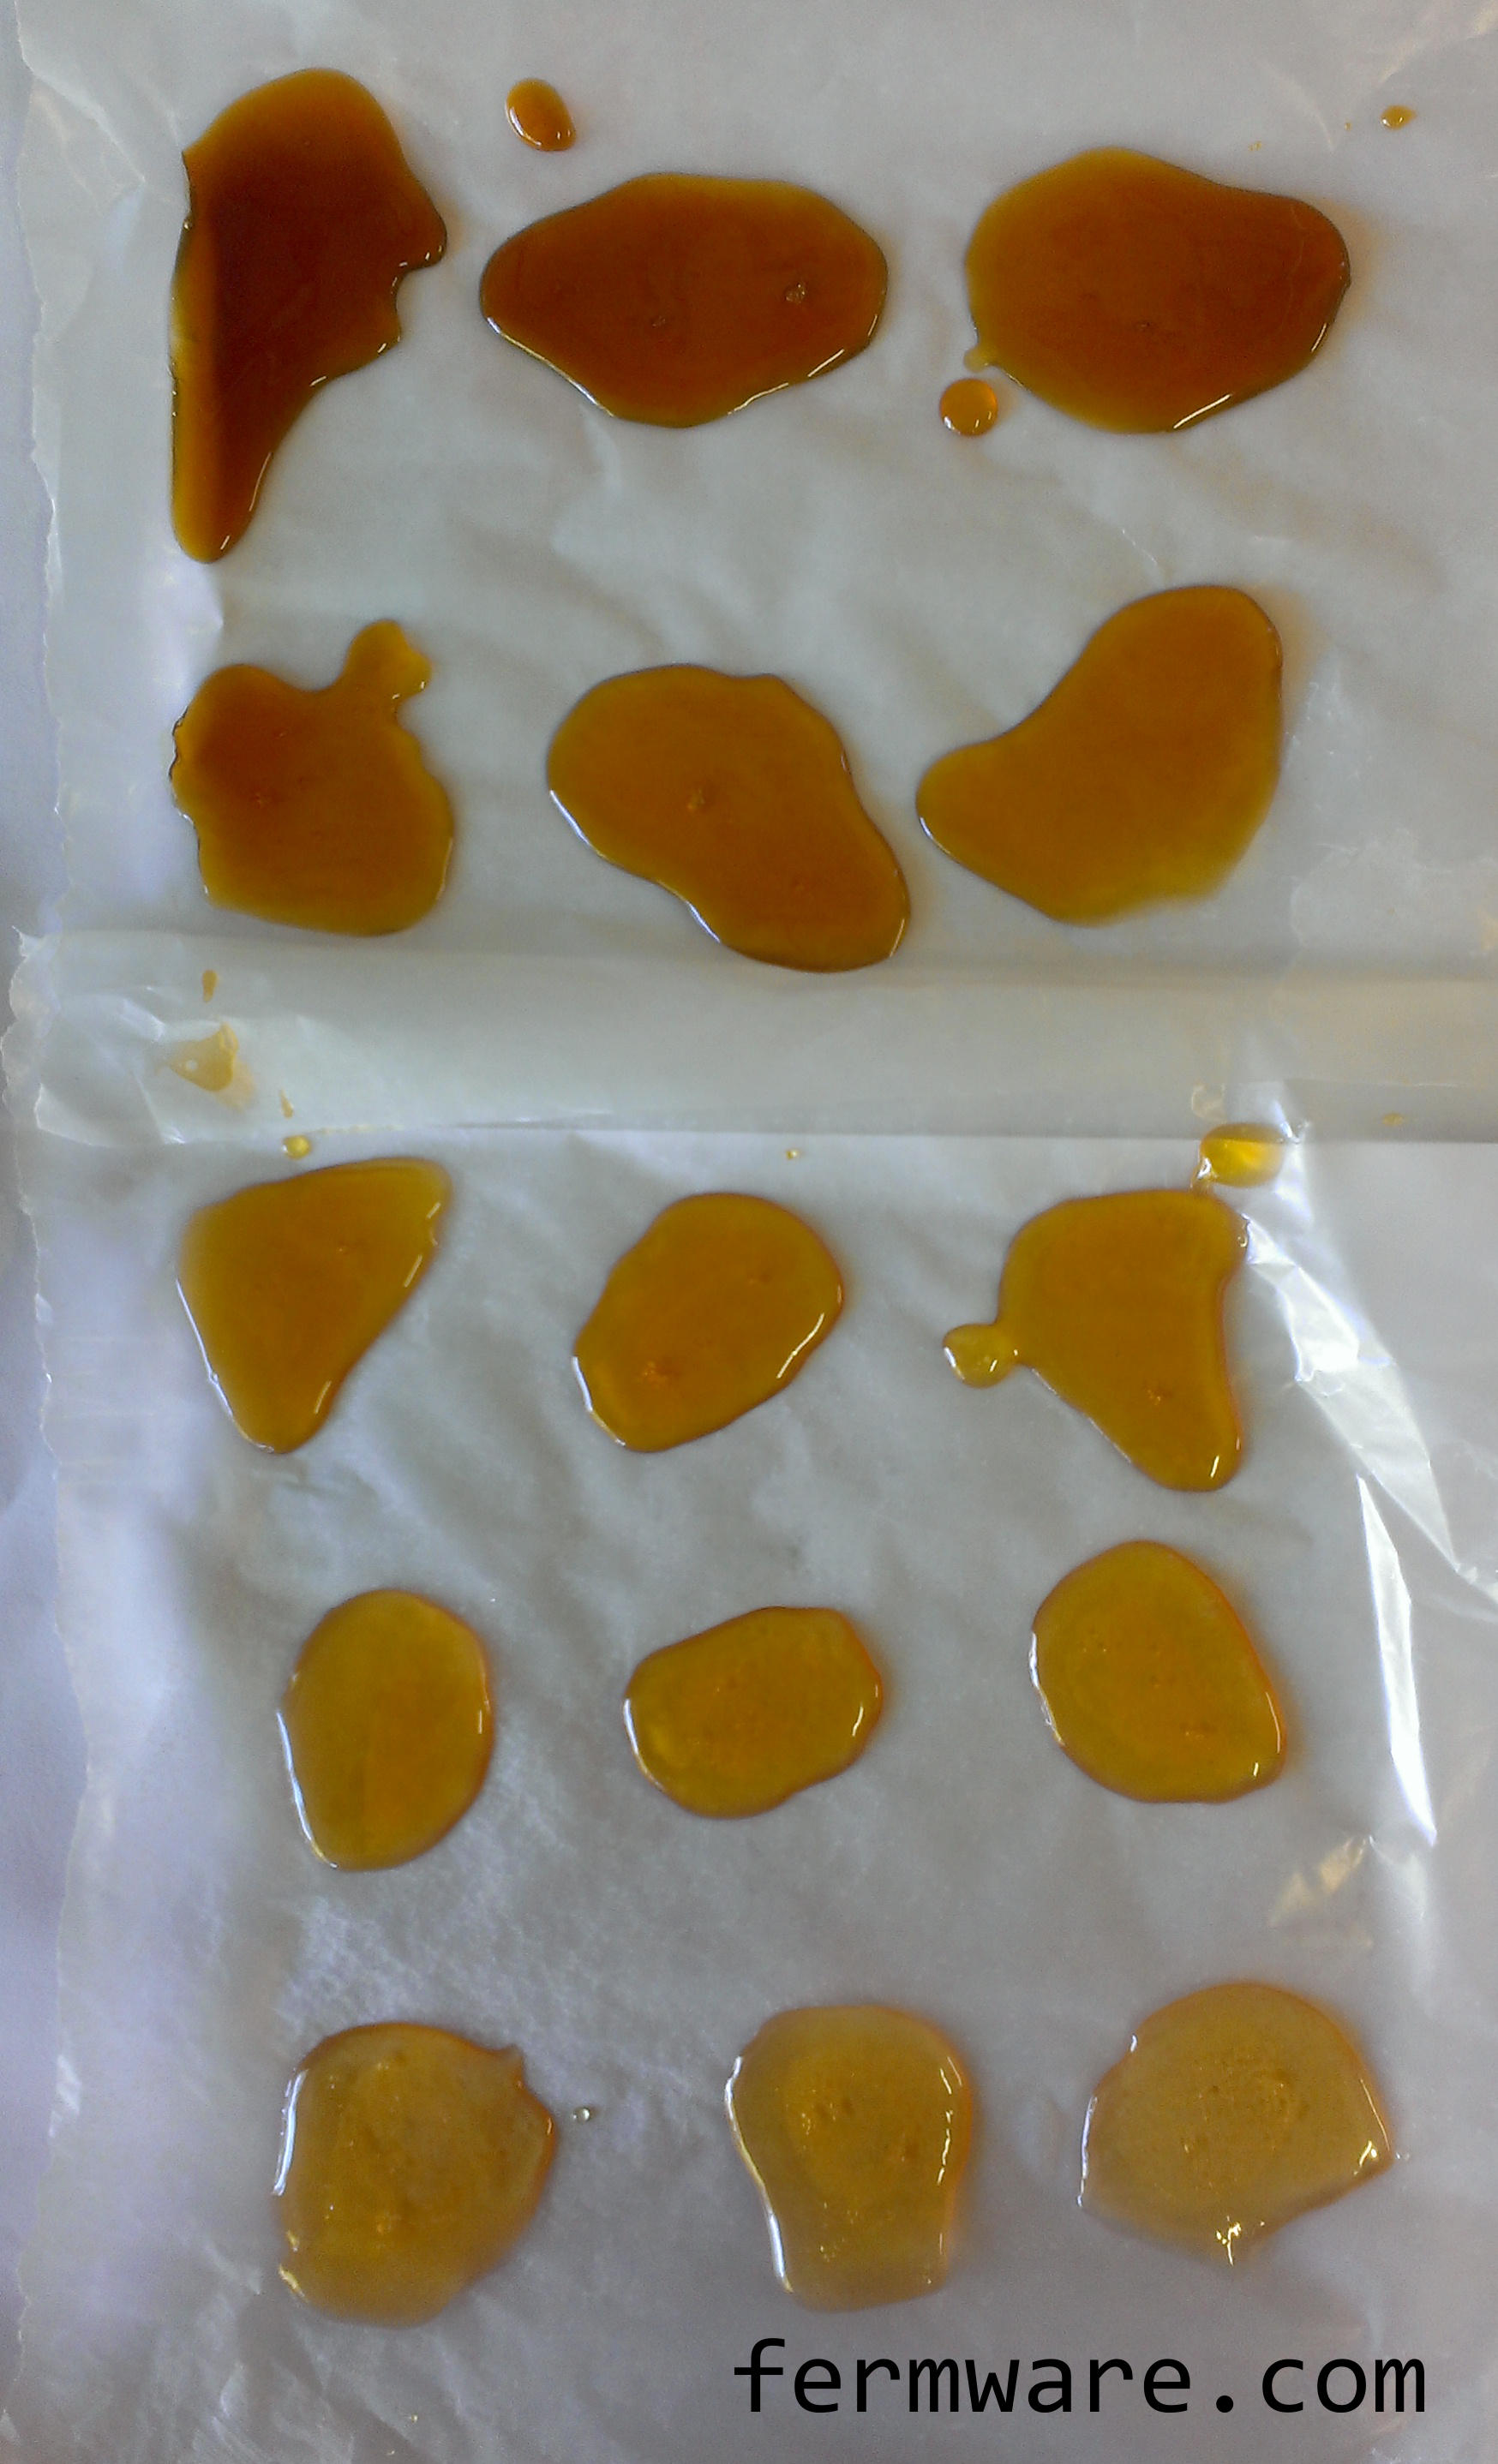
Take a sample small spoonful and drop it onto a piece of wax paper to do a color check with your handy dandy SRM chart. Yes, I know I said not to use wax paper, but it is semi-transparent and if you also put a piece of white paper under it, you will be able to better judge the color. Now SRM is officially taken through 1 cm of beer and my spoonfuls ended up at about 0.1″ (2.5 mm). You aren’t measuring an exact SRM, but you are at least establishing a reference for the next time you make the candi sugar that will lead you down the path of repeatability. The longer you keep at temperature, the darker the candi sugar will be. Scroll to the bottom to see the results of my experiment of sugar color versus time.
Once you are happy with the color, raise to 300 degF (Hard Crack)
Raise to 300 degF… All you need to do is raise the temperature of the mixture to 300 degF then pour onto your silicone pad lined baking pan.
Pour Some Sugar on Me!
Make sure you have a hot pad under the pan or you might do something unintentional with your countertop. Also, be very careful when pouring. 300 degrees is HOT and you don’t want to burn yourself or splash any all over your nice kitchen. It is a pain to clean up.

Let cool
I was making dark candi sugar this time, so it is much darker than you would want in a Tripel. It also adds some burnt caramel, smokey flavors to your beer.
Clean your equipment immediately
Just like your brewing equipment, it is much much easier to clean right after you are done with it than it is when it has been sitting around for a while. The candi sugar will harden on everything and be much more difficult to clean off. You can soak in hot water, but don’t wait for that water to cool.
Break into pieces
Once the candi sugar has cooled completely, simply peel the silicone mat off of the back of the candi sugar sheet. You can also bend the sheet to help break the candi sugar into smaller pieces. I typically just break into small enough chunks that it will fit into a gallon plastic storage bag. Then I just chuck it in the freezer until brew day.
Nerd Alert!
As I was letting the sugar darken, I took a tablespoon every 3-4 minutes in the beginning, then 5 then 10 minutes apart until I got to where I wanted it so that I could come up with some guess on time required for a certain darkness. I dropped these samples onto a sheet of wax paper laid on top of a plain white sheet of paper on a cooking sheet. YES, I know I told you not to use wax paper, but these samples were not going to be used for anything but color measurement. Technically SRM is measured with a specific wavelength of light through 1 cm (0.4″) sample. I measured the thickness my hardened samples and they measured 0.008″ to 0.012″.
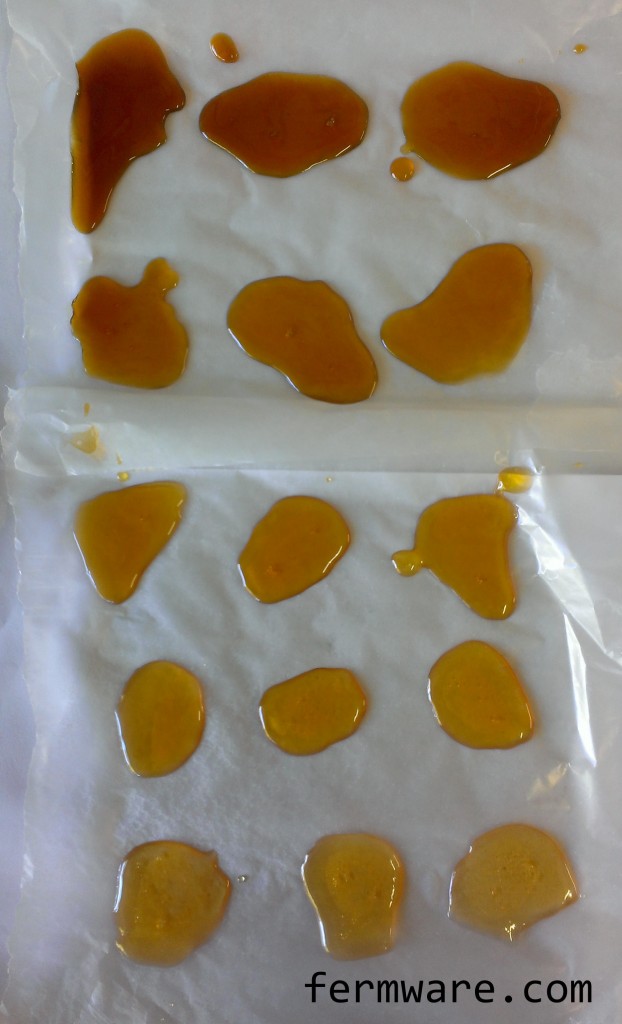
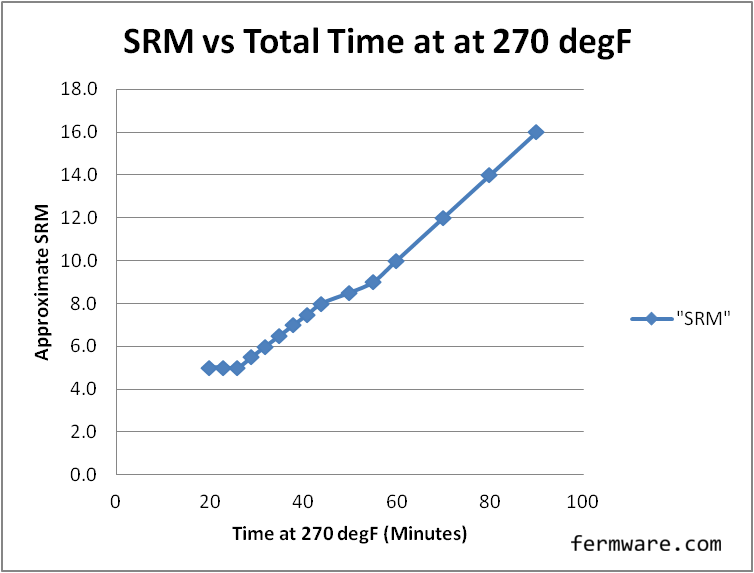
There might be some equations out there to scale one thickness sample to the equivalent for SRM measurement. So my measurements, although not actual SRM, are good enough for me to be able to repeat a certain darkness based on time or spot checking the value to my SRM color chart. Below is a chart of “SRM” versus total cook time at 270 degF of my samples.
Plot of “SRM’ versus time (Your times may vary)
Source Data