Category Archives: Nerd Alert!

Refrigerator Conversion Part 6 – Finishing up and other observations

Here are some final thoughts on my refrigerator conversion and other related observations.
If you missed the first post, start here: Part 1: Introduction
That post has a run down of most of the materials, tools and supplies needed for this project.

Difficulty: level_4

This project requires a few inexpensive special tools, but will most likely take an entire weekend, lots of improvisation, some thorough cleaning and the cost of the fridge takes it to level 4.

Posts for this Project:

Part 1: Introduction
Part 2: Clean up
Part 3: Disassembly
Part 4: Door modification
Part 5: Shelf building
Part 6: Finishing up and other observations (this post)

Affiliate Links

Pros and Cons of other setups I’ve seen:

A/C units to cool down a fermentation chamber

I had serious reservations about the ability of a window air conditioner to maintain 34 degF in a cabinet of sufficient size in the middle of summer, let alone have enough capacity to lower the temperature of your fermenting beer at any reasonable speed

Dorm fridge powered fermentation chamber

I know this seems to be all the rage with fermentation chambers, but again, I didn’t see how it would be able to handle the cooling needs of a chamber of the size that I needed.

Gutting a full size fridge and re-installing those components in a customer insulated chamber

This was my “ultimate” plan from the beginning, but when I planned out the costs of the wood, the insulation and the FRP panels to line the inside, I was close to double or tripel (see what I did there) the cost of the fridge itself.  I then had the realization that if I found a fridge large enough, the capacity of the freezer alone would be enough to serve my needs.

Temperature Controller:

A temperature controller is a MUST for any fermentation cabinet.  My first controller for my keezer was the Ranco ETC-111000 single stage temperature controller.  I’ll have a post about my wiring at some point.

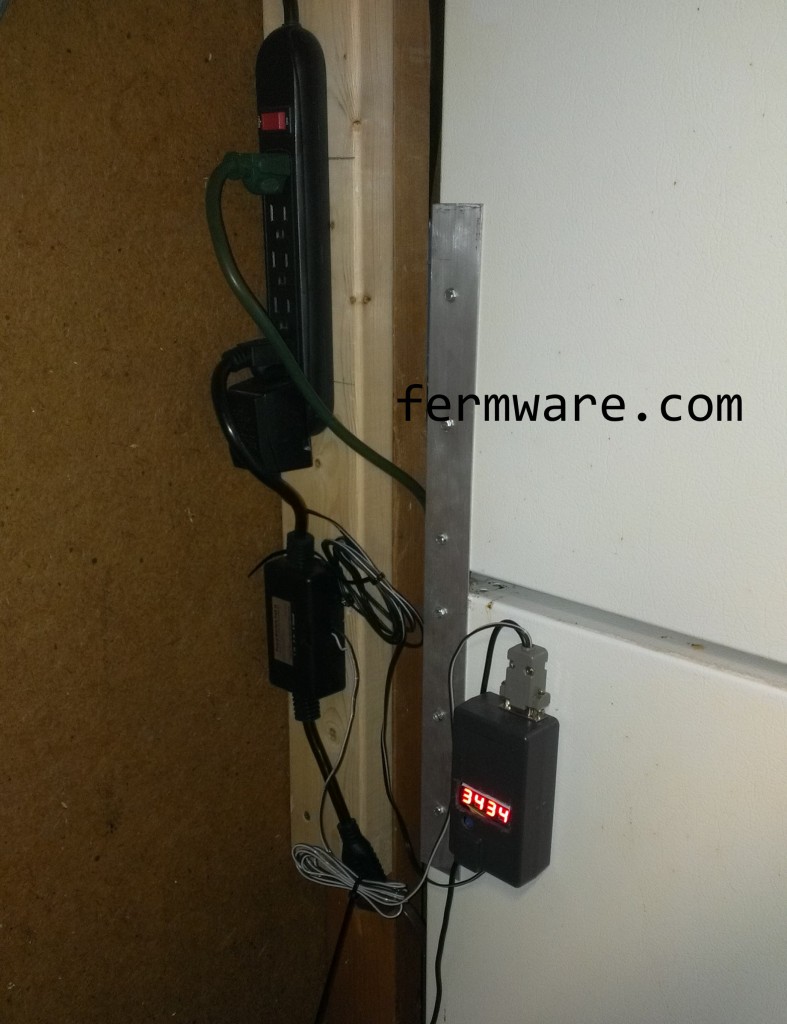
There are plenty of options out there.  For this lagering fridge as well as my other two converted dorm fridges, I actually made a simple Arduino based temperature controller.  There isn’t really anything novel about them, except that I wanted the challenge of designing my own system.  Below is a picture of the controller setup I’ve got on this lagering cabinet that I just built.  Basically the Arduino controller has a temperature probe inside the fridge to detect temperature and it cycles the fridge on and off through a relay box to maintain temperature.  The display on the box shows 3434.  It’s my simplified way of showing a setpoint of 34 degF and a cabinet temperature of 34 degF.

012 - Temperature Controller

Google search for Arduino Temperature Controller


I do however have a Raspberry Pi and am looking at going to the BrewPi setup or some derivative.  I really geek out on that stuff and it gets me really excited when I think about that possibility.  Here are some good links:

Official BrewPi

Home Brew Talk thread on using all the BrewPi code, but a standard Arduino

Small Tip for the Newbie

If you are new to temperature control, note that for best results, you need to set your fridge or freezer to maximum cold and let the temperature controller do the rest.  All of these temperature controllers basically power cycle the fridge/freezer on or off to control the temperature.

How to move a fridge from point A to point B:

You’ll hear many times that you can’t lay a fridge on it’s back or it will ruin the compressor.  This is half-true.  You can lay a fridge on it’s back to transport it, BUT when you get it to your house, you just need to get it upright so that the compressor fluid drains back into the compressor before it is powered on again.  I generally just get it to my garage, get it upright again and let it sit overnight.  I’ve done this 4 times with no dead fridges.

As an FYI, we’ve got a 2005 Honda Odyssey and with the middle seats taken out and the back seats folded into the floor, it has fit all 4 of those fridges inside with the tailgate all the way closed.  If you have a trailer, more power to you.

Oh, another important tip.  Remove all of the shelves from the fridge before laying it on it’s side.  All of those things are meant for gravity to hold them in place and when you put the fridge on it’s back, they all usually fall out of their slots.

What I tried to do with another fridge (drilling FAIL):

I was always under the impression that every important mechanical component was either at the back or underneath.  I was proven wrong one time when attempting to install a draw catch latch to a fridge.  I started drilling the pilot hole in the side of the fridge for the screws and the psssssssshhhhhh of the magic refrigerant came blowing out.  RIP fridge.

Simplified explanation of how a refrigerator works:

A refrigerator is simply a mechanical system that removes heat from an insulated cabinet.  That’s as far as I’m going with that.

You may also hear someone tell you that a refrigerator won’t work in a garage.  The reason behind this is that when the ambient temperature gets below the internal temperature of the freezer or close to it, the temperature difference gets closer to zero (T_ambient – T_freezer).  An A/C compressor or refrigerator compressor system relies on a temperature difference to function, so if you take away this difference, it won’t function properly.

Having said that, we live in central Indiana and have 3 refrigerators and one deep freezer in our garage.  We only have a problem with our primary overflow fridge with the ice maker in deep winter, where it doesn’t produce enough ice.  Except during long cold spells (where it can get close to freezing), our garage is usually about 55 degrees in the areas directly adjacent to a living space and in our bump out (furthest away) it is maybe low 40’s.

The more unknown part is that almost all top and bottom refrigerators are essentially a freezer on top that does all the work and bleeds cold air to the refrigerator compartment.  If you get to tearing one apart, you’ll see this.  Also if you’ve ever had a fridge with weak magnetic seals, you may notice that when you slam one of the doors, the other one pops open.  That’s because they are linked.

That’s all folks…Thanks for reading!


Grain Storage

Grain Storage

Difficulty: level_1

Time Required:

As long as it takes you to replace a trash bag.  Maybe more if you decide to nerd yourself out.  Keep reading to the bottom if this is you.

Affiliate Links

Cost:

Less than $5 per bucket assembly.

Background:

So if you are serious about brewing and want to save money in the long run, you are most likely buying your most used grains in bulk.  If you don’t want those savings to go to waste, you need to store the grains in a way that doesn’t degrade the quality of the grain.

Required:

5 Gallon bucket + lid of your choosing
food safe bag

“Let’s do this”:

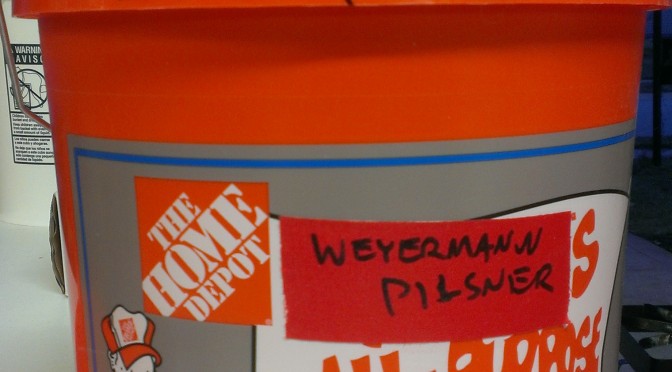
Whenever I choose a storage solution, I try to find something readily available where that exact same container can be purchased again at some later point in time.  I arbitrarily chose Homer buckets from Home Depot.  Maybe I fell for their marketing scheme of having them available everywhere you look in the store for a reasonable price, but hey, they work.  So now, I just buy these buckets so everything matches.

What is convenient is that each bucket holds just about 25 pounds of grain.  So what I usually do is buy the 50 pound bag of ‘Merican grain when I’m going to use it, then the remainder always fits in two buckets.  The same goes for when I get the 55 pound bags of “Ferrin” grain.

So choose your bucket and then decide which lid you will use.

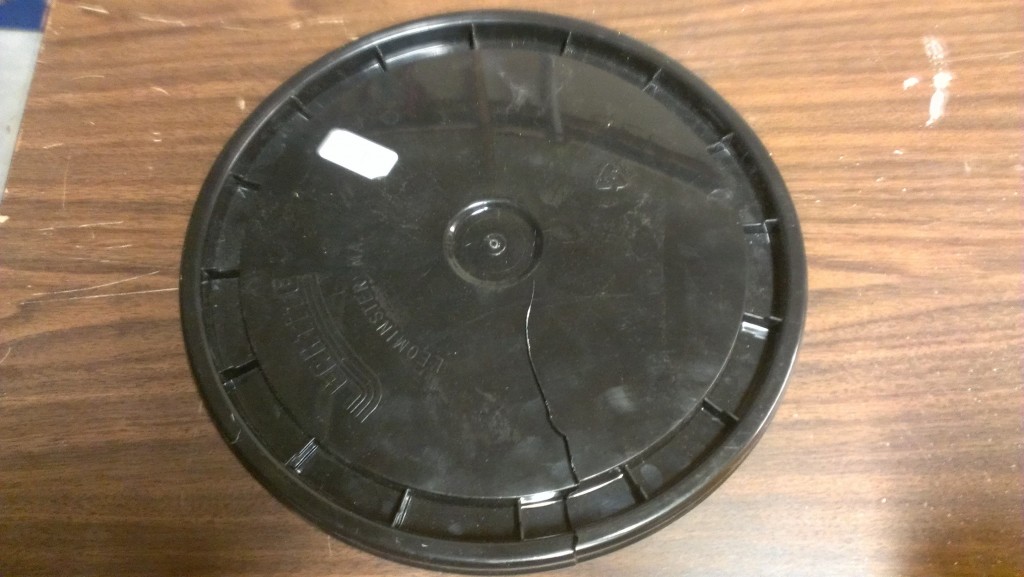
008-Grain Storage-Crappy lids

Do not buy these lids!  They tempt you with the “easy removal” line, but upon the first or second removal of this lid, this will occur.

008-Grain Storage-Sealed Lid

This is what I buy.  They are a few cents more and in my opinion, worth so much more.

008-Grain Storage-Seal on lid

These lids have a rubber seal, which helps keep moisture out.

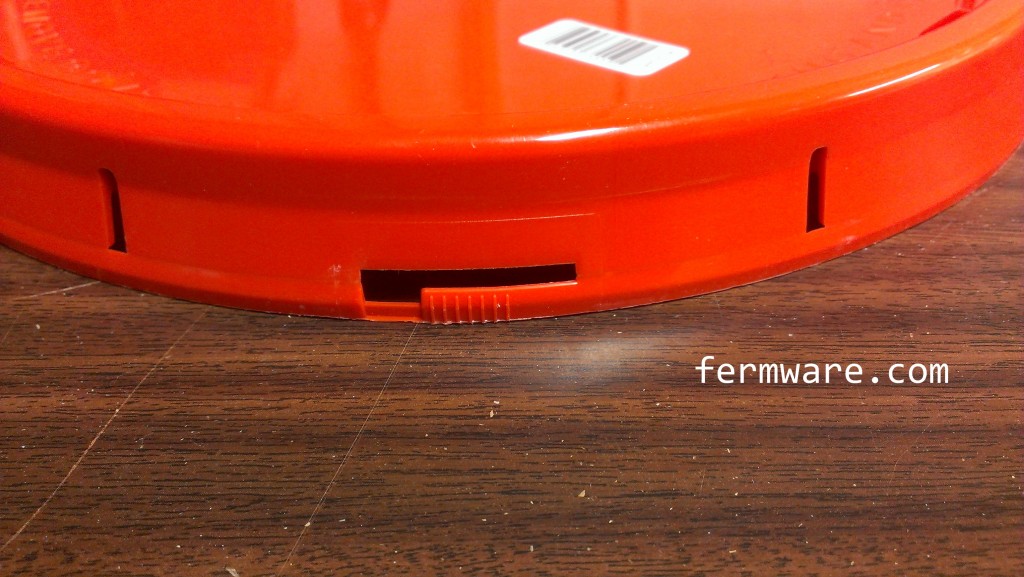
008-Grain Storage-Lid as Received

The lids do have this one time seal feature, but just go ahead and pull it off.  If you are just the slightest bit careful, you can remove these lids over and over again.

008-Grain Storage-These lids crack too


You might get a crack in the lid where the stress “reliever” is, but as long as it doesn’t go beyond the rubber seal, you should still be ok.

If you want the ultimate in awesomeness, go for the Gamma lids.  I personally don’t use these for my grains, because the highest frequency I need to access my grains is every two weeks and I can cope with the standard lids.  I do however use them for our bulk dog food storage and hay for our guinea pig, since we store them in the garage and we access them every day.

The Gamma lids are surprisingly decently well priced at Home Depot ($7-8).

Ok, enough about lids already!

Since it is mostly accepted that the plastic used in most 5 gallon buckets is not rated as food safe, lets just add another layer of protection.

Once you have decided on your bucket / lid combo, just place a food safe plastic bag liner in the bucket.  Reference my post on food safe bucket liners to get an idea on where to get these bags.

008-Grain Storage-Twist bag


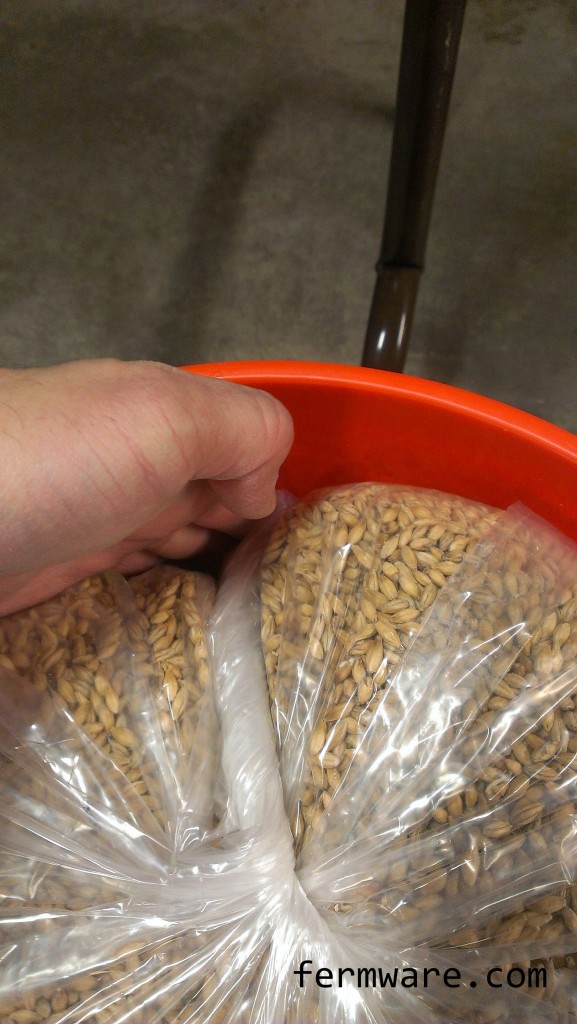
Not much to explain really.  Put the bag in the bucket and pour your grains in.

008-Grain Storage-Tuck Bag

I then twist the top of the bag and tuck it in the side of the bucket.  Then just put your lid on.

Labeling

Per my post on Easy Fermenter Labels, I just used gaffers tape to note the grain type and amount of grain in the bucket.  See “Nerd Alert” at the end of this post to determine the amount of grain in the bucket.

008-Grain Storage-Label Contents

Moisture control

Ok, so I admit, I had been using muslin bags filled with rice for “moisture control”.  After some reading on the internet (so it must be true), I came to the conclusion that rice is a poor desiccant.  I fell for the commonly held belief that it absorbed moisture because they use it in salt.  Well, it seems that rice is used in salt shakers to prevent clumping.  Sodium chloride is actually a better moisture absorber.  It all makes sense now, because the container I store our ice melter in always has a pool of water on top.  Now I just say (my opinion here) that if you won’t be using the grain within 3-6 months, you probably aren’t making the best of purchasing grain in bulk.

Nerd Alert!level_5

Ok, so if you aren’t using all of your grain at once, you’ll probably want to know how much grain you have left.  What I do is weigh the bucket plus the bag liner before pouring the grain in.  This is my tare weight.  So whenever I need to know how much grain is left, I just weigh the grain bucket with the grain in it and subtract the tare weight.

008-Grain Storage-Tare Bucket

I also note the date each time I weigh, because I know myself and I know that if I just put the weight on there, I will wonder if it was before or after a certain brew an then end up re-weighing the grain.

008-Grain Storage-Stacked Buckets

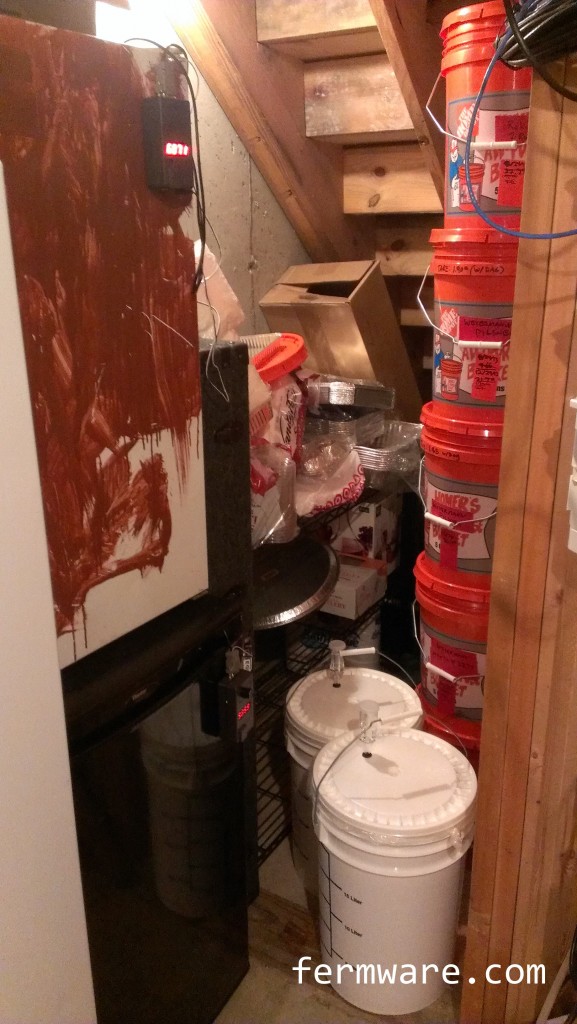
So here is “Fermentation Central” in my basement.  Two batches of Cream Ale fermenting, next to my stack of grain storage buckets and my two dorm fridges converted to fermentation chambers.  The top one is running intermittently (had since college) and the bottom one is facilitating a German Alt.

Belgian Candi Sugar and Silicone Baking Mats

DIY Candi Sugar Made Easy

Difficulty: level_2

Time Required:

one to two hours, depending on how dark you plan to make your candi sugar

Background:

If you are planning on making a potent Belgian beer such as a Dubbel, Tripel or a Home Run (just kidding!), you are going to need Belgian Candi Sugar. If you have already purchased some, you know that it can make the cost of your batch of beer skyrocket. It typically runs about $6/lb! My Tripel recipe uses a modest 3 lb. You can however make your own Belgian Candi Sugar at home with just a few simple things, some time and some regular table sugar that you can get for about $2.50/4 lb. bag ($0.63/lb).  As I write this Christmas season is just around the corner and thus the reason I’m preparing some candi sugar.  I’m preparing to brew one of my favorite and most interesting beers I’ve ever had.  It is based on a Northern Brewer recipe Saison de Noel.  Mine is identical, but I use homemade dark candi sugar instead of the candi syrup.  If you want the quick instructions, just read the headings.

Oh, and this recipe could be used to create windows for a gingerbread house too!

Affiliate Links

Equipment / Ingredients Required:

  • Table Sugar (1 lb. sugar yields approximately 1 lb. candi sugar)
  • Lemon Juice (addition of approximately 1 tsp. / lb.)
    • Used to “invert” the sugar
  • Candy thermometer
    • This one had the best reviews.  They indicated that the temperature markings would come off of others
    • I like the coded indicators for different crack temperatures
    • These are good, because they keep the bulb off of the bottom of the pot, which will help to prevent false readings
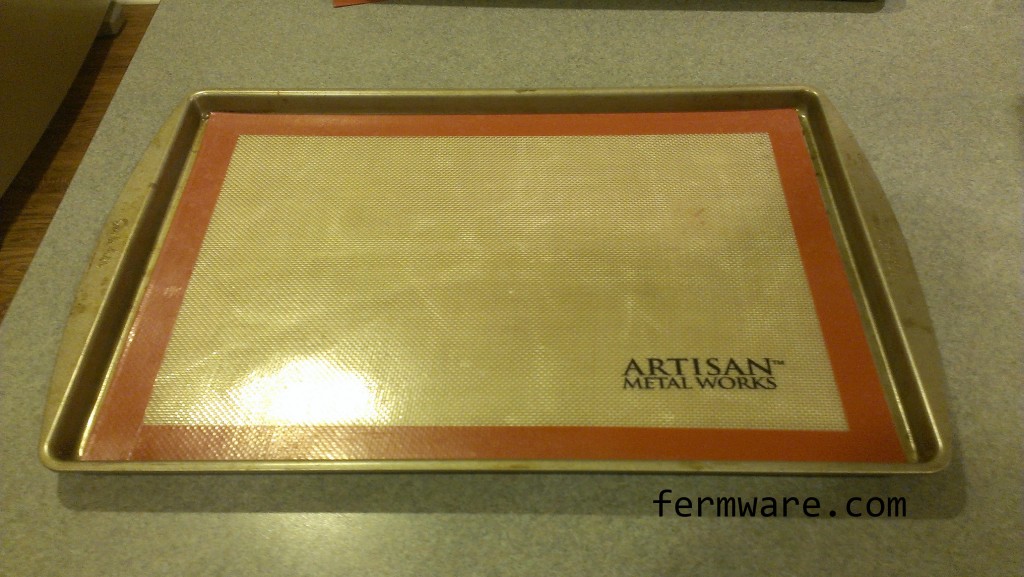
  • Silicone baking mat (Trust me, this is the best way to do it)
    • Less expensive that actual Silpat brand
    • Fit our inventory of baking pans better
    • We’ve had ours for almost a year now and they get used often.  Still no staining or degradation in the material.
    • My wife is a great baker, so this was an easy sell on why we “needed” them
  • SRM color chart (for consistency)

Why I recommend the silicone mats?  Past fails…

  • Non-stick baking pan
    • Yes, they are non-stick, as long as it isn’t Candi Sugar you are making on them
    • You can warp the baking sheet to pop it off, but quite a bit still sticks.
  • Wax paper
    • Stuck to the hardened Candi Sugar
    • I ended up with bits of wax paper floating in the boil
    • I did catch it with a colander when I poured into my fermenter, but just a pain
  • Foil
    • Still no luck
  • Just learn from my mistakes and buy some silicone mats!

Procedure:


002-Candi Sugar - lemon juice

Get your lemon juice ready

As I mentioned before, you need about 1 tsp. per pound of sugar.  I love using syringes for liquid measurement.  We have 3 kids, and so we’ve got about a bunch of these from all the prescriptions they’ve needed.  I just used lemon juice.  Fresh squeezed or the pre-bottled stuff will work.

002-Candi Sugar - Just Sugar

Pour the sugar into a pot

With candi sugar, you put in a pound of sugar, you pretty much end up with a pound of candi sugar.  I recommend putting in a little extra to account for some sticking to the pot when you pour it and some of it ending up in your mouth when you are done.  It’s so good it tastes like candy!  Oh wait..

002-Candi Sugar - warming up

Add just enough water to saturate the sugar

If you add more water than necessary, it won’t ruin it.  You’ll just be waiting longer for the water to boil off.  You’ll be surprised at how little water you need.

002-Candi Sugar - maintaining temperature

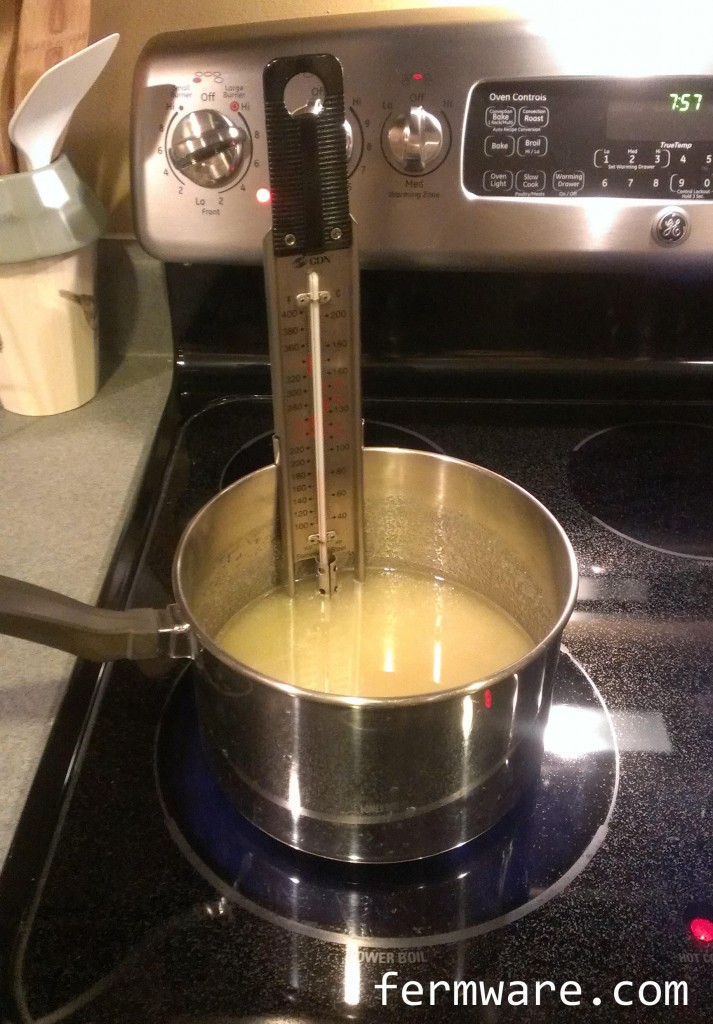
Add lemon juice and warm up to temperature (260-275 degF)

Pour in your lemon juice and you want to warm to between 260-275 degF.  This is right between “Hard Ball” and “Soft Crack”.  It will take a bit of time to get the sugar dissolved and boil the water off.

Maintain temperature for about 20 minutes

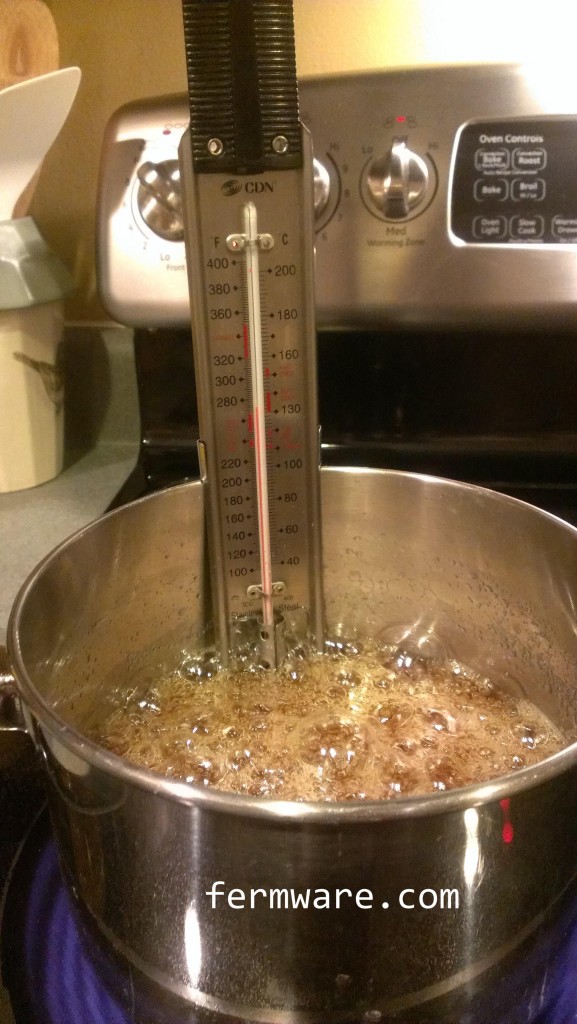
Once you get the mixture into the temperature range, you want to dial back the heat on your cooktop.  I took it down to about 4/10 and was able to maintain with just 2 large spoonfuls of room temperature water at a time.  This is just like a boiling kettle, in that if you walk away, you could come back to a mixture that has overheated and made a mess or cooled too much.  I fluctuated through the range, but was averaging about 270 degF throughout the initial 20 minutes and on into the darkening period.

After 20 minutes, keep at temperature and decide how dark you want it to get

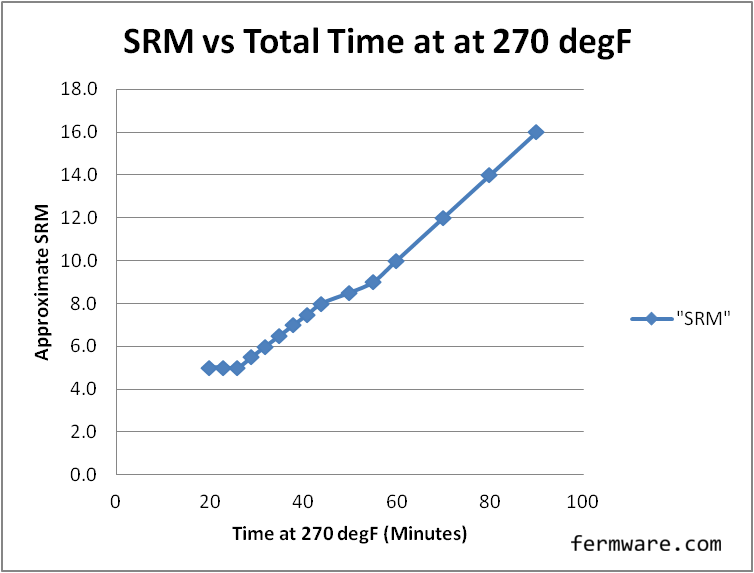
Take a sample small spoonful and drop it onto a piece of wax paper to do a color check with your handy dandy SRM chart.  Yes, I know I said not to use wax paper, but it is semi-transparent and if you also put a piece of white paper under it, you will be able to better judge the color.  Now SRM is officially taken through 1 cm of beer and my spoonfuls ended up at about 0.1″ (2.5 mm).  You aren’t measuring an exact SRM, but you are at least establishing a reference for the next time you make the candi sugar that will lead you down the path of repeatability.  The longer you keep at temperature, the darker the candi sugar will be.  Scroll to the bottom to see the results of my experiment of sugar color versus time.

Once you are happy with the color, raise to 300 degF (Hard Crack)

Raise to 300 degF… All you need to do is raise the temperature of the mixture to 300 degF then pour onto your silicone pad lined baking pan.

002-Candi Sugar - ready for sugar

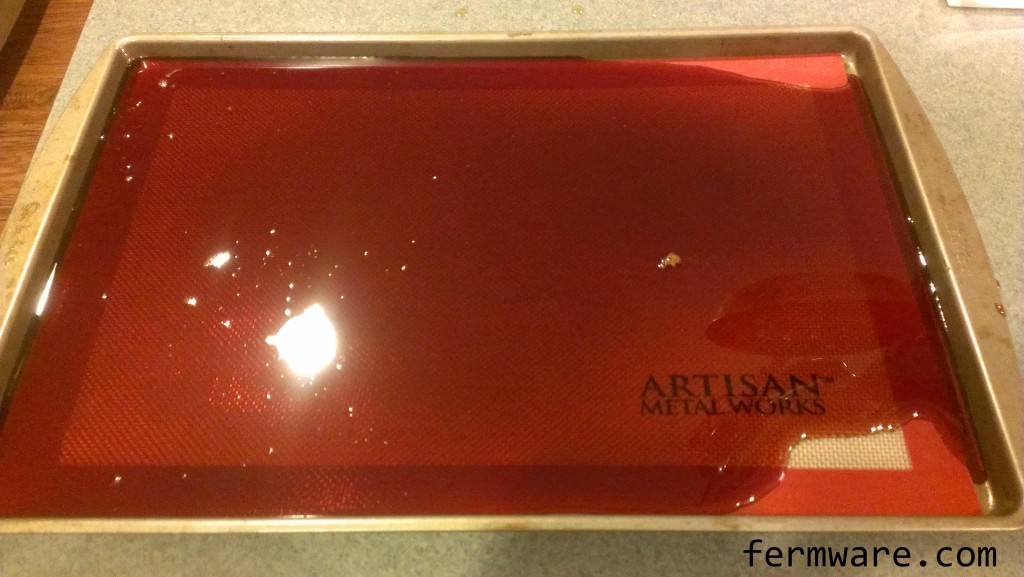
Pour Some Sugar on Me!

Make sure you have a hot pad under the pan or you might do something unintentional with your countertop.  Also, be very careful when pouring.  300 degrees is HOT and you don’t want to burn yourself or splash any all over your nice kitchen.  It is a pain to clean up.

002-Candi Sugar - finished

Let cool

I was making dark candi sugar this time, so it is much darker than you would want in a Tripel.  It also adds some burnt caramel, smokey flavors to your beer.

Clean your equipment immediately

Just like your brewing equipment, it is much much easier to clean right after you are done with it than it is when it has been sitting around for a while.  The candi sugar will harden on everything and be much more difficult to clean off.  You can soak in hot water, but don’t wait for that water to cool.

Break into pieces

Once the candi sugar has cooled completely, simply peel the silicone mat off of the back of the candi sugar sheet.  You can also bend the sheet to help break the candi sugar into smaller pieces.  I typically just break into small enough chunks that it will fit into a gallon plastic storage bag.  Then I just chuck it in the freezer until brew day.

Nerd Alert!level_5

As I was letting the sugar darken, I took a tablespoon every 3-4 minutes in the beginning, then 5 then 10 minutes apart until I got to where I wanted it so that I could come up with some guess on time required for a certain darkness.  I dropped these samples onto a sheet of wax paper laid on top of a plain white sheet of paper on a cooking sheet.  YES, I know I told you not to use wax paper, but these samples were not going to be used for anything but color measurement.  Technically SRM is measured with a specific wavelength of light through 1 cm (0.4″) sample.  I measured the thickness my hardened samples and they measured 0.008″ to 0.012″.


002-Candi Sugar - different levels

There might be some equations out there to scale one thickness sample to the equivalent for SRM measurement.  So my measurements, although not actual SRM, are good enough for me to be able to repeat a certain darkness based on time or spot checking the value to my SRM color chart.  Below is a chart of “SRM” versus total cook time at 270 degF of my samples.

Plot of “SRM’ versus time (Your times may vary)

002-Candi Sugar - SRM vs Time

Source Data

002-Candi Sugar - SRM vs Time source data