Tag Archives: labels

NHC 2014 Homebrew Expo

Ok, so this is REALLY what I came for.  You know I’m an equipment geek, so it was cool to see all the latest stuff.  In no particular order, here is my list of the coolest things I saw.

Missed my first post on my thoughts of the evening events?  Go back to the beginning..

Difficulty: level_1

This might be slightly more difficult to read than most, because your inner brew geek mind will easily wander into thinking about what you can buy or make next.

Affiliate Links

My Favorite Things….
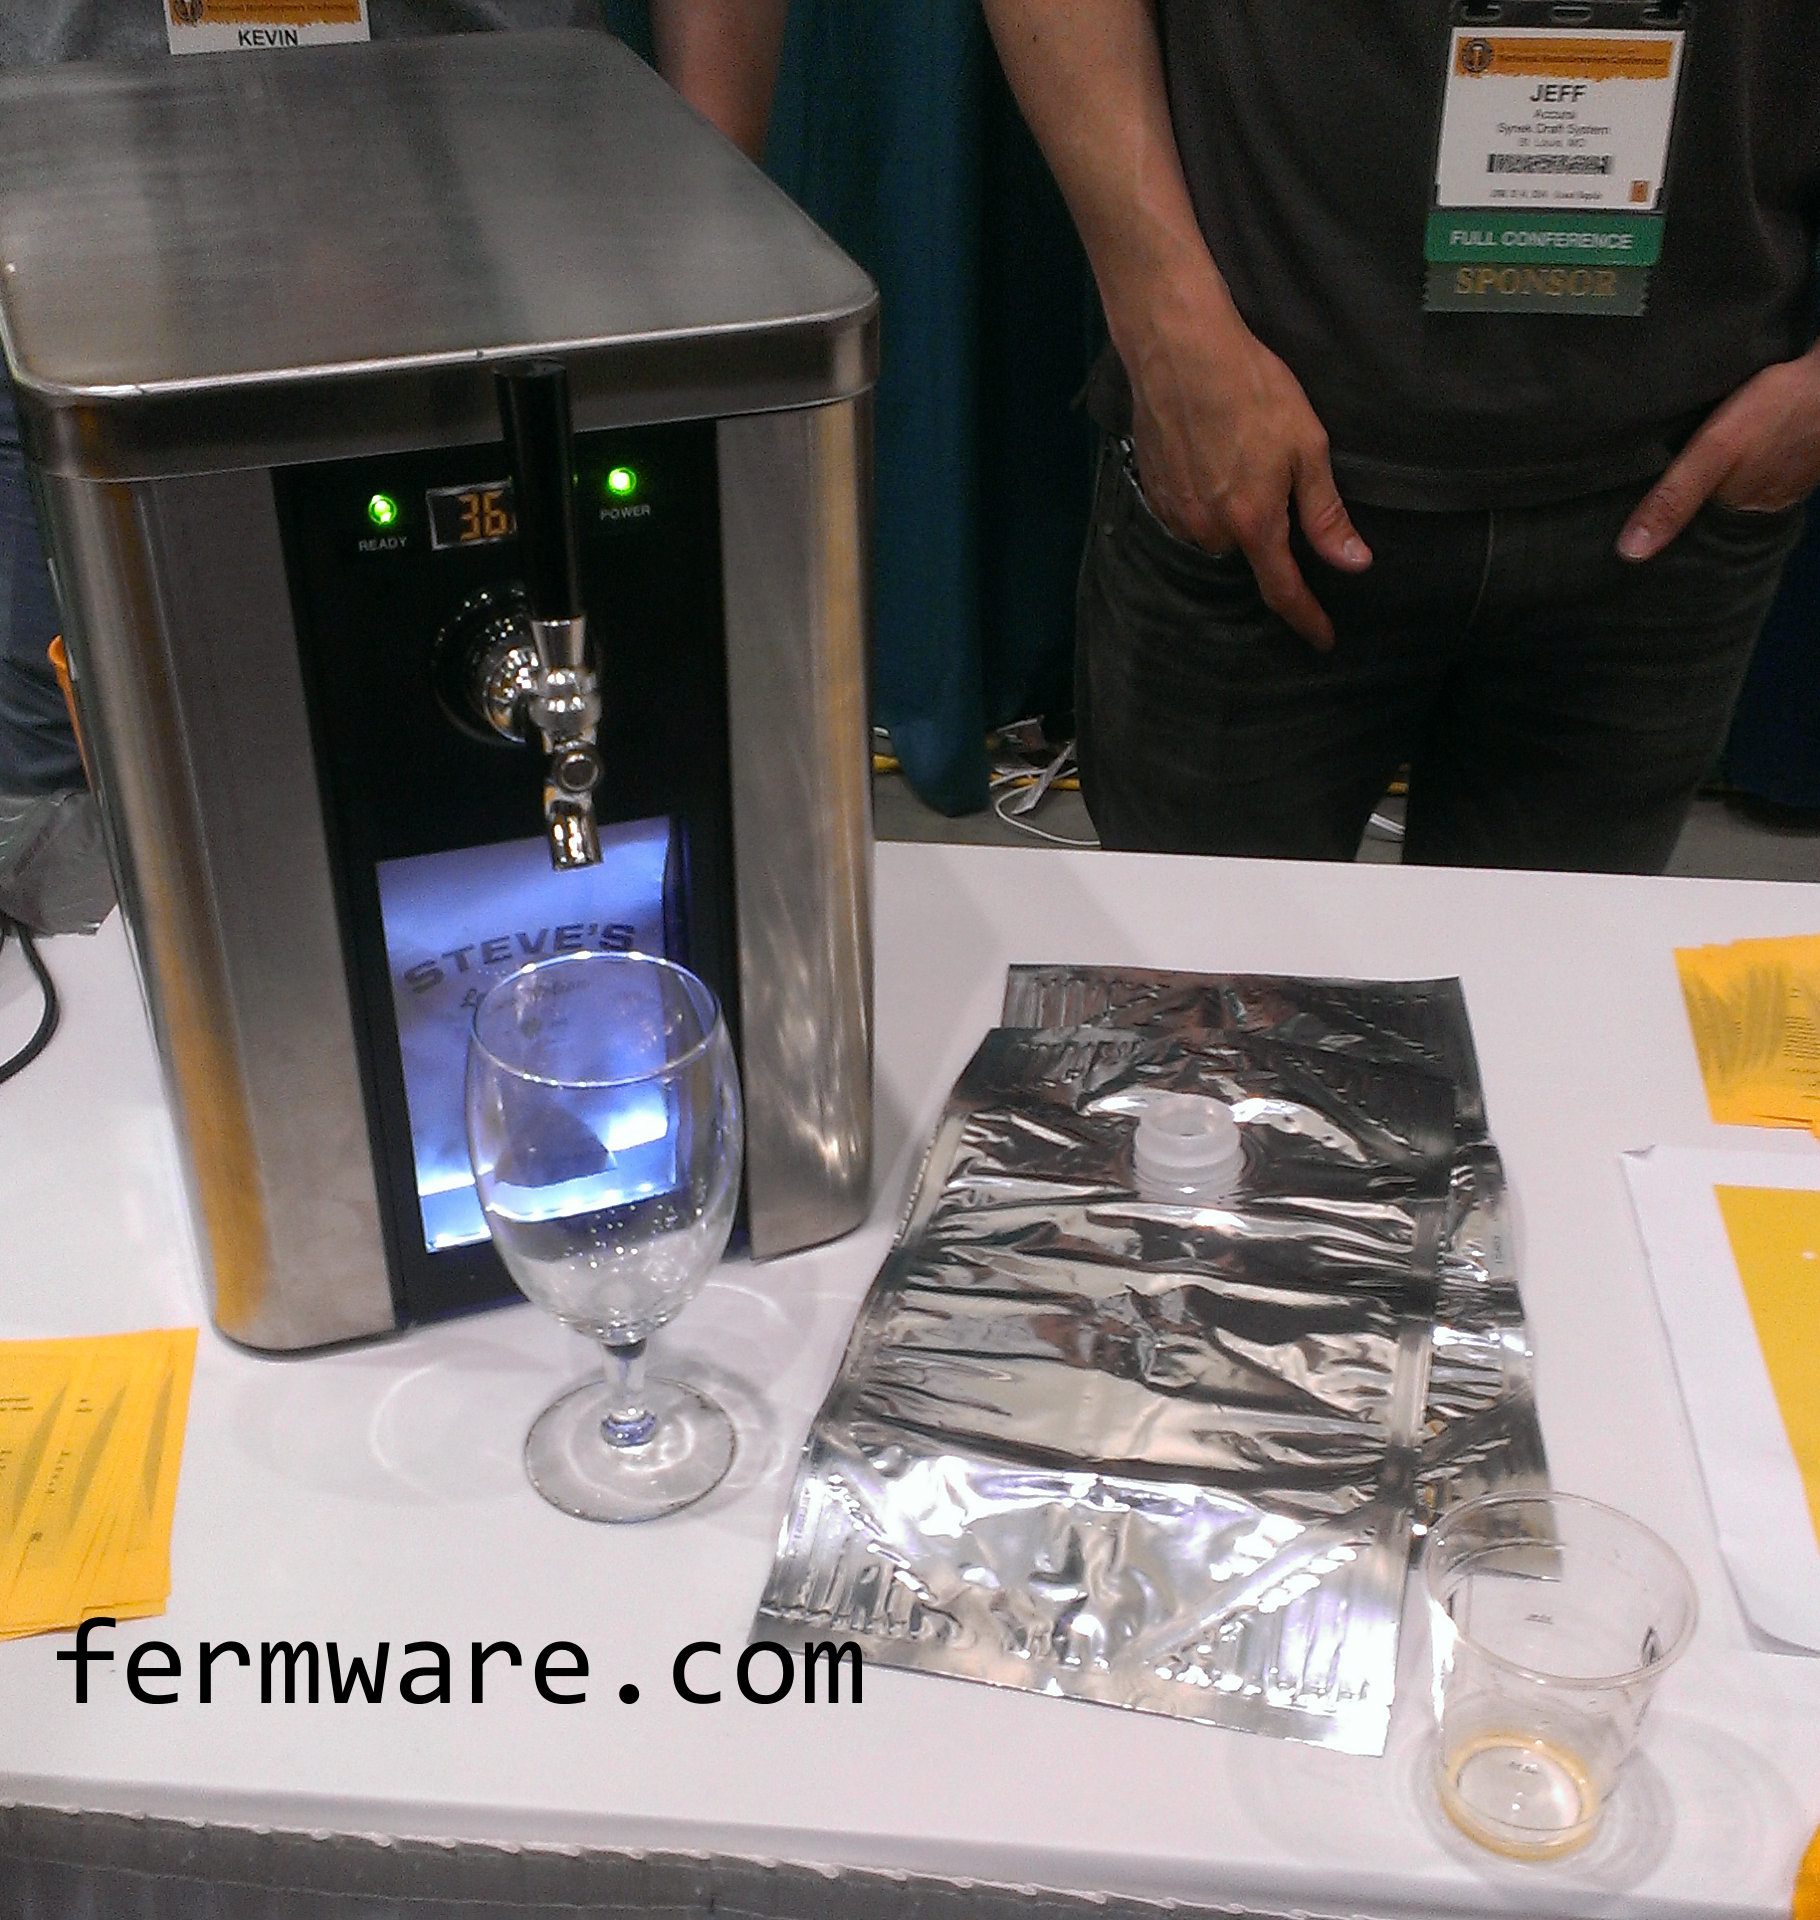
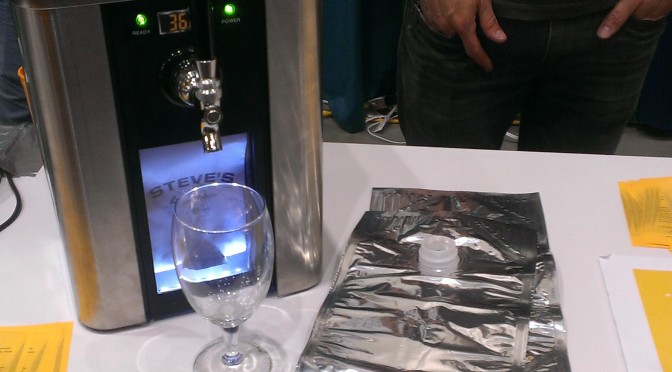
010-NHC_2014-SYNEK

SYNEK Draft System

This is like the countertop kegerator. And the thing is, that isn’t the coolest thing about the SYNEK. What is so cool, is that they have brought focus to a new way to package beer. The best way to describe it is like box wine. If you’ve ever bought some and taken apart the box to find the bag inside, you’ll know what I’m talking about. I’m not ashamed to say that I still do buy it, because there actually is good box wine. I’m an ultra-beersnob, but I’m fine with the Two Buck Chuck (or Three Buck, depending on where you live).

Anyway, back on subject. The premise is that anyone from homebrewers on up to professional breweries will be able to use the new packaging. It’s one of those ideas that was waiting to happen, since all the technology was there. I like the fact that with growlers, you can go to most any brewery and bring home the deliciousness. The bad thing is that once you open them, you need to drink the beer within a few days or it goes flat. Unless you are using some sort of carbonation cap (I’ve got a method, which I’ll have a post on soon). In any case, glass is not an ideal material for holding pressure.

I talked for a while with Steve Young, the founder for quite a while.  He’s the guy in the videos on their site.  You really have to watch the videos at the SYNEK Kickstarter page. It can do more justice than me writing about it.

I myself am planning on acquiring an early unit to run it through it’s paces. For purely scientific reasons….

010-NHC_2014EV_Keg

EV Container Plastic Kegs

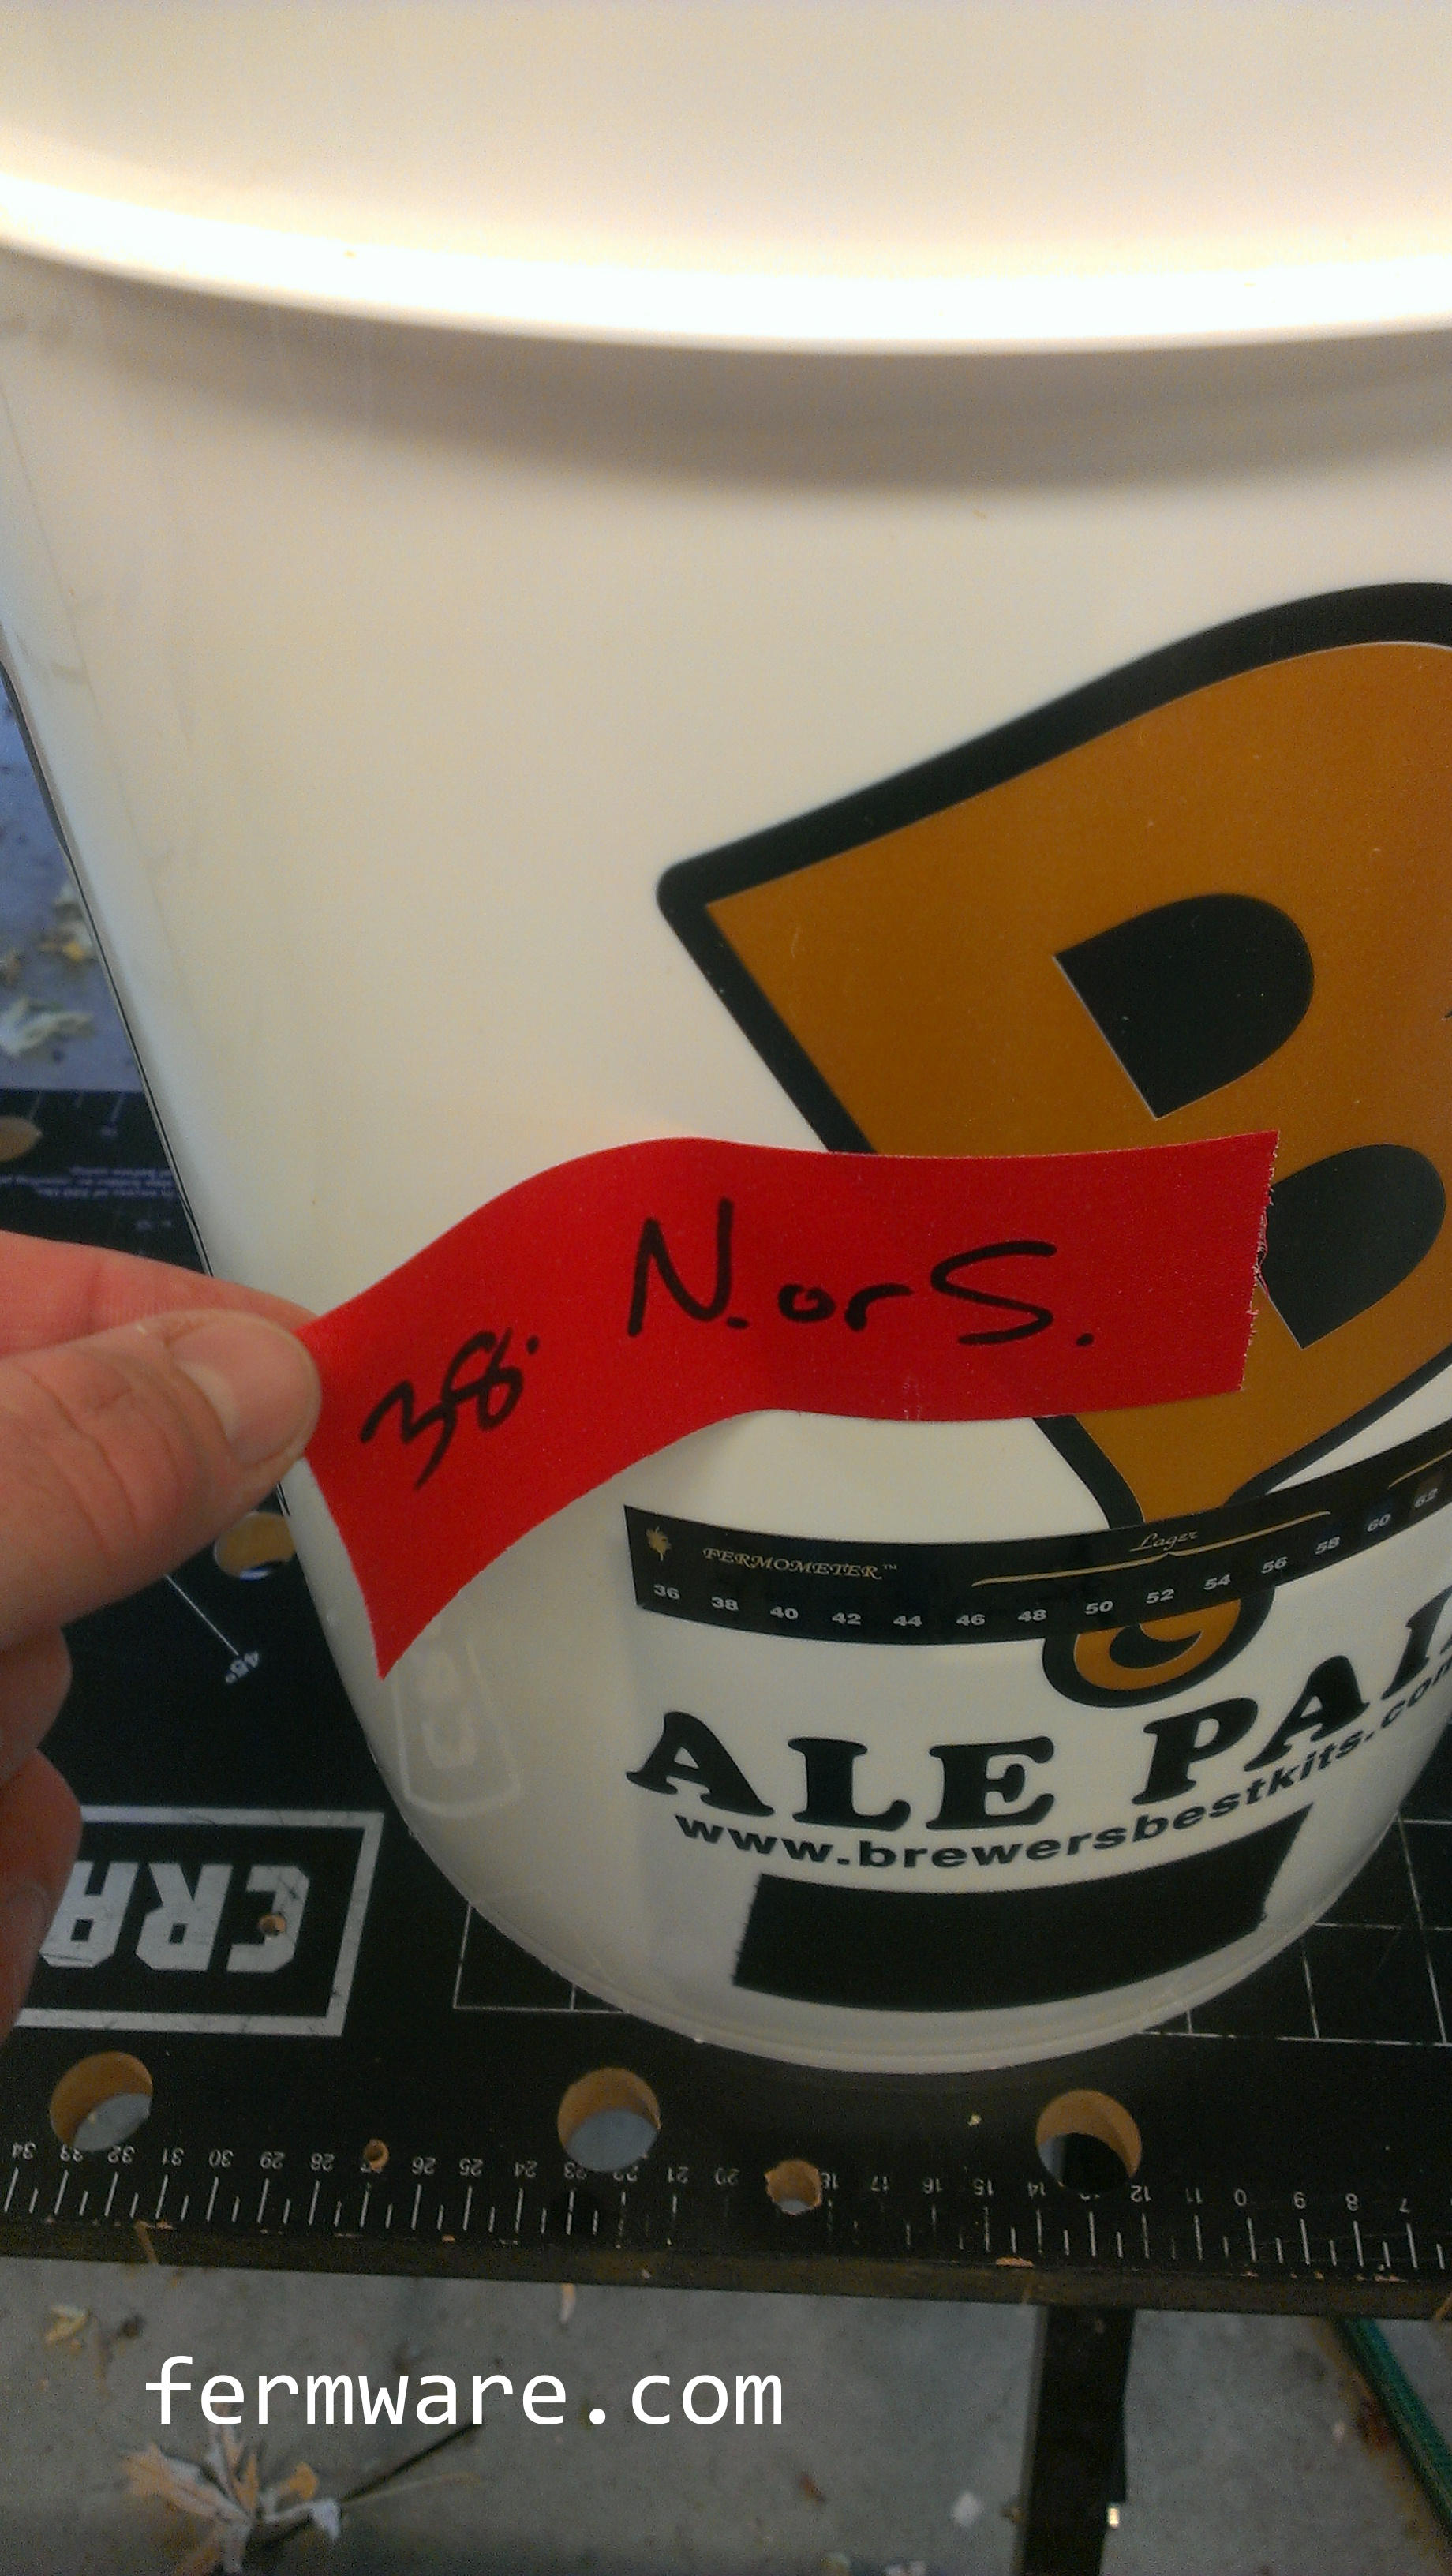
So a few plastic keg manufacturers have come to market with mixed reception. What I think is so great about this one is that they have a removable liner, so it makes cleanup a snap. This will have huge implications for commercial breweries. NOBODY likes cleaning. I had this idea when I decided to go with the Fermentation Bucket Liners, but hadn’t thought all the way through how to do it with a corny keg, so I’m glad to see that somebody has done it with normal kegs at least. Currently, the only fittings available are for a Sanke keg connector. They are supposed to be slightly larger in diameter than a standard sixth-barrel or corny keg.  Visit their site to get more info.
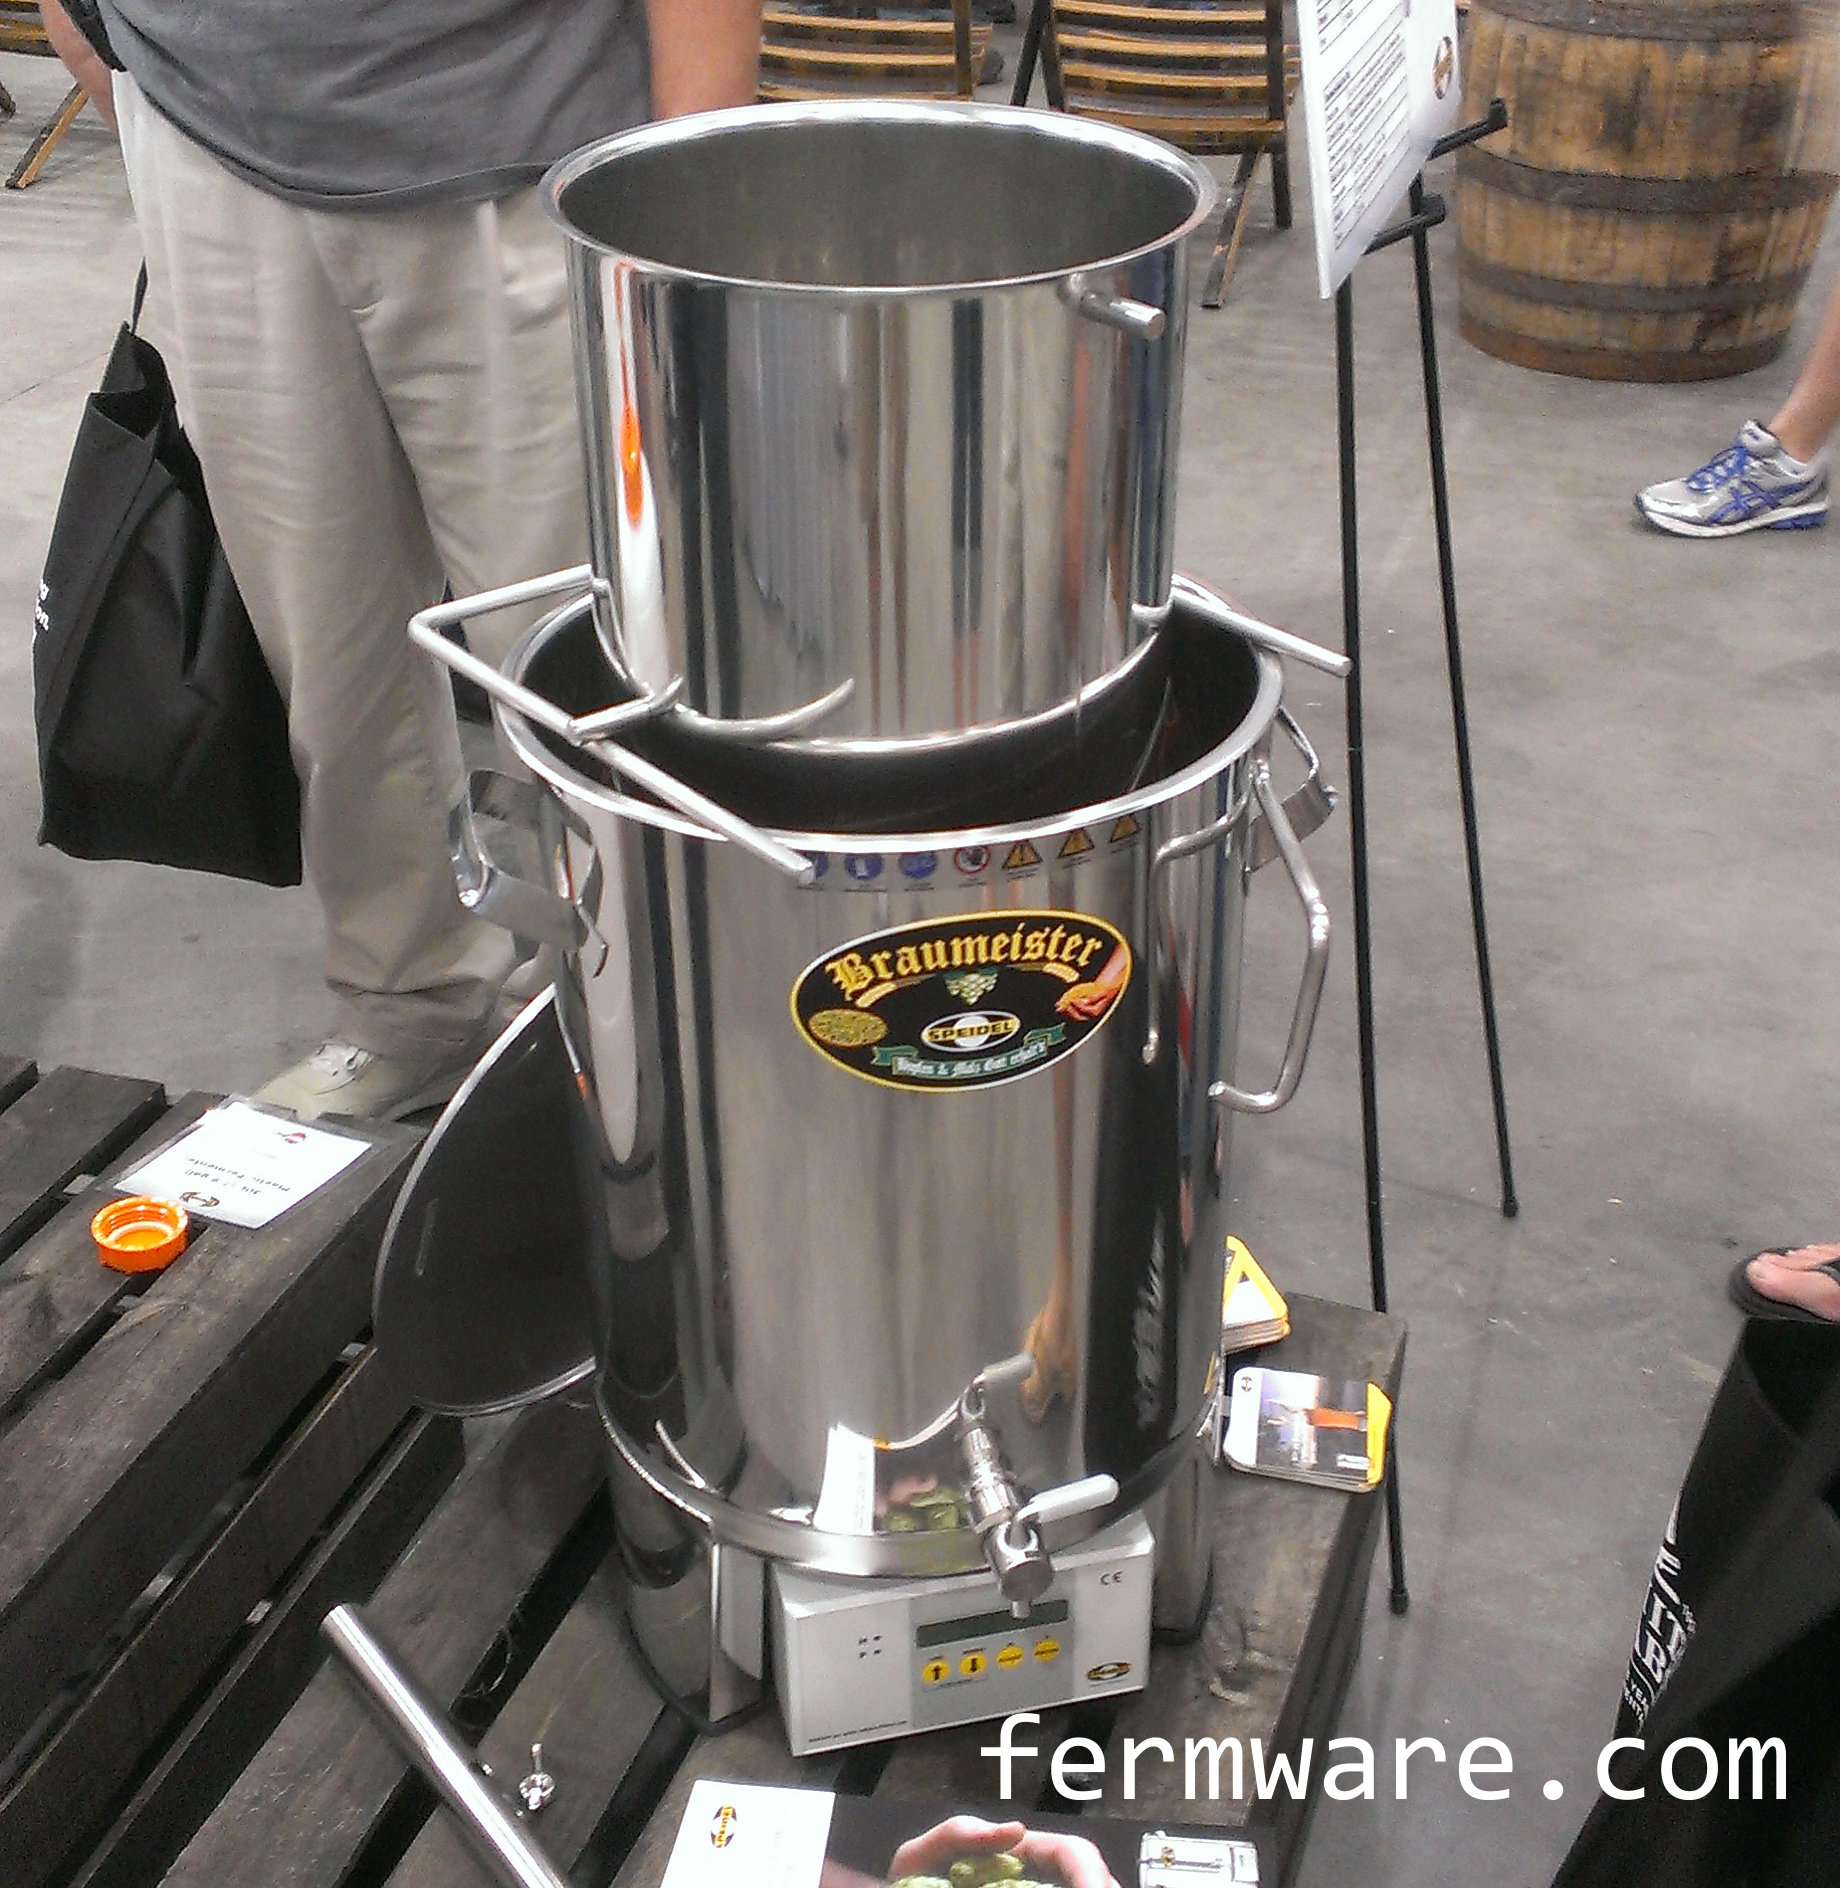
010-NHC_2014Braumeister

Speidel Braumeister

Not necessarily new, but my first time seeing it in person. I have to say, it is quite beautiful. It’s like the Porsche of brewing equipment. Appropriate, since they are headquartered in Ofterdingen Germany, not too far from Stuttgart, Germany, home of Porsche. If you have the means, I highly recommend picking one up.
If you can read German, go here:
http://www.speidels-braumeister.de/brauprozess.html
If not, go here:
http://morebeer.com/category/braumeister-electric-allgrain-brewing-systems.html

Hop Union

Until NHC, I hadn’t used their products or website. I had just seen their nice advertisements in Zymurgy. I got a few hop samples and intend to use one for my 1 gallon brewing experiment (in process). Their website has a ton of resources applicable to the homebrewer. You MUST go to their site and find out all you didn’t know about hops already.

White Labs

What’s so new with White Labs? They’ve been around. Ok, well besides what I think is a cool application of genetic mapping technology to study the yeast family tree.

White Labs is introducing their new FlexCell packaging. All the information you would want can be found here:
http://www.whitelabs.com/innovation
And in case you were wondering, as with the traditional vials, if you collect 5,000 empty FlexCell packages, Chris White will come to your house. Start saving!!

Clear Beer Draught System

So I keg and don’t filter my beer. I use a combination of patience and not necessarily caring what my beer looks like. OK, so when I do get to that point in the keg where my beer is crystal clear, I do feel pretty pleased with myself. What we have here is an invention that allows you to pull beer from the top of the keg, instead of at the bottom. It’s basically a floating siphon. When I saw it, I thought “I wish I had invented that!”. I must acquire one and try it out.

Grog Tags

Ok, so I don’t bottle. Why do I care? It’s not just bottle labels, but keg/carboy labels, coasters, bottle caps and more. I hadn’t realized this before visiting their booth at the expo. I currently use gaffer’s tape on my fermenting buckets and then keep the same label all the way to the keg, but I do like the keg/carboy labels. And since my bottle labeling consists of a handwritten Sharpie label, it might be handy to have some real bottle labels made up. What else is cool about the bottle labels is that they are re-usable. As a test, I even ran my NHC tasting glass through the dishwasher with their sample label and it came out just fine.
More info and video.

Click on my link below for 10% off.

[ad name=”GrogTAG 720×300″]

Brew Toad

First off, thanks for the free wireless at NHC!

Another brewing software has entered the market. I talked to the developer of Brew Toad at the expo. While it doesn’t yet support special tools for BIAB, I will wait for it to mature a little and then include them in a future comparison of brewing software. I currently use BeerSmith, but I know things are moving the way of web based so you can have your information anywhere you have an internet connection, so we’ll see how this turns out.

I’ll be breaking my thoughts into a few posts:

Part 1: Evening Events
Part 2: Seminars
Part 3: Homebrew Expo (This post)
Part 4: Other highlights and parting thoughts


Grain Storage

Grain Storage

Difficulty: level_1

Time Required:

As long as it takes you to replace a trash bag.  Maybe more if you decide to nerd yourself out.  Keep reading to the bottom if this is you.

Affiliate Links

Cost:

Less than $5 per bucket assembly.

Background:

So if you are serious about brewing and want to save money in the long run, you are most likely buying your most used grains in bulk.  If you don’t want those savings to go to waste, you need to store the grains in a way that doesn’t degrade the quality of the grain.

Required:

5 Gallon bucket + lid of your choosing
food safe bag

“Let’s do this”:

Whenever I choose a storage solution, I try to find something readily available where that exact same container can be purchased again at some later point in time.  I arbitrarily chose Homer buckets from Home Depot.  Maybe I fell for their marketing scheme of having them available everywhere you look in the store for a reasonable price, but hey, they work.  So now, I just buy these buckets so everything matches.

What is convenient is that each bucket holds just about 25 pounds of grain.  So what I usually do is buy the 50 pound bag of ‘Merican grain when I’m going to use it, then the remainder always fits in two buckets.  The same goes for when I get the 55 pound bags of “Ferrin” grain.

So choose your bucket and then decide which lid you will use.

008-Grain Storage-Crappy lids

Do not buy these lids!  They tempt you with the “easy removal” line, but upon the first or second removal of this lid, this will occur.

008-Grain Storage-Sealed Lid

This is what I buy.  They are a few cents more and in my opinion, worth so much more.

008-Grain Storage-Seal on lid

These lids have a rubber seal, which helps keep moisture out.

008-Grain Storage-Lid as Received

The lids do have this one time seal feature, but just go ahead and pull it off.  If you are just the slightest bit careful, you can remove these lids over and over again.

008-Grain Storage-These lids crack too


You might get a crack in the lid where the stress “reliever” is, but as long as it doesn’t go beyond the rubber seal, you should still be ok.

If you want the ultimate in awesomeness, go for the Gamma lids.  I personally don’t use these for my grains, because the highest frequency I need to access my grains is every two weeks and I can cope with the standard lids.  I do however use them for our bulk dog food storage and hay for our guinea pig, since we store them in the garage and we access them every day.

The Gamma lids are surprisingly decently well priced at Home Depot ($7-8).

Ok, enough about lids already!

Since it is mostly accepted that the plastic used in most 5 gallon buckets is not rated as food safe, lets just add another layer of protection.

Once you have decided on your bucket / lid combo, just place a food safe plastic bag liner in the bucket.  Reference my post on food safe bucket liners to get an idea on where to get these bags.

008-Grain Storage-Twist bag


Not much to explain really.  Put the bag in the bucket and pour your grains in.

008-Grain Storage-Tuck Bag

I then twist the top of the bag and tuck it in the side of the bucket.  Then just put your lid on.

Labeling

Per my post on Easy Fermenter Labels, I just used gaffers tape to note the grain type and amount of grain in the bucket.  See “Nerd Alert” at the end of this post to determine the amount of grain in the bucket.

008-Grain Storage-Label Contents

Moisture control

Ok, so I admit, I had been using muslin bags filled with rice for “moisture control”.  After some reading on the internet (so it must be true), I came to the conclusion that rice is a poor desiccant.  I fell for the commonly held belief that it absorbed moisture because they use it in salt.  Well, it seems that rice is used in salt shakers to prevent clumping.  Sodium chloride is actually a better moisture absorber.  It all makes sense now, because the container I store our ice melter in always has a pool of water on top.  Now I just say (my opinion here) that if you won’t be using the grain within 3-6 months, you probably aren’t making the best of purchasing grain in bulk.

Nerd Alert!level_5

Ok, so if you aren’t using all of your grain at once, you’ll probably want to know how much grain you have left.  What I do is weigh the bucket plus the bag liner before pouring the grain in.  This is my tare weight.  So whenever I need to know how much grain is left, I just weigh the grain bucket with the grain in it and subtract the tare weight.

008-Grain Storage-Tare Bucket

I also note the date each time I weigh, because I know myself and I know that if I just put the weight on there, I will wonder if it was before or after a certain brew an then end up re-weighing the grain.

008-Grain Storage-Stacked Buckets

So here is “Fermentation Central” in my basement.  Two batches of Cream Ale fermenting, next to my stack of grain storage buckets and my two dorm fridges converted to fermentation chambers.  The top one is running intermittently (had since college) and the bottom one is facilitating a German Alt.

Easy Fermenter Labels

Easy Fermenter Labels

Difficulty: level_1

Time Required:

As long as it takes you to tear off a piece of tape and write on it

Background:

This is my method of keeping track of what is what by labeling my fermenting buckets that allows you to re-use the label when you transfer to a secondary then your keg.

Affiliate Links

Required:

Gaffer’s tape
Marker

Gaffer’s tape (aka “racers tape”, “hundred mile an-hour tape”)

*”mile an-hour” is the colloquial way to pronounce “miles per hour”

I was first introduced to this tape when I started working in IndyCar racing as a DAG (Data Acquisition Guy).  When setting up the pits and timing stands, we would use it to tape down the various cords we would need to run along the ground so that people wouldn’t trip over them.  It is a cloth-like tape that can be easily torn by hand and comes in different colors.  The best thing about it though is that after sitting outside for 3 days in the sun, when you pull it off, it doesn’t leave the sticky residue that you get with duct tape, electrical tape, masking tape, etc.

It got it’s name from gaffer’s in the entertainment industry using it for pretty much the same purpose.  You can also see it on NASCAR racecars when they go out for qualifying.  They tape off the grille and other inlets when they do a qualifying run to reduce aerodynamic drag, at the expense of cooling.

Where to buy Gaffer’s tape:

  • Amazon
  • Hardware store
  • Racers supply store (most variety of color and best price)
  • Music store (the instrument kind, not the CD kind. If those still exist??)

*It’s typically about 3x the cost of duct tape, but in my opinion, much more useful.  And keep in mind that sometimes, it the rolls have a lot more length of tape on them than duct tape or masking tape rolls.

Process:

Straightforward really…

005-Fermenter Labels - gaffers tape label

Peel off a piece of tape, stick it on the fermenter and write on it with a marker.

Be careful however, the tape doesn’t absorb the marker fluid immediately and if you wipe across it, it could get on your fingers.

N. or S.” is my Christmas Ale, Naughty or Spice.  Cheesy name, but tasty brew!  It should be carbonated in time for Thanksgiving!  38 is the batch number.  Just a habit of mine and how I name them in my brewing software.

005-Fermenter Labels - pulling gaffers tape off

Peel off and re-apply

When transferring from your primary to your secondary, just peel off and re-apply to the secondary.
*Apply to a room temperature vessel. If you try to apply it to something cold, it most likely has condensation on it and the tape will not stick

005-Fermenter Labels - gaffers tape - no line

No unsightly residue

“Can’t see the line, can you Russ?”

Keg labels

005-Fermenter Labels - Keg

 Same thing when transferring to your keg.

005-Fermenter Labels - Keg in keezer

Visible enough in your keezer

**I do sometimes just write on the top of the keg with a Sharpie and wipe if off with acetone when I am cleaning the keg