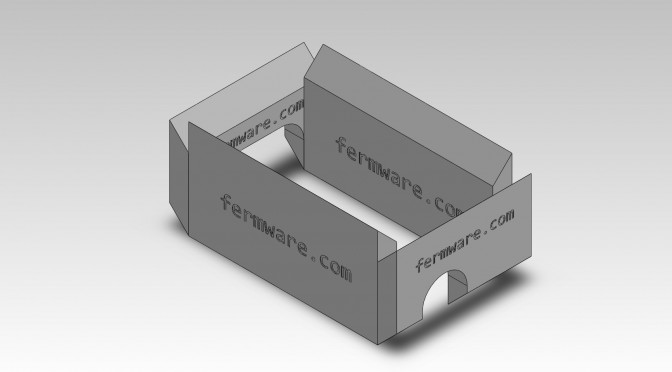
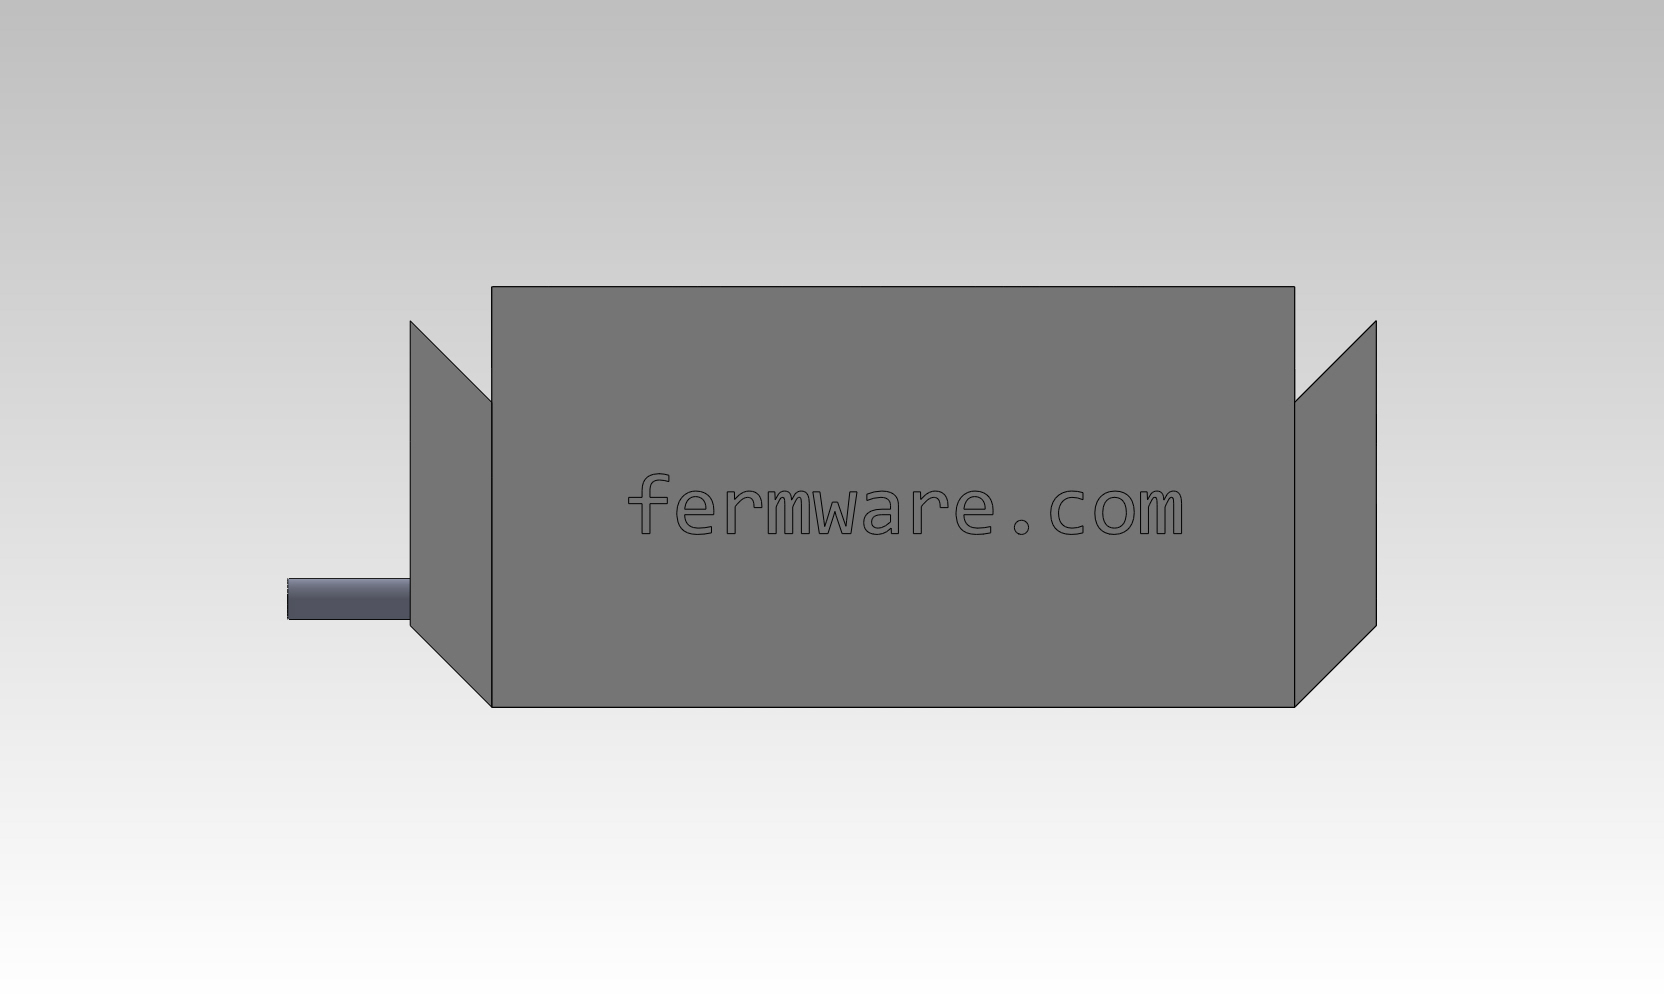
This is part 4 in the series documenting how to create your own Homer Hopper. If you haven’t seen the introduction yet, please check it out. In this post, we’ll be making the mill box.
I started with some 3/4″ x 4″ pine I had from another project. You’ll need about 26-30″ worth. You’ll also want some wood glue or wood screws if you are too impatient for the glue to dry or don’t want to mess with clamps.
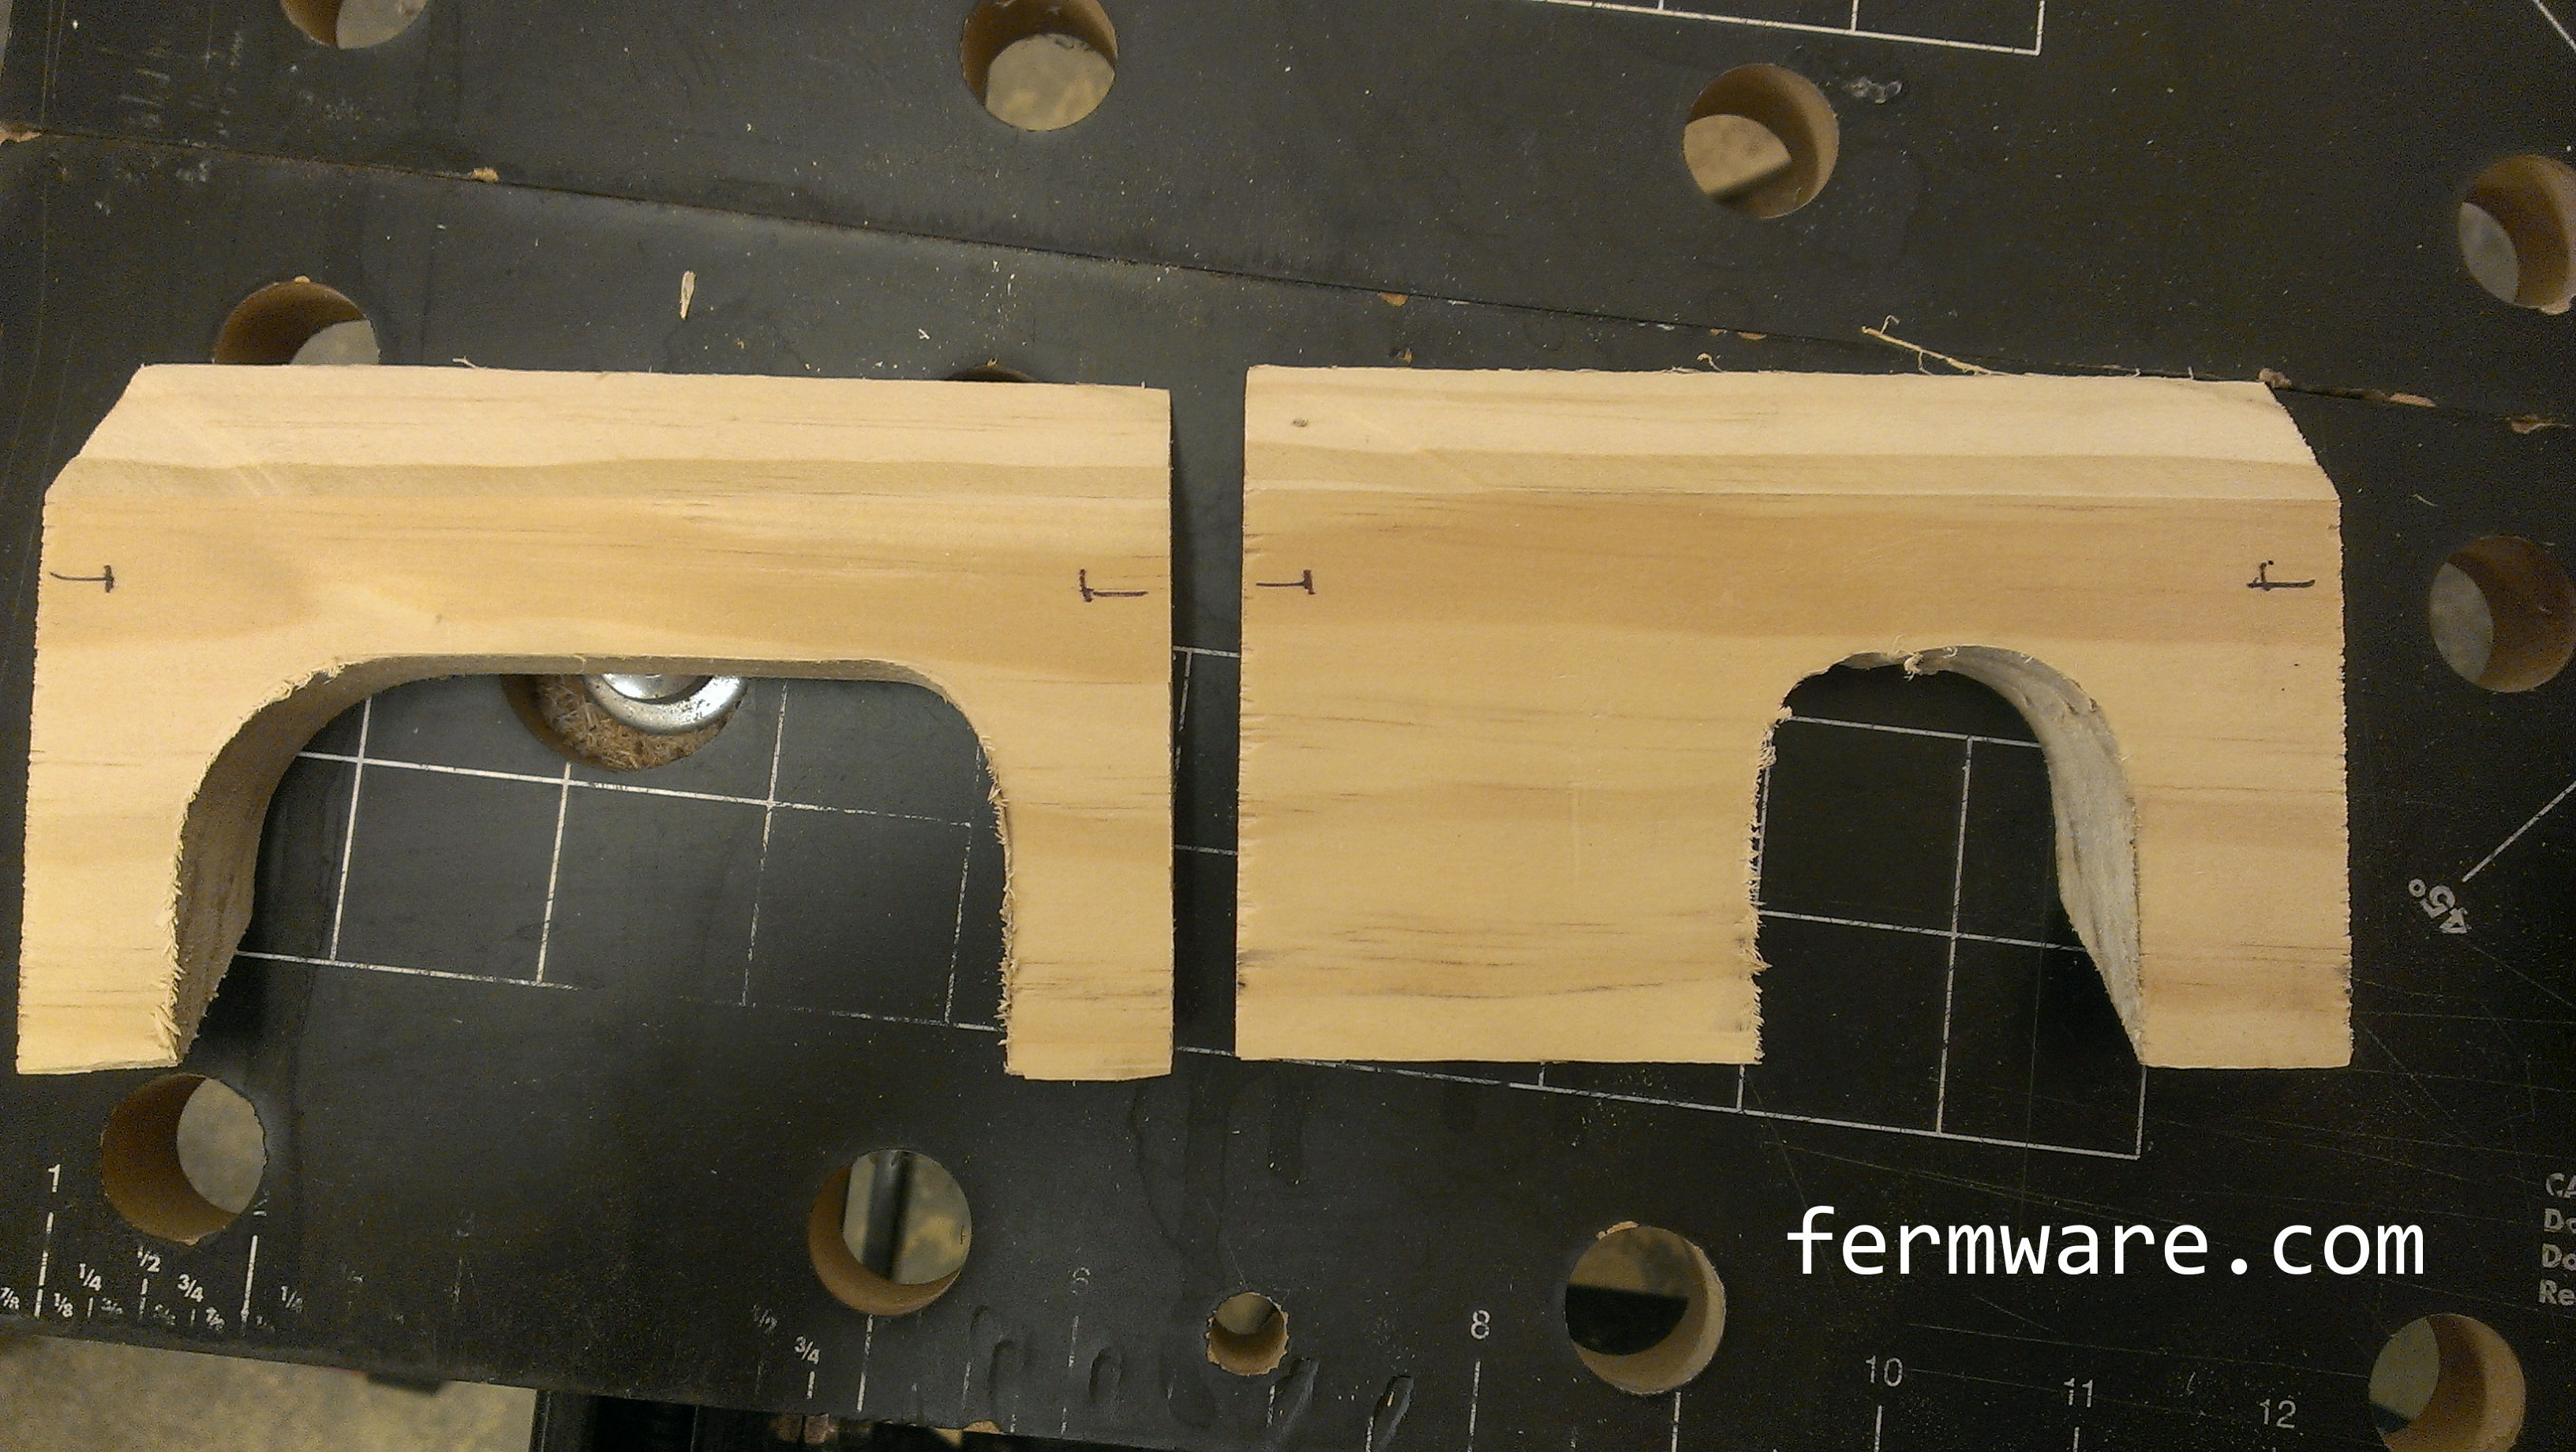
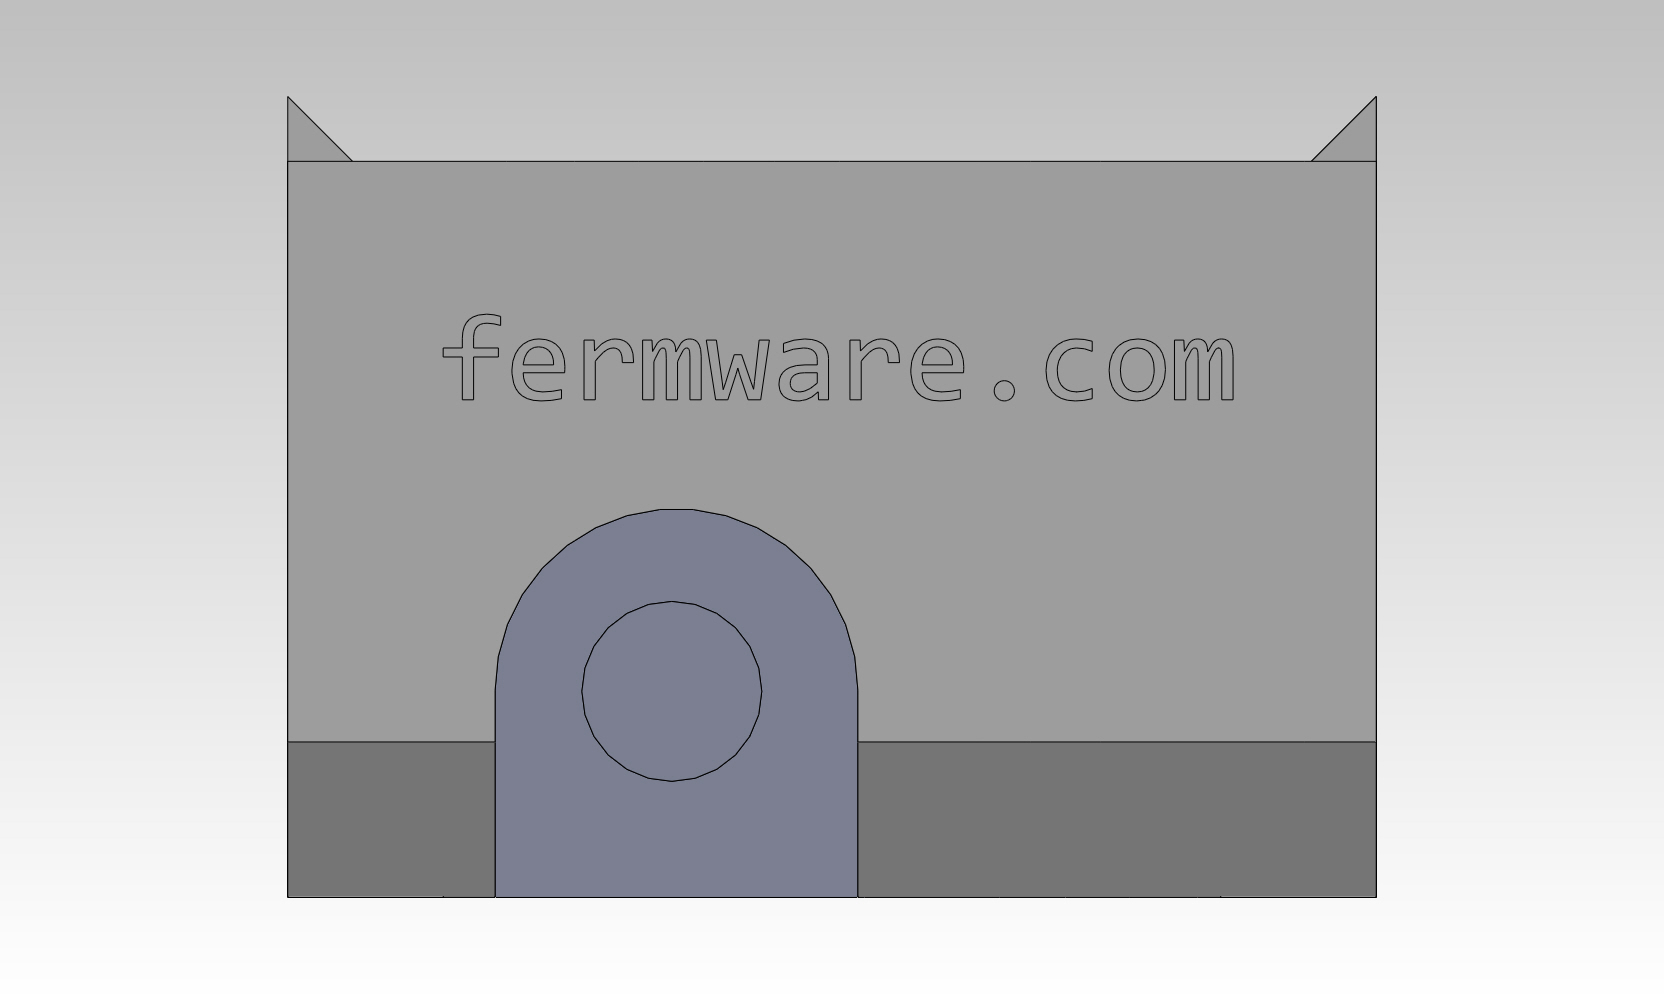
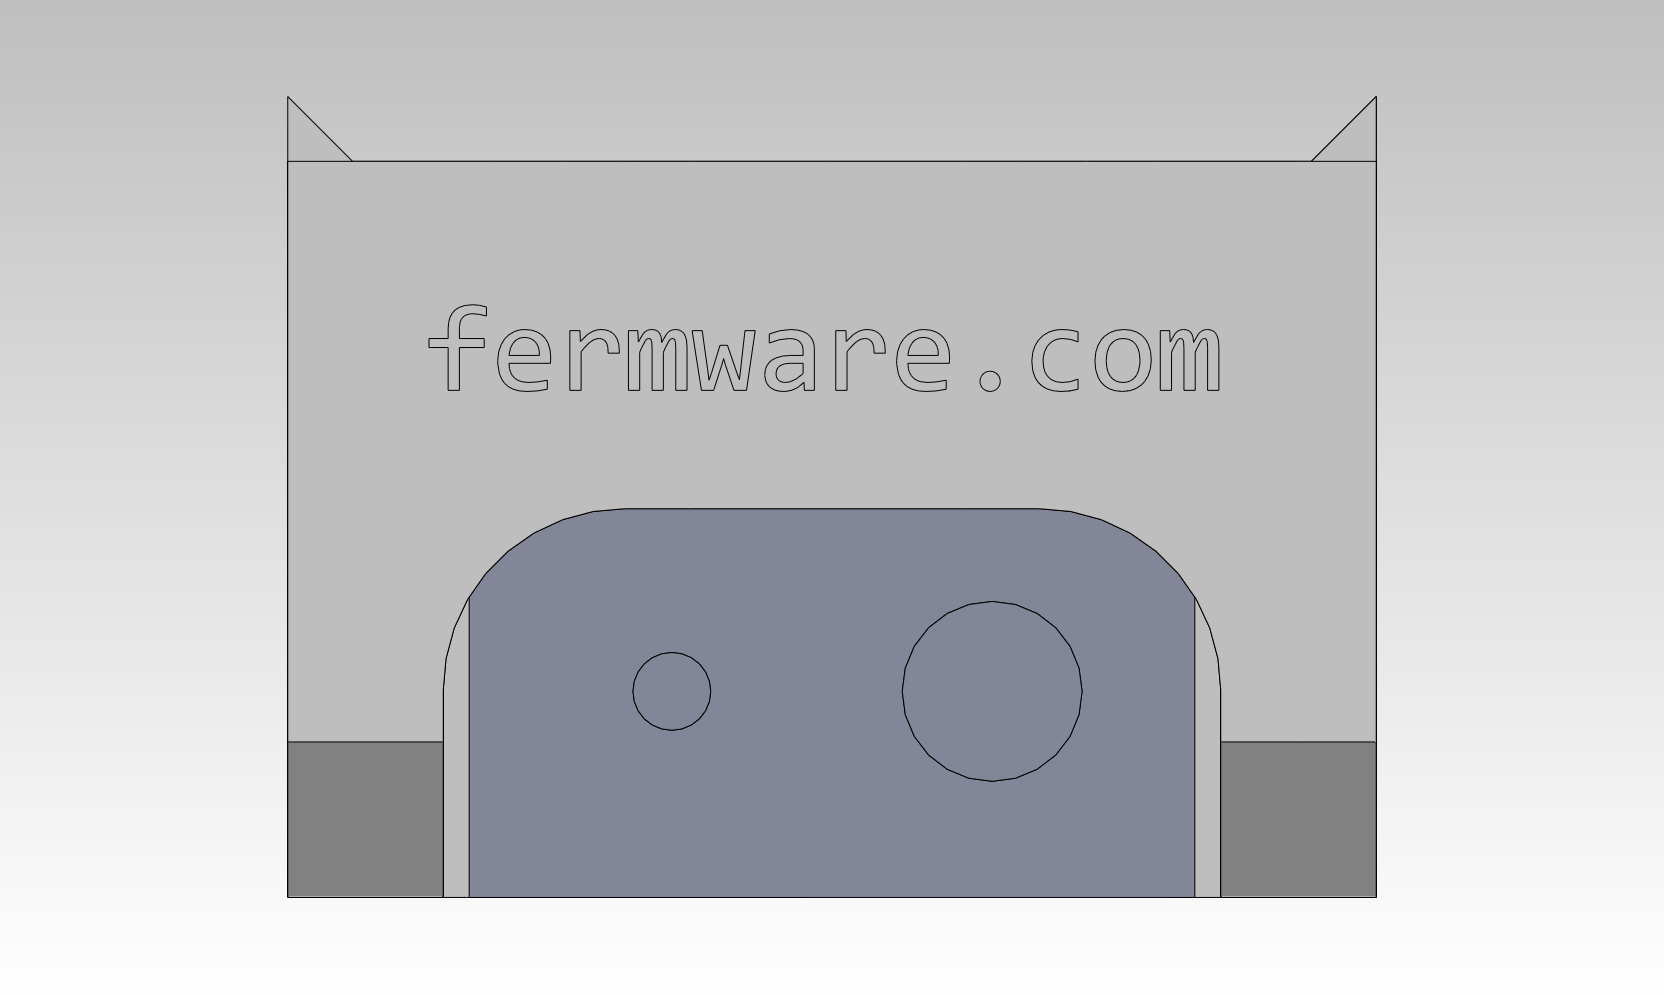
You can print out the drawings or just use them for reference and measure out the old fashioned way. mill_box_adjust_side mill_box_drive_side mill_box_front_back Cut the wood to size. You’ll want to use a miter saw or table saw to cut the angles. The windows are obviously clearance for the adjustment knobs and the drive shaft.
I pre-drilled holes so I could use some wood screws to hold it together while the glue dried.
One thing you’ll notice is that with this mill box, it won’t fit over the thumb screws of the Monster Mill. I actually replaced the thumb screws with some set screws in order to minimize the external features. If you still like the thumb screws or you forgot or don’t have the set screws, you’ll need to cut clearance holes for them.
This is part 3 in the series documenting how to create your own Homer Hopper. If you haven’t seen the introduction yet, please check it out. In this post, we’ll be making the wooden base.
Jig saw
Drill with 5/16″ drill bit, maybe a 3/8″ or 1/2″ for starter holes for saw
Sanding device (belt sander, handheld, sandpaper)
Material recommended:
5/8″ plywood, big enough for 14″ diameter. You can go thinner or thicker. Use scrap wood or find a 24″x24″ square for maybe $10 at the hardware store. I used some nice birch, but only because I had it around.
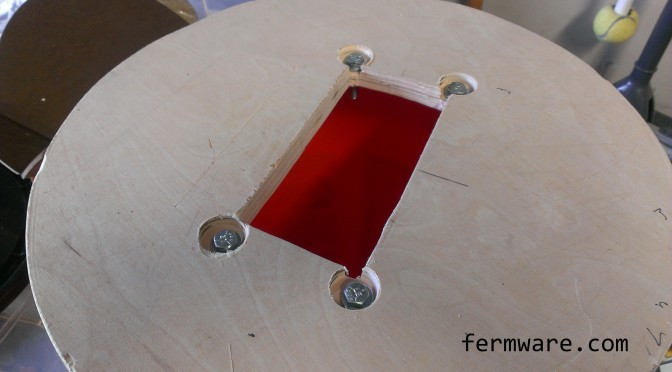
First, print out the entire Hopper Base print or just the Window Template only. I’ve put centerlines on the print so you can line them up with the center of the base more easily.
First cut your wood to size. Basically a 14″ diameter circle. Optional is the flat cut on the side. This is to allow easier access to the drill chuck when setting up. I started with a full round circle and then modified it later. I prefer the flat side.
Next you’ll mark out the window and through hole locations on the base. I drilled 5/16″ holes to give me more clearance, since my woodworking skills are not CNC accurate. Also, go ahead and drill some starter holes for the jig saw. Just make sure you choose a size larger than your saw blade.
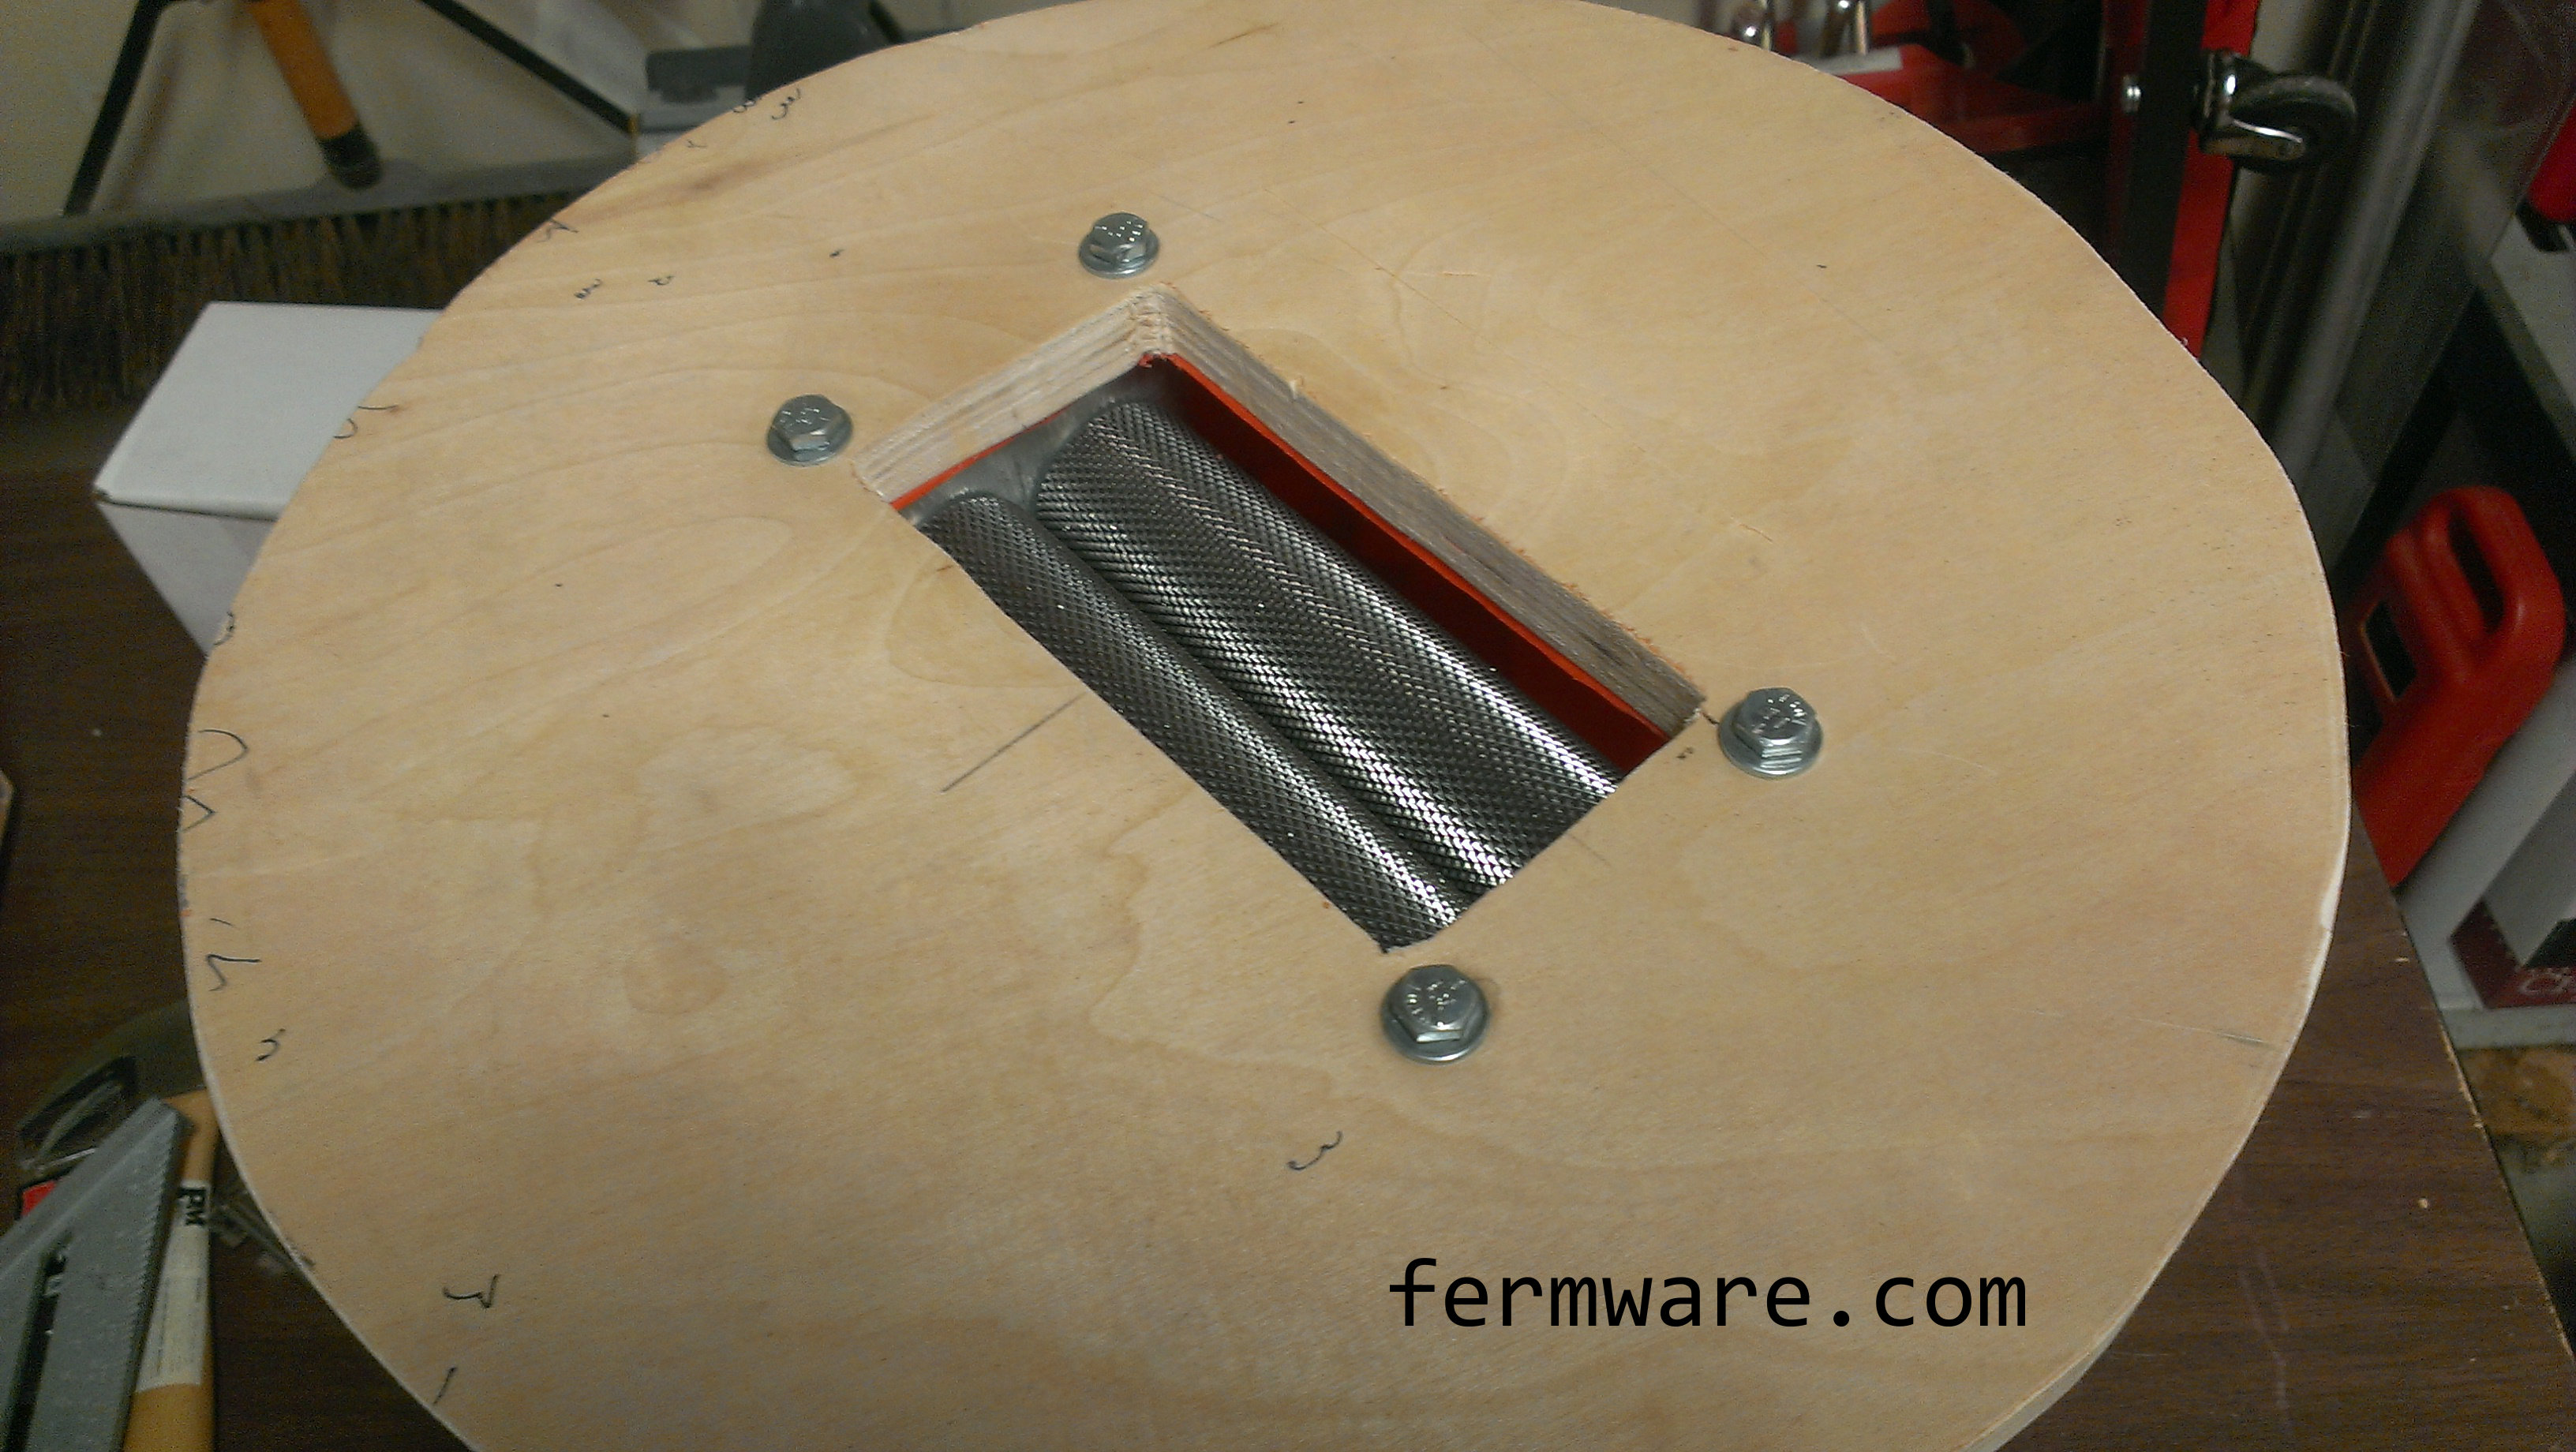
Now you have a choice. Do you want counter sunk holes or do you not mind the bolt heads sticking out. I wanted the hopper to be able to sit completely flat on the ground or shelf when I stored it. And if the bolt heads are sticking out, you run the risk of putting scratches on your storage shelf.
If you don’t mind the bolt heads sticking out or you don’t have a router, you’re done. Otherwise, get out your router. I just used a 7/8″ square bit set at a plunge depth of 3/8″. That size and depth gives you enough room for the 1/4″ washers and the bolt to be completely recessed with room to spare. It will take a steady hand to create counterbores with the router and it may not necessarily be the safest. If you have a drill press, more power to you!
So you know how much of a pain it is to clean and sanitize your carboy/bucket/conical after fermentation is complete? All that yeast residue, hop matter, etc? Well this is my method that has served me quite well the last 2 years and makes cleaning a piece of (yeast) cake.
The bags are also great to store your milled grain the night before brewday. Then re-use the bags for trash or spent grain.
When I say “bucket” in these instructions, I also mean carboy, conical, trash can, etc.
Affiliate Links
Required:
FDA Approved bag liner. See below for discussion….
Options:
Option 1 (new as of March 26, 2015)
An astute reader (see post comments) found another source on Amazon for another equivalent bag liner. I’ll pick up a case and update. They are much thinner (0.39 mil versus the 1.5 mil thick bags that I’ve been using). They are also about half the price. As of March 26, 2015, they were $26 for 250 ($0.10 / bag).
The link above is for the clear 40 gallon size, but they also have different capacities.
If you are an Amazon Prime member, this would be the way to go, since the cost of shipping can easily lower the cost/benefit ratio.
Here is a link to the manufacturers site and their quote about it’s food worthiness.
Hi D Tuff® liners are USDA and FDA Approved for direct food content, and implement a star seal bottom seal, the strongest, most reliable seal available utilizing pickets for wet material below the seal.
I went way larger than the 6.5 gallon size of my buckets
Only $2 more per box than the next size down
I went with the heavier 1.5 mil thickness bags
Lid seal
Despite the thickness, the bucket lid still seals just fine
I can even shake the fermenting bucket to oxygenate and it has never leaked
FDA Compliant
If you go to their website and click on “Additional Info”, it will list “FDA Compliant”
Made from Linear Low Density Polyethylene (LDPE)
Most fermentation buckets are made from High Density Polyethylene (HDPE)
I called them before ordering and they couldn’t tell me what “FDA Compliant” meant
Pre-Sanitized or sterilized?
I don’t know
I have always just pulled a new bag out and dropped it right in
Never had any off flavors
Never had any infections
As of 11/14/13 they are $51 for 250 bags
$0.20 / bag
Durable
Never had a bag leak
fully supported by bucket anyway
You can essentially make any container into a fermenter!
Mr. Obvious Directions:
Pull new bag out, put into fermenter, pour in wort
Then do everything you would normally do
When done, rack beer as you normally would
pull bag out, tie shut, put in trash
easy peasy!
Directions with bonus material:
Preparation
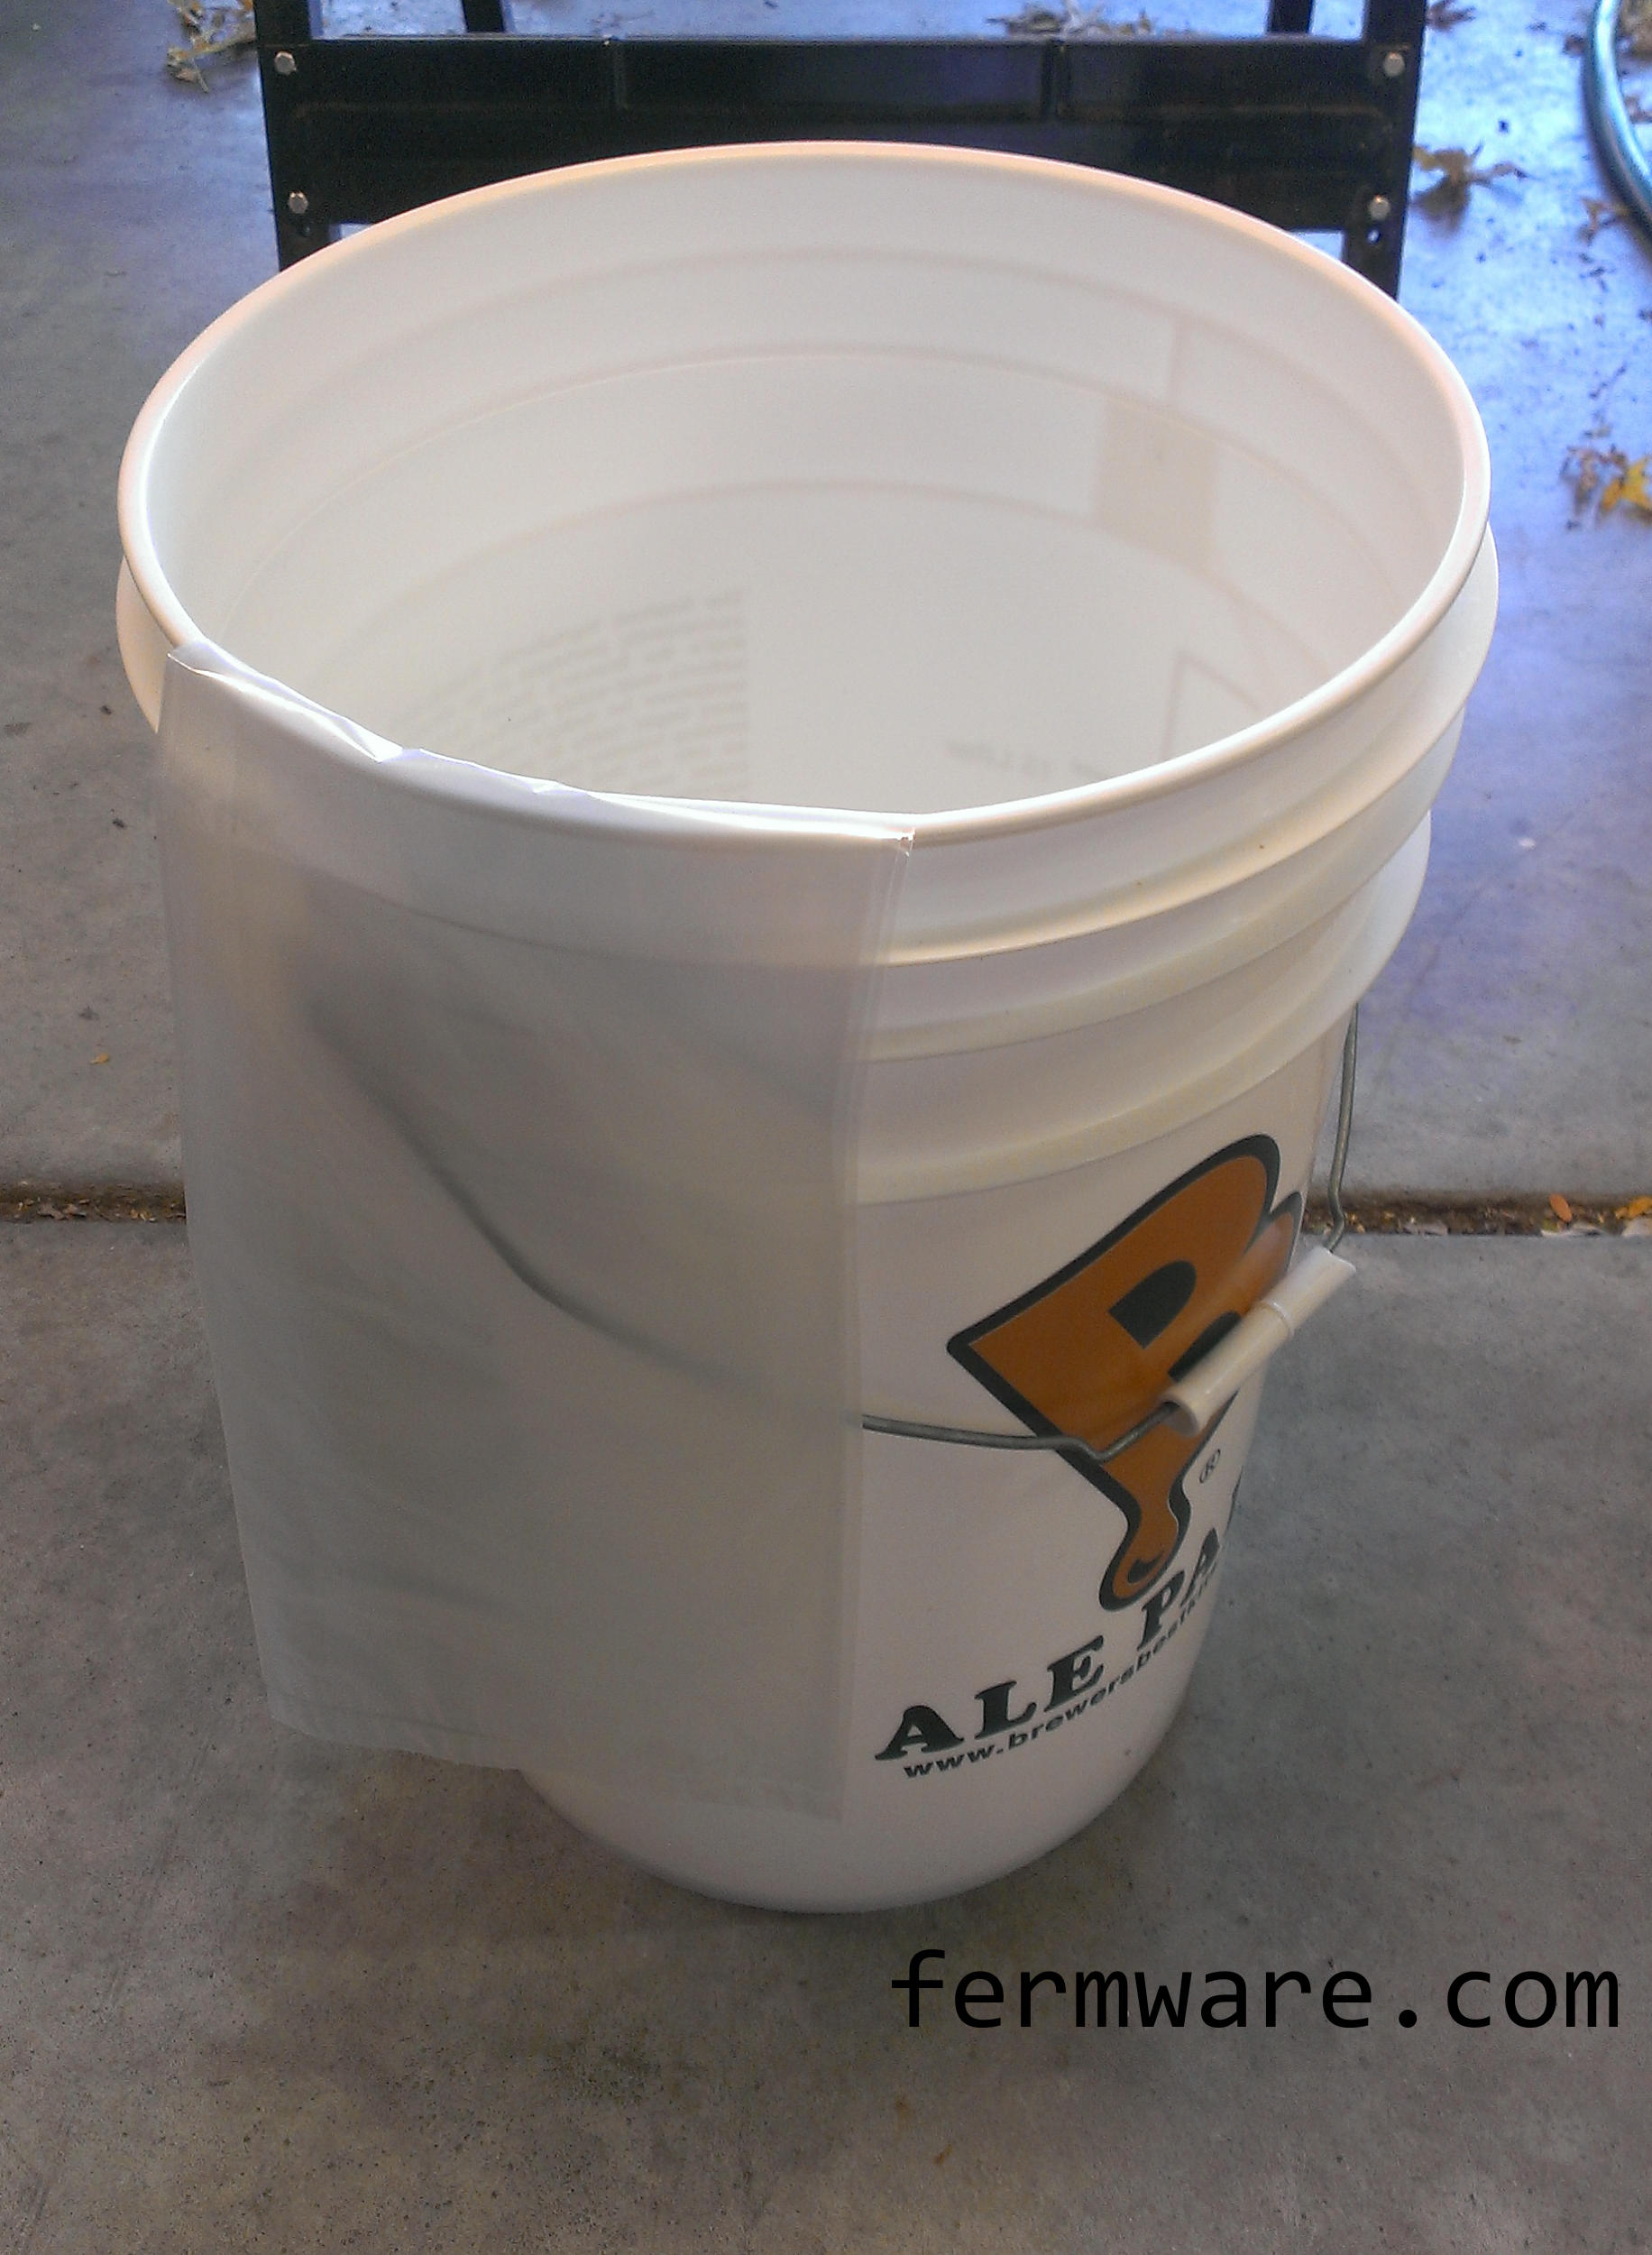
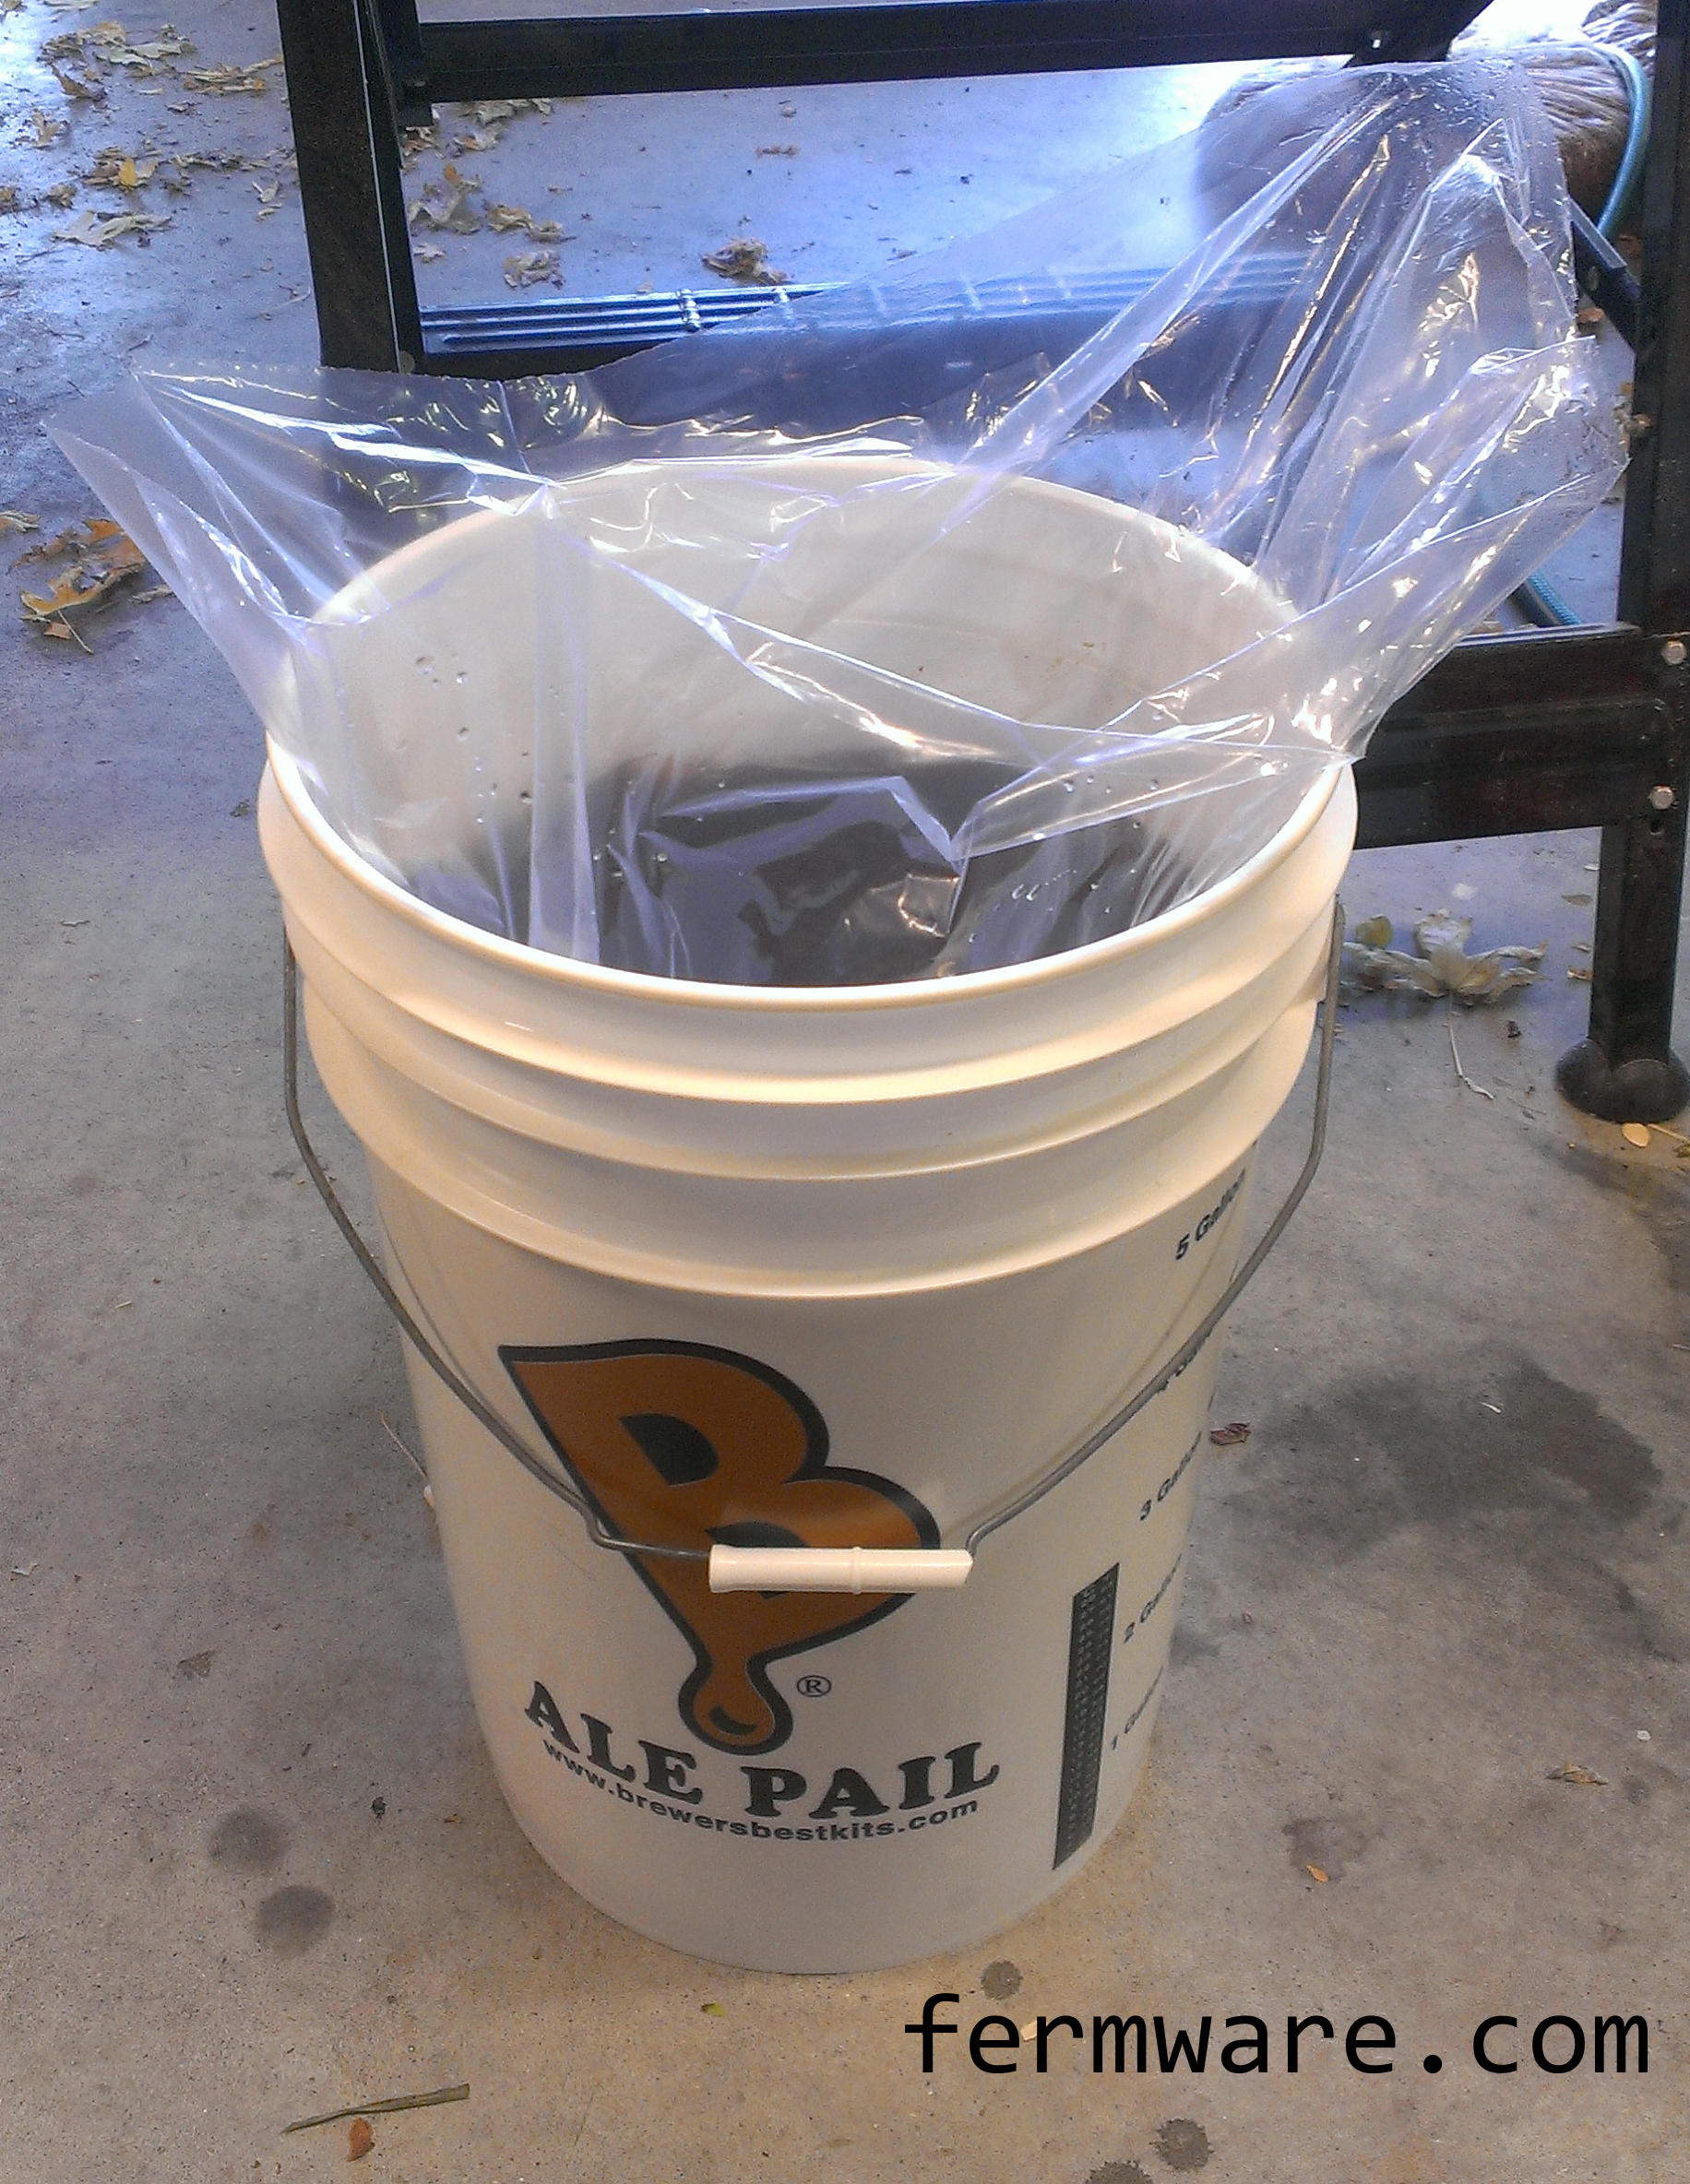
Get the bag and bucket ready
Bag Construction
Bags are sturdy on the bottom
Easy tiger!
If you shake to oxygenate your wort, or you will be opening the lid before starting the fermentation, go directly to the next step. With the bag all the way to the bottom of the bucket, the rest of the bag COULD be pulled down all the way like this, but DON’T. I’ll get to that in a bit.
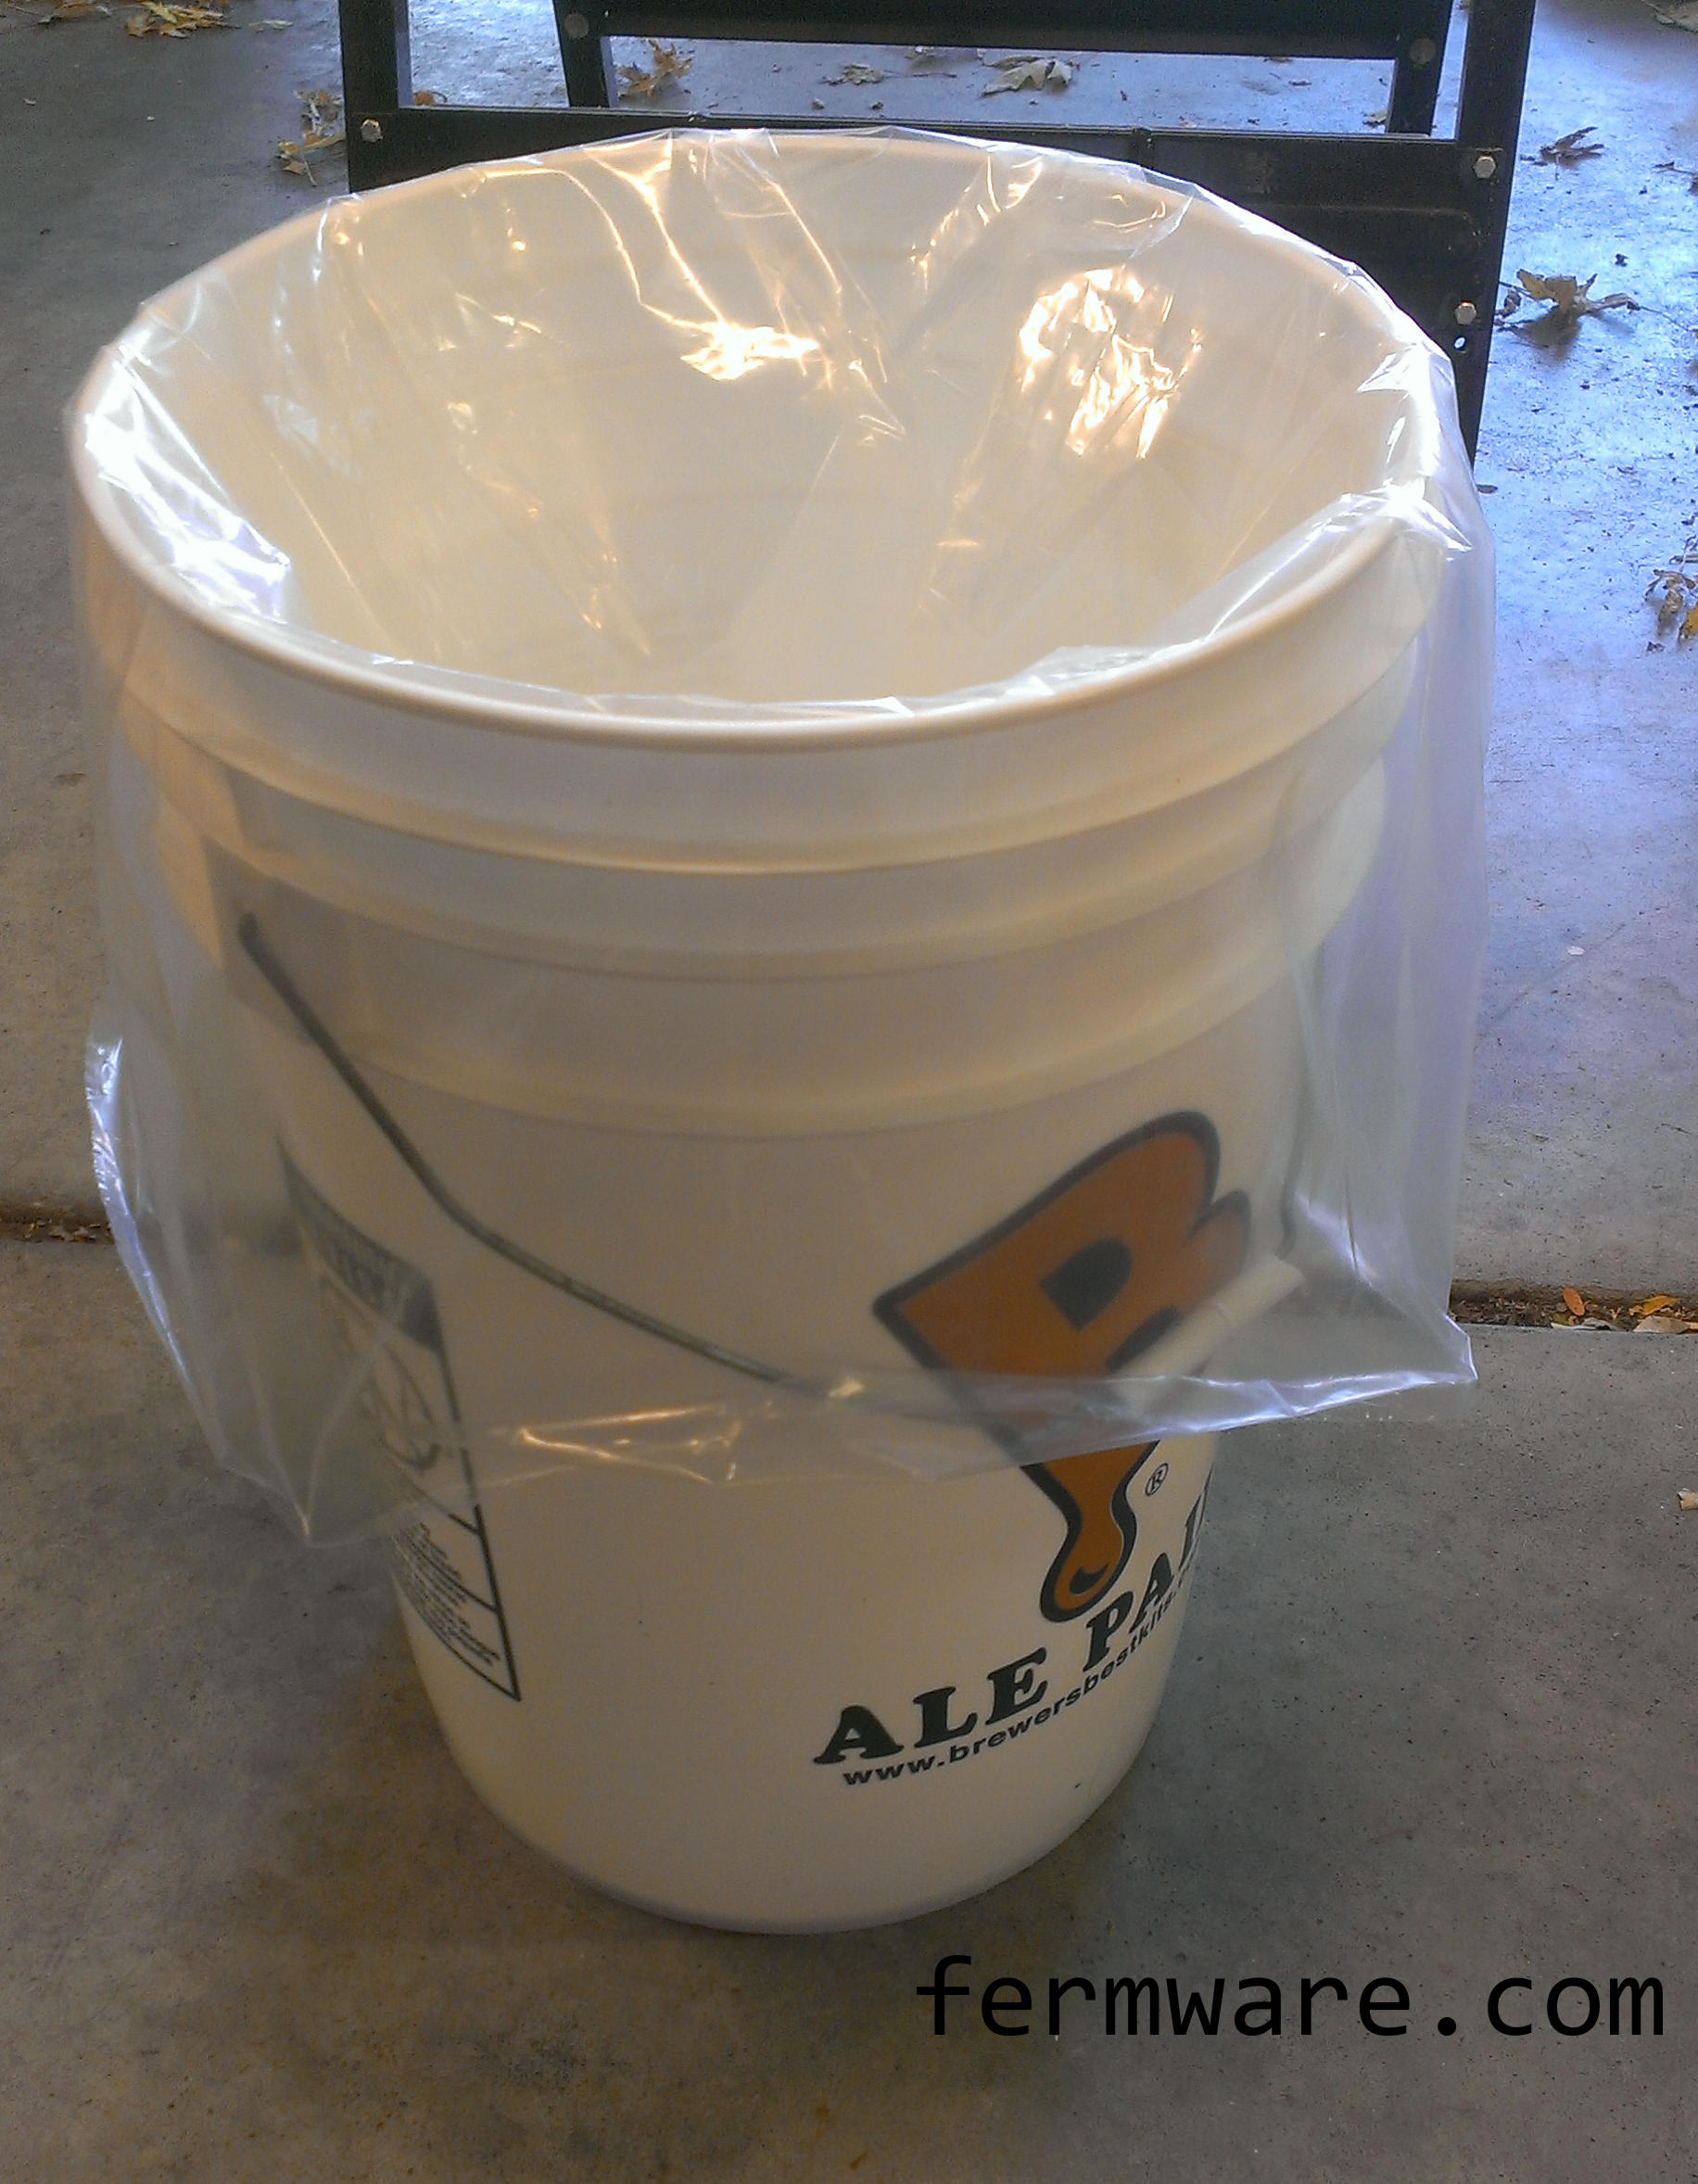
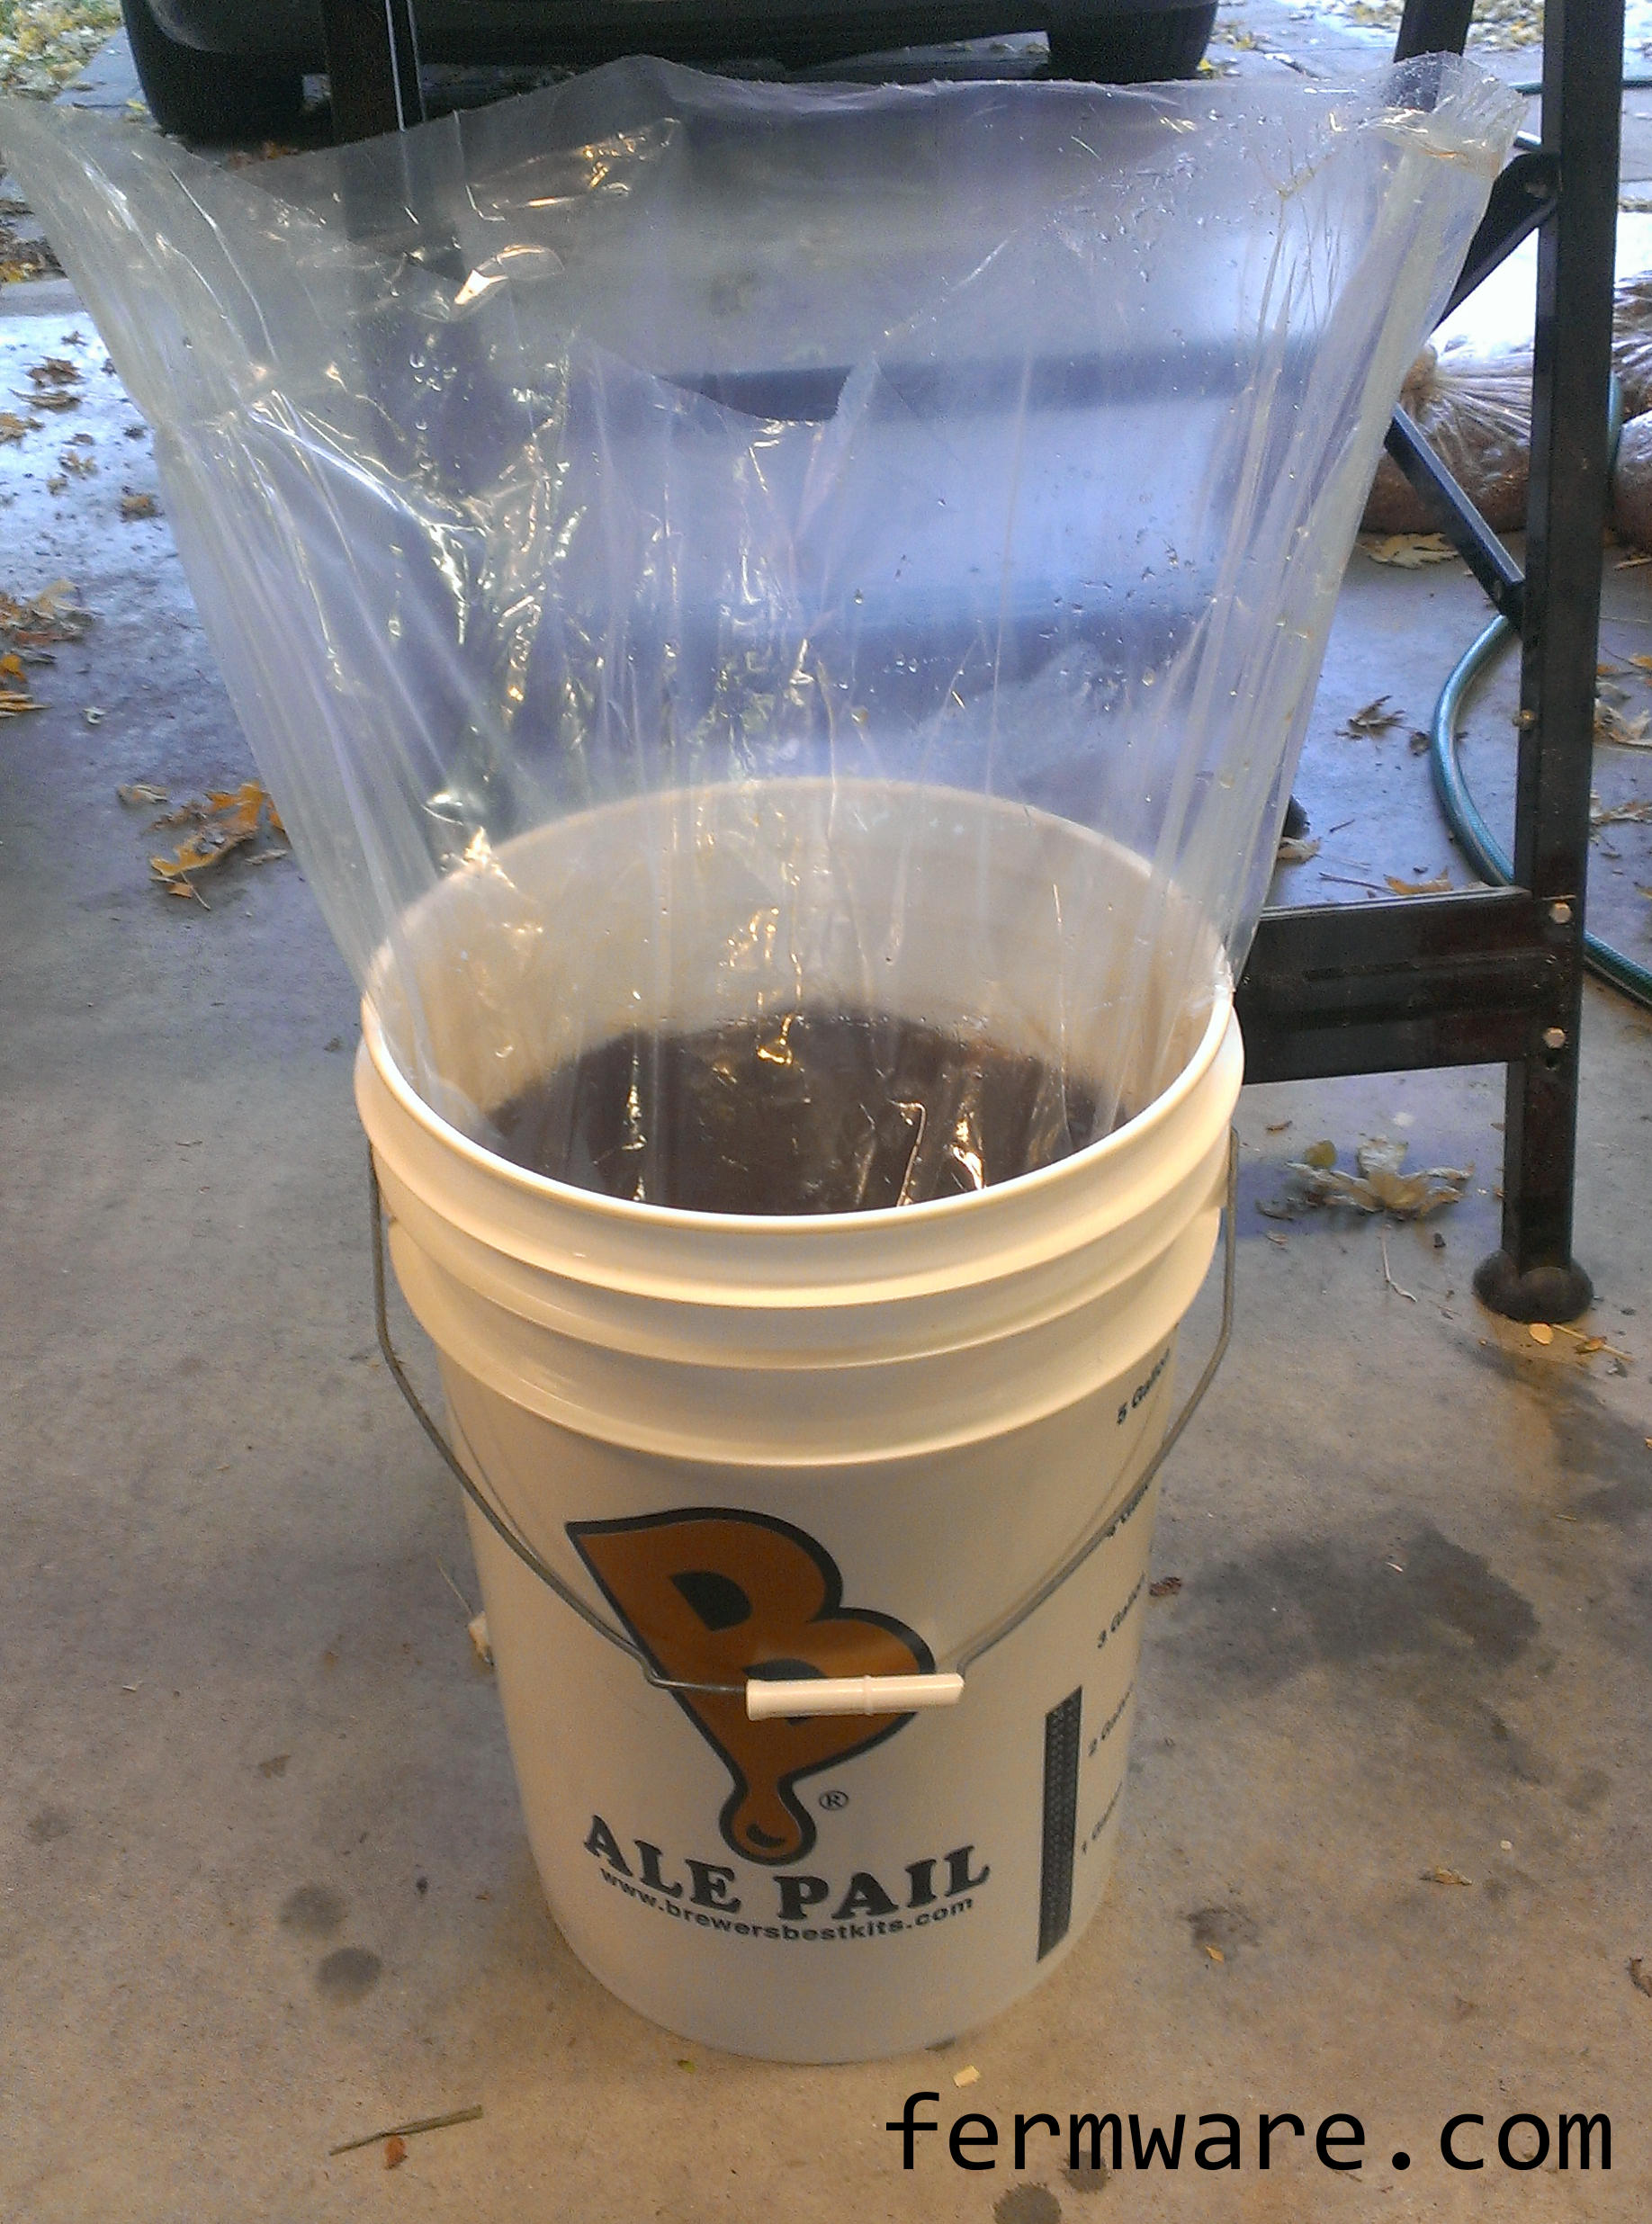
Leave a lot of the bag in the bucket
I went from shaking to oxygenate the wort, to an aquarium pump, back to shaking. Not great for my back, but this is my method for now. My point is, when you put the lid on, it does stretch the bag material and sometimes could put a hole in the bag and if you need to open the lid and reseal before starting fermentation, you may not get a good seal the next time. By leaving more bag in the bucket, after you open the lid, you can pull more fresh bag out and have a brand new seal.
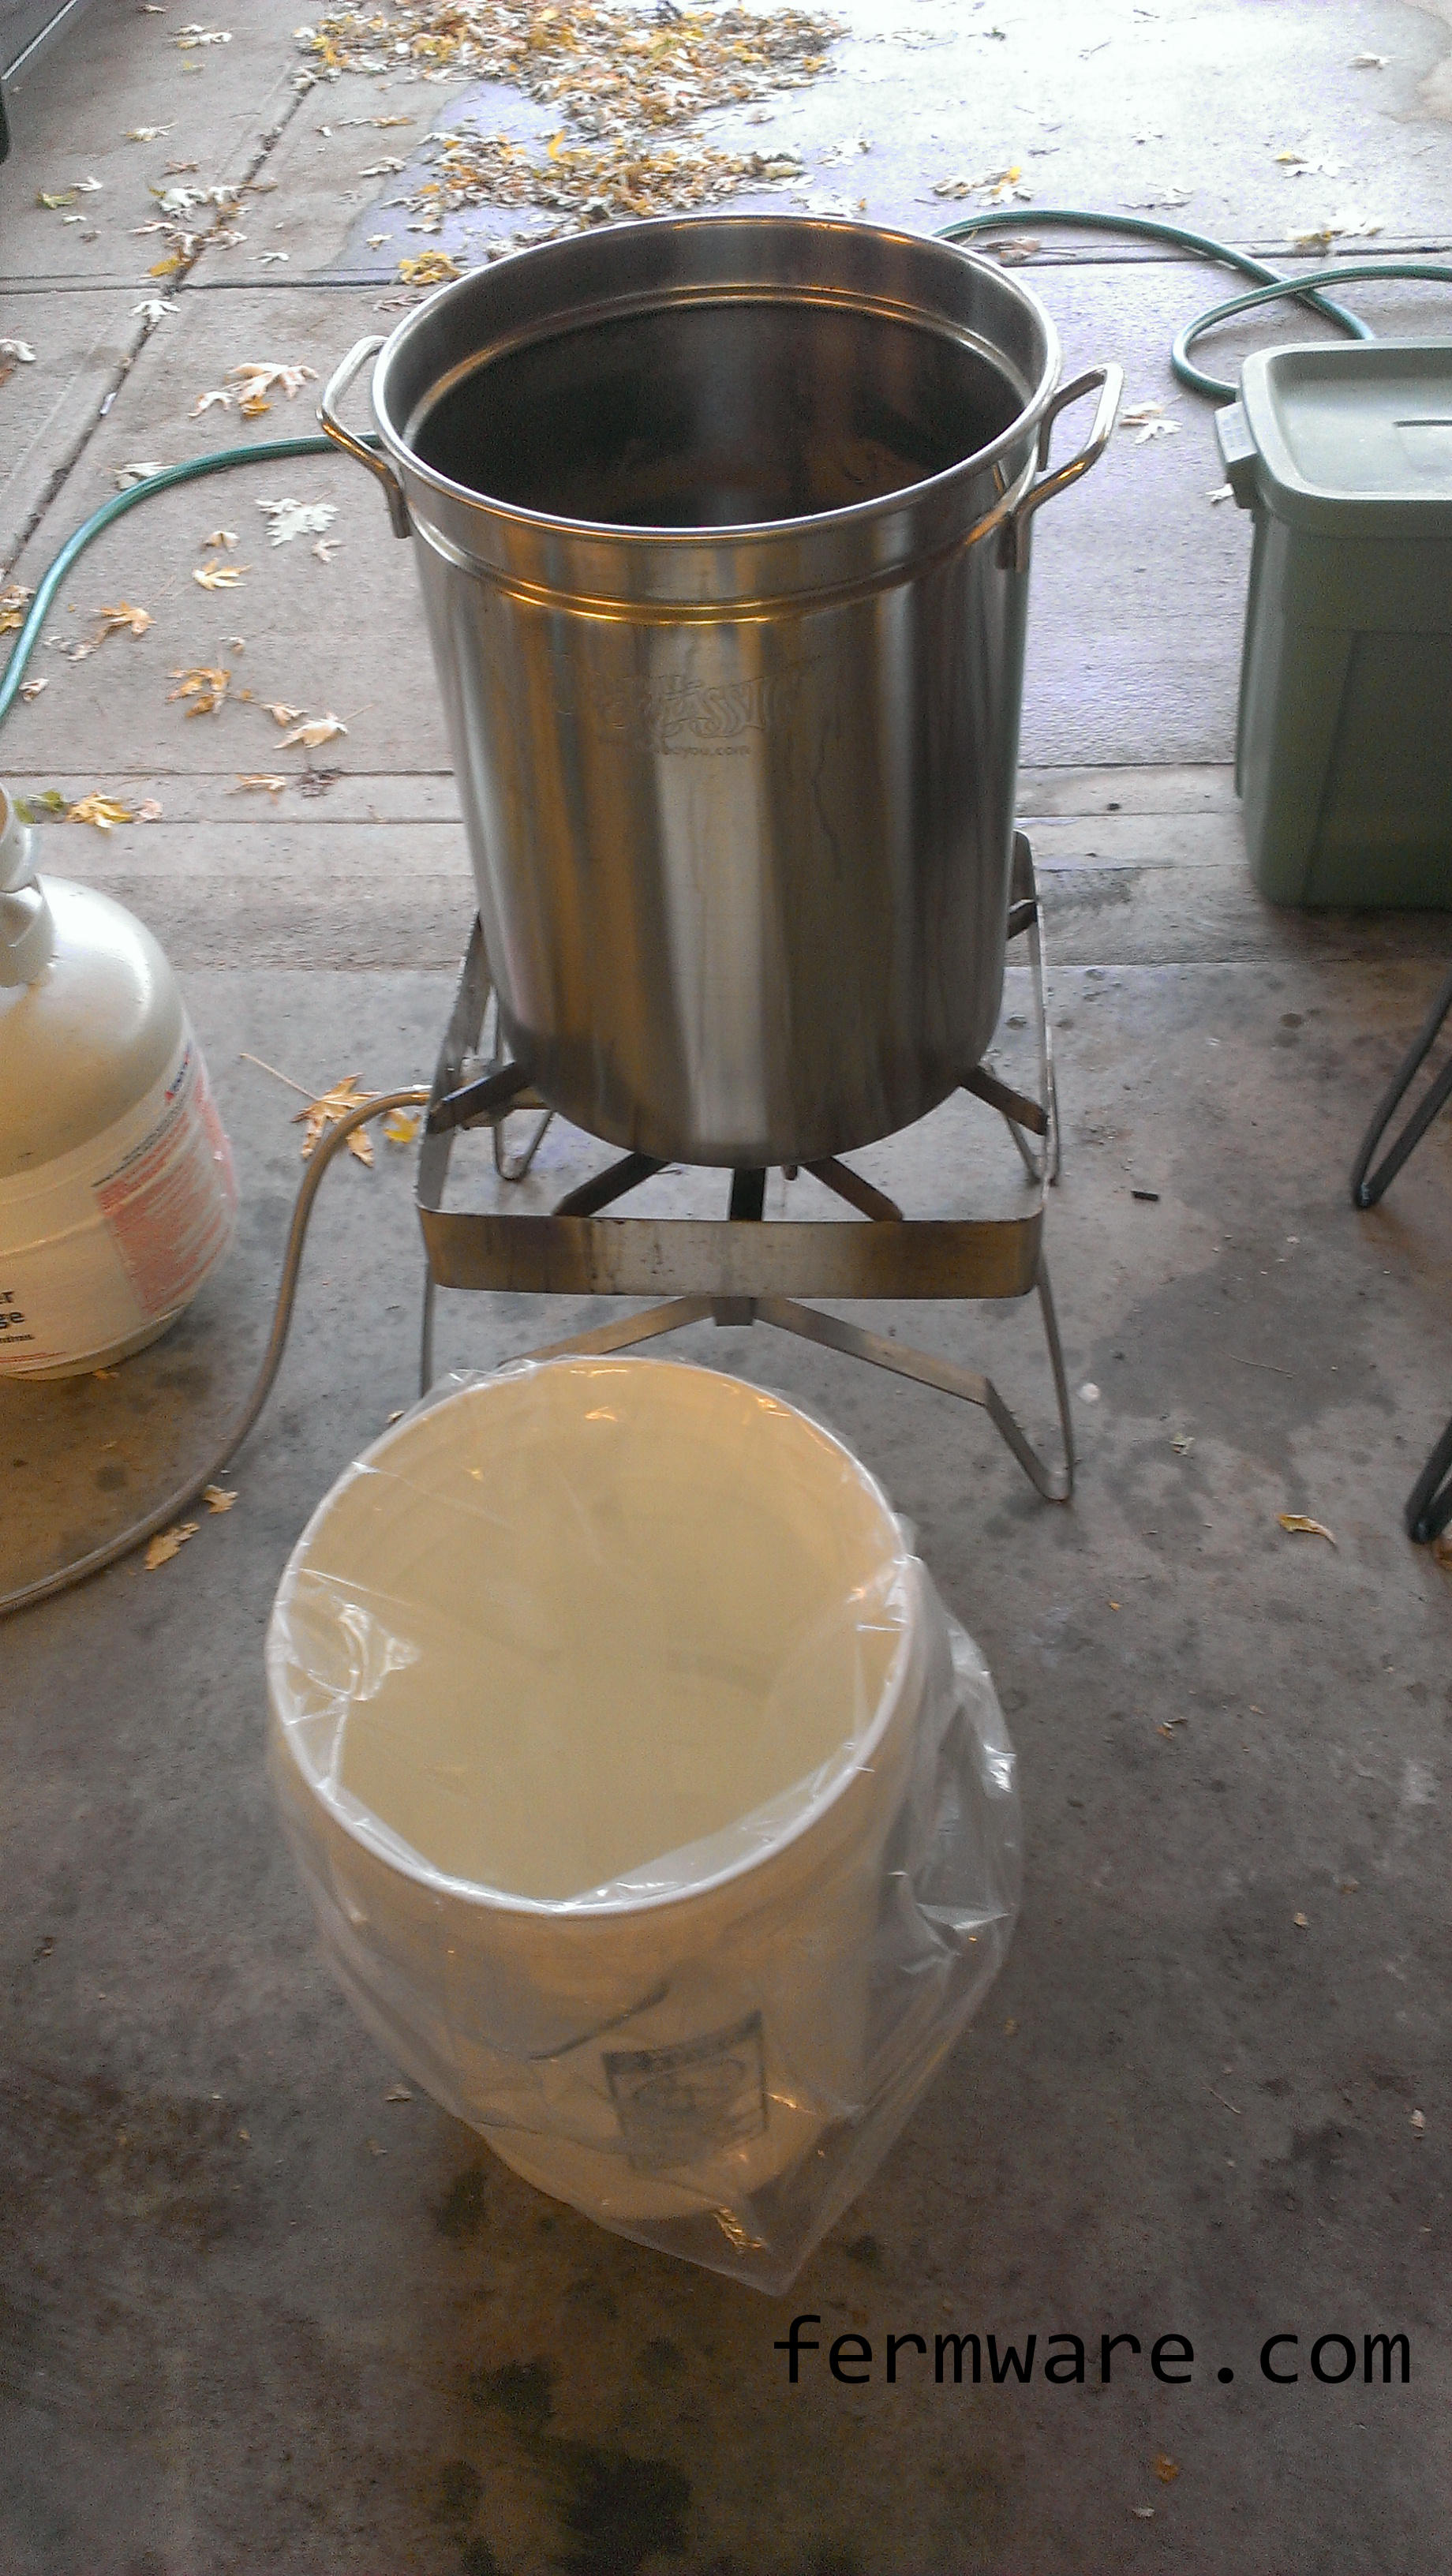
Ready for the wort
My burner is at the perfect height where I just tip my kettle and pour it into the fermenter. By the time I need to lift it to pour the remaining wort, it only has about a gallon left.
Now the wort is in the bucket with the liner
If you are going to put the lid on to shake it or you need to put it in your keezer to get some extra temperature drop before pitching your yeast, go ahead and do so now.
Cut me some slack, Jack!
When you are ready to pitch your yeast and close the lid for the final time, grab the bag and pull up on it. Not enough to pull it out of the bucket, but just enough to pull the slack out of it and hopefully get rid of any potential air pockets between the bag and the walls of the bucket.
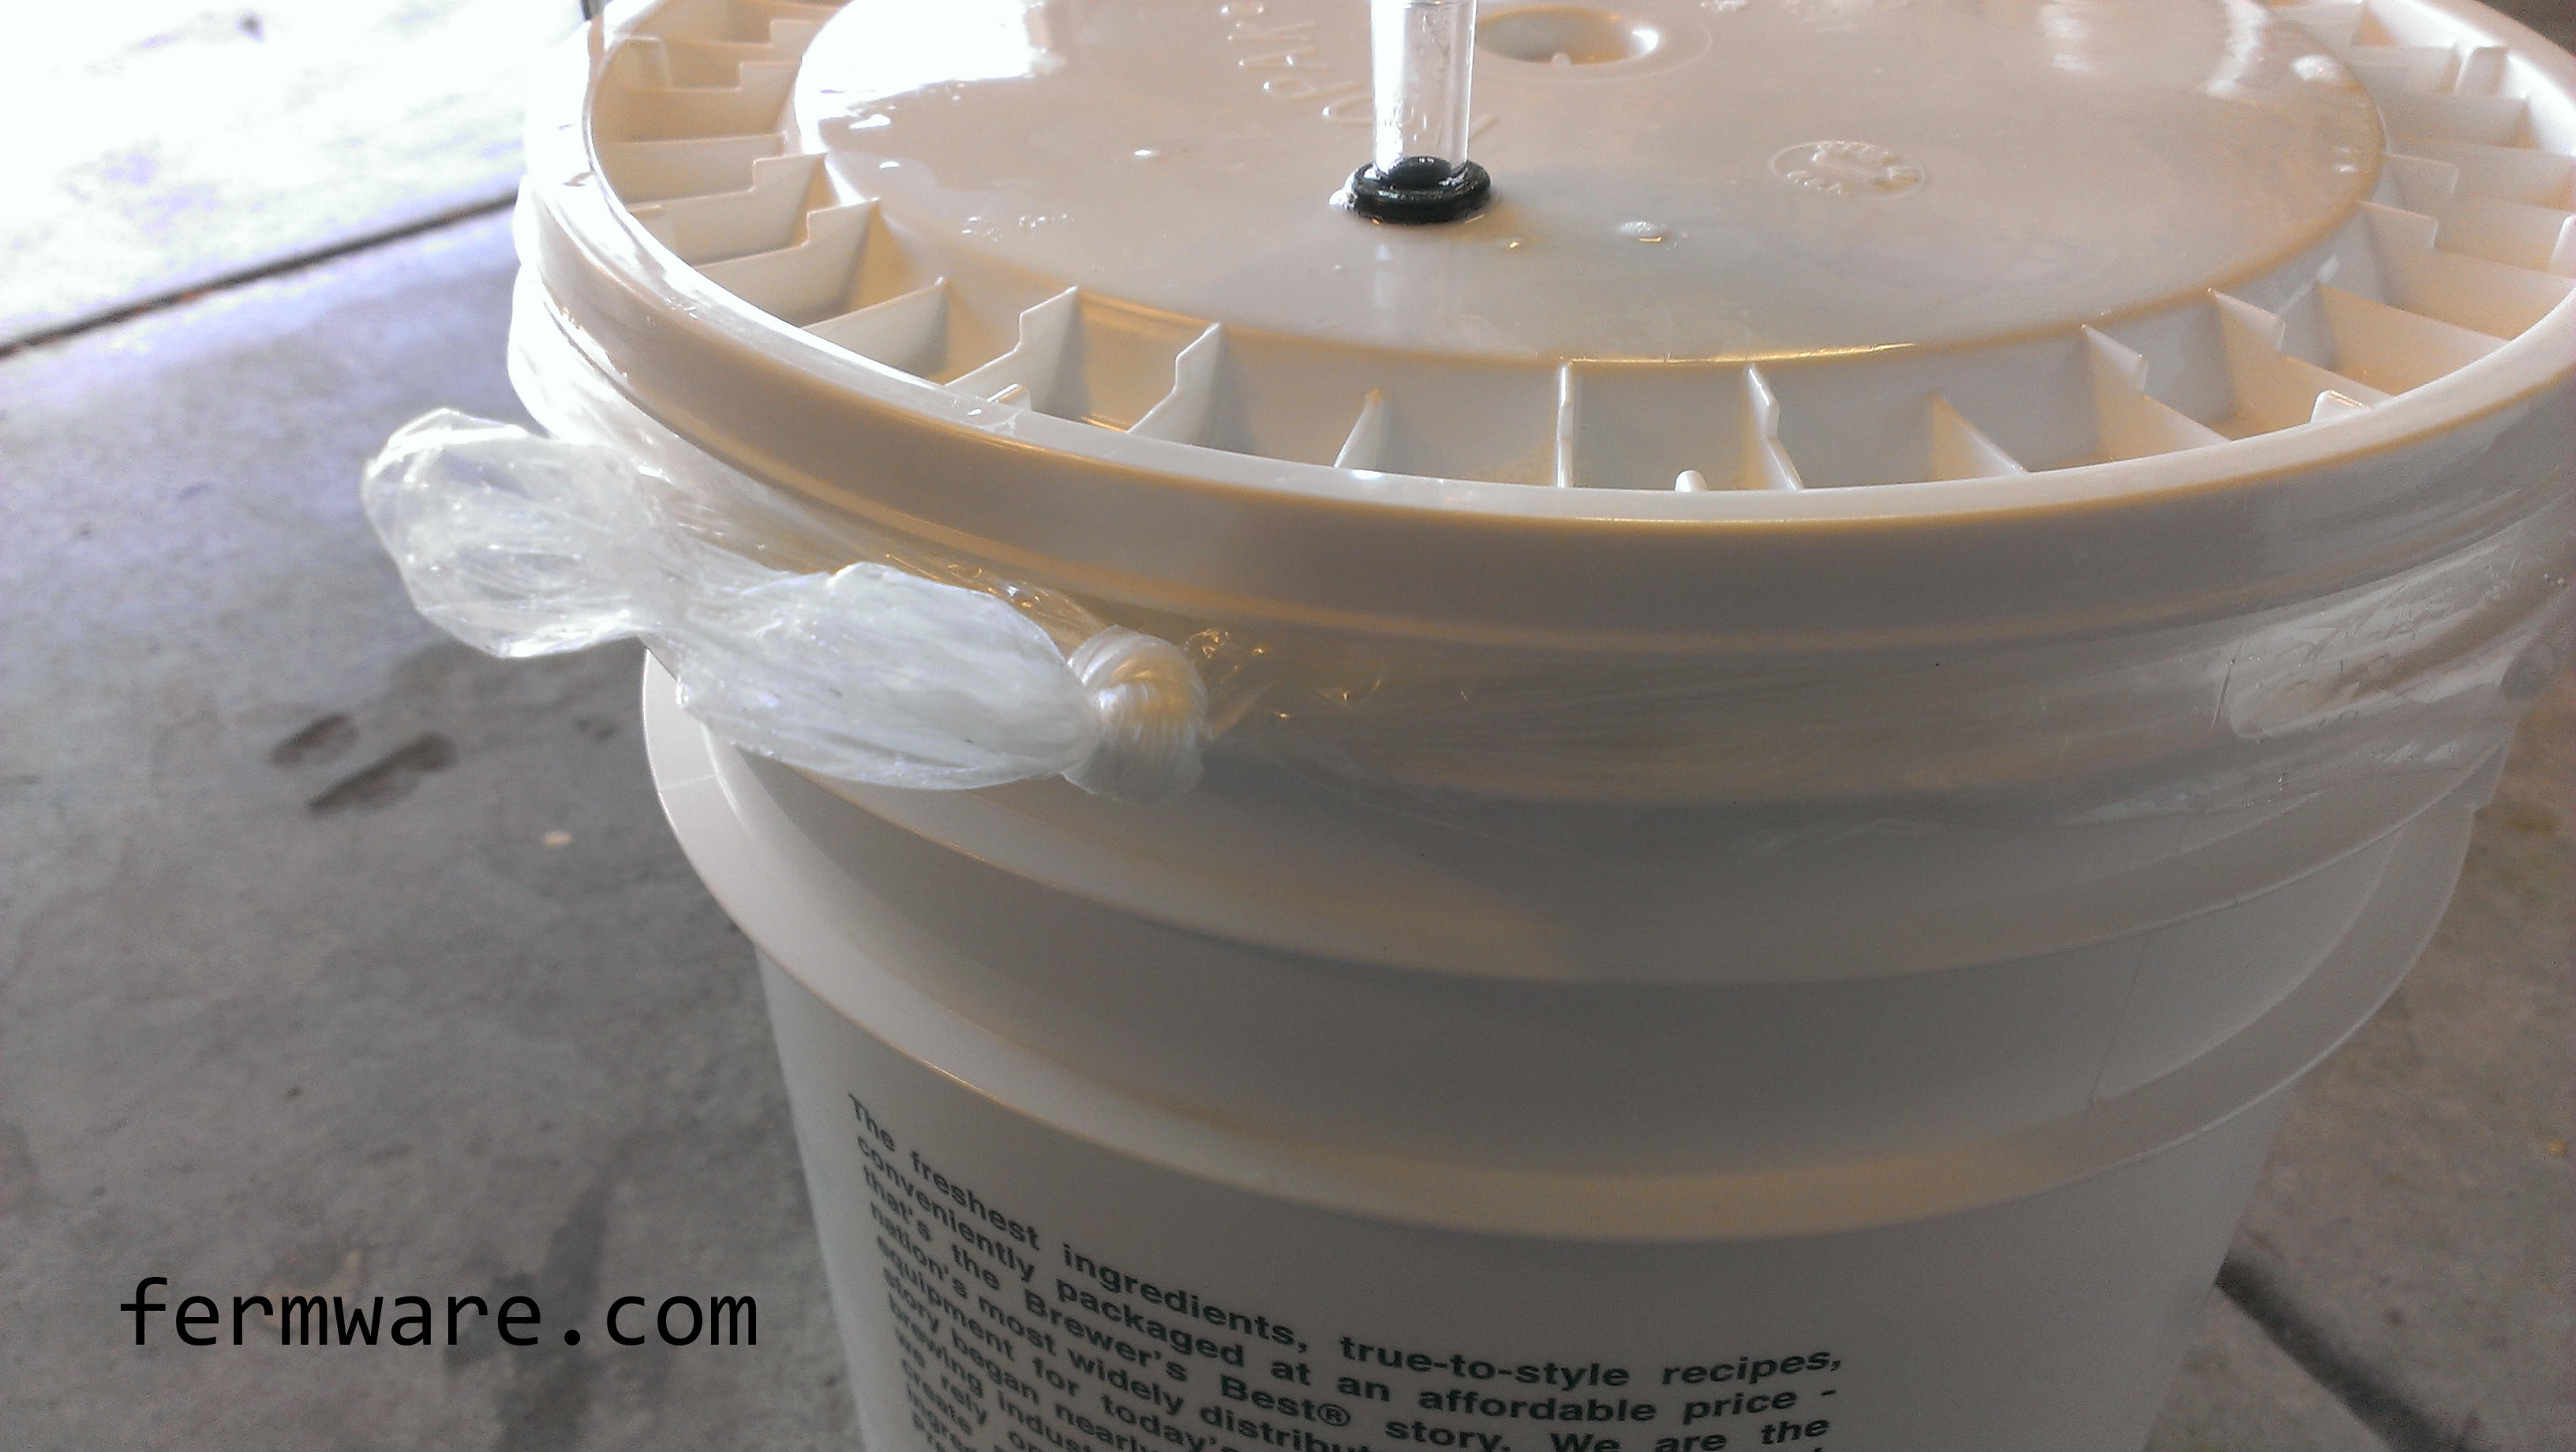
Keeping things neat and tidy
If you want, you can roll the excess bag up and then tie it into a knot.
Fermentation…..waiting……
When you are ready to rack to secondary or the keg or whatever, pop the lid and smell the awesomeness you just created.
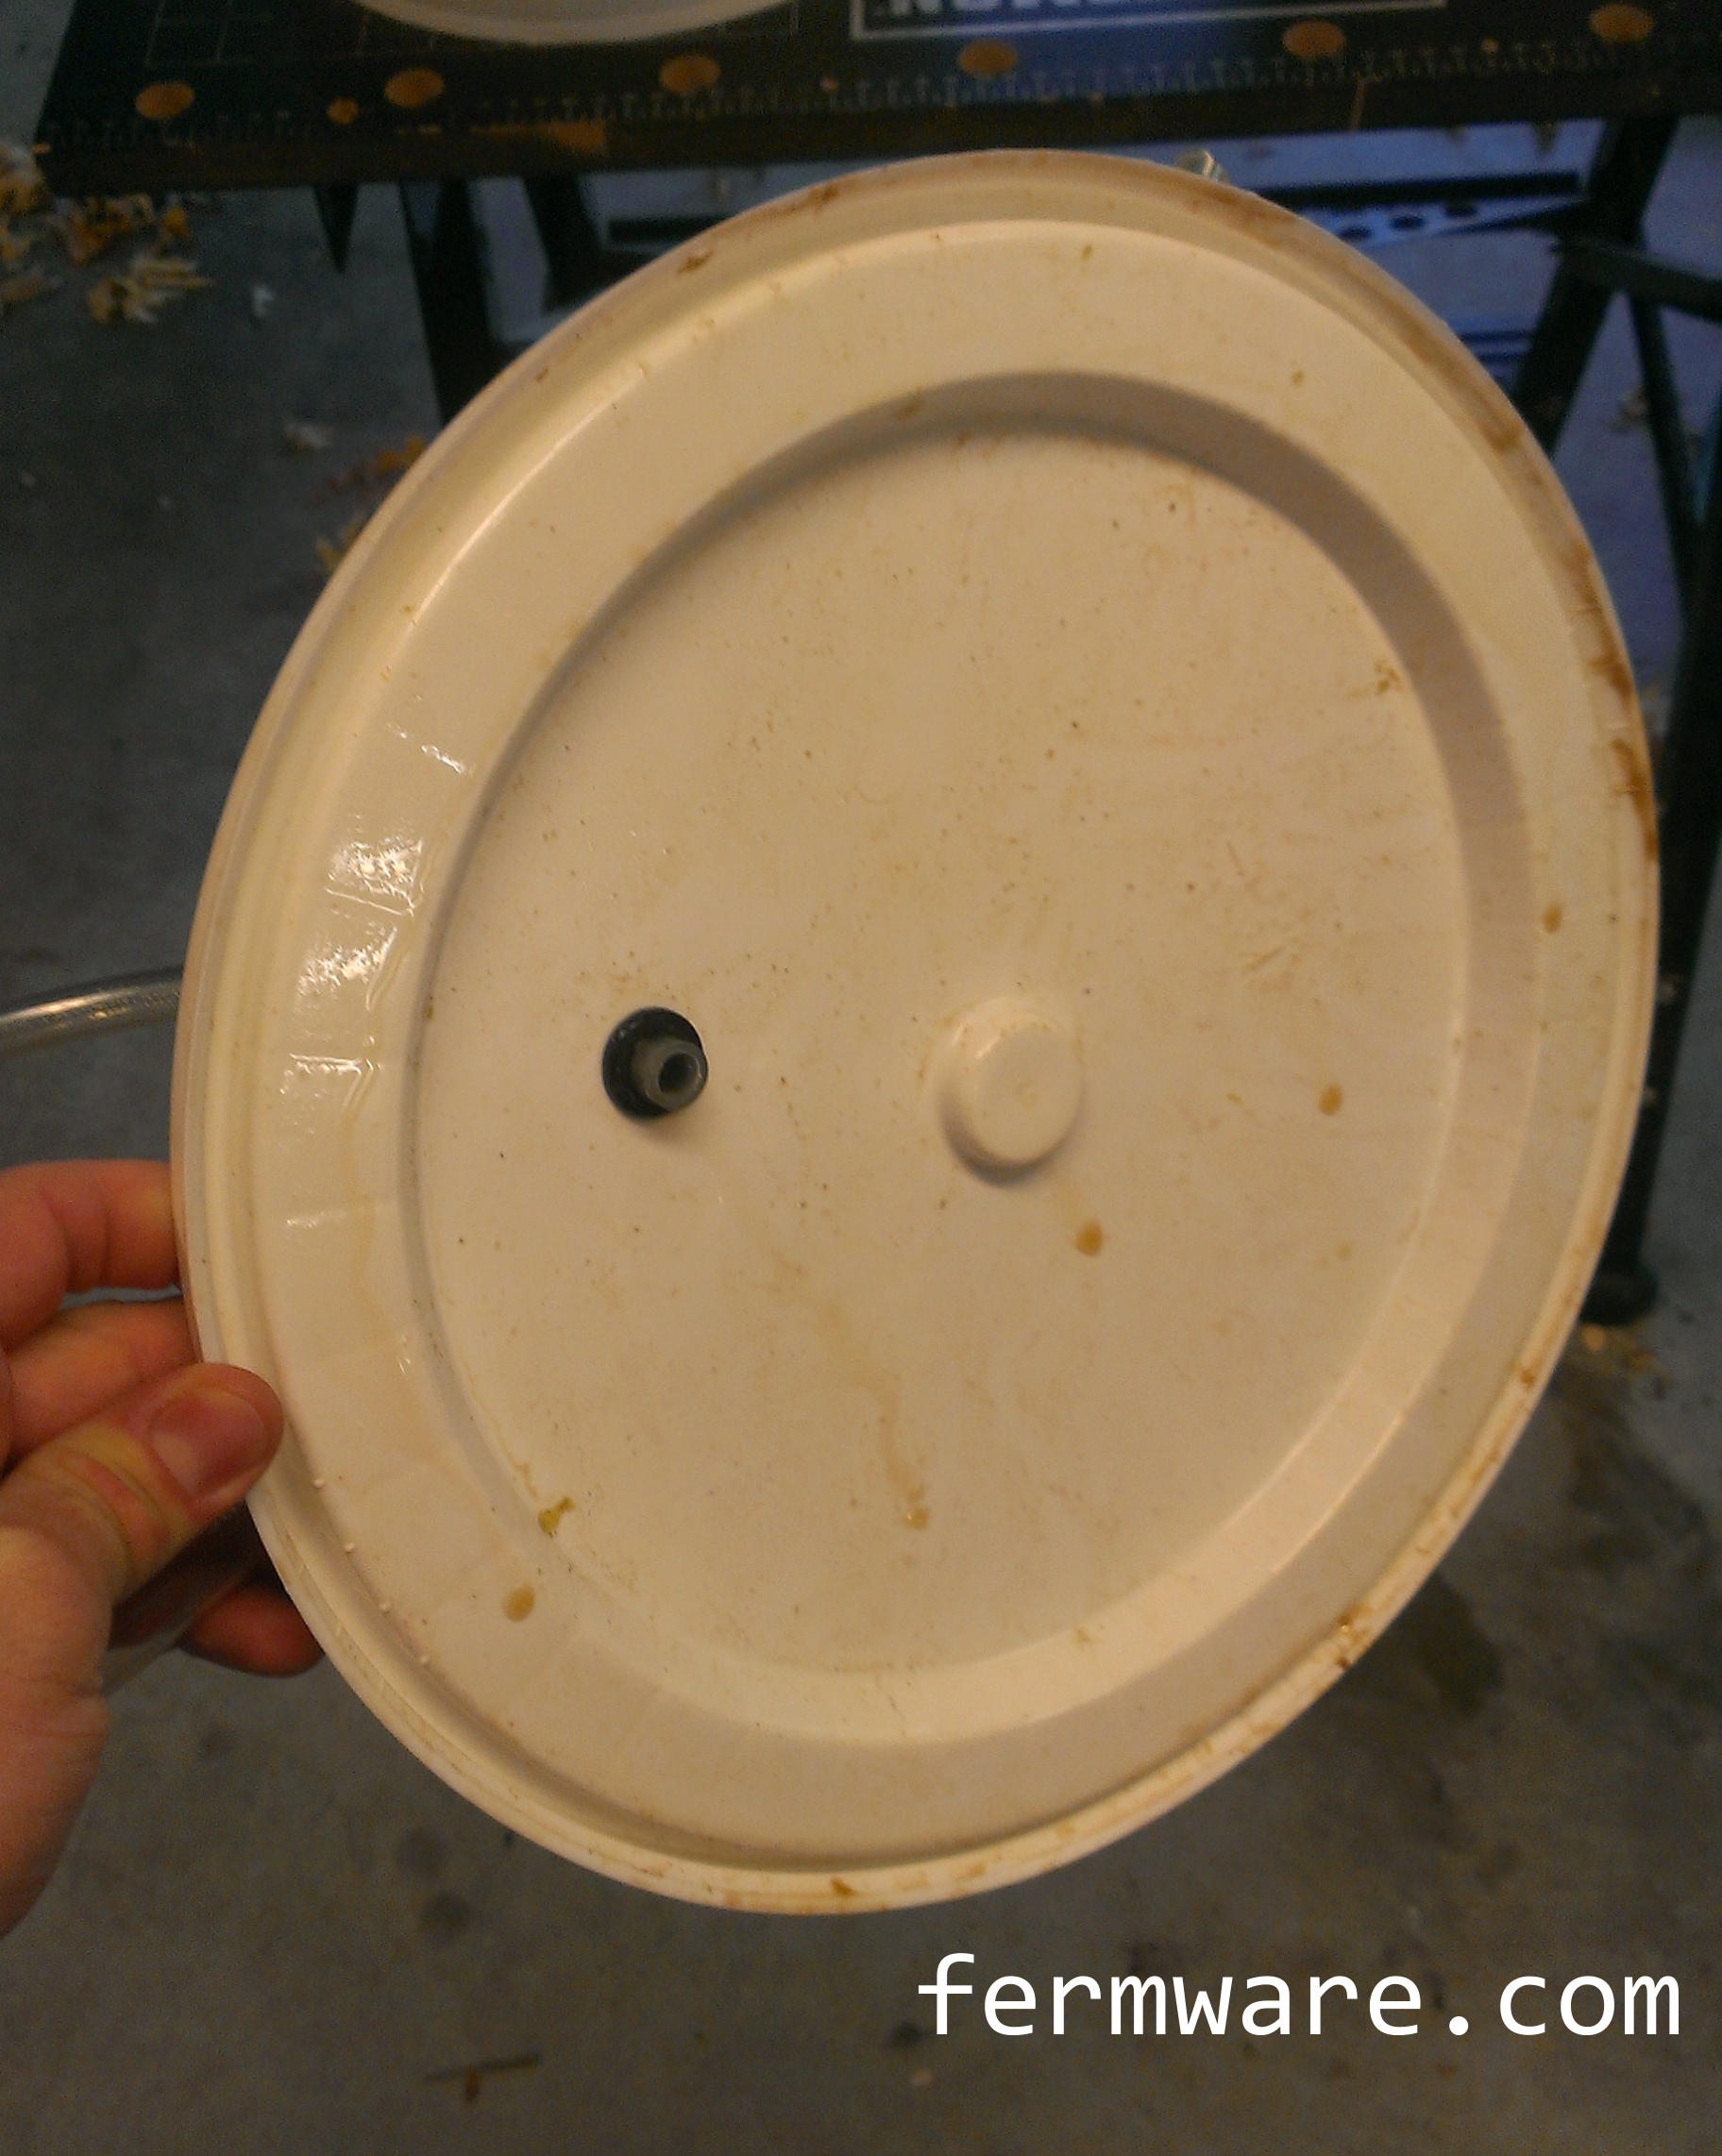
Only the lid is messy
The lid has crud on it like usual or from the vigorous shaking you did prior to pitching the yeast.
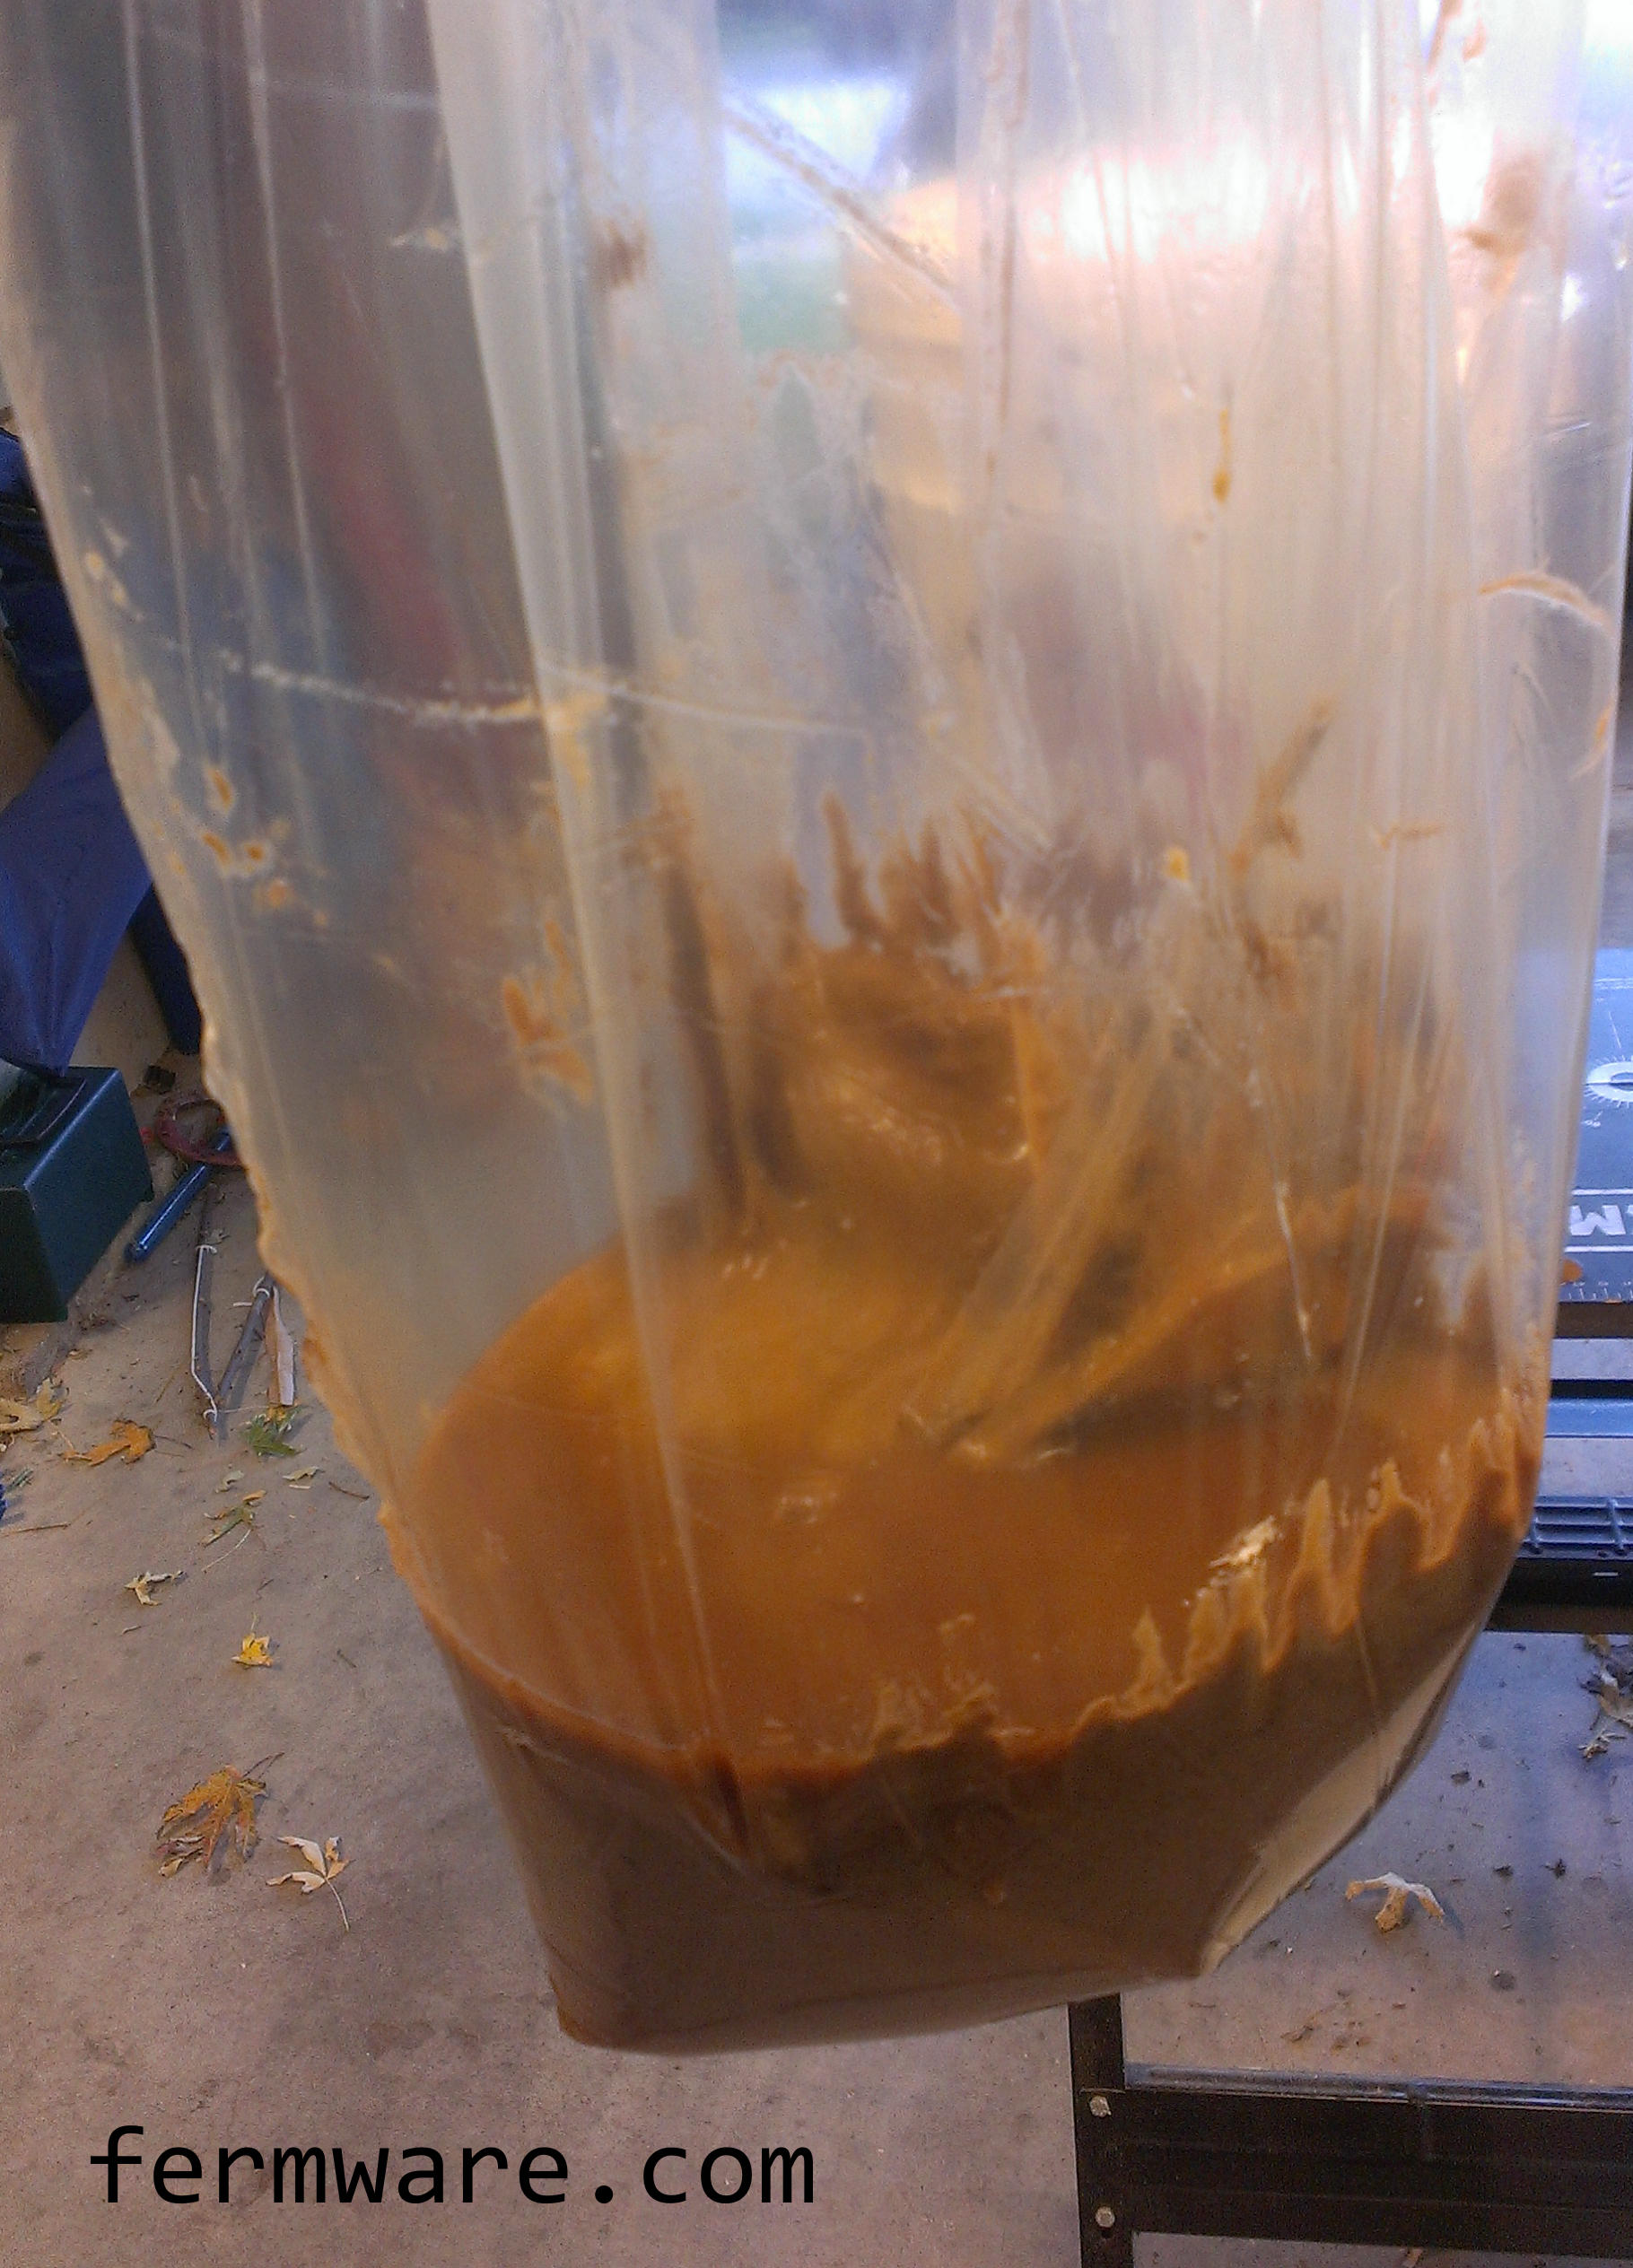
Holes / Stretching I mentioned
See the stretching and potential holes in the bag? You only want these from the lid seal outward.
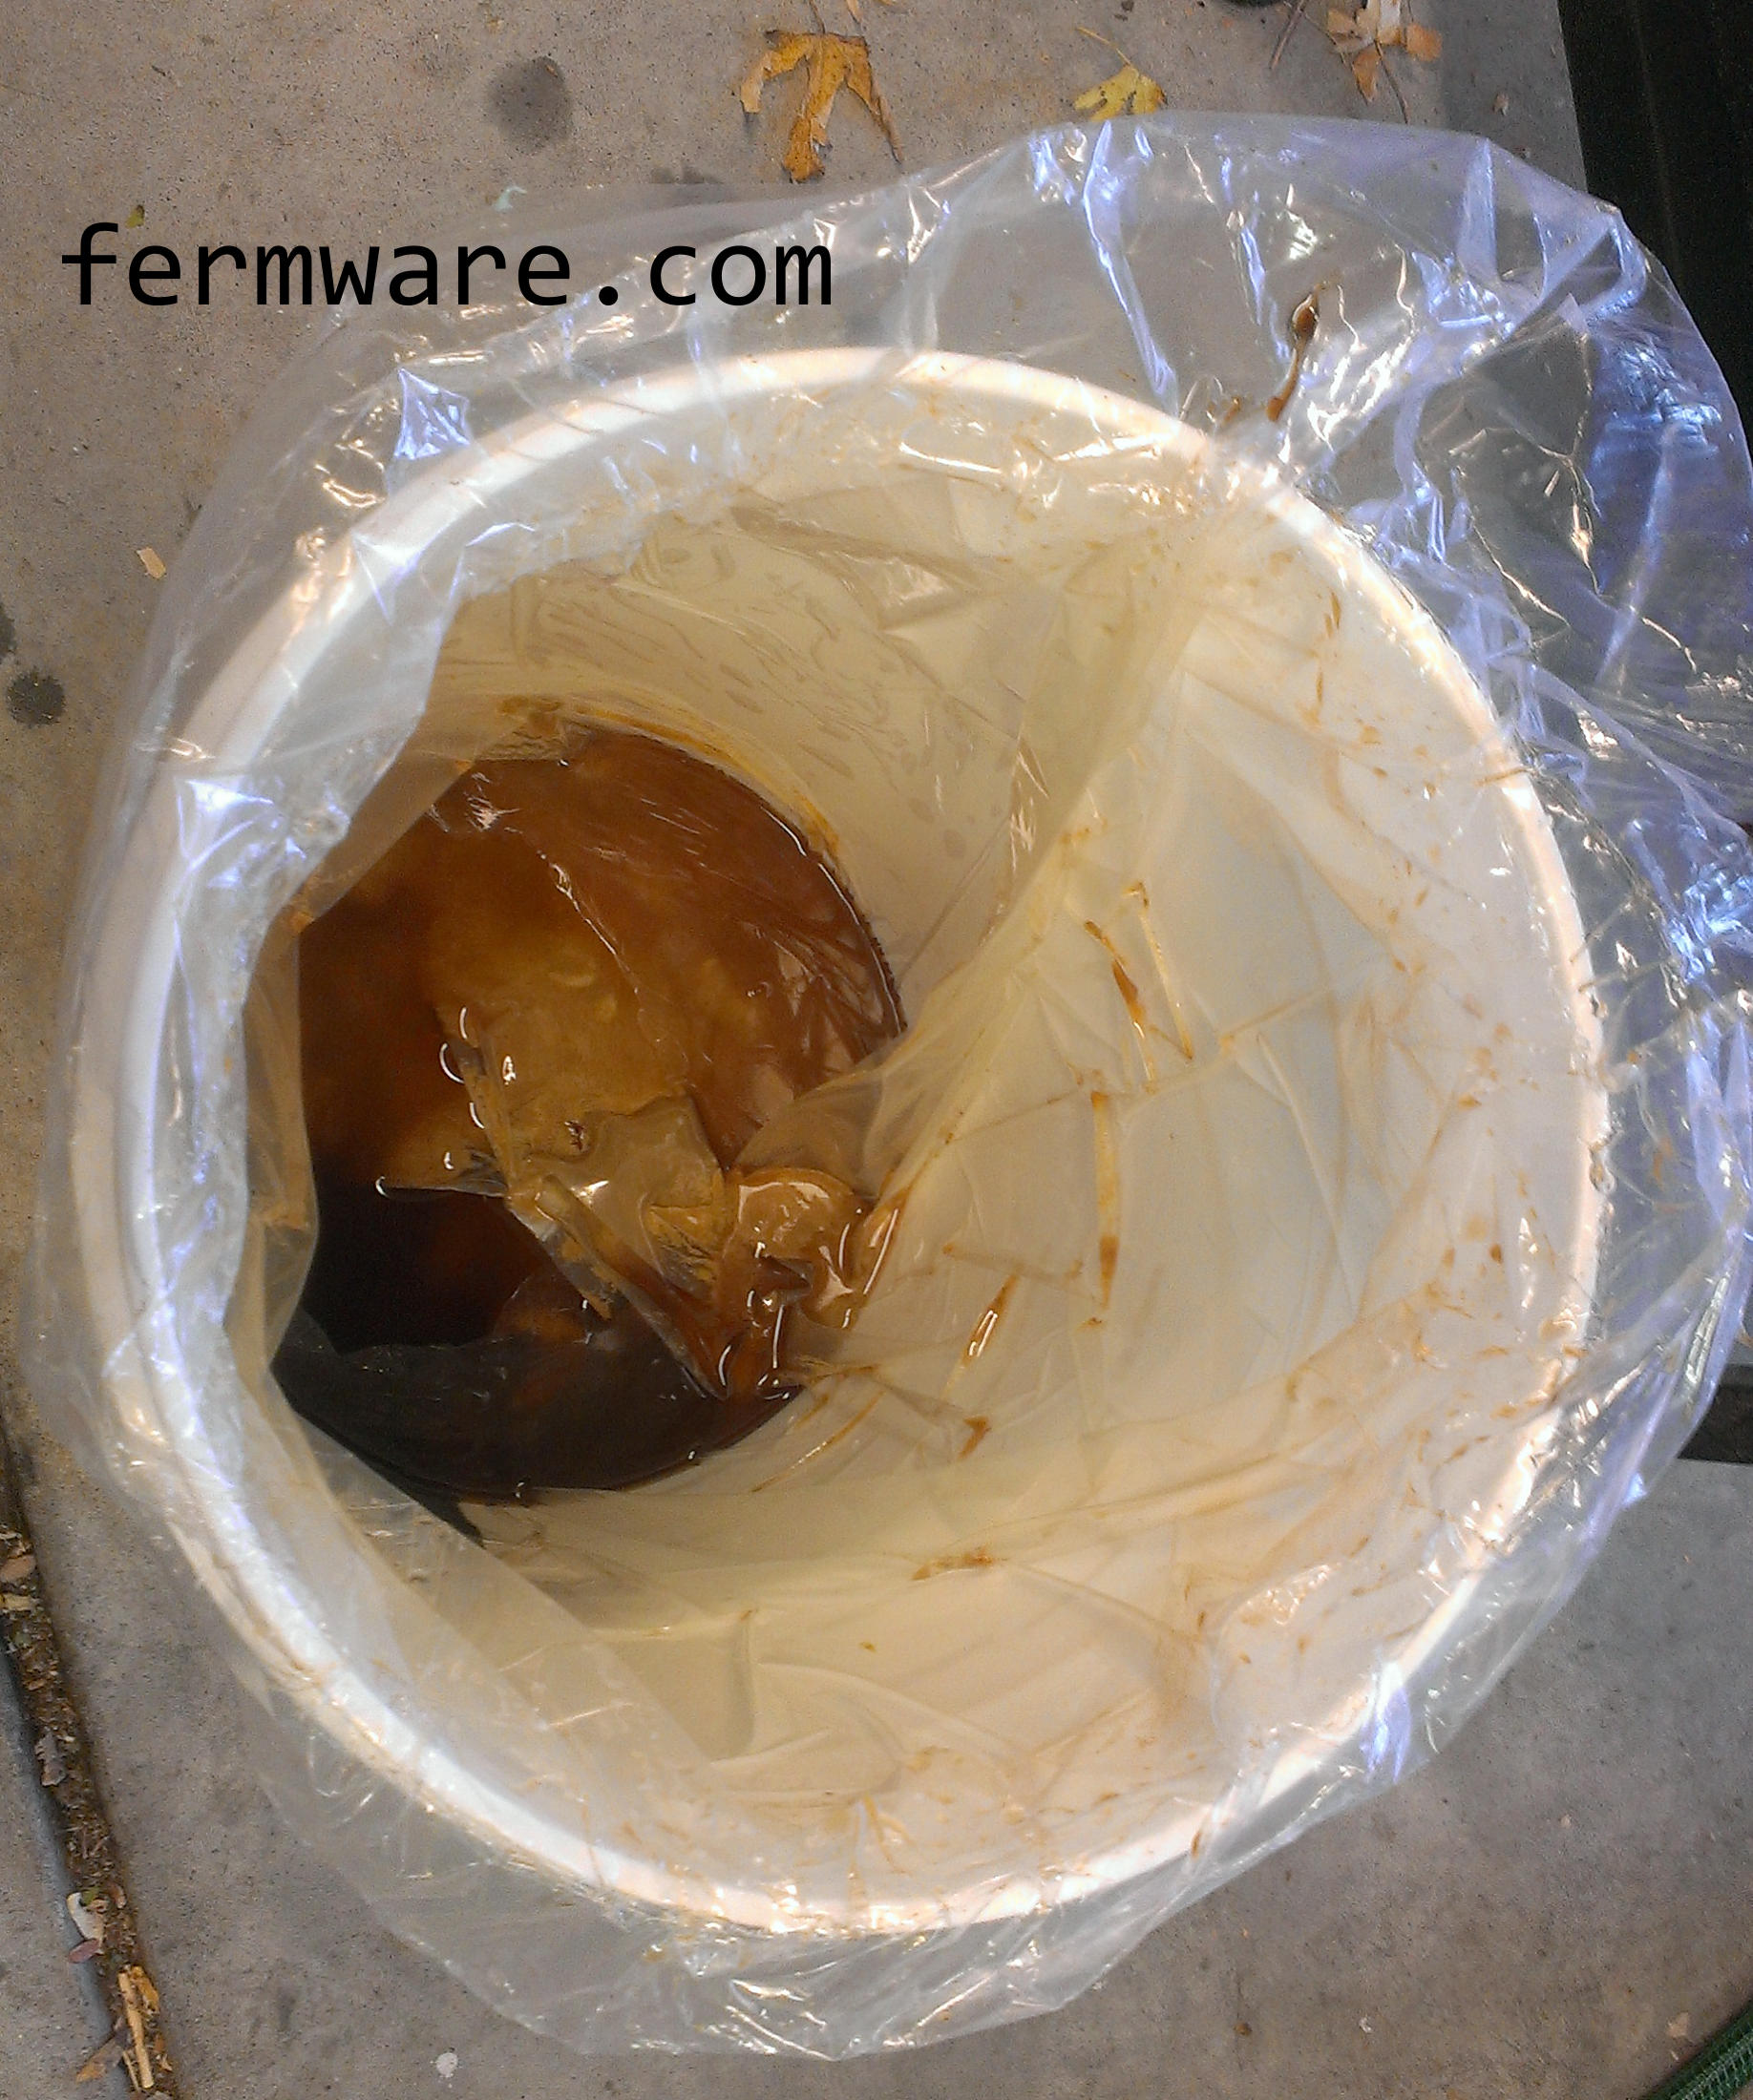
This is what’s left
Your usual yeast cake. Do notice how some sediment settles in the wrinkles of the bag. You really can’t prevent this, but it doesn’t mean you can’t have cleared beer. I’ve had some brilliantly clear beers. In my opinion, it’s all about giving it enough time to settle.
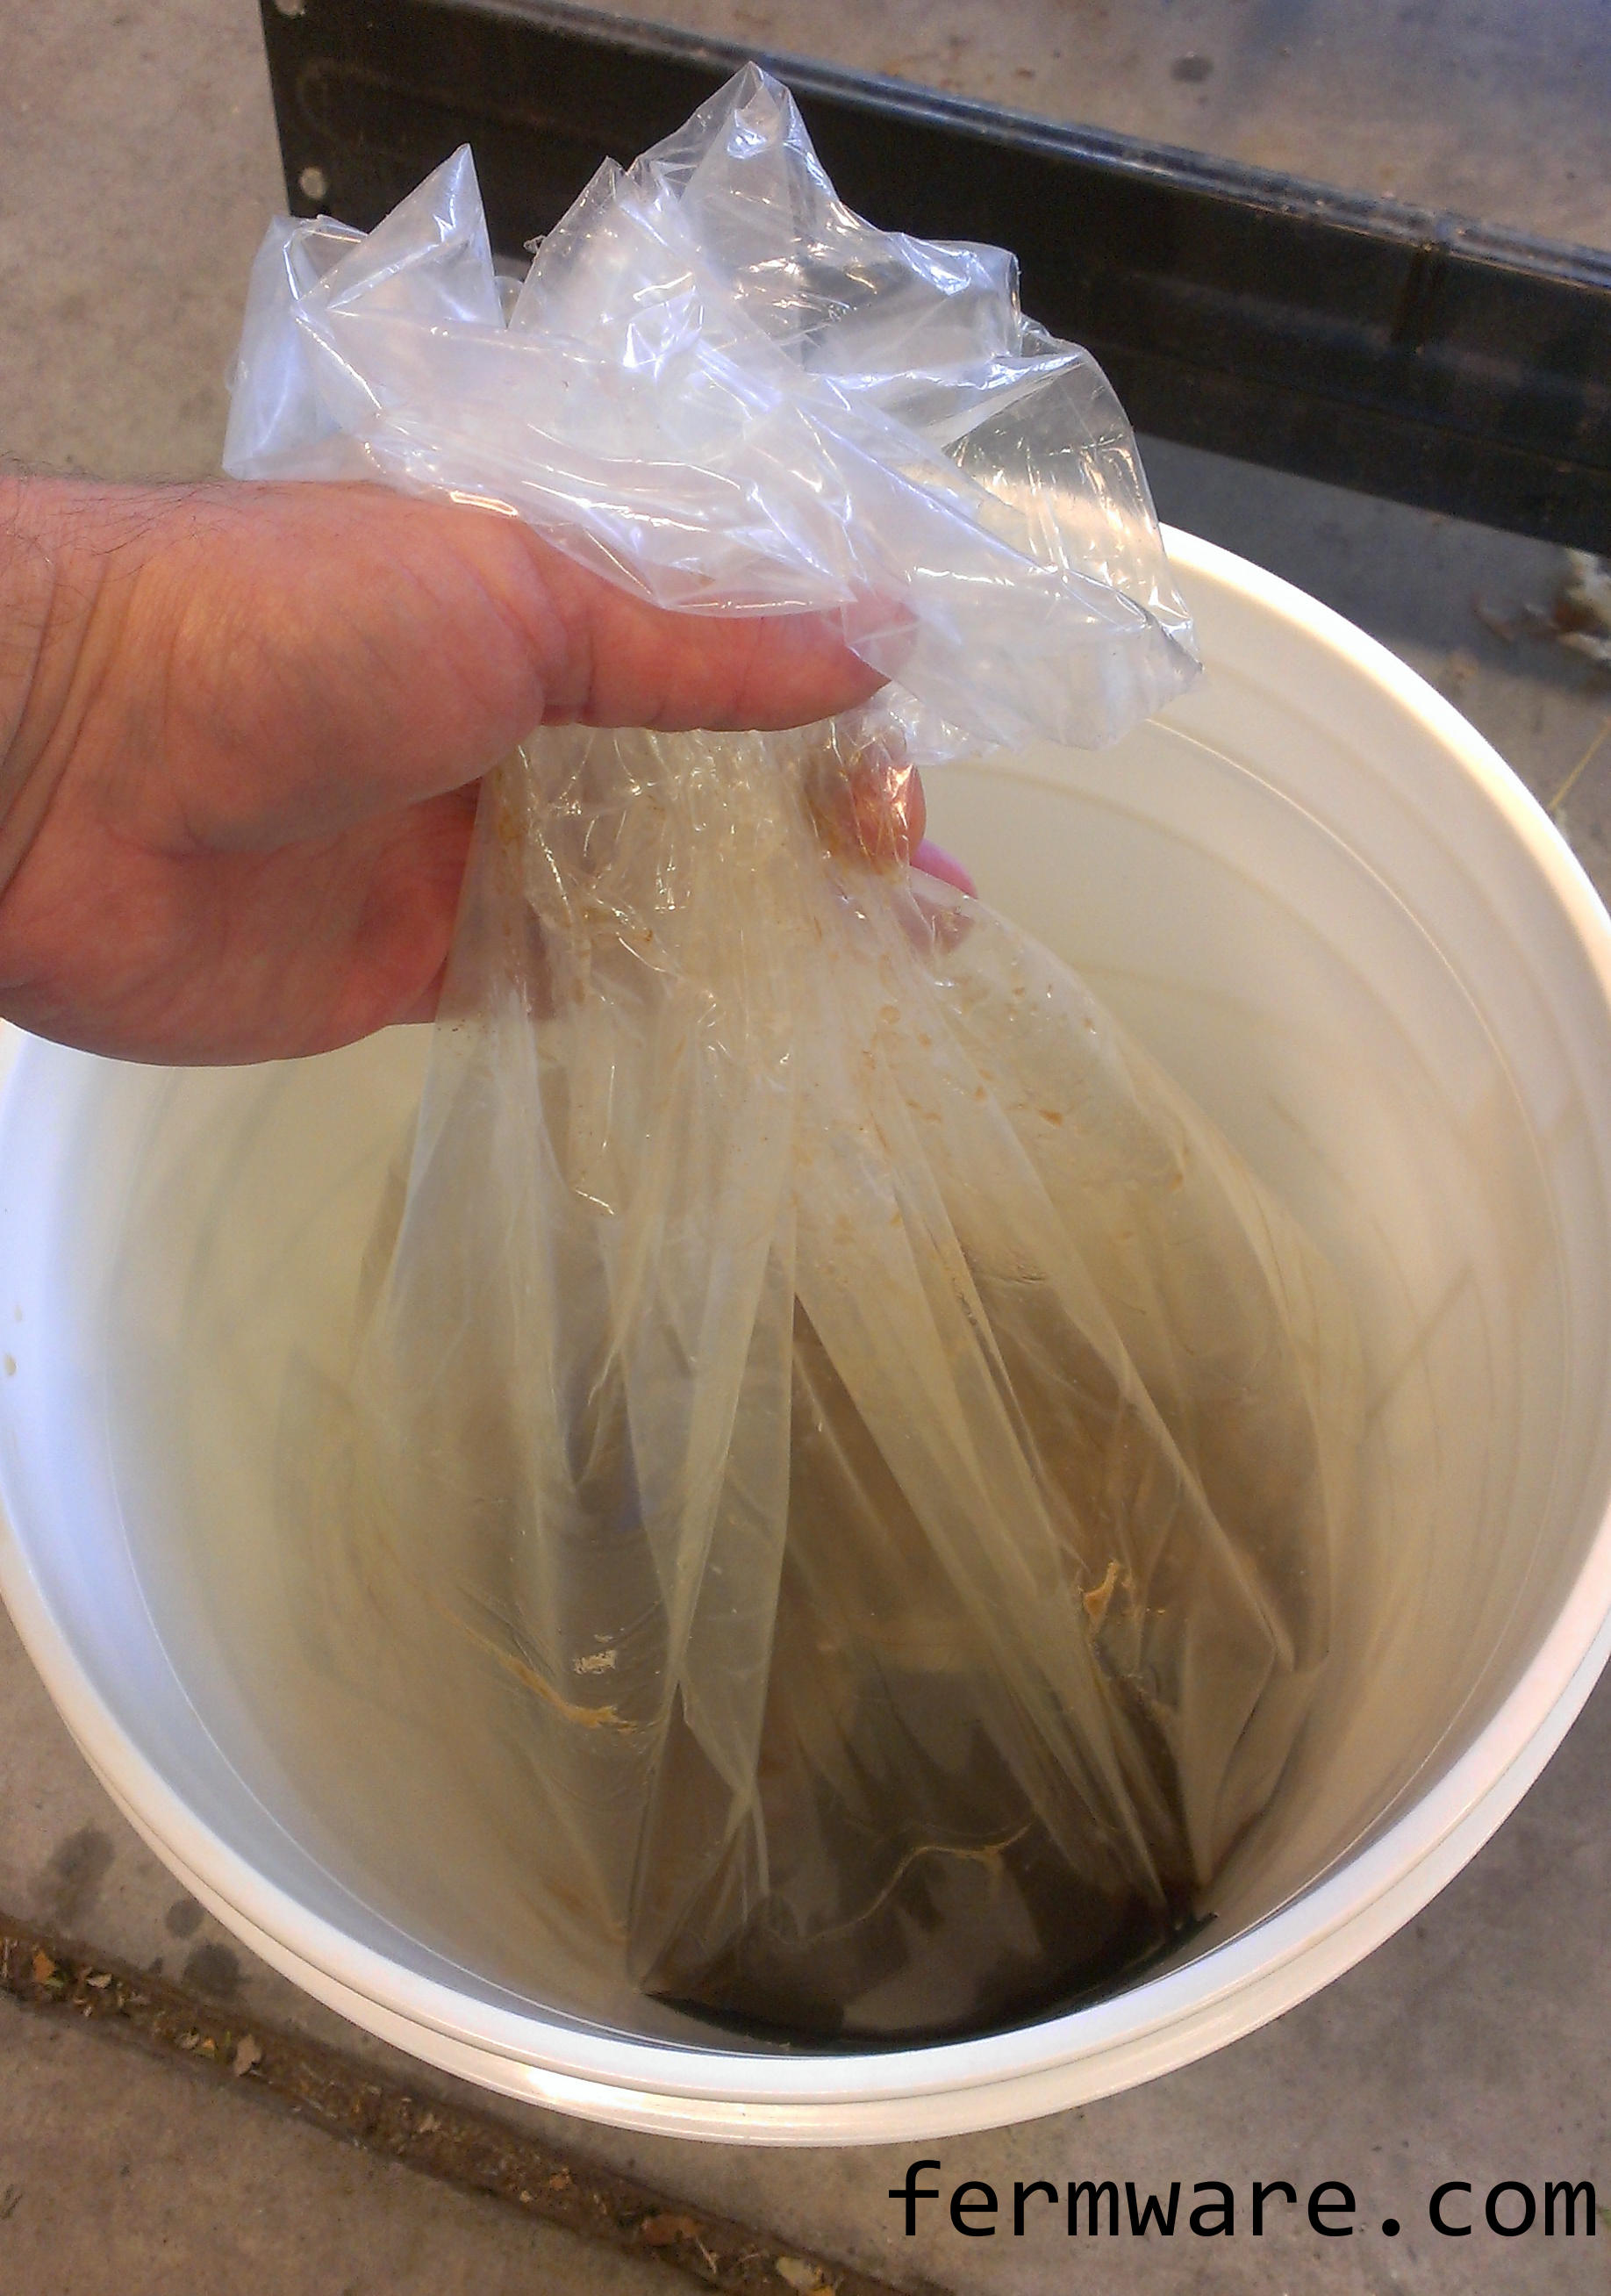
Pull the bag out
Here’s your yeast ready for washing, re-pitching, whatever
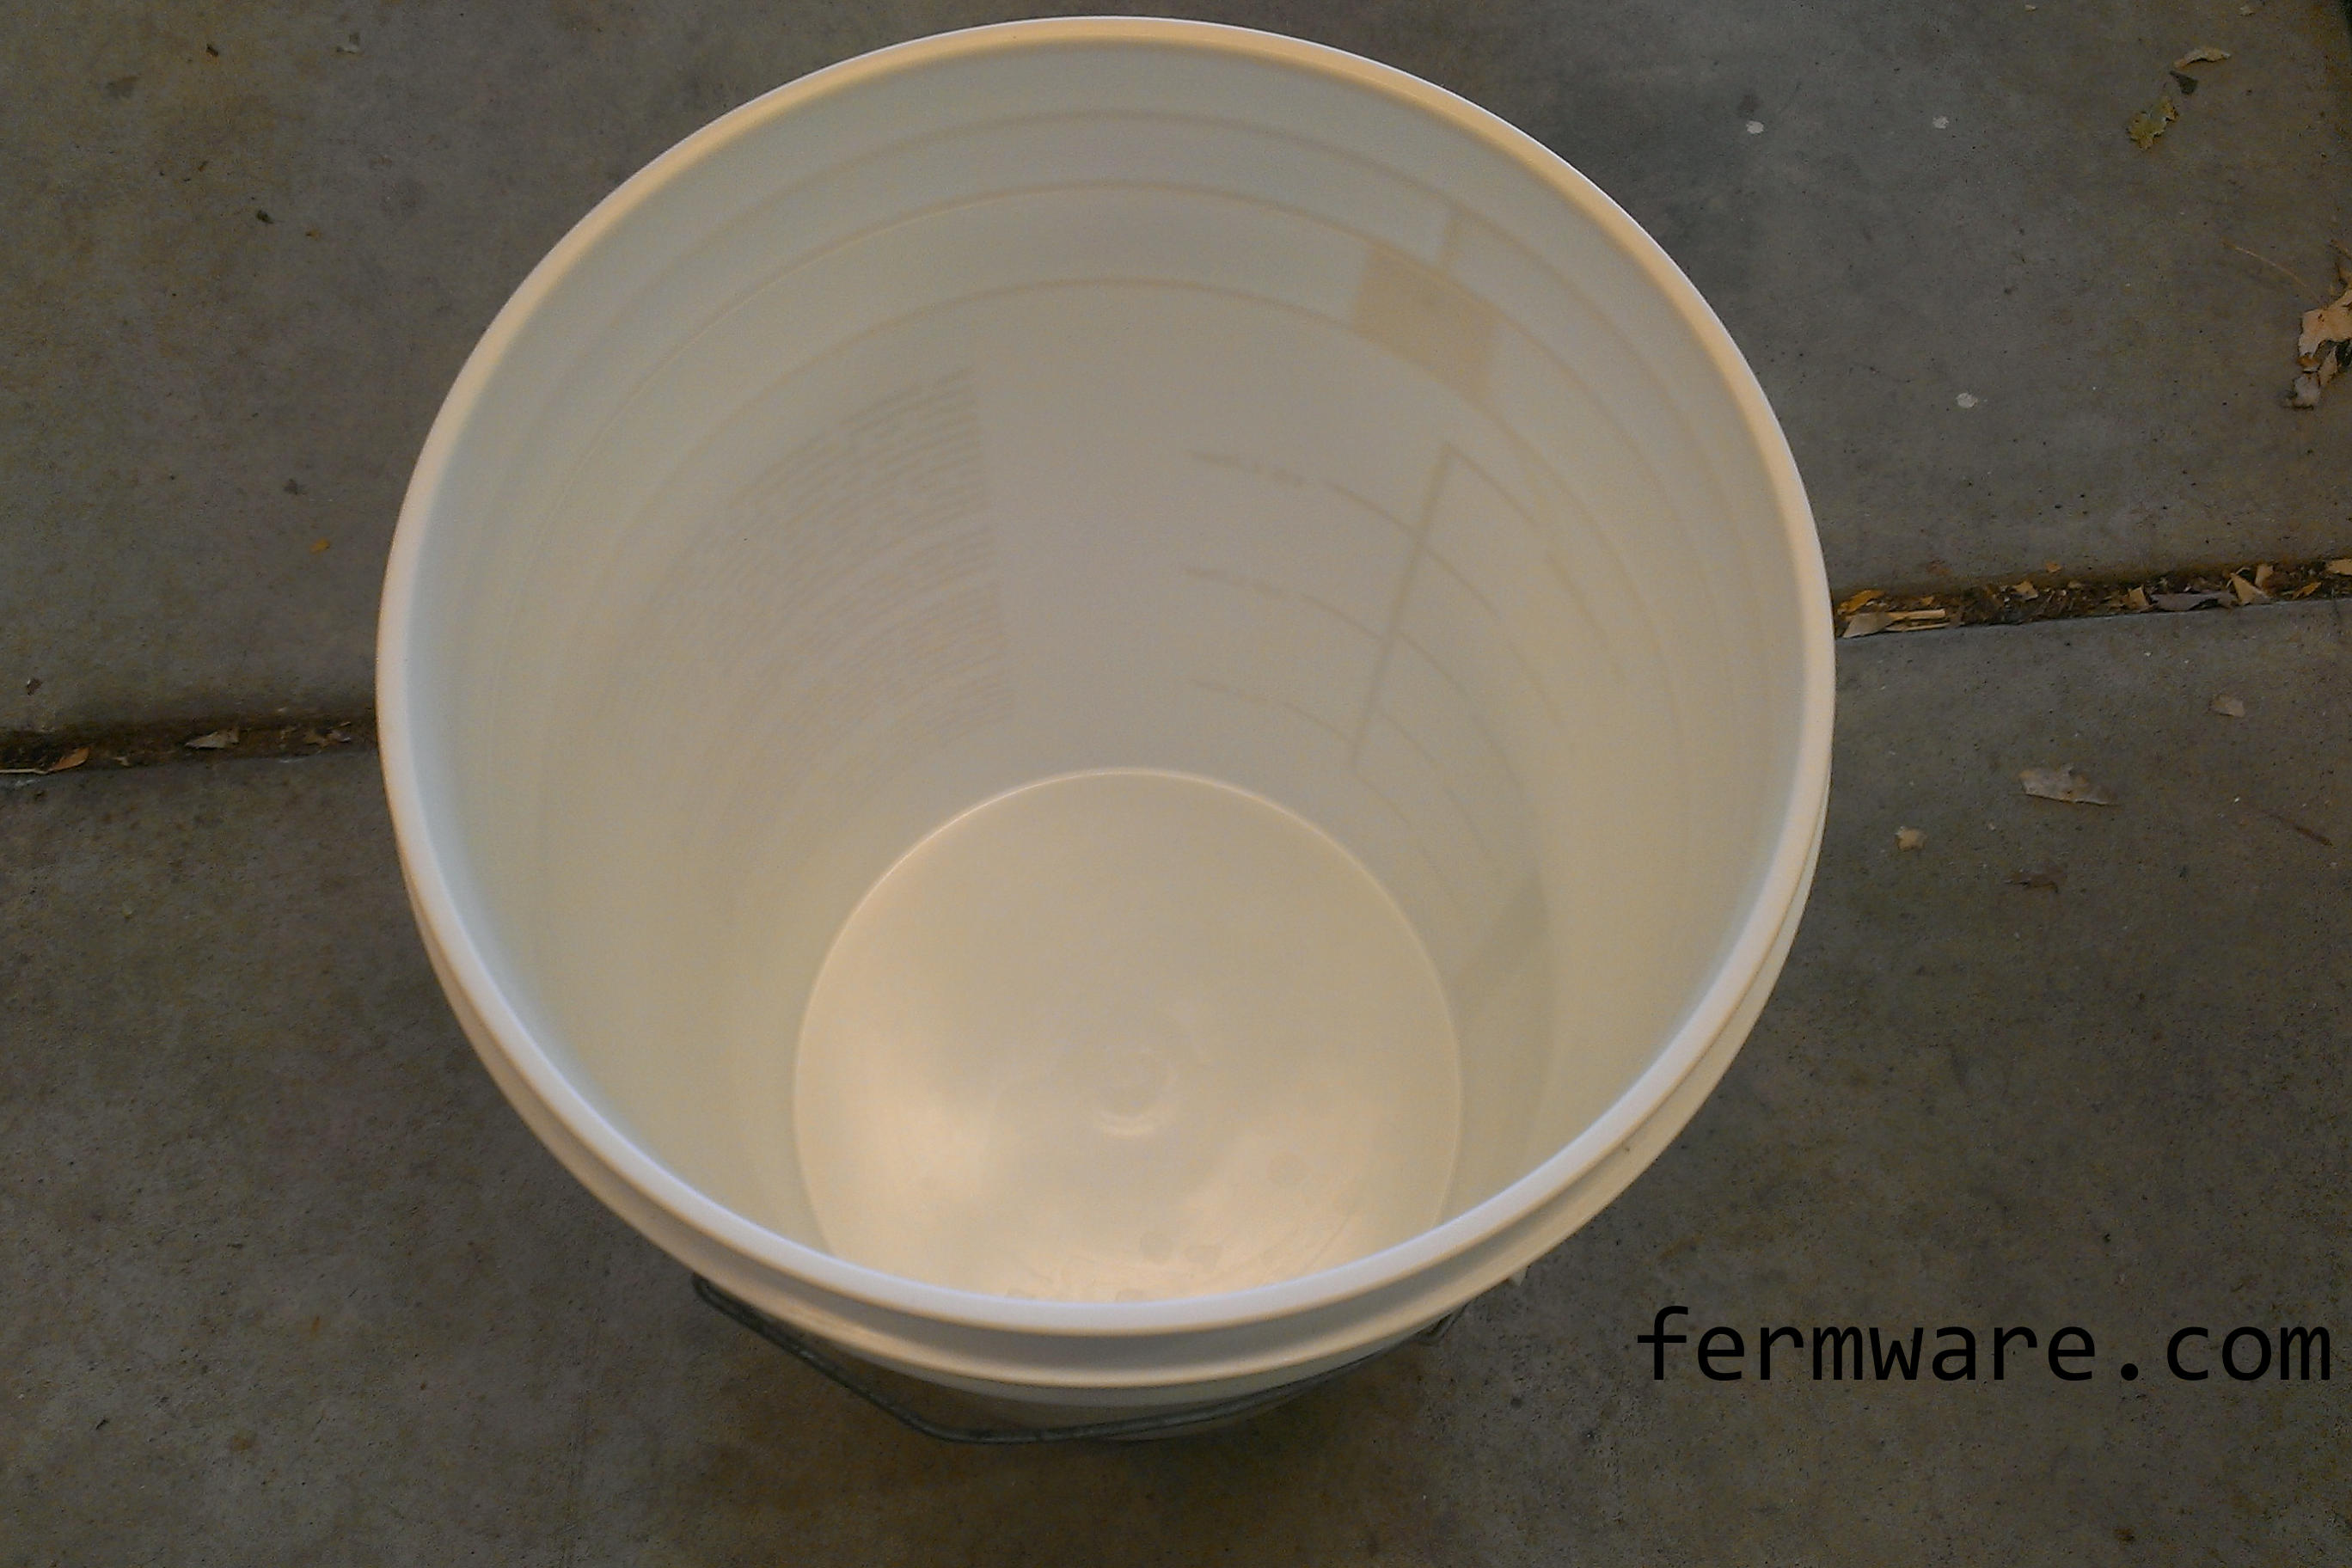
Check out that perfectly clean bucket!
And the rim is clean too
Not often, but occasionally due to the stretching of the bag or holes, I do get some beer on the lip only. Still, way easier to clean the lip than the entire bucket!
Congratulations! You just saved yourself a few minutes (if not more) of cleaning and sanitizing, plus the drying time.
February 7, 2014 Update
Ok, so even though I’ve been using the bags for over a year now, and my judgement was good enough for me, I thought I would get a second opinion.
Fortunately, it just so happened that on the Basic Brewing Radio podcast, James had recently done a couple episodes on Homebrew Toxicology.
Part 1:
Part 2:
I emailed James to get in touch with “Paul the Toxicologist” to get his opinion. Do not take this as a full endorsement from Paul or James, but just some cool homebrewers helping another homebrewer out.
Here is Paul’s response:
So on to your question about FDA compliant vs. Food Grade. There could be a difference, but it may just be semantics as well. Think “not all parallelograms are squares, but all squares are parallelograms”. FDA has a lot of regulations, so by saying it is FDA compliant does not mean it is food grade. But I would take it that if someone were to call a product food-grade, what they would mean is FDA compliant to the specific FDA regulations that deal with food contact materials.
That link also says FDA compliant but is more specific in that is says “FDA approved for food storage”. Again, this is not to say that the bags you are using aren’t the same. What would help is if Uline were to provide the specific regulation that is making them FDA compliant – this would tell you whether they are compliant to the food contact regulation. The reference you would be looking for is 21 CFR 177.XXXX, where the XXXX is another set of numbers that specifies the approval for that specific polyethylene.
A reference to the CFR citation will also help to figure out if your specific use (storing alcoholic beverages) is an approved use of the material. I took at look at one of the entries for polyethylene in 21 CFR 177.1630 (you can find it at the FDA search site as well http://www.accessdata.fda.gov/scripts/cdrh/cfdocs/cfcfr/cfrsearch.cfm). In this entry you will see that (according to part 21 CFR 177.1630 (f)(2)) that “The plastics are used for packaging, transporting, or holding food, excluding alcoholic beverages, at temperatures not to exceed 250 deg.”
So you can see that FDA compliant is a complicated statement, in that it isn’t a material that is approved for use, but instead it is a material for a specific use that is approved for use. This is based on the fact that the companies need to conduct migration testing to ensure that nothing hazardous migrates out of the plastic and into food under specific conditions. To be compliant with the FDA regulation, they only need to test situations that are water-based, and do not need to look at contact with alcohol (which is a different solvent and could leach out different compounds).
I just sent a note out to Uline that I used some of my regulatory-speak, I’ll let you know if I hear anything back from them.
So the bottom line is that if I had to guess, I would think that the Uline liners you have found (and likely all other similar liners you could find) are actually compliant with the FDA regulation for food contact. However, I would also suspect that they will indicate that they are not intended to be used in contact with alcoholic beverages, such as your intended use. So from a regulatory compliance standpoint, I have a feeling that you are not using those liners for an approved use.
That being said… I would also say that your risk of having things migrate into beer at a relevant concentration is pretty small. When I talked to the polymer toxicologist that I know, his advice was that if you are using a food-grade polyethylene that the starting materials that are used in their manufacture are almost all gone in the final product, leaving only long polymers that are not toxic. There could be some of these starting materials left over in trace amounts (monomers, catalysts, etc.), but anything that would migrate out of that plastic would be coming out under “approved” use. When you are using these bags under “non-approved” use, you are likely only going to be leaching out the same materials that would come out under the approved use, and therefore unlikely to be leaching out anything else with the alcohol that would increase the hazard of those liners.
So if you wanted a toxicological opinion, since you are using a food grade material (and a known material) it is a low risk from using those bags. If you listen to the podcasts, this is a similar explanation that I gave for the picnic cooler mash tun or jerry can no-chill wort chilling, they are all “non-approved” uses for food grade materials but are low risk.
Response from Uline
Dear Paul,
Thank you for contacting Uline Product Questions.
In response to your question about the S-13572, 24 X 33″ 12-16 Gallon 1.5 Mil Clear Trash Liners, these bags are approved for the bagging or packaging of containers of alcoholic beverages. They are also approved for containing or packaging of non-contained beverages. Unfortunately, there is no 21 CFR reference available and no migration testing has been done on this item.
Update again:
In the 3rd installment of Homebrew Toxicology, they actually discuss my conversations with them. It’s the first topic they cover and it starts at about 5:30 into the podcast.
The fact that they are approved for containing “non-contained beverages” is good enough for me. I can certainly understand the legal ramifications of the word “approved”. As a company, I am assuming that they can only list a product as approved, if the actual test has been carried out to a certain standard. The FDA standard Paul referenced does however have the caveat “excluding alcoholic beverages”.
If you listen to the Basic Brewing Radio podcasts however, you will quickly understand that when it comes to food contact, it doesn’t seem to matter what is in contact with the plastic and at normal temperatures, if something is going to leach from the plastic into your food/liquid, it is going to happen anyway. So by that logic, I work out that if it is safe for generic beverages, it is safe for alcoholic beverages.
I just wanted to say a special thanks to James Spencer of Basic Brewing Radio and Paul “the toxicologist”. I appreciate the straightforward nature of the Basic Brewing podcasts and Paul for just being a cool guy willing to help other homebrewers and to dispel some of the myths and misconceptions withing the brewing community.
For what it’s worth, Paul also found these bags. Different size, but you can work out which size you want:
Also, if you subscribe to BYO Magazine, you might have seen this in the March/April 2015 BYO Homebrew Hacks Issue. If you click on the link, you’ll be able to download a copy of the article.