
Difficulty: 
This project just requires some basic building skills, but you might need some help getting the keezer onto the Bierwagen.
Posts for this Project:
Part 1: Introduction
Part 2: Building of the frame
Part 3: Bicycle wheel attachment (this post)
Part 4: Getting the keezer onto the Bierwagen
Part 5: Keezer collar
Part 6: Storage of the Bierwagen
Overview:
This post will show how to create and attach the bicycle wheels to the Bierwagen.
Affiliate Links
Any links in this post or on this website may link to affiliates, which compensate this website for purchases. All links are provided to help the reader locate items mentioned or used in the post. As an Amazon Associate I earn from qualifying purchases.Helpful tools:
I do use the cut off saw more frequently than I had anticipated. It’s pretty handy for cutting through metal bars and tubes. I got an inexpensive model at Harbor Freight.
Step bit
or Step bit set
The step bits are really useful for other uses in brewing equipment. I’ve used them to create airlock grommet holes in bucket lids before and spigot holes as well. I think the most preferred method for putting holes in kettles is a hole saw or punch, but I think these would do a great job as well.
Fabrication:
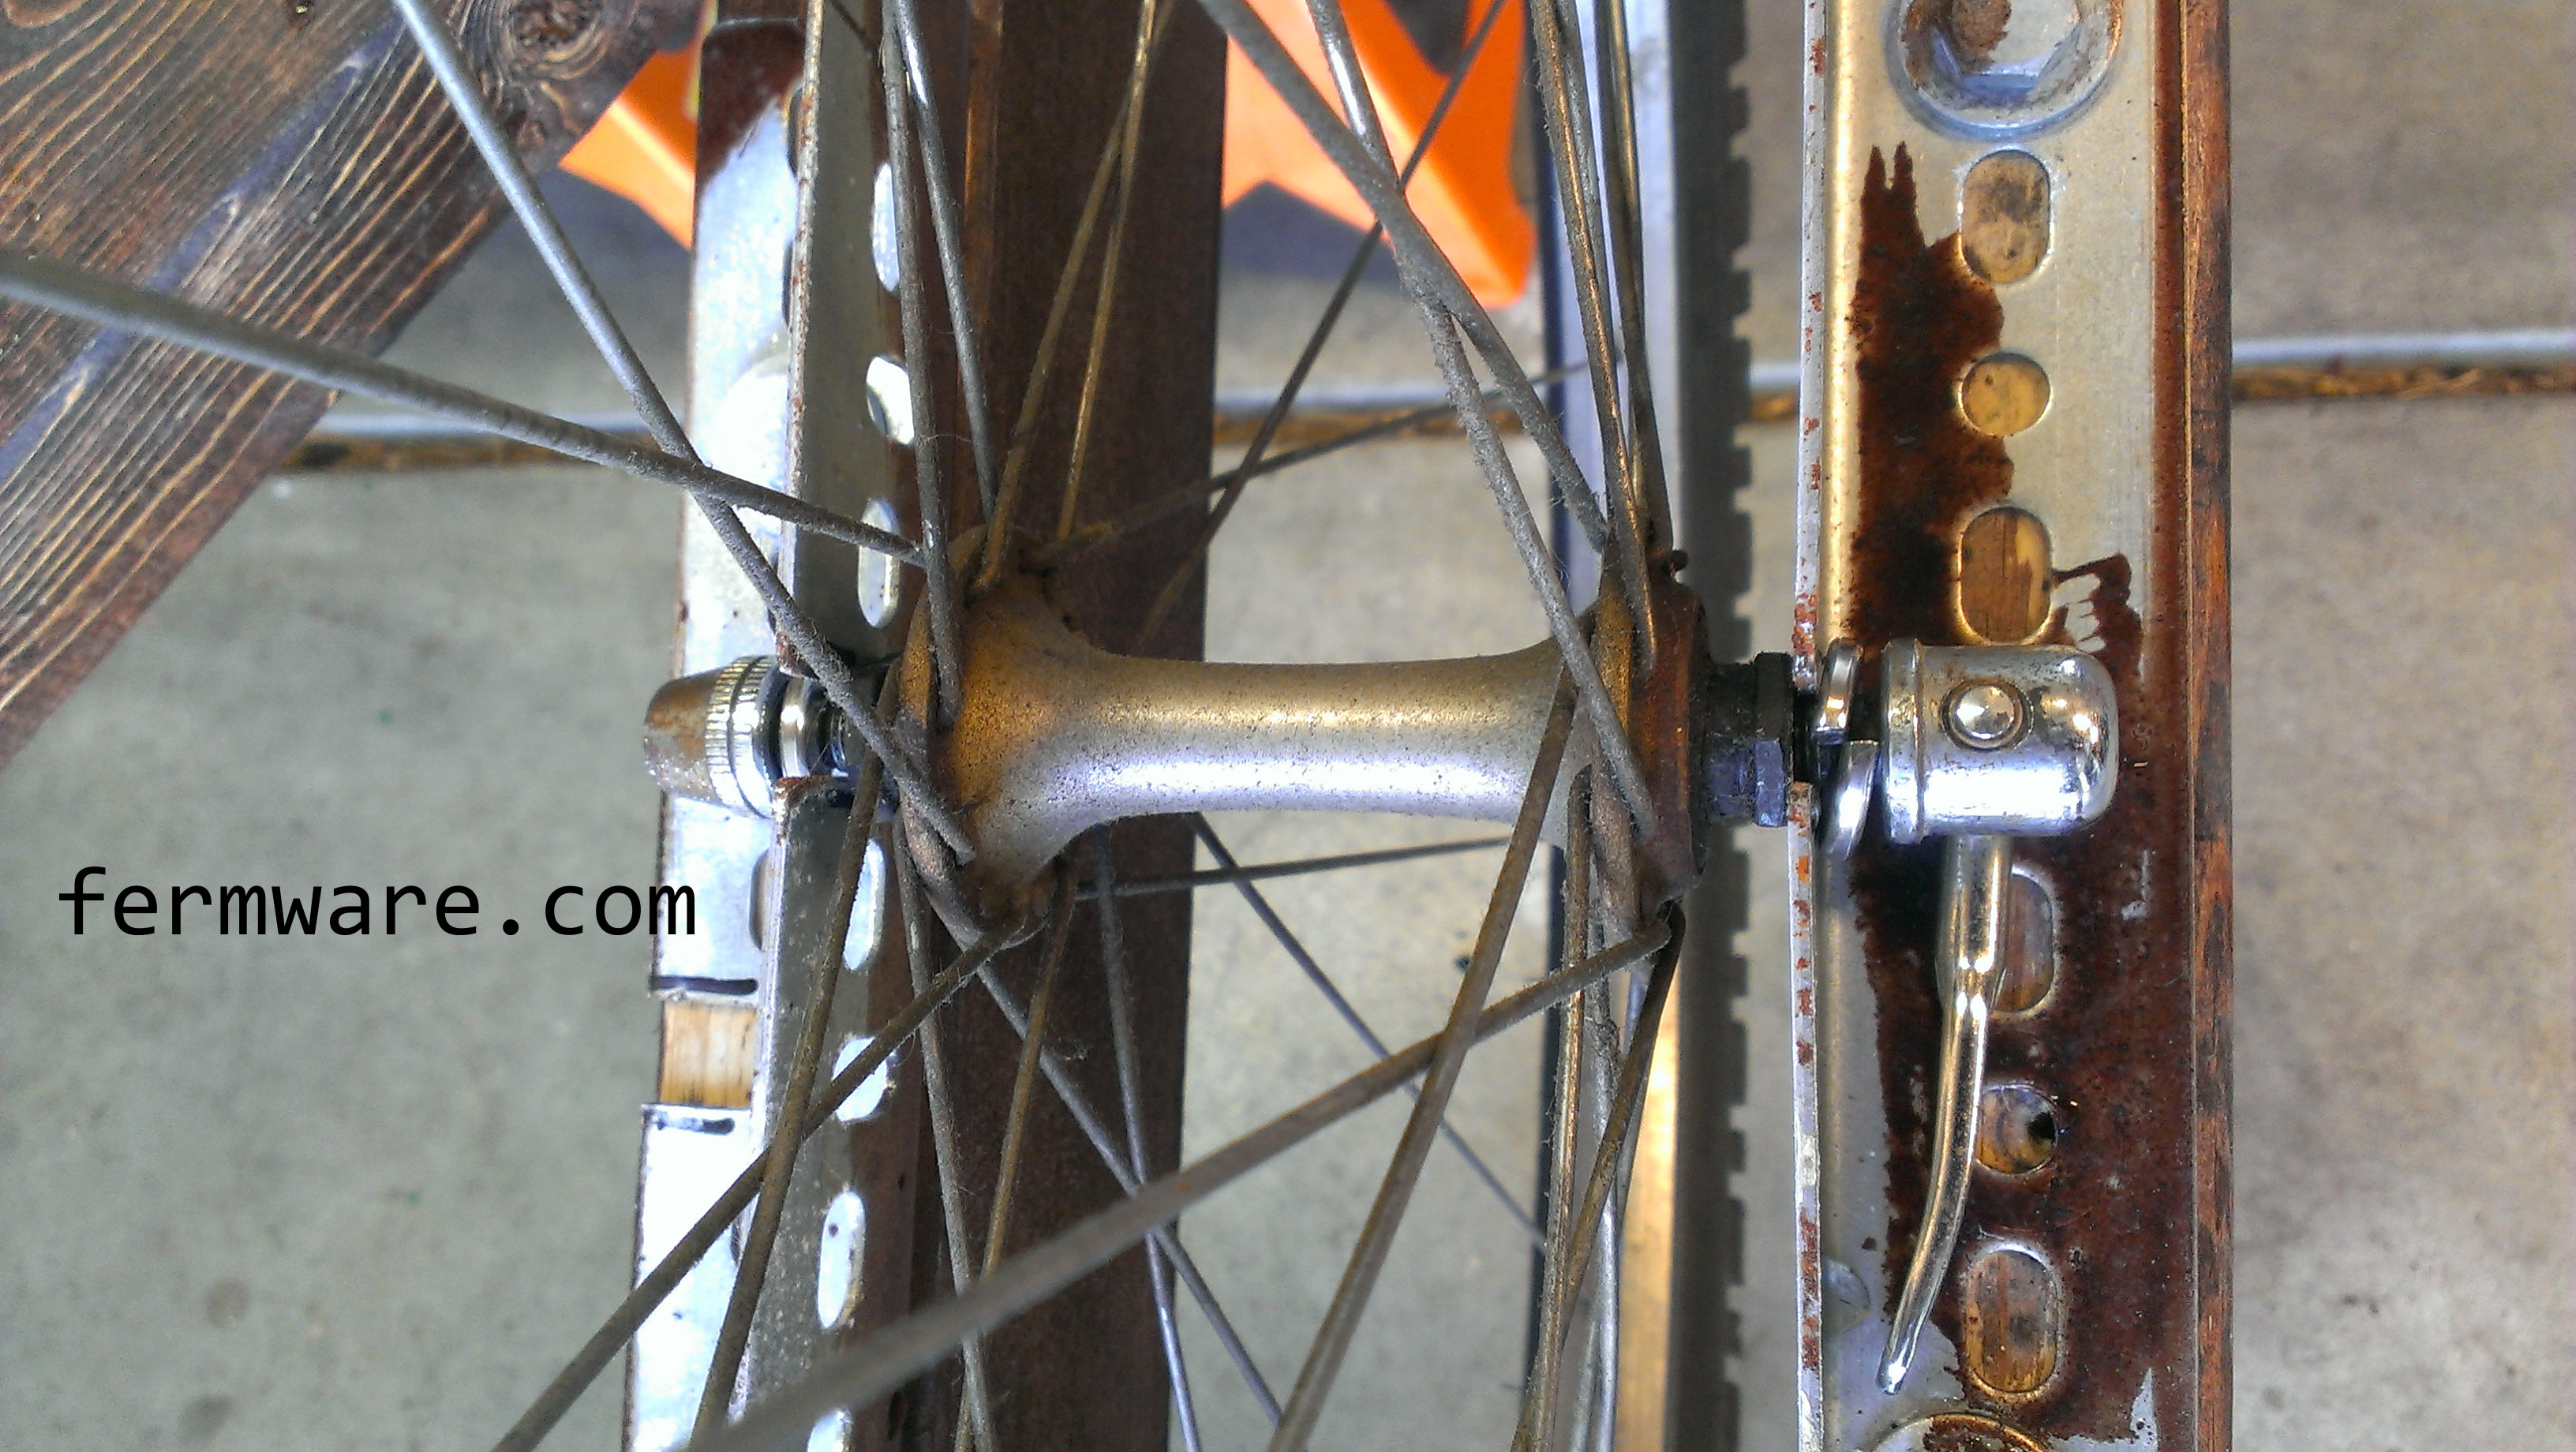
You might recognize the L-channel (AKA angle iron or L bracket) from the Keezer Dolly project. You’ll need 4 short sections to attach both wheels to the frame. I cut approximately 6″ sections.

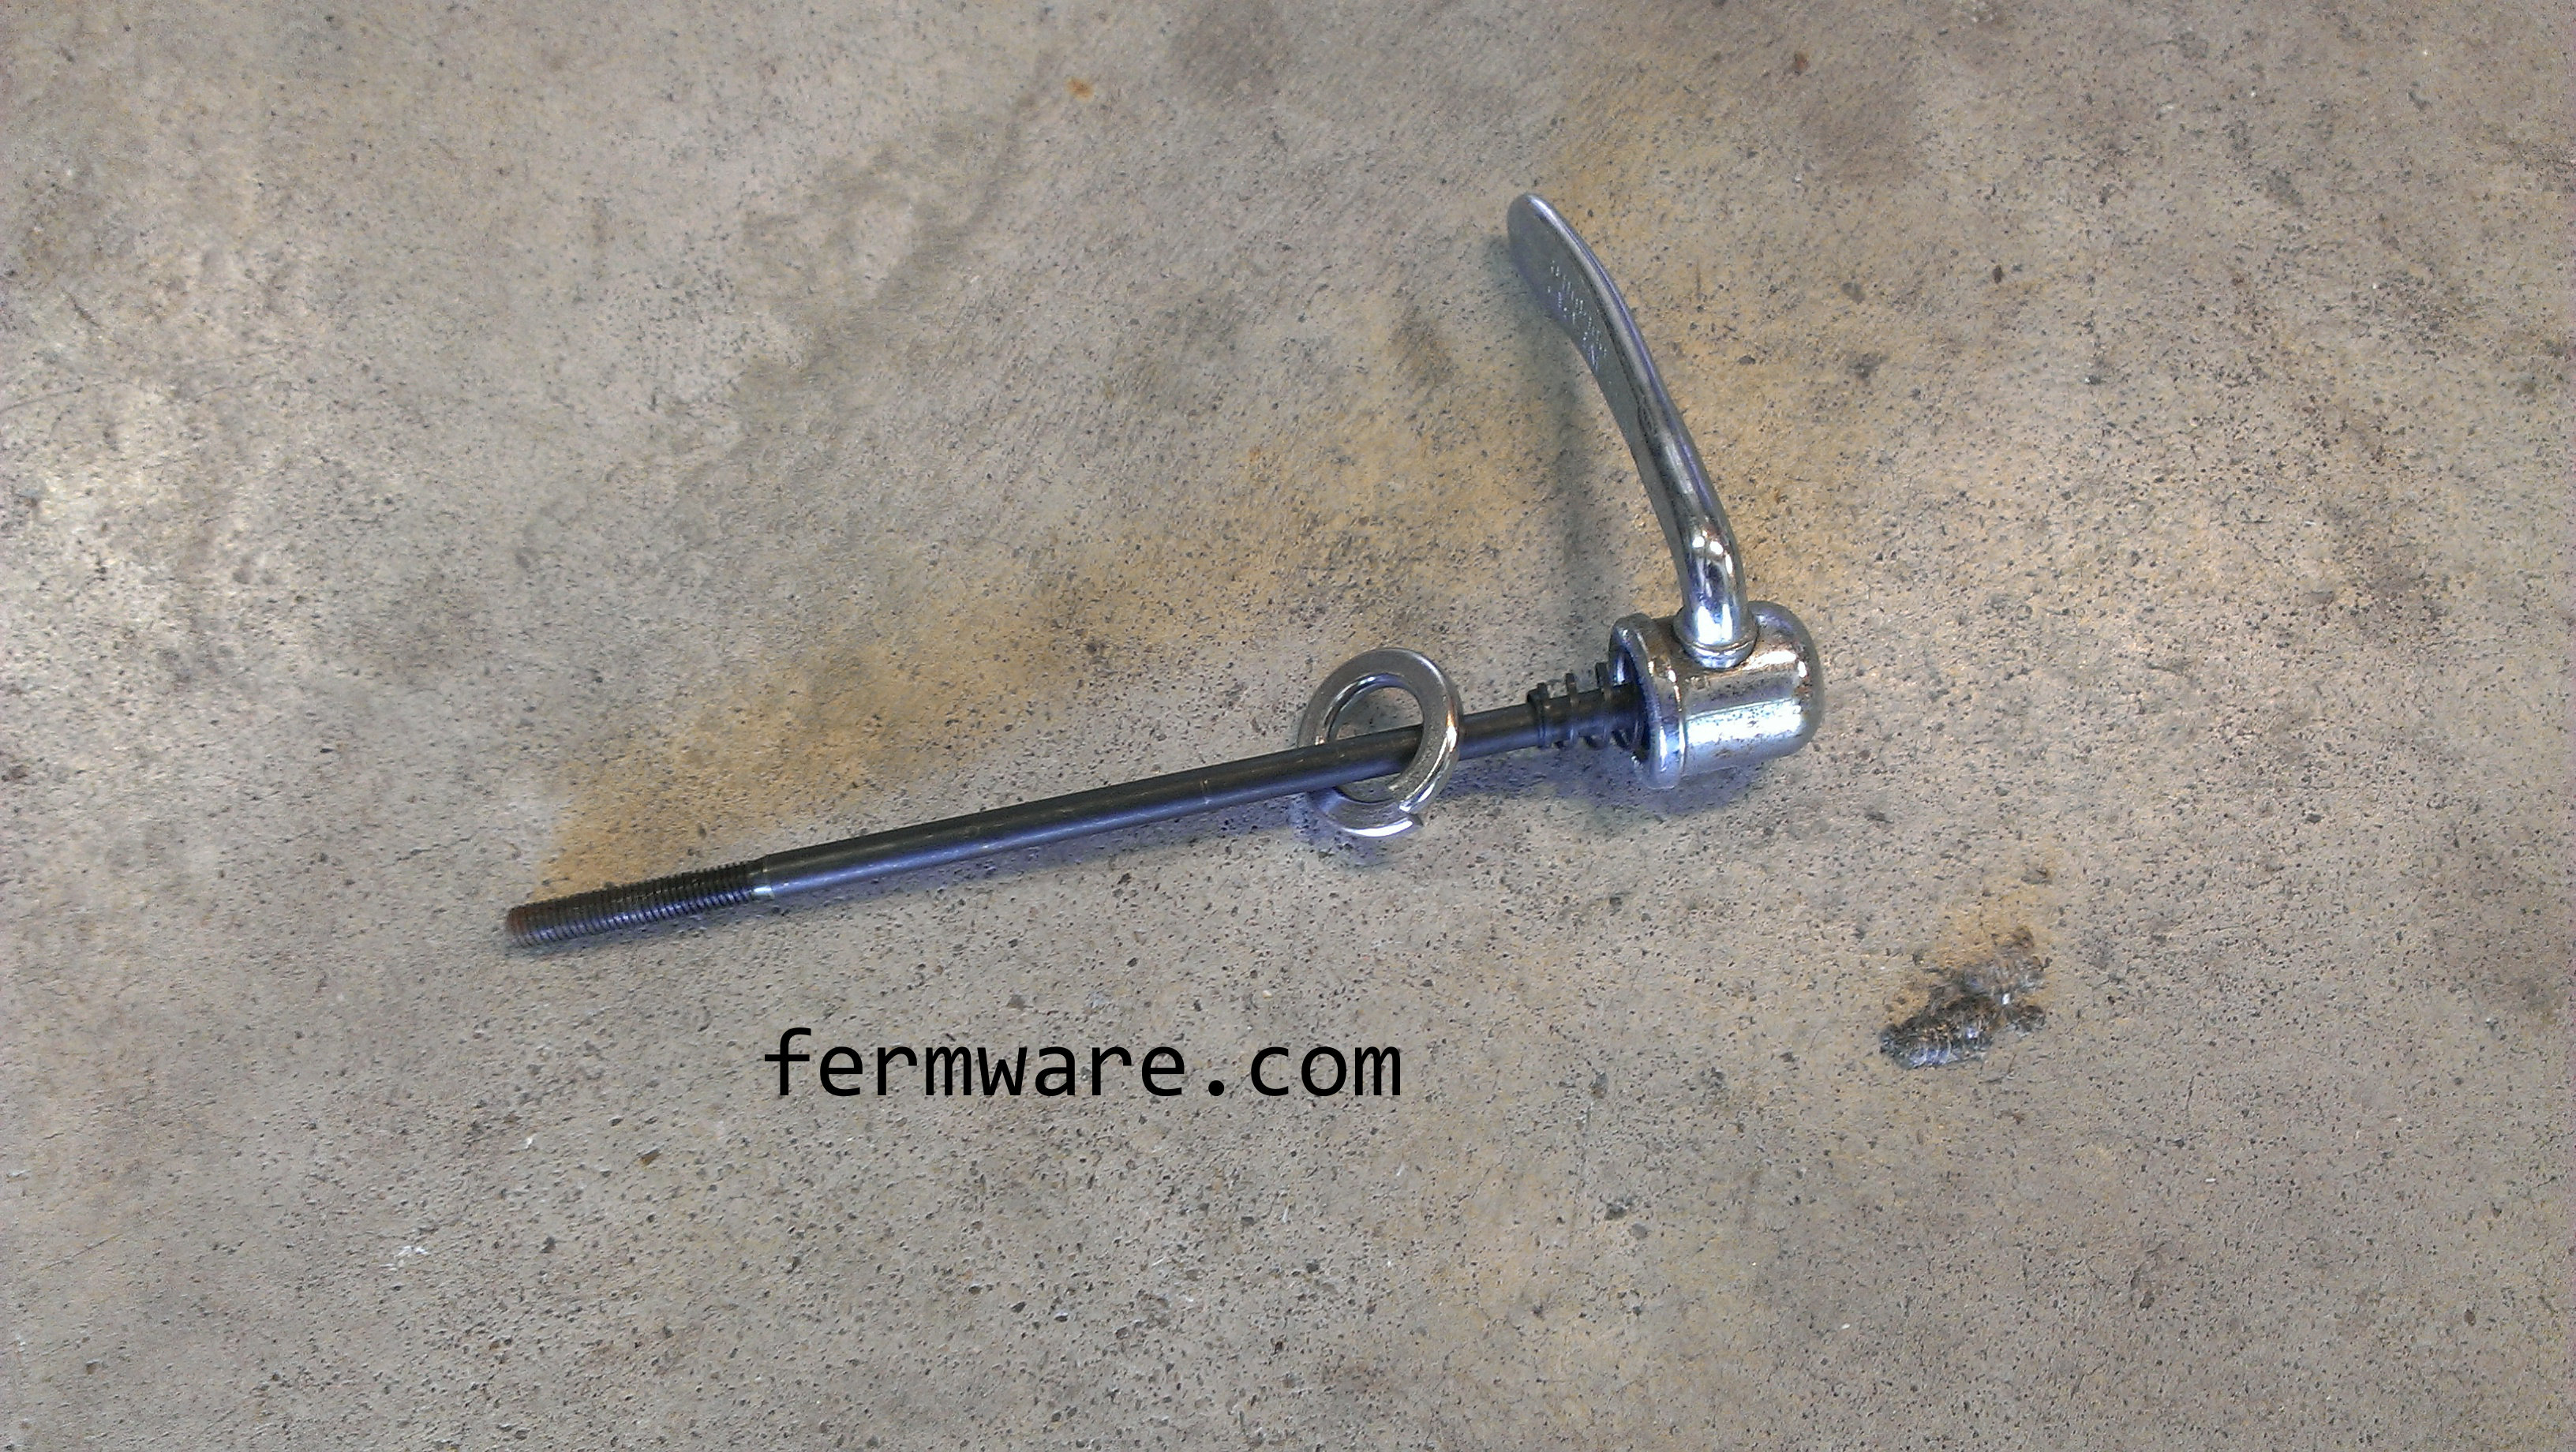
You’ll then pick one of the already round holes and open it up using the step bit. I measured the diameter of the opening on the forks of both of our bikes and matched the hole size on the bracket. The wheel actually rides on a very narrow section of the axle that sticks out of the wheel hub on both sides, then a cam clamp snugs it up tight.

After you have opened up the hole, you’ll need to make the hole a slot that the wheel can drop into. You are basically going to mimic what is on the bicycle fork.
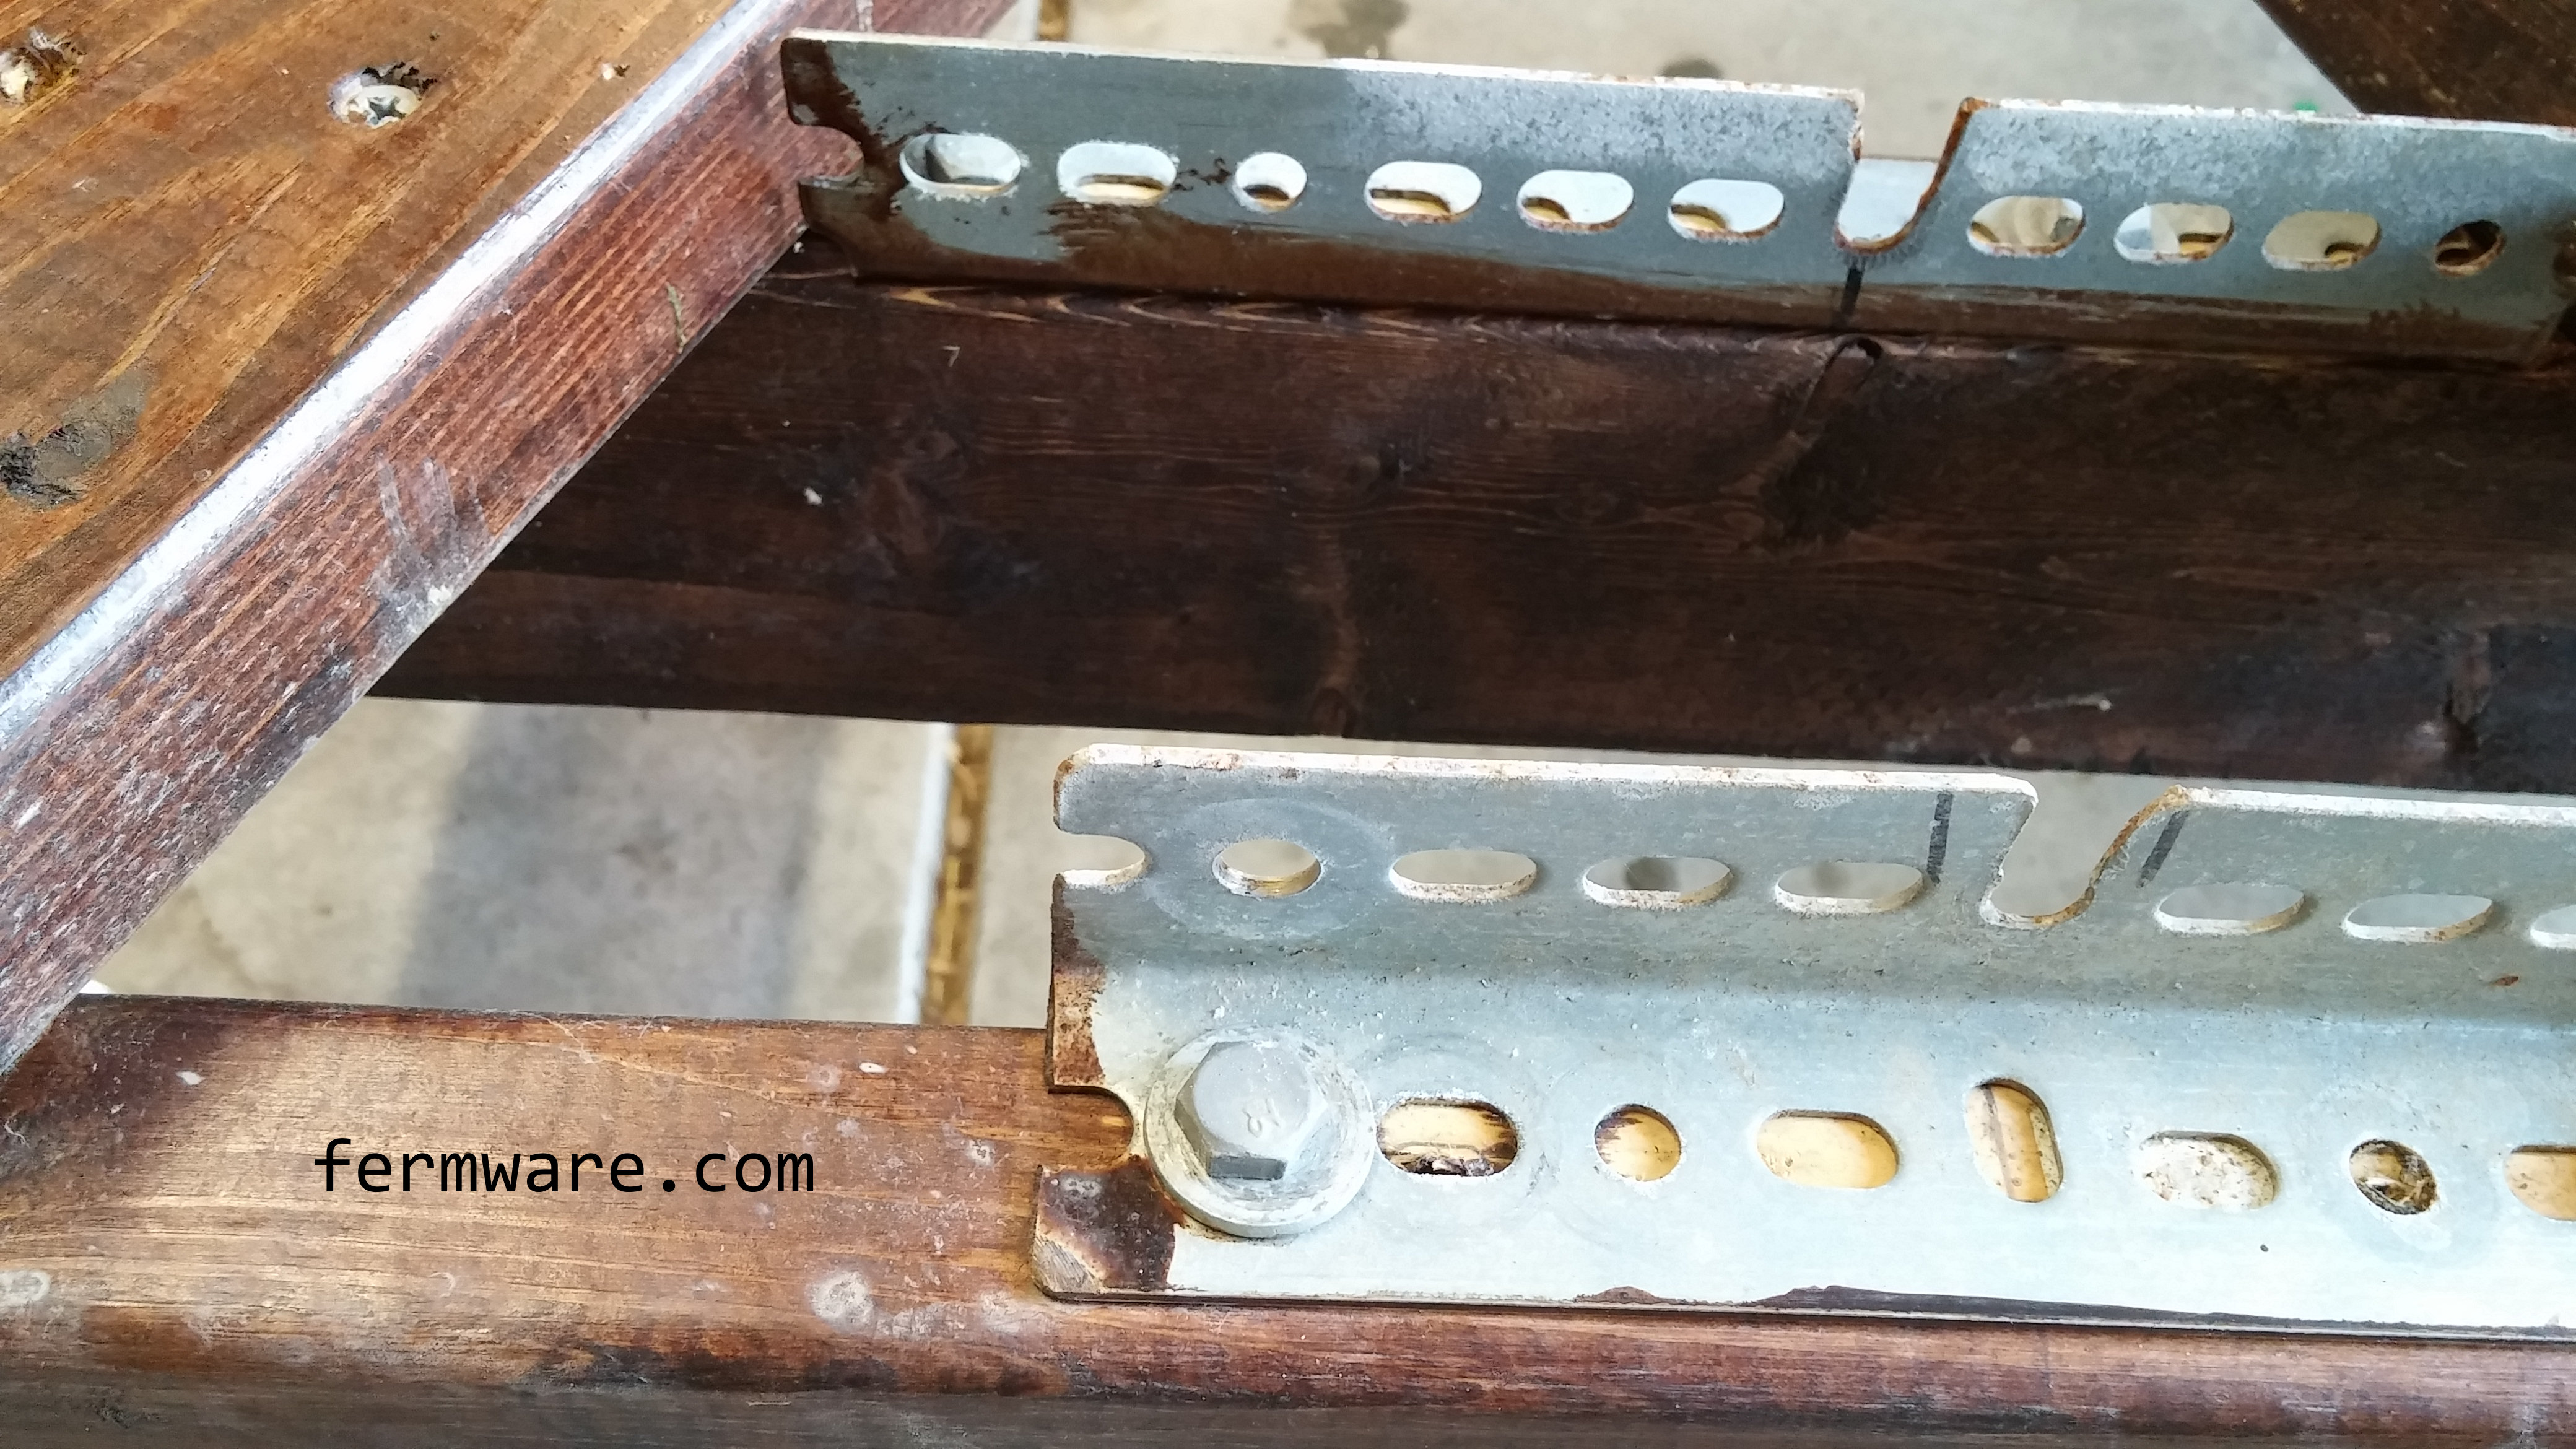
You’ll also want some lag bolts to attach the new mounting brackets to the frame. I used some 3/16″ lag bolts with a washer. This is where you’ll need some careful measurement and alignment.
Since the L bracket is much thinner than the bike fork attachment point, you’ll need some washers to add thickness. The only washers I could find that were thick enough were some lock washers or split washers. They will stack up like shown in the pictures below.

The important washer dimensions are shown below. My axles required a 1/2″ ID (inner diameter) washer to fit around the bearing surface of the axle.
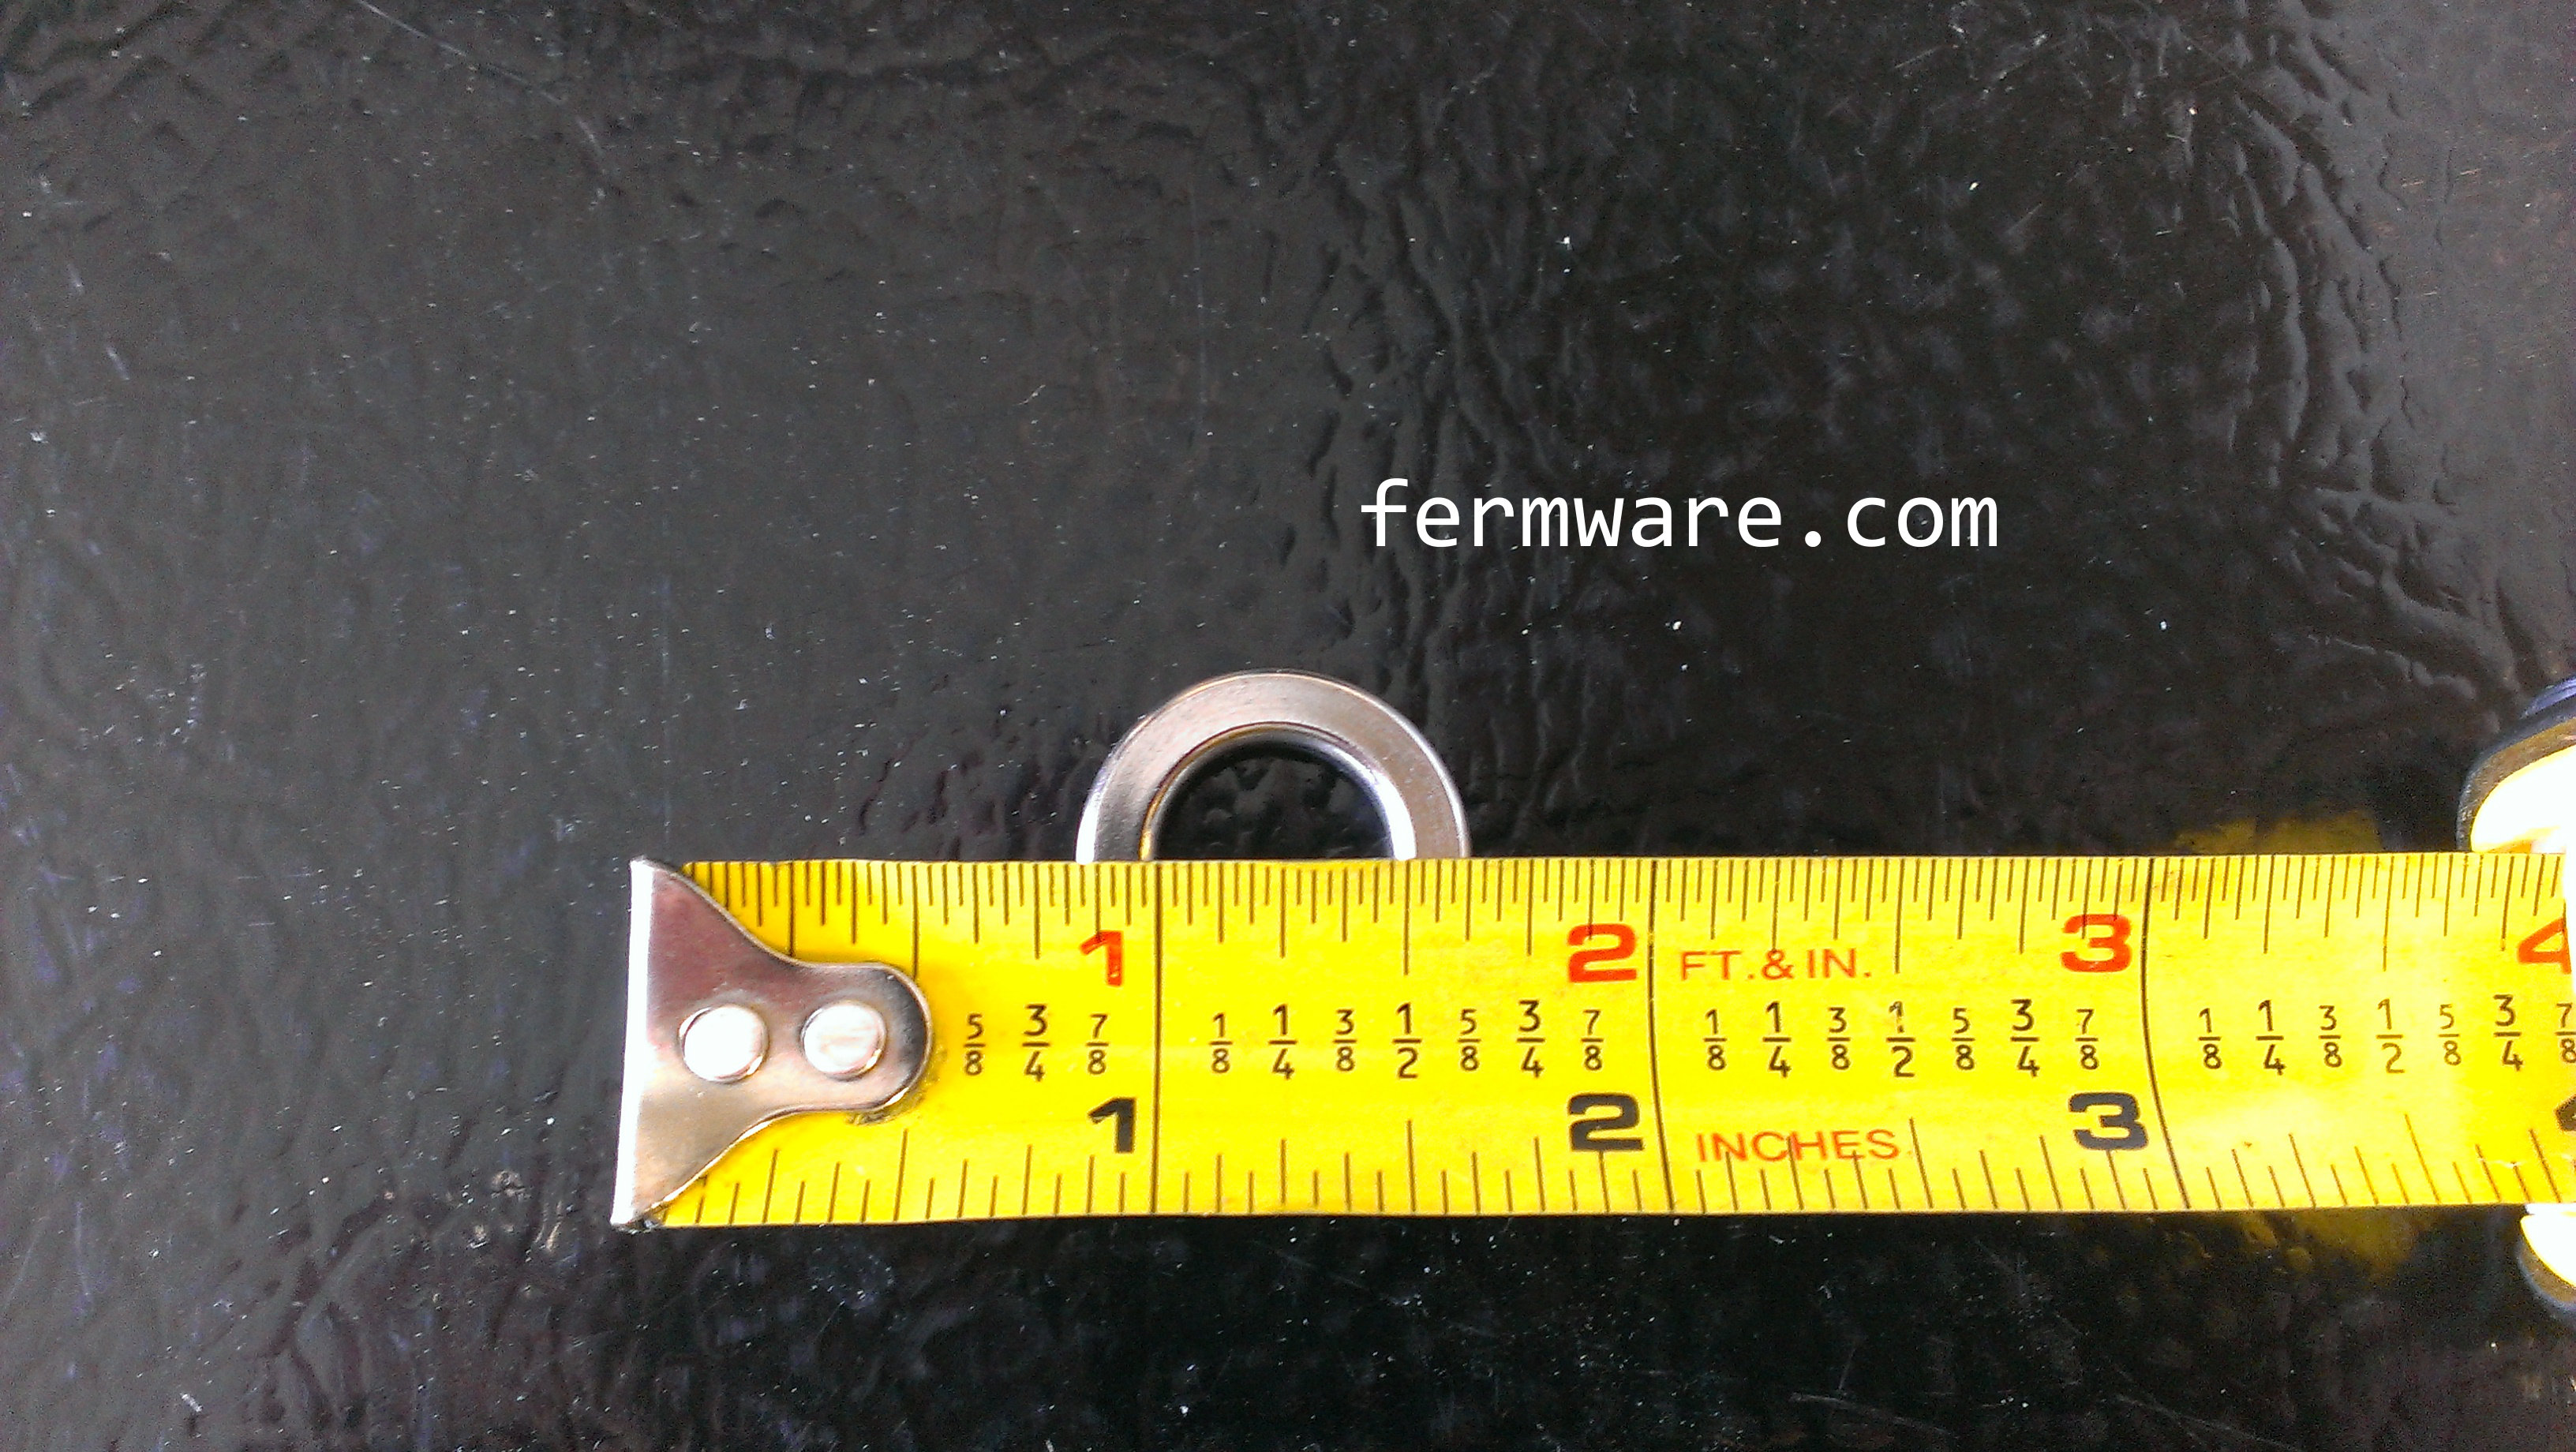
The thickness of the lock washer (when compressed) was about 3/32″.
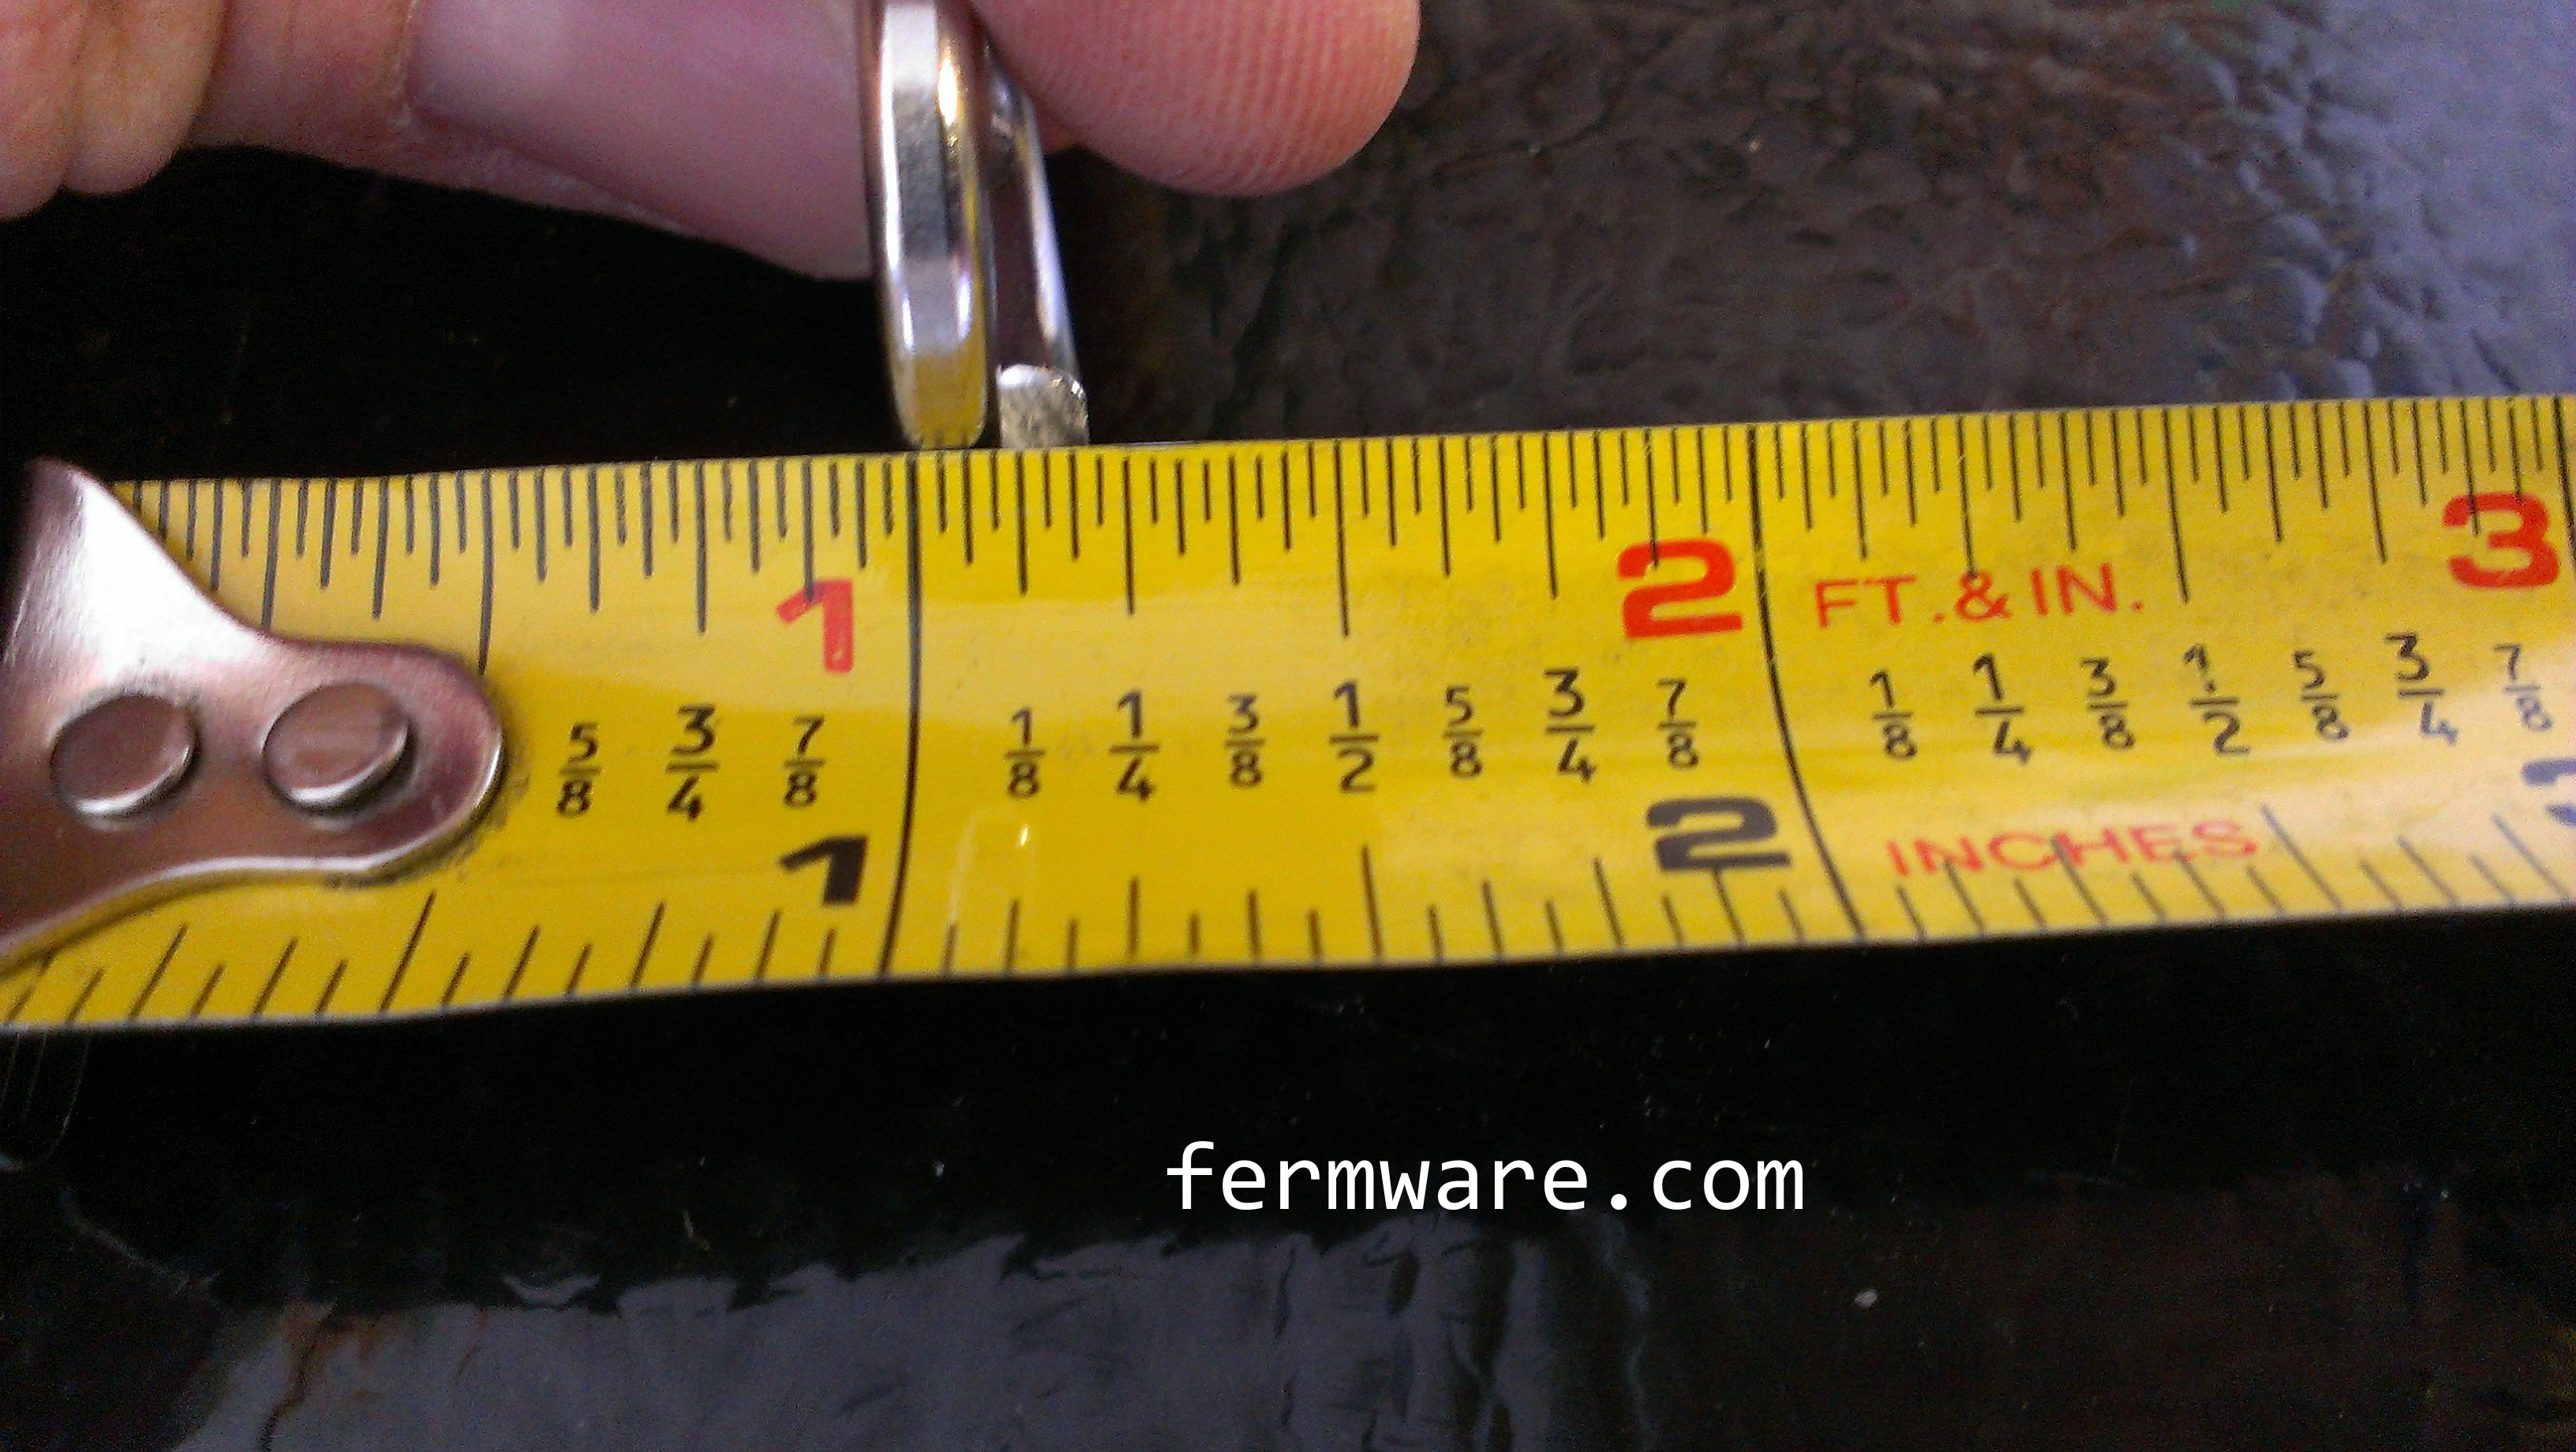
Here is an alternate arrangement that also works if you don’t need a ton of thickness.

I’m going to use some car talk here. If you’ve opened up the holes properly on the brackets, you should still have a zero camber wheel angle. The main challenge will be to ensure there is zero toe, or the amount the tires steer in toward each other or away from each other. The best way to check this (making the assumption that your frame rails are straight) is to measure the distance from the bicycle rim at the front of the wheel to the frame rail and make sure that the distance from the rim at the back of the wheel to the frame rail is the same. If there is any error, you are better off with very minor toe-in (wheels pointed at each other at the front side). This may take some tweaking, so don’t secure the lag bolts all the way until you have your mounting plates in the right position.
Here are some different views to show how everything goes together.


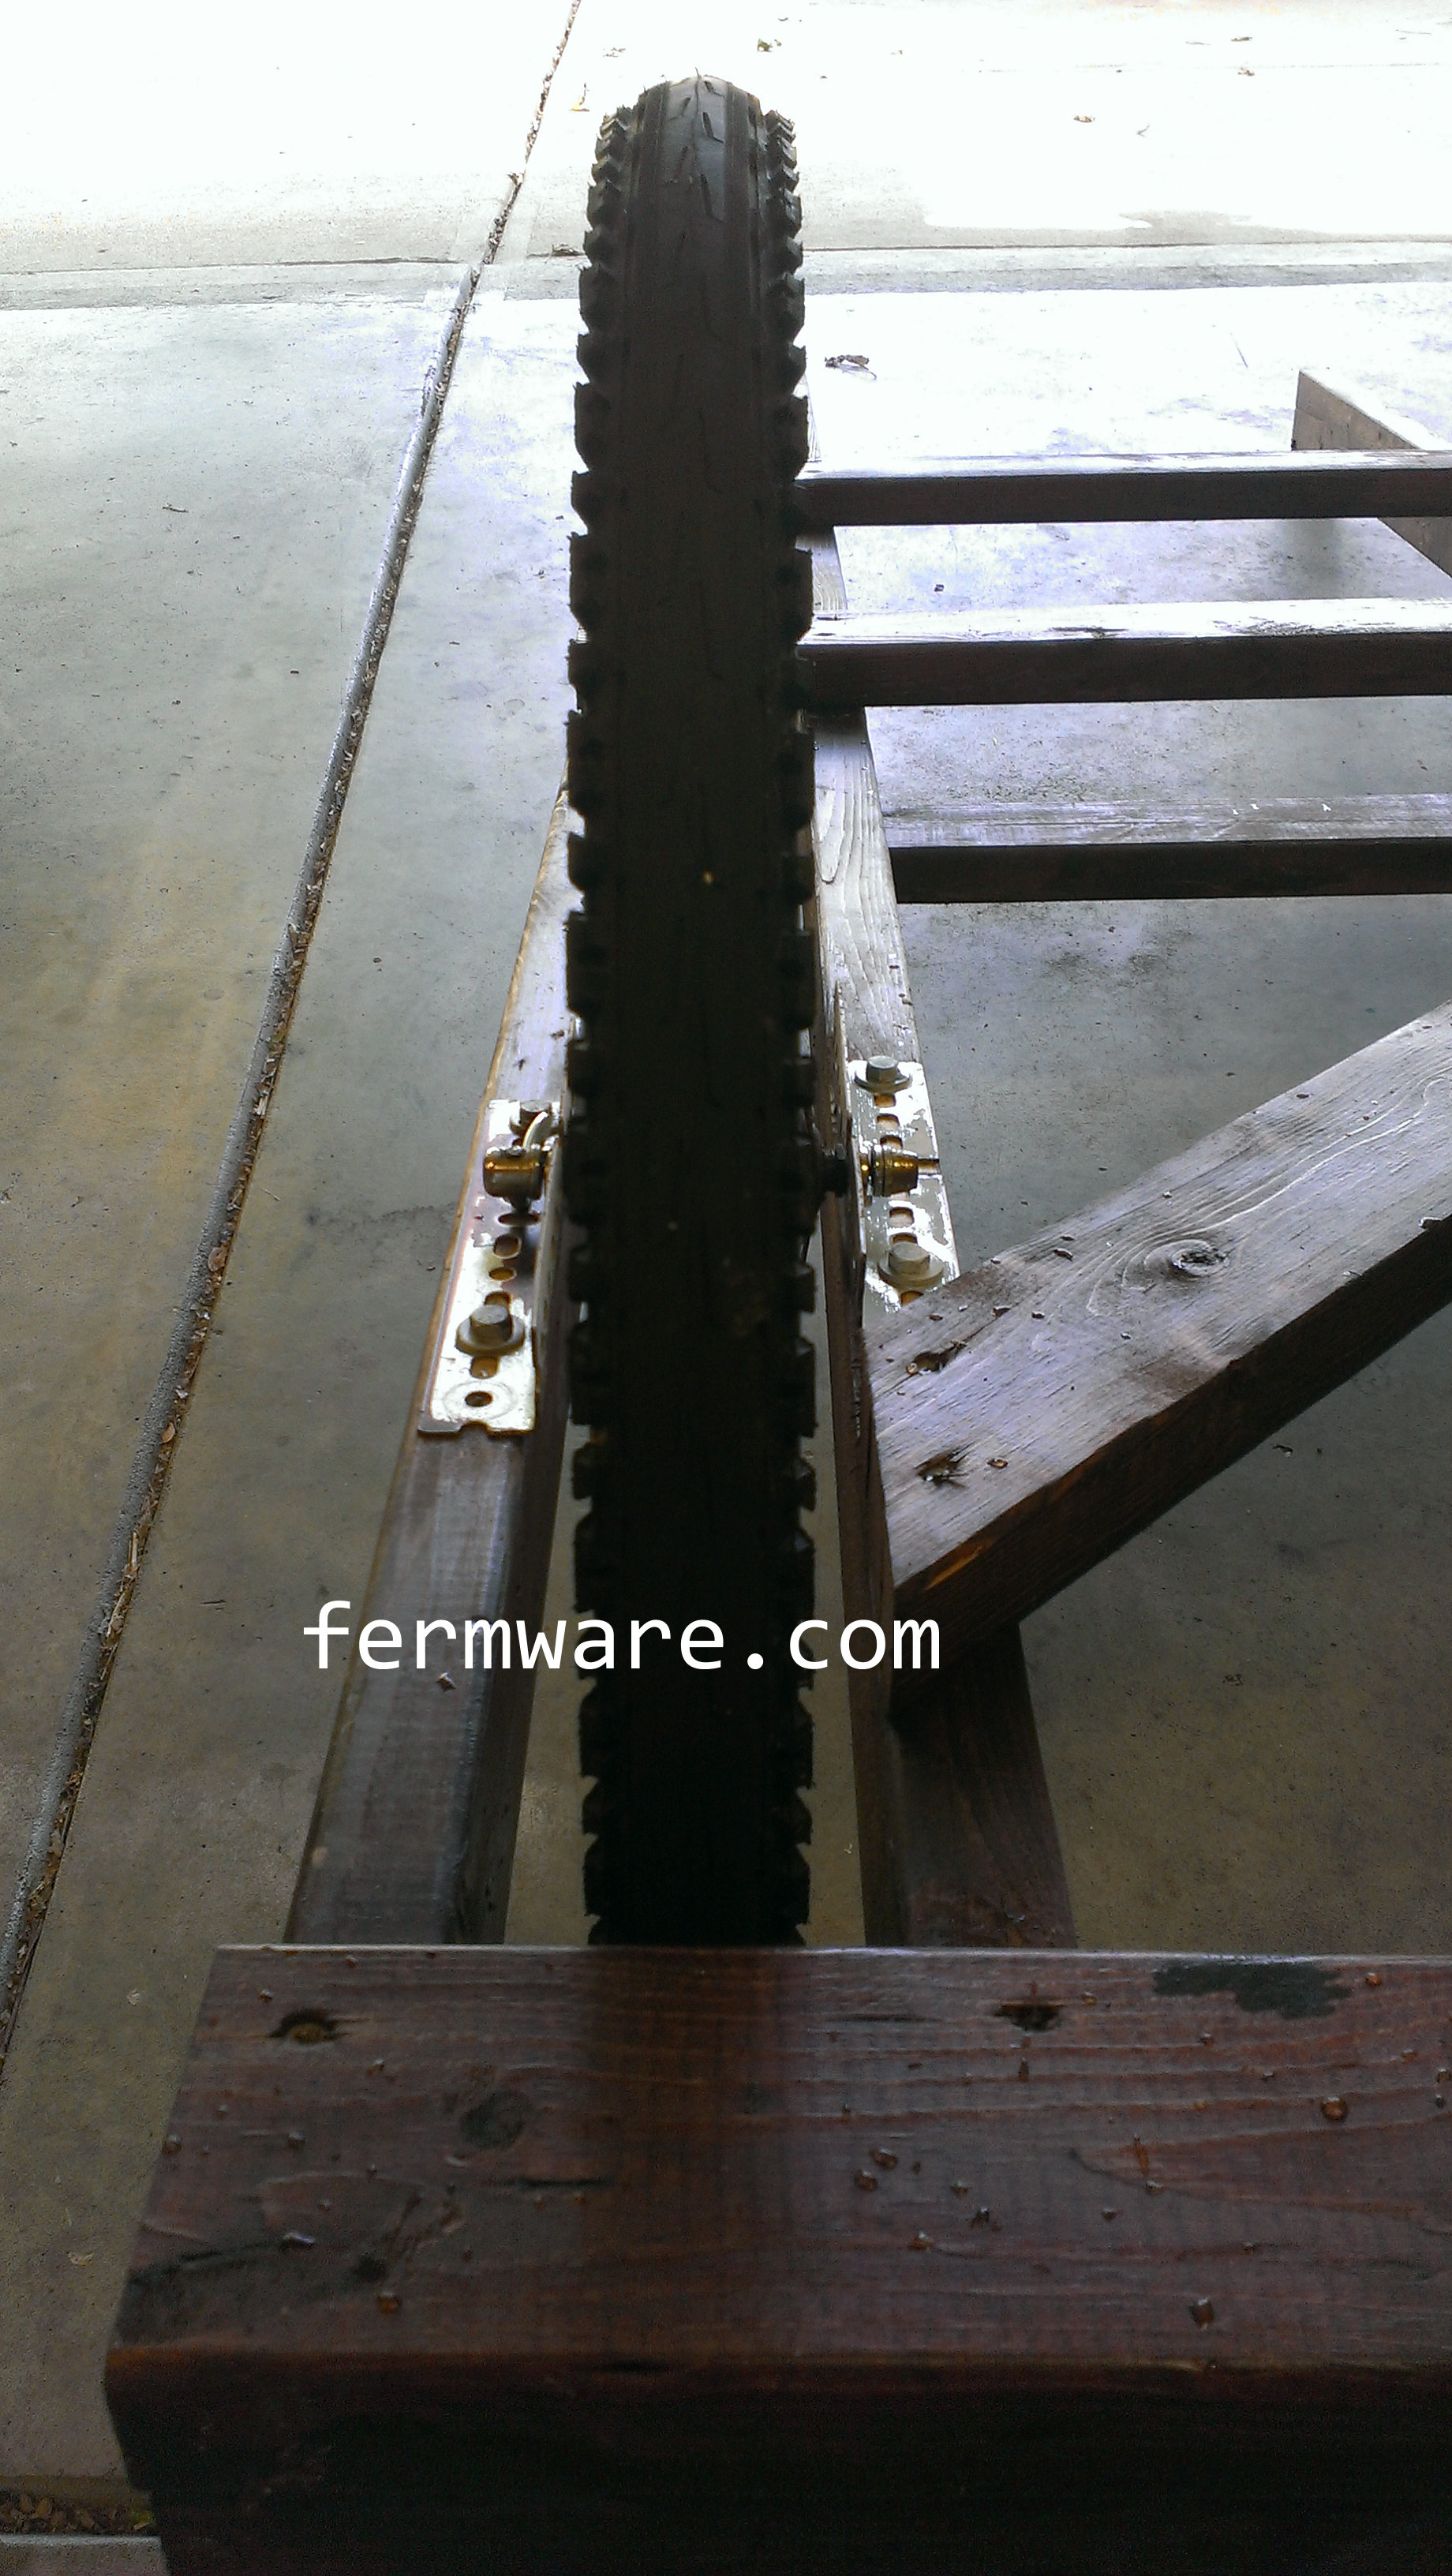

There you go, bicycle wheels delivering calories, rather than helping burn them!
Up next…
Getting the keezer onto the Bierwagen
Posts for this Project:
Part 1: Introduction
Part 2: Building of the frame
Part 3: Bicycle wheel attachment (this post)
Part 4: Getting the keezer onto the Bierwagen
Part 5: Keezer collar
Part 6: Storage of the Bierwagen