Category Archives: Keezer / Kegerator

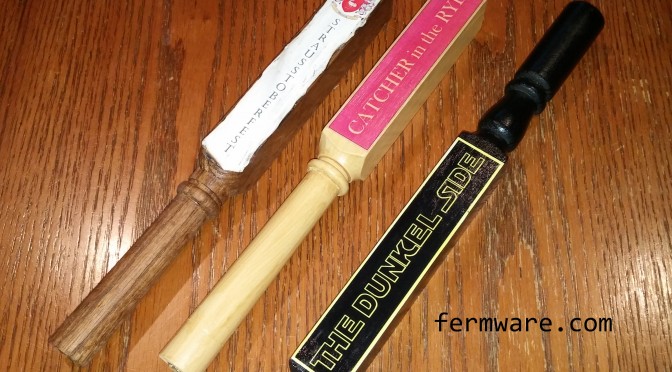
Super Easy Tap Handles

Ok, so the big party is two days away and you realize that in your months of planning down to the last detail, you actually forgot one important detail.

Beer…Check

Keezer cart…Check

New faucet system…Check

Method to actuate said faucet system…DOH!!!!

A weekend of brewing followed by 9+ weeks of TLC and lagering of your Oktoberfest beer.  This needed some representation.  A couple pairs of vice-grips were not going to work in this situation.

Difficulty: level_2

Time Required:

Once you have collected all of the supplies, about an hour max.  More if you are also going to paint and design your own labels.

Affiliate Links

Cost:

Less than $10 for two tap handles

Required:

009-Brass Insert

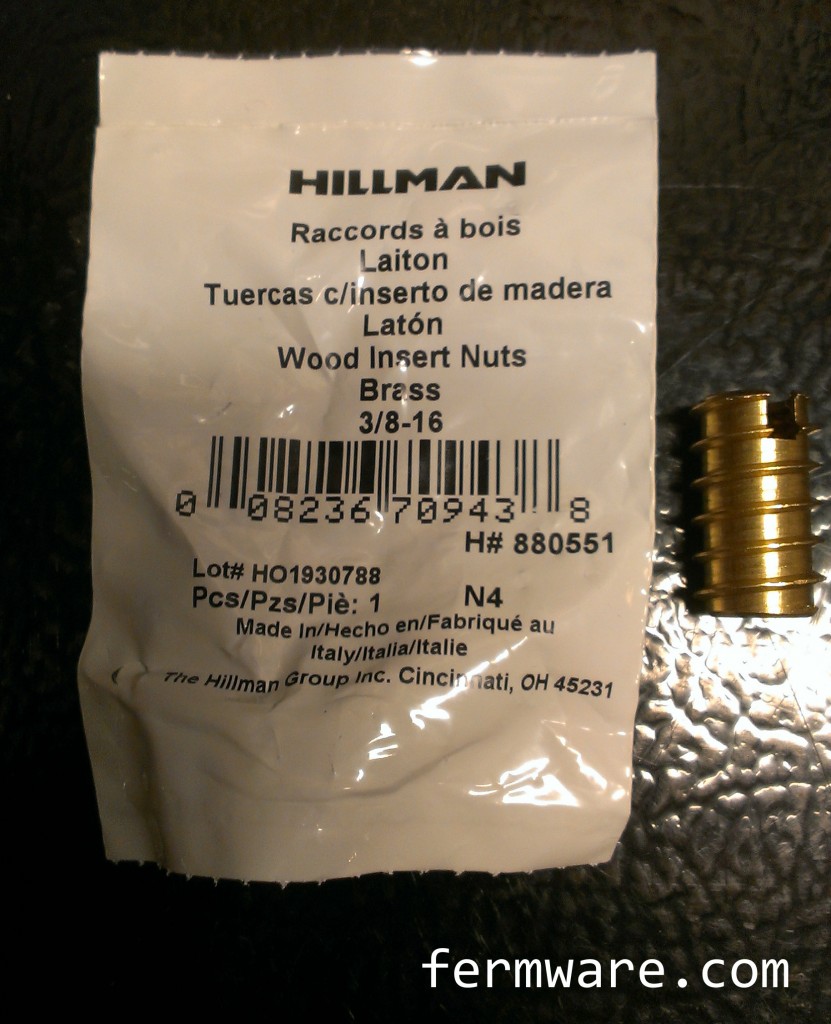
3/8″-16 Brass threaded inserts

009-Spindle
1x wooden staircase spindle

Tools:

Chop saw or miter saw
Some sort of vice or clamping system
Hand drill and drill bits up to 1/2″

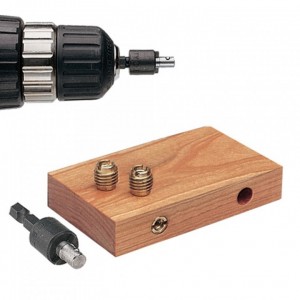
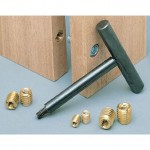
Insertion tool (optional if you plan ahead, not an option if only have days).  Make sure you get the 3/8″-16 version.  As of 5/31/14, the price was $10.99 at Rockler.

Insert_tool


Or there are T-handle designs

t-handle_insertion_tool

Alternately, you could use a 3/8″-16 threaded bolt and two corresponding nuts, which I also didn’t have on hand at the time of build.  If you are doing these often, I would get a tool.  If not, maybe make the call yourself on how MacGyver you want to get.

How it’s made:

Cut handles to length

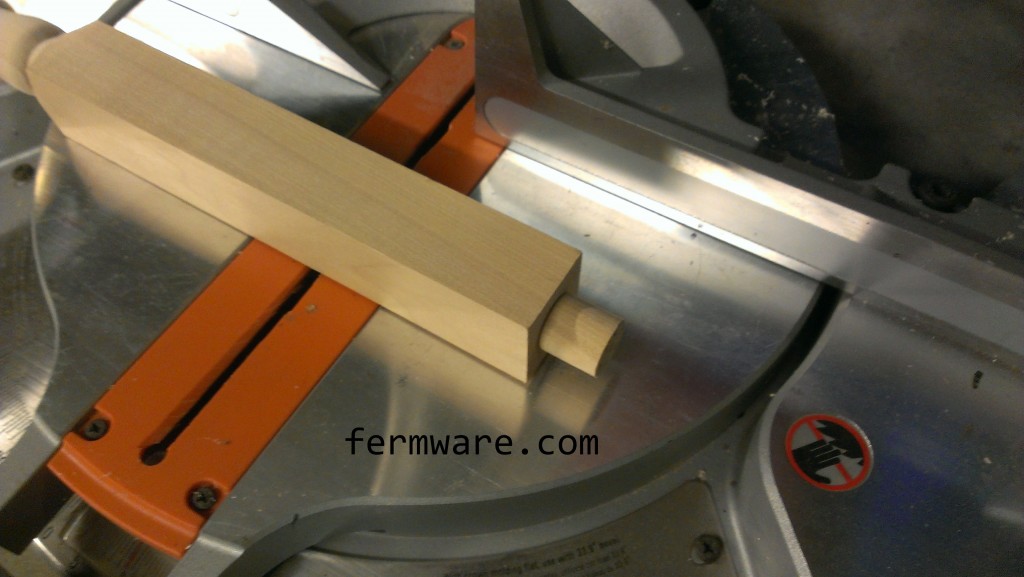
First, you need to cut off the little nubbin on the end of your spindle (if applicable).

009-Spindle nubbin

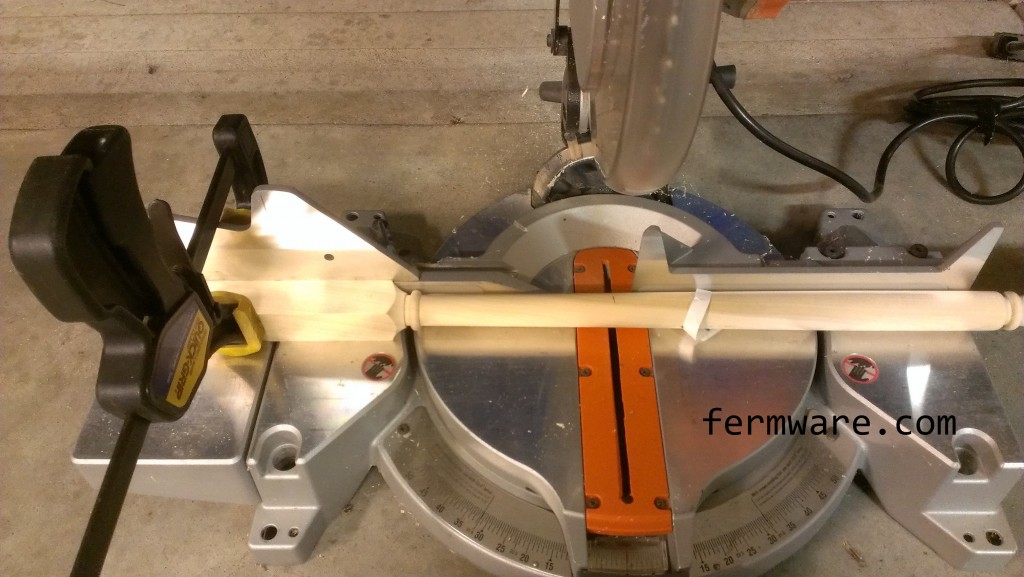
Then, decide how long you want your tap handles to be and cut each of the fancy ends off of the spindle to your desired length.  Try to cut perpendicular to the spindles axis.  I used a quick clamp to hold it to my miter saw (basically because I had misplaced the super handy integrated clamp that went with the saw).

009-cutting spindle

Drill holes

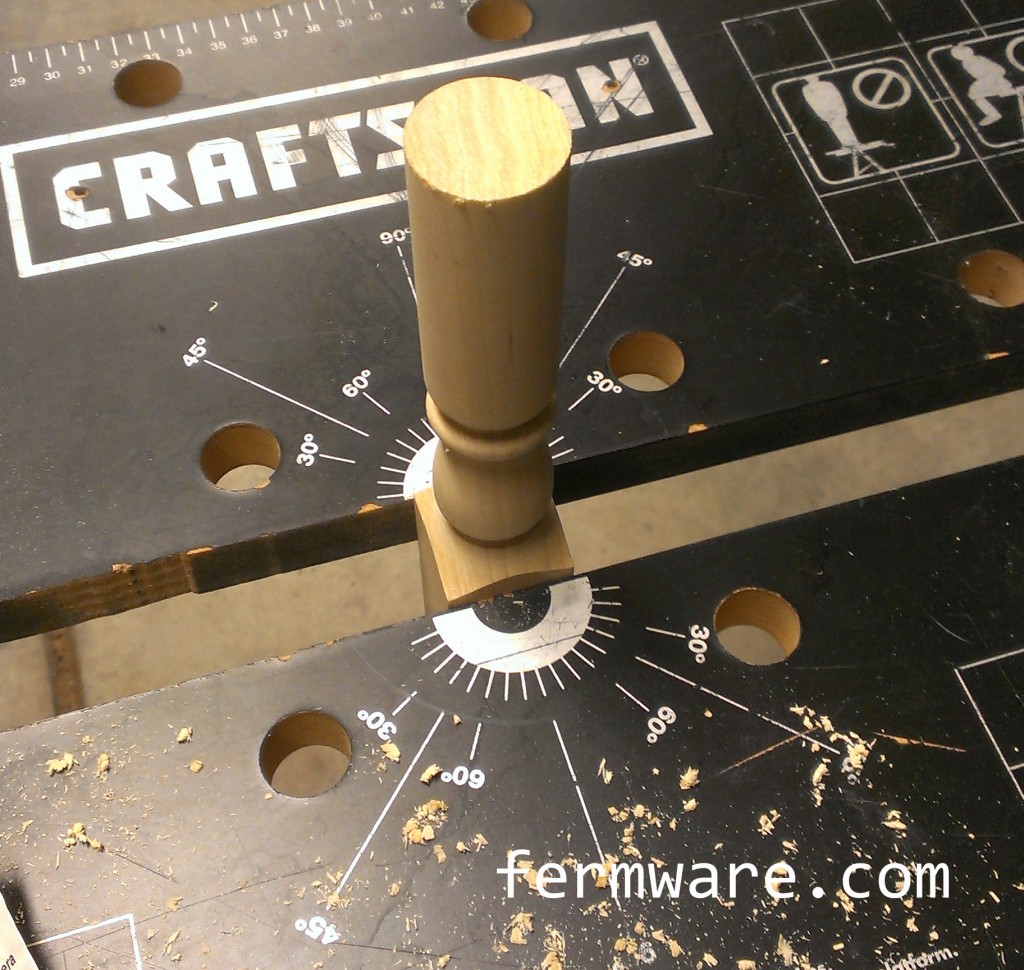
Using your vice or whatever clamping system you fancy, get your tap handle secured for drilling.  If you are seriously cool and have a lathe or a drill press, go for it.  I tried a hole drilling jig, but the problem is that the spindles do not have nice constant diameter sections, which made squaring up the jig virtually impossible.

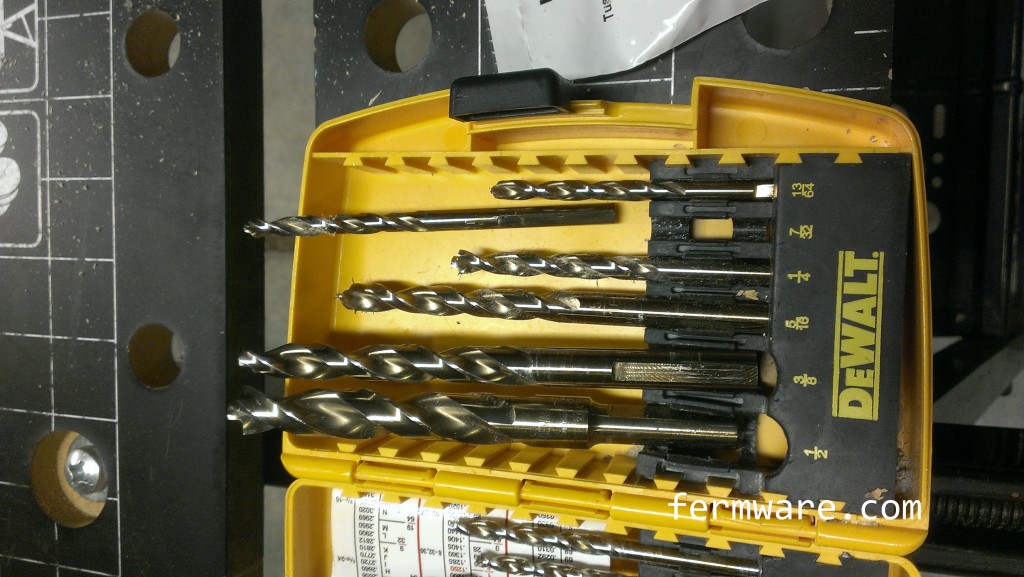
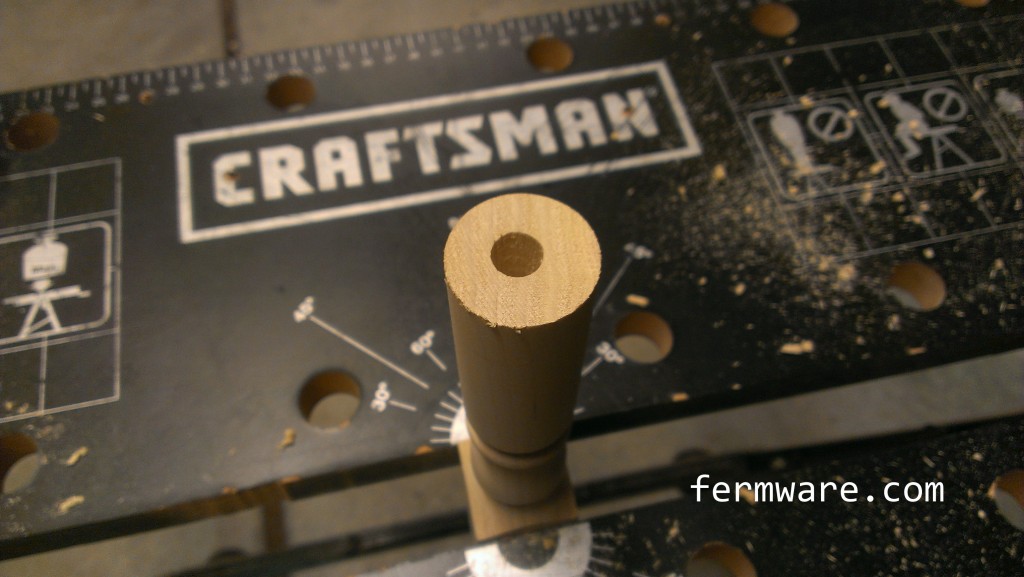
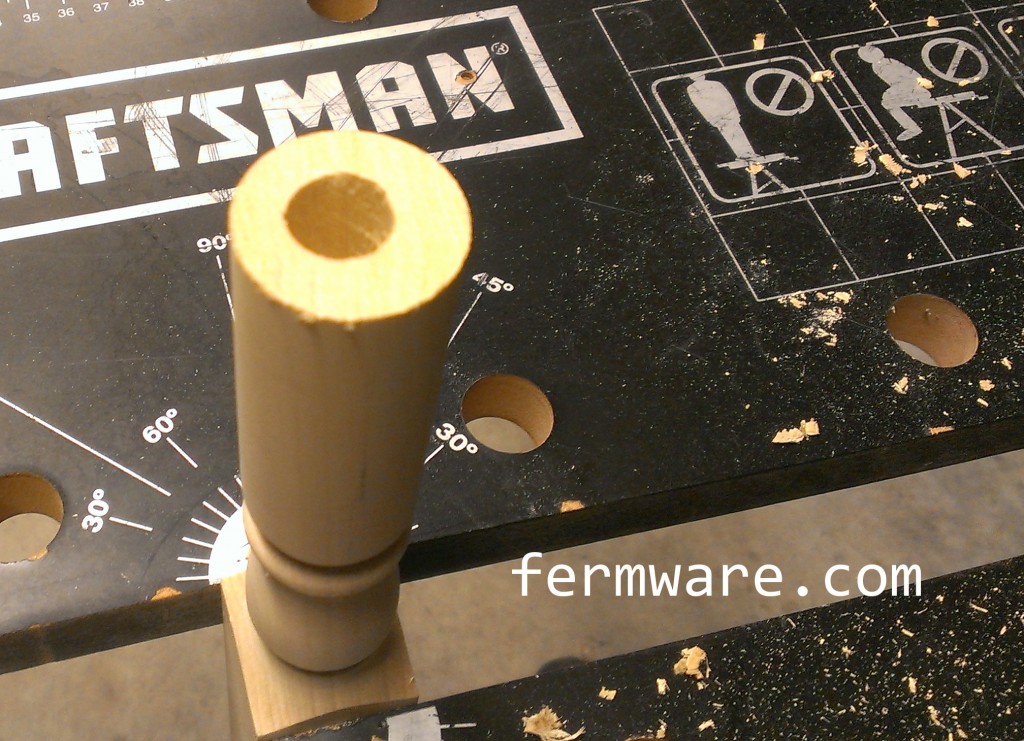
Drill progressively larger holes in the bottom end of the tap handle to work your way up to a 1/2″ hole.  If you have the means, I highly suggest you don’t drill off center as I have obviously done in these pictures.

009-drill bits

009-drill 1

009-drill 2

009-drill 3

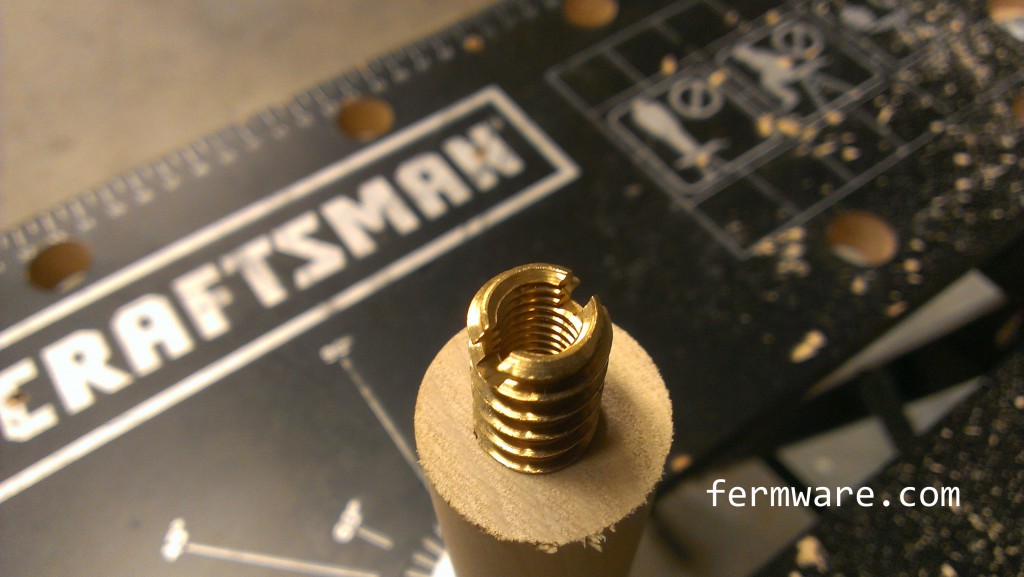
Install the insert

009-install brass insert 1

009-install brass insert 2

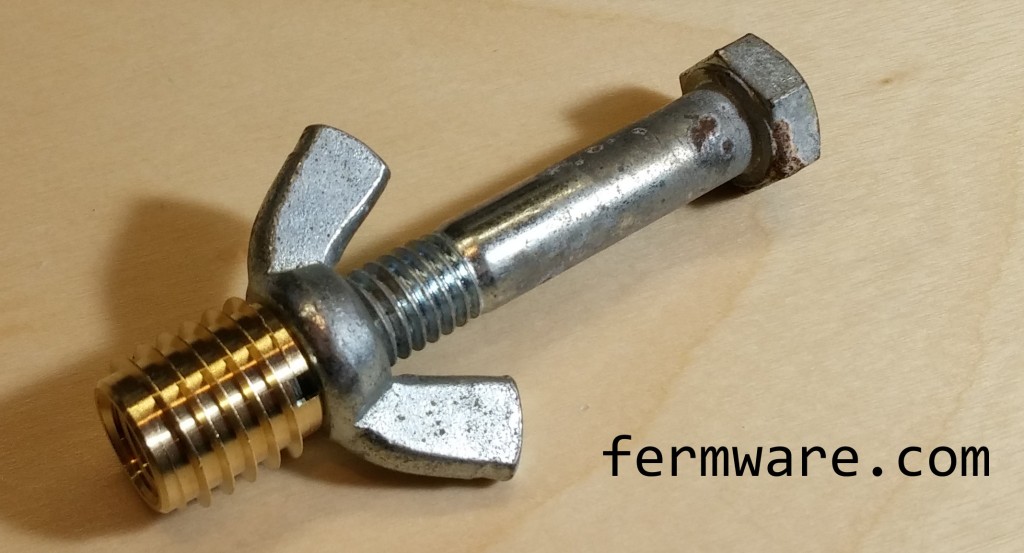
November 2, 2014 update:  You’ll see further down alternate methods to install the insert.  This picture directly below shows my most recent “tool-less” method.  I use a standard 3/8-16 bolt along with a wing nut.  You thread the wing nut onto the bolt as shown, then also thread the brass insert almost fully onto the bolt.  Then tighten the wingnut to the brass insert.  You can then use this assembly to thread the insert into the tap handle.  When the brass insert is fully installed, just undo the wing nut and unthread the bolt.

009-alternate install method

Here is the “proper” method below:

Insert_tool

My initial MacGuyver method:

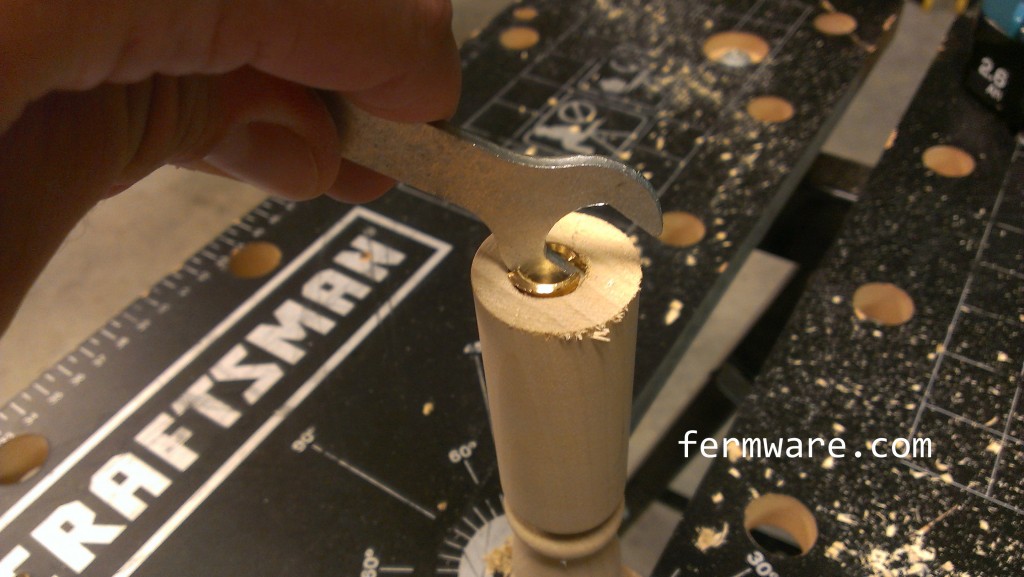
I don’t know how this worked out, but I needed something that would fit in the slot and help me screw the insert in.  I ended up using a cheapie wrench that came with some sort of put-it-together-yourself furniture.

These are hard to get started straight, so do your best. Usually they pull themselves straight after the first full thread or two. If not, you may want to back it out and start again.

009-install brass insert 3

NOTE: This is NOT the proper way to do this.  I just made do with what I had.  If you plan ahead, get an insertion tool or use the bolt method I mentioned above.

Getting the insert flush with the bottom takes a little extra “ingenuity”.

009-install brass insert 4

Finishing

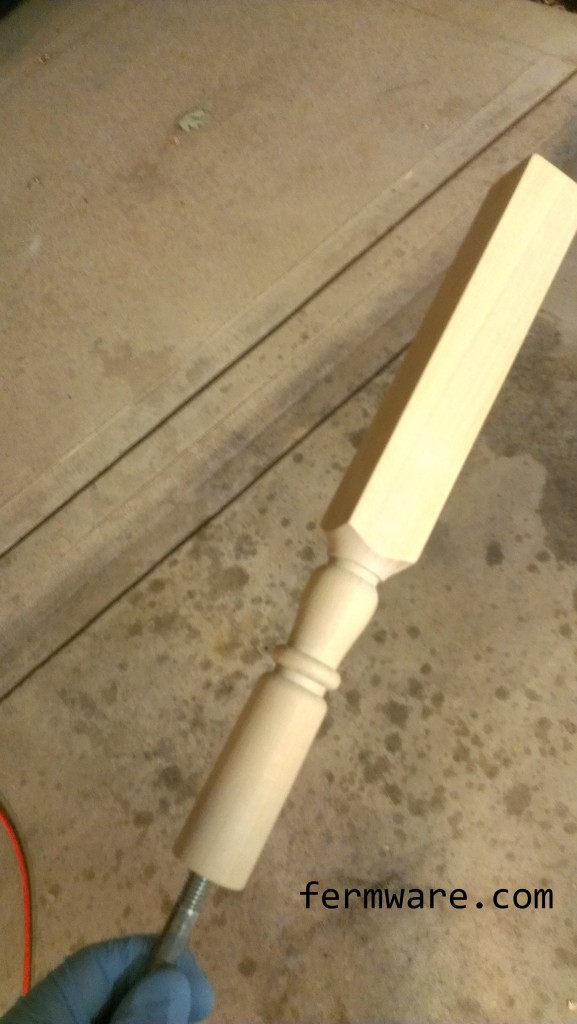
Alright, so it’s functional at this point and you could go ahead and use it.  If you want to make it a little more presentable, you could sand and paint it and add labels.  For painting, I just used a 3/8″-16 bolt I had and used it as a handle while I spray painted.  You can also stain as I did on some other tap handles.  Before you apply your labels, I would suggest threading the tap handles onto the faucets and determine which orientation is best for not looking crooked.  If you drilled the holes by hand this is imperative.  If you drilled using a method that is guaranteed straight, proceed at will.

009-Ready to paint

The first year, I designed some labels and my crafty wife stained the handles, did the burned edge treatment on the labels and sealed them with some mod podge.


009-Stained tap handle

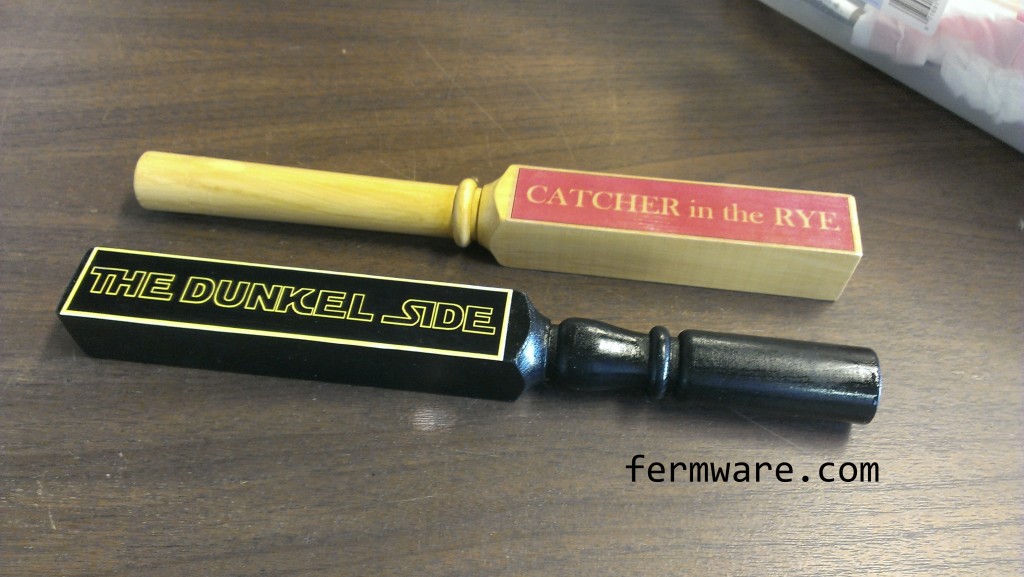
These are my painted versions for my Dunkel and Rye PA.

009-painted tap handles

There you have it folks.  Super easy tap handles.


Easy Fermenter Labels

Easy Fermenter Labels

Difficulty: level_1

Time Required:

As long as it takes you to tear off a piece of tape and write on it

Background:

This is my method of keeping track of what is what by labeling my fermenting buckets that allows you to re-use the label when you transfer to a secondary then your keg.

Affiliate Links

Required:

Gaffer’s tape
Marker

Gaffer’s tape (aka “racers tape”, “hundred mile an-hour tape”)

*”mile an-hour” is the colloquial way to pronounce “miles per hour”

I was first introduced to this tape when I started working in IndyCar racing as a DAG (Data Acquisition Guy).  When setting up the pits and timing stands, we would use it to tape down the various cords we would need to run along the ground so that people wouldn’t trip over them.  It is a cloth-like tape that can be easily torn by hand and comes in different colors.  The best thing about it though is that after sitting outside for 3 days in the sun, when you pull it off, it doesn’t leave the sticky residue that you get with duct tape, electrical tape, masking tape, etc.

It got it’s name from gaffer’s in the entertainment industry using it for pretty much the same purpose.  You can also see it on NASCAR racecars when they go out for qualifying.  They tape off the grille and other inlets when they do a qualifying run to reduce aerodynamic drag, at the expense of cooling.

Where to buy Gaffer’s tape:

  • Amazon
  • Hardware store
  • Racers supply store (most variety of color and best price)
  • Music store (the instrument kind, not the CD kind. If those still exist??)

*It’s typically about 3x the cost of duct tape, but in my opinion, much more useful.  And keep in mind that sometimes, it the rolls have a lot more length of tape on them than duct tape or masking tape rolls.

Process:

Straightforward really…

005-Fermenter Labels - gaffers tape label

Peel off a piece of tape, stick it on the fermenter and write on it with a marker.

Be careful however, the tape doesn’t absorb the marker fluid immediately and if you wipe across it, it could get on your fingers.

N. or S.” is my Christmas Ale, Naughty or Spice.  Cheesy name, but tasty brew!  It should be carbonated in time for Thanksgiving!  38 is the batch number.  Just a habit of mine and how I name them in my brewing software.

005-Fermenter Labels - pulling gaffers tape off

Peel off and re-apply

When transferring from your primary to your secondary, just peel off and re-apply to the secondary.
*Apply to a room temperature vessel. If you try to apply it to something cold, it most likely has condensation on it and the tape will not stick

005-Fermenter Labels - gaffers tape - no line

No unsightly residue

“Can’t see the line, can you Russ?”

Keg labels

005-Fermenter Labels - Keg

 Same thing when transferring to your keg.

005-Fermenter Labels - Keg in keezer

Visible enough in your keezer

**I do sometimes just write on the top of the keg with a Sharpie and wipe if off with acetone when I am cleaning the keg


Keezer / Kegerator / Deep Freezer Dolly

An easy way to store your keezer / kegerator under a shelf

Difficulty: level_3 *

*Due to the potential of needing help to lift the keezer onto the dolly

Time Required:

one morning or afternoon, plus overnight if gluing the base is required

Background:

As I mentioned in my About: This Blog page, I have limited space for my equipment and the Keezer is no small piece of equipment.  It certainly wouldn’t go with the decor of the house and I also didn’t want it to be in easy reach of the kids.  Not that they would be drinking it, but I would be concerned they would think it was funny to squirt pressurized beer at will.  In my opinion, having the chest freezer sitting on the garage floor with nothing above it was a waste of air space.  My ultimate solution was to build a keezer dolly that would allow me to have easy access, but could easily be rolled under a shelf in the garage.  It also makes it easy to clean behind it, rolling it to the edge of the garage when defrosting or draining the moisture buildup and is just all around convenient.  I’ve had it for 2+ years and it has been great.  I’ve also had no issues with it being in the garage and it’s on an outside wall.

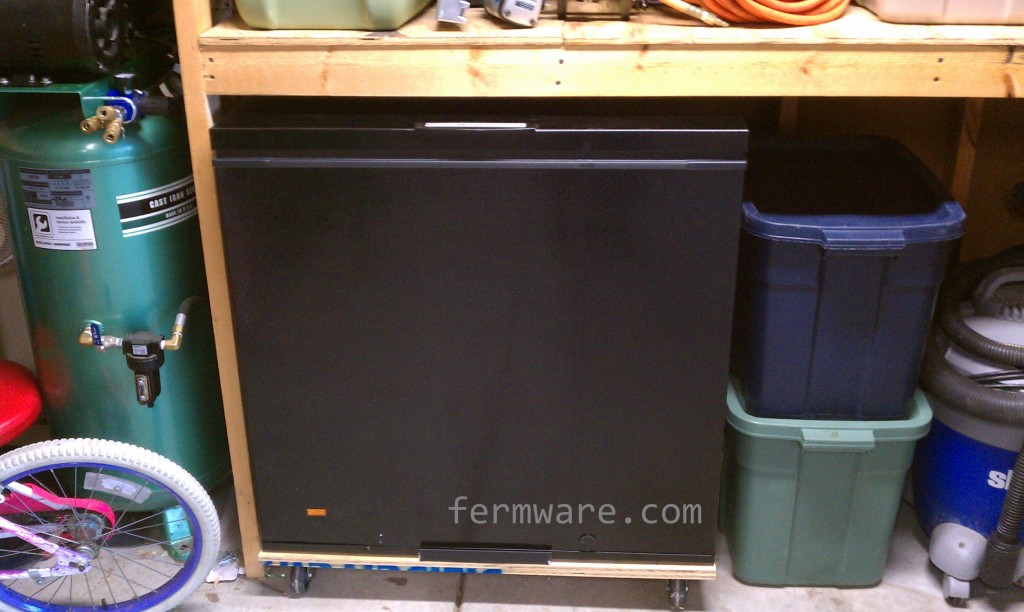
001-Keezer Dolly - Keezer put away wm


My keezer happily in it’s place under a shelf in the garage.

Important note: This would not be wise for a vertical freezer or refrigerator. It could easily tip when moving. This would not be good. Those typically have some wheels anyway.

Affiliate Links

Parts Required:

  • Casters, carriage bolts and nuts/washers
    • You could buy a moving dolly for the parts (potentially inexpensive way to get casters and bolts)
      • I got mine from harbor freight
      • Movers dolly
      • I usually pull 20% off coupons from my Road & Track and Car and Driver magazines
    • Size / Type
      • Big enough to roll over separations in the floor
      • Small enough to not raise the keezer too high
        • Unless you plan on rolling it into the yard (later post blog, stay tuned…)
      • Choose solid rubber wheels.  The air filled tires have more resistance on flat surfaces
      • The wheels from the Harbor Freight dolly I used are 3″ in diameter and with the casters are about 3.5″ tall
    • Plywood sheet
      • About 1″ larger than your keezer on all sides
      • To use the same bolts from the dolly, make your platform the same thickness of the dolly (more on that later)
    • Some type of L-channel (AKA angle iron or L bracket) to help retain the keezer on the dolly
      • I used some leftover channel from my garage door opener installation 10 years ago (I knew it would come in handy at some point!)
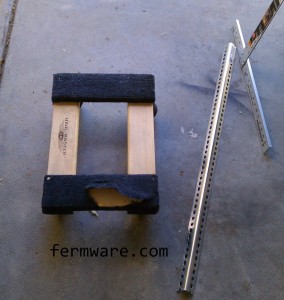
001-Keezer Dolly - Dolly and L Channel wm
Donor moving dolly and L Channel


The Build:

Disassemble the dolly to remove the casters (skip to the next step if you just bought them)

  • loosen the bolts on the underside that attach the casters to the frame
  • 001-Keezer Dolly - dolly underside wm
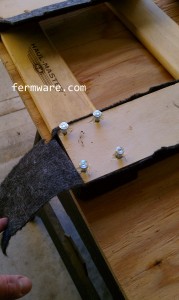
  • If you are using the Harbor Freight dolly or a similar one, you can cut the carpet coating with a knife and peel it off
  • push through or hammer the carriage bolts out the other side
  • 001-Keezer Dolly - taking bolts out wm
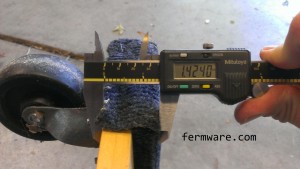
  • measure the thickness of the dolly’s frame (important for the building of the platform)
  • 001-Keezer Dolly - measure thickness wm

Build the Platform

  • Dimensions
    • It should be slightly larger than the maximum plan area (top view) of the keezer
    • This is so that the first thing that runs into walls is the base, not the handles or hinges
    • The sides can be close, but I would overshoot by 1/4″ or so
  • Thickness
    • If you take a look at the carriage bolts, you’ll notice that they probably aren’t fully threaded
    • You want to match the thickness of the platform with the bolts
      • Too thin: There will be too much thread extending out
        • It could potentially block rotation of the casters
        • If this is unavoidable, you could cut them after assembly with a hack saw or your favorite rotary tool
      • Too thick: You won’t get enough thread engagement to secure the casters
    • I simply doubled up the available plywood I had
      • cut 2 sheets the same size
      • put some wood glue between them
      • set something heavy on top and let them sit overnight

Attach the casters

  • Choose the location of the casters
    • Be sure to allow room on each edge for the wheel to rotate 360 degrees without swinging beyond the extents of the platform
    • Note how in the picture below, the wheel can extend beyond the frame when swiveled.  I didn’t want mine to protrude.
    • Rotation of caster wheel
      Rotation of caster wheel
  • Mark the holes and centers
  • Drill the holes with enough clearance for the carriage bolts
  • Go slightly oversize on the holes to allow for slop in your drilling and make it less frustrating to assemble
  • Put the carriage bolts through the holes (you may need to lightly tap them in with a hammer)
  • Secure on the other side with the nuts
    • Don’t go so tight that you pull the carriage bolts through the wood
    • If you have nyloc nuts, you should be ok to re-use them
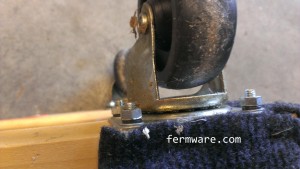
    • The moving dolly I used had split lock washers
      The moving dolly I used had split lock washers
    • Optional: I always have loctite on hand, go ahead and use a drop of low strength on each nut if you want

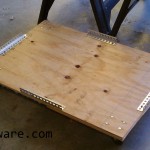
Retaining Pieces

001-Keezer Dolly - base on ground wm

  • These are to make sure that if the keezer slips on the platform, you won’t push it off the edge when moving it
  • you don’t need much length, just enough to catch the keezer on all four sides
  • I just cut the piece I had into 4 lengths
  • A hacksaw or cutoff wheel will do
  • If you want to be really cool, you could get some nuts and bolts to secure them
  • I just used some short drywall screws at opposite sides of the outer slots to secure them
  • Optional: I covered them with black gaffers tape to match the keezer and make it look nicer
    • If you don’t know what gaffers tape is, get some
    • It mostly does the same thing as duct tape
    • Doesn’t leave residue that duct tape does
    • I use it throughout my fermentation process for labels that can be removed and placed on the next vessel in the process. Works for me all the way through kegging.

Finish it up

  • You could paint it if you wanted
  • Go con / recruit a neighbor / friend to help you lift your keezer up onto the platform
    • Pay them with one of your delicious brews
    • Be sure to take everything out of it first!!

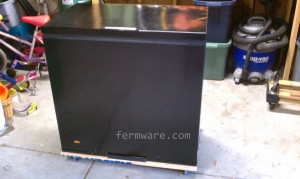
001-Keezer Dolly - Keezer rolled out wm