Have you always had that idea, but just didn’t know how to make it or didn’t have the funds to purchase an entire machine shop?
Well with recent advances in rapid prototyping technology and the expiration of some key patents, the availability of so-called 3D printers has exploded.
In this post, I’ll show you how I put mine to good use for my beer dispensing by designing and printing a tap handle.
Difficulty: 
Due to the investment in a 3D printer and the amount of time it takes to get one dialed in and making parts, this one gets a high difficulty rating.
You also must posses some CAD design skills to generate the required files to send to the 3D printer.
Time Required:
I can’t really put a time on this one. It’s really a labor of love.
For the print time only, this particular handle took about 11 hours of print time.
Affiliate Links
Cost:
$300 to $3000 depending on how nice of a printer you want to get.
Required:
3D Printer
Ever since I first saw my first rapid prototyping machine in college and then to a greater extent, seeing that this technology was nearly affordable for a DIY person like me, I’ve had a child-like fascination with these awesome machines. It may sound goofy, but I’ve got the same level of amazement that I did when my Dad bought our first computer in the early ’80s and I was able to type my name and have it appear on our television.
I got the Flashforge Creator and I am very happy with it. It had the right balance of cost, dual-extruders, reliability, non-proprietary filament and has required me to do a little bit of tinkering that has allowed me to better understand the capabilities 3D printers.
CAD Software
I use SolidWorks, but there are plenty of different paid packages as well as some free ones. I won’t even begin to list them here, but some good research will turn up what you want.
Designing:
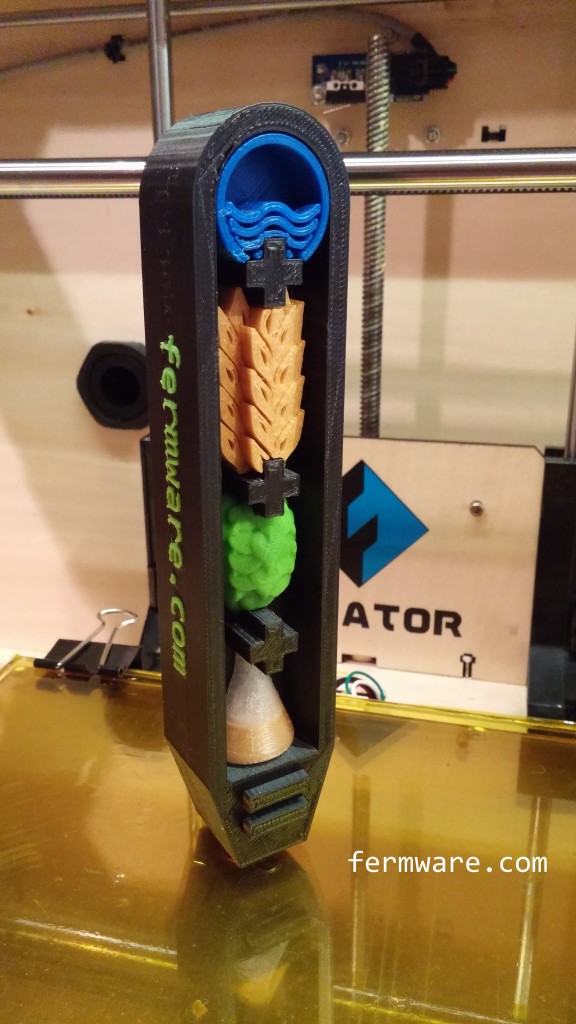
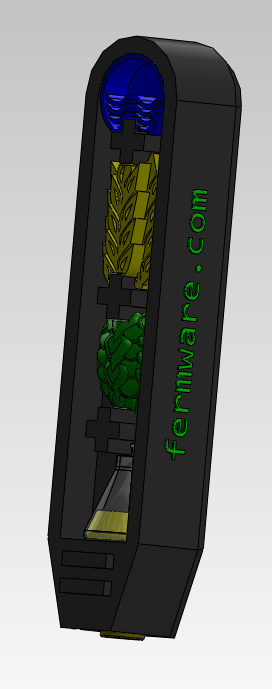
To print something, you must first have some sort of solid model. I had the idea that I would make something that would be extremely difficult to make out of wood, metal or other material. The beer geek in me also thought to go with the theme of beer ingredients.
Water + Barley + Hops + Yeast = Beer (the beer being real beer dispensing from the faucet)
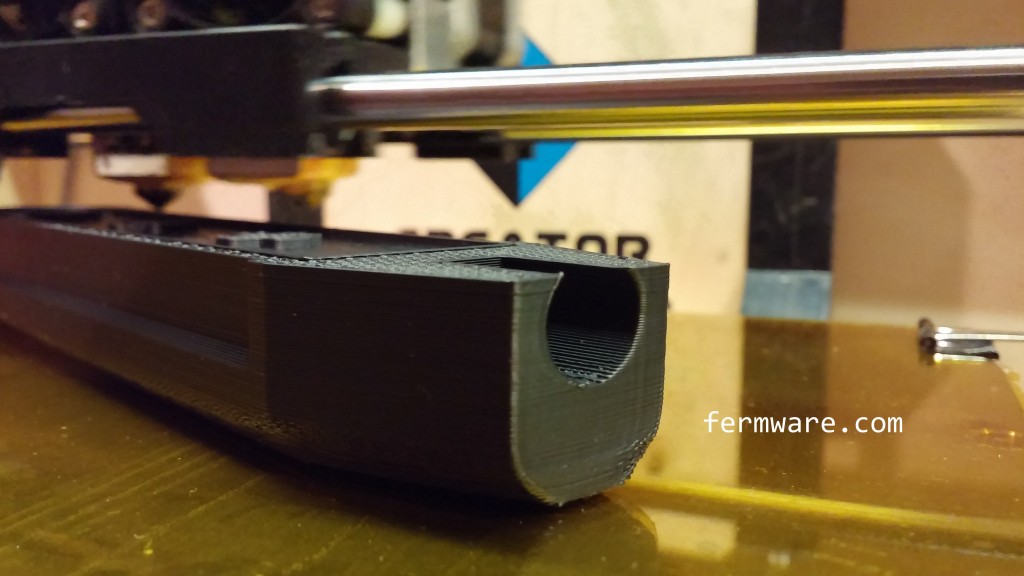
Printing:
This was mid-process in printing my first version of the tap handle. I wasn’t confident that I could print the logo in the handle in a different color at the same time. I printed a separate plaque that I would glue on later. I was still learning and I still learn something new every time I use the thing.
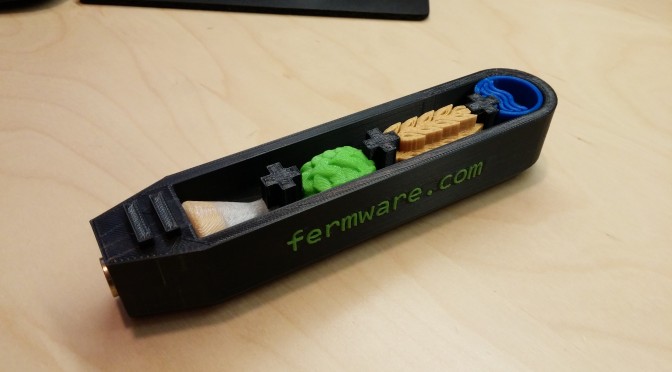
This is my second version where I was able to successfully print the letters vertically.
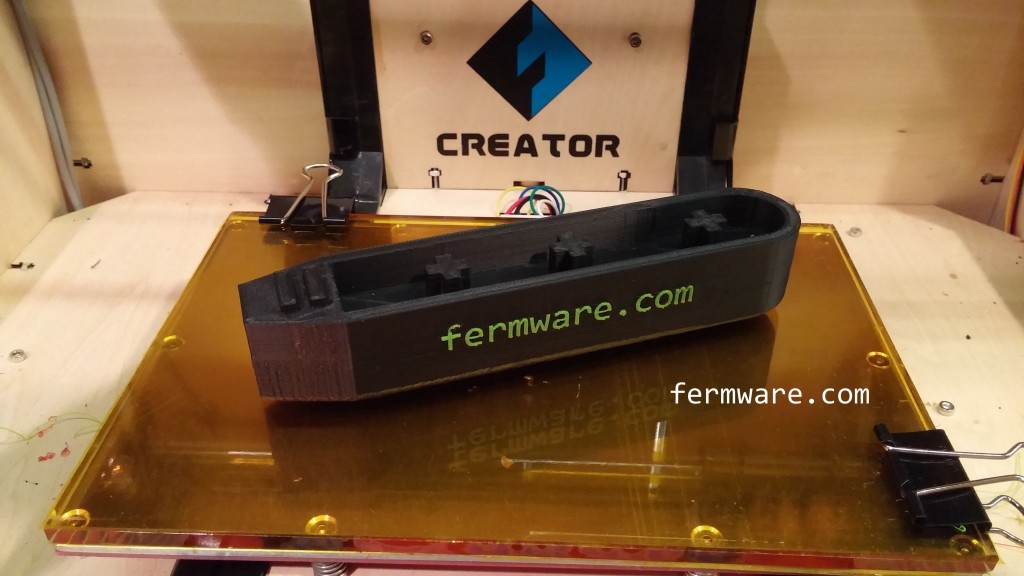
I had to print the other parts separately and glue them in later.
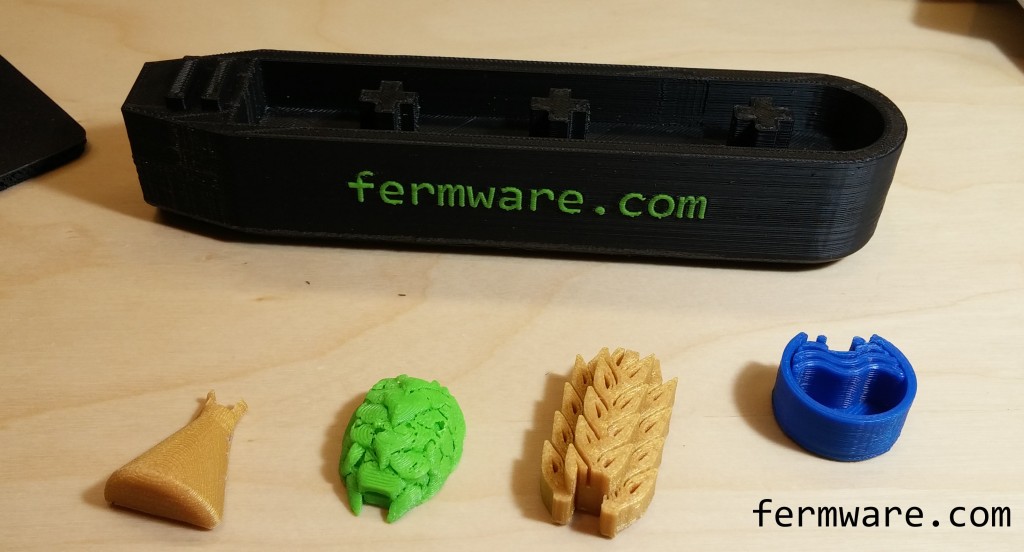

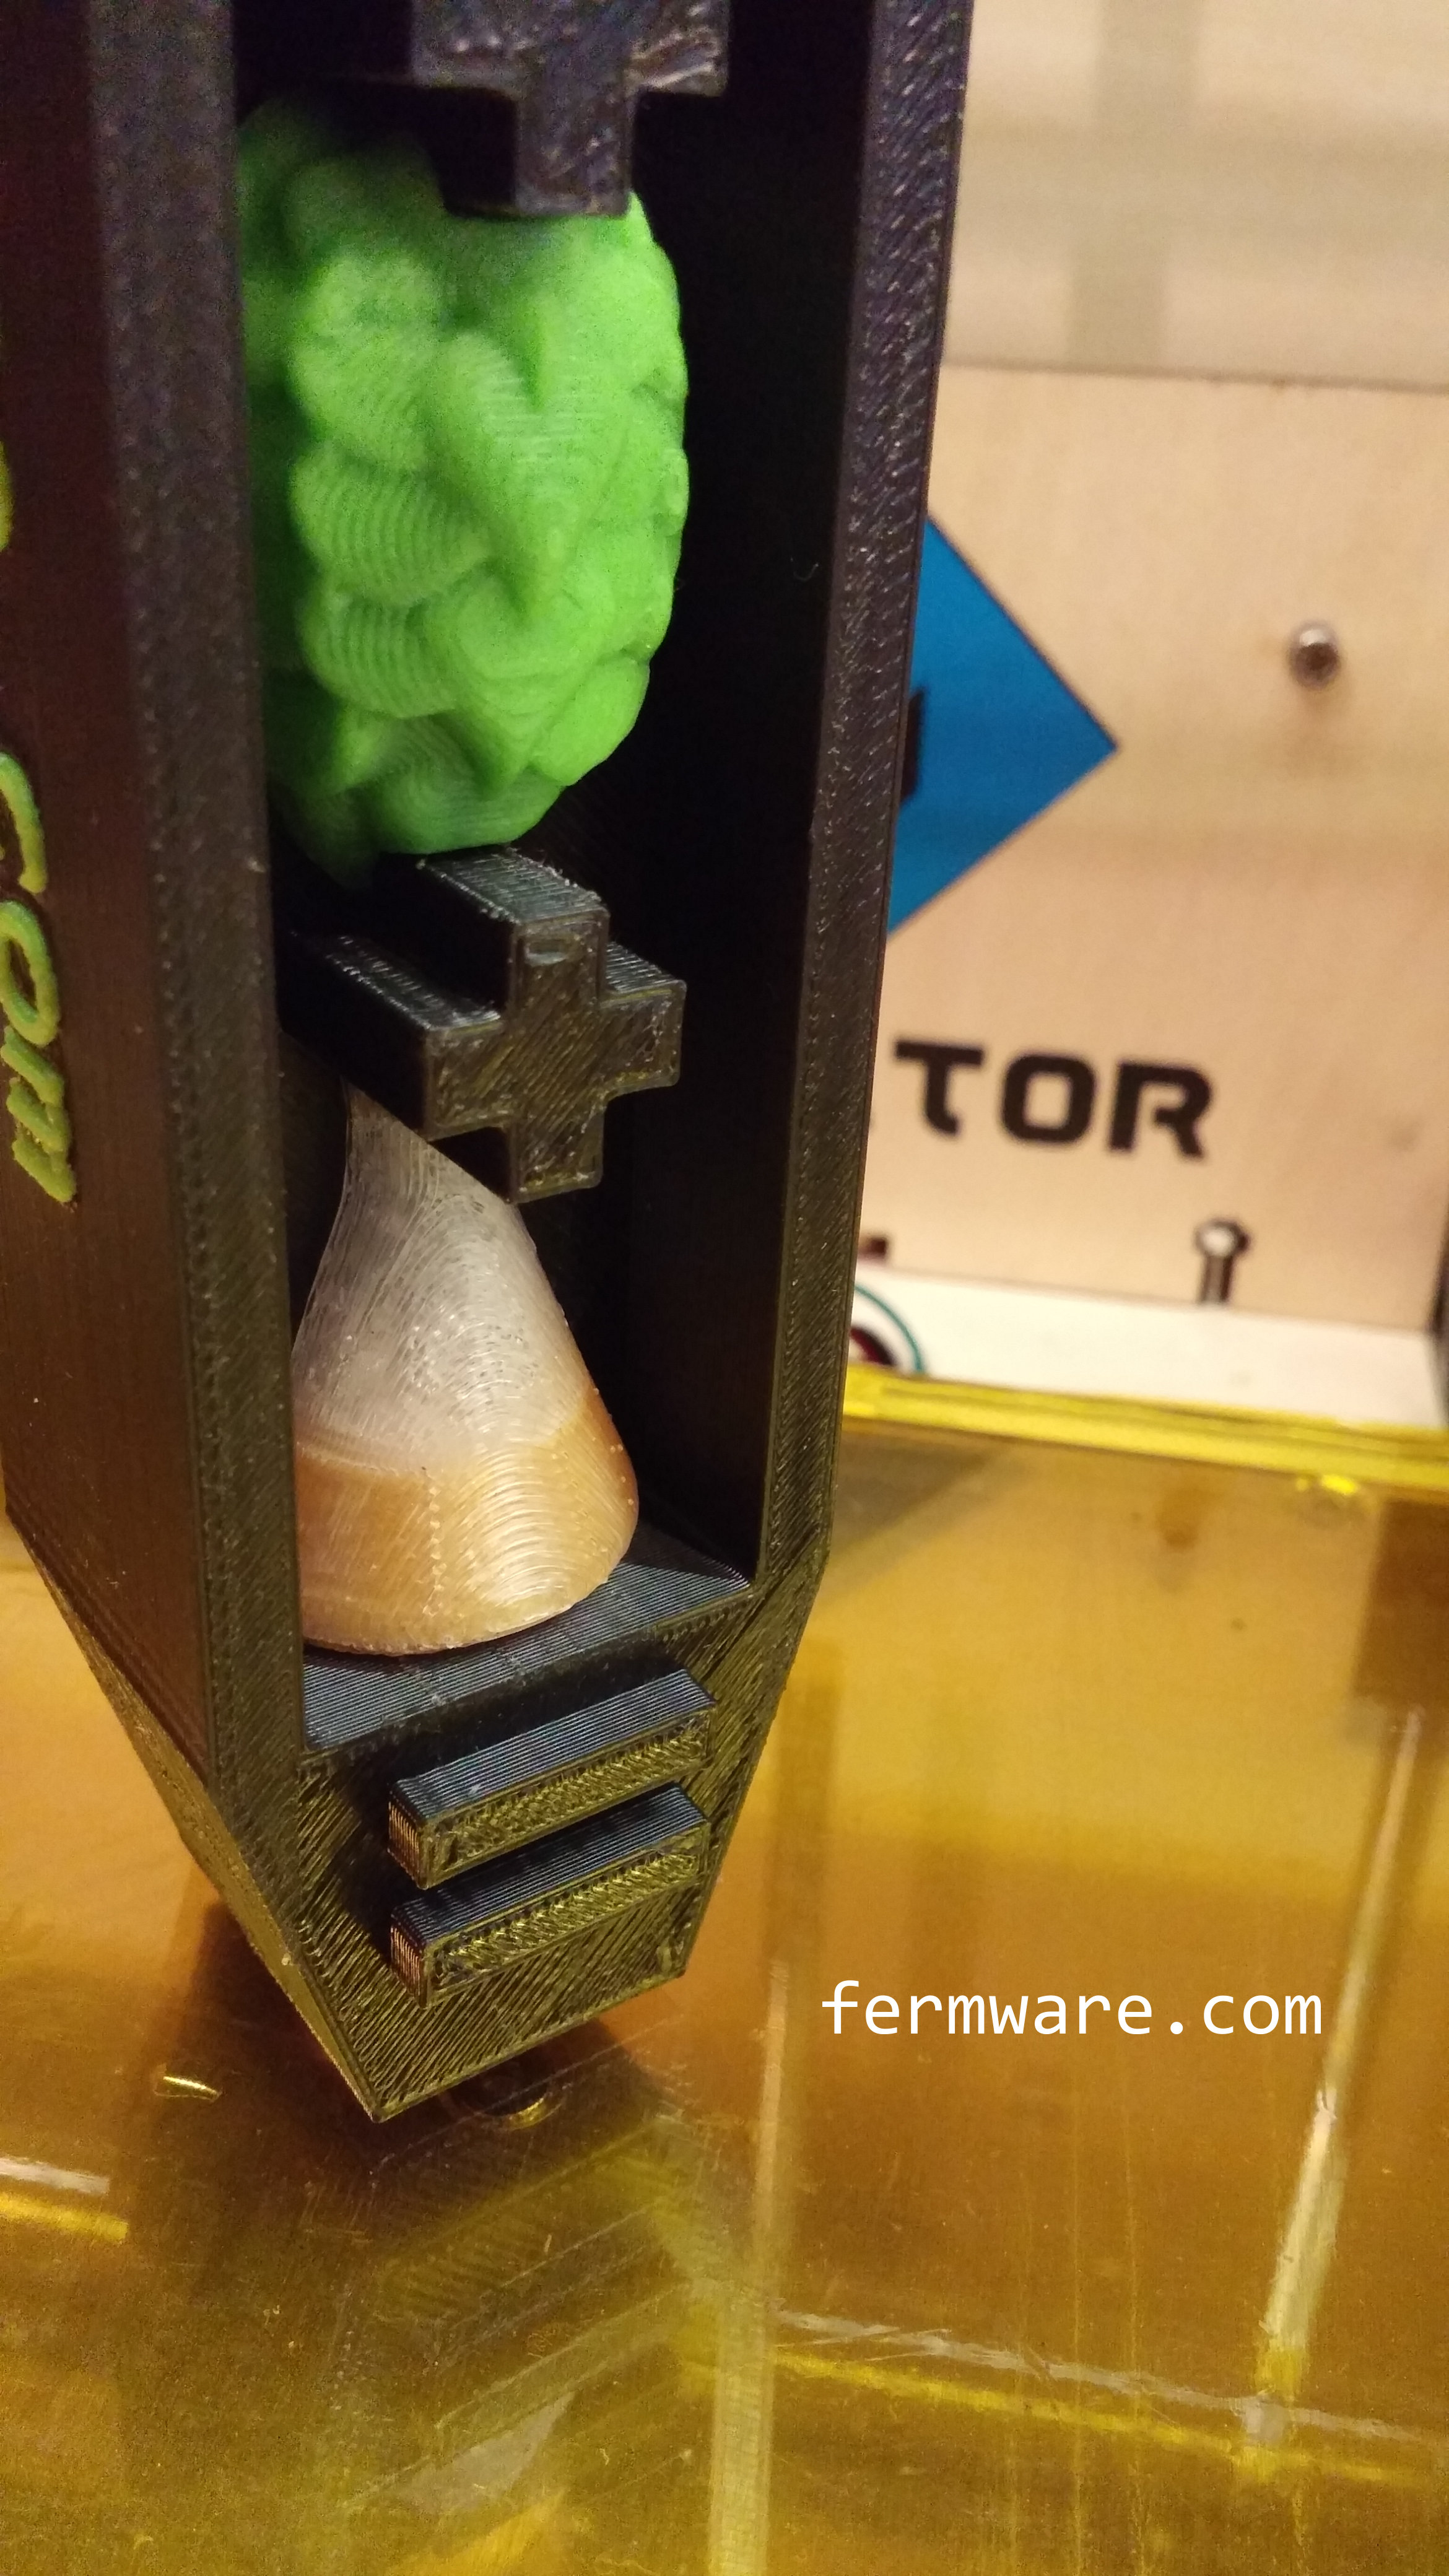
Version 3 is shown above. I experimented with clear filament and was able to make a yeast starter flask instead of the boring one color flask. All WBHY tap handles will have the this flask from now on. I was also able to remove the gaps in the hop cone. That looks much better now too.
3D printers are awesome, but they are still far away from being able to print everything usable. I chose to use press-in inserts for the threading.
1. I didn’t think that the plastic threads would be durable enough
2. I didn’t think that the threads would be dimensionally correct

Here is my first version that I used for our Strausstoberfest party.

Whats next?
Your imagination is the limit…..
Want to build one?
The intention in making these files downloadable and free is for people to make this themselves or modify/improve the design to suit them.
Go to Thingiverse to download the STL files and build your own.
http://www.thingiverse.com/thing:542537
Don’t have a Thingiverse account?
If you don’t have a Thingiverse account or have no interest in creating one, you can download the CAD files & Templates by subscribing using the form below:

This work is licensed under a Creative Commons Attribution-NonCommercial-ShareAlike 3.0 Unported License.
By clicking on the download, you agree to the terms of this license and to be added to the awesome fermware.com subscriber list. Don’t worry, you won’t receive a bunch of trub in your inbox.
[lab_subscriber_download_form download_id=25]
If you are interested in this for commercial purposes (i.e. you want to make money on my effort), I’m flattered, but please contact me first.
Don’t have a printer and want to buy one?
I’m offering a printing and assembly service for $47 (including free shipping) for those that don’t have a 3D printer and would like a tap handle.
Everyone should understand what cosmetic quality one should expect from a 3D printed part and the pictures on this post I feel, do a sufficient job of it. I will not do any finishing work on the tap handles. I feel that the as-printed look is part of the charm of these parts.
I can offer customized text. It looks like approximately 18 characters would fit. I would of course let you approve a rendering first. The text I’ve got on the tap handle now, is about the smallest I would want to go and have it look nice.
If you have a custom logo or artwork you want on a tap handle, the best thing to have is CAD friendly file formats such as DXF, DWG or some other native CAD file format.
I can accept a certain amount of customization (colors, fonts or wording), but for anything beyond that, please contact me for a custom quote.
I can now also customize the color of the plus and equal symbols.
My preferred logo/text method on the sides is now plaques as shown below. They print much better and also allow two color logos.

If you want ideas, check out my Gallery of Customer 3D Printed Tap Handles showing some of the tap handles already made for customers.
I also take custom orders, such as the kombucha tap handle I did for Pekoe Kombucha Bar in Toronto, ON.
Lead time from the date of order could be up to three weeks.
Use the link below to purchase for $47 via PayPal. Shipping to the US only at this price. If you live outside the US, contact me through the contact link in the top menu bar of the site.