This is part 2 in the series documenting how to create your own Homer Hopper. If you haven’t seen the introduction yet, please check it out. In this post, we’ll be cutting the required openings in the bucket.
Jig saw or oscillating tool
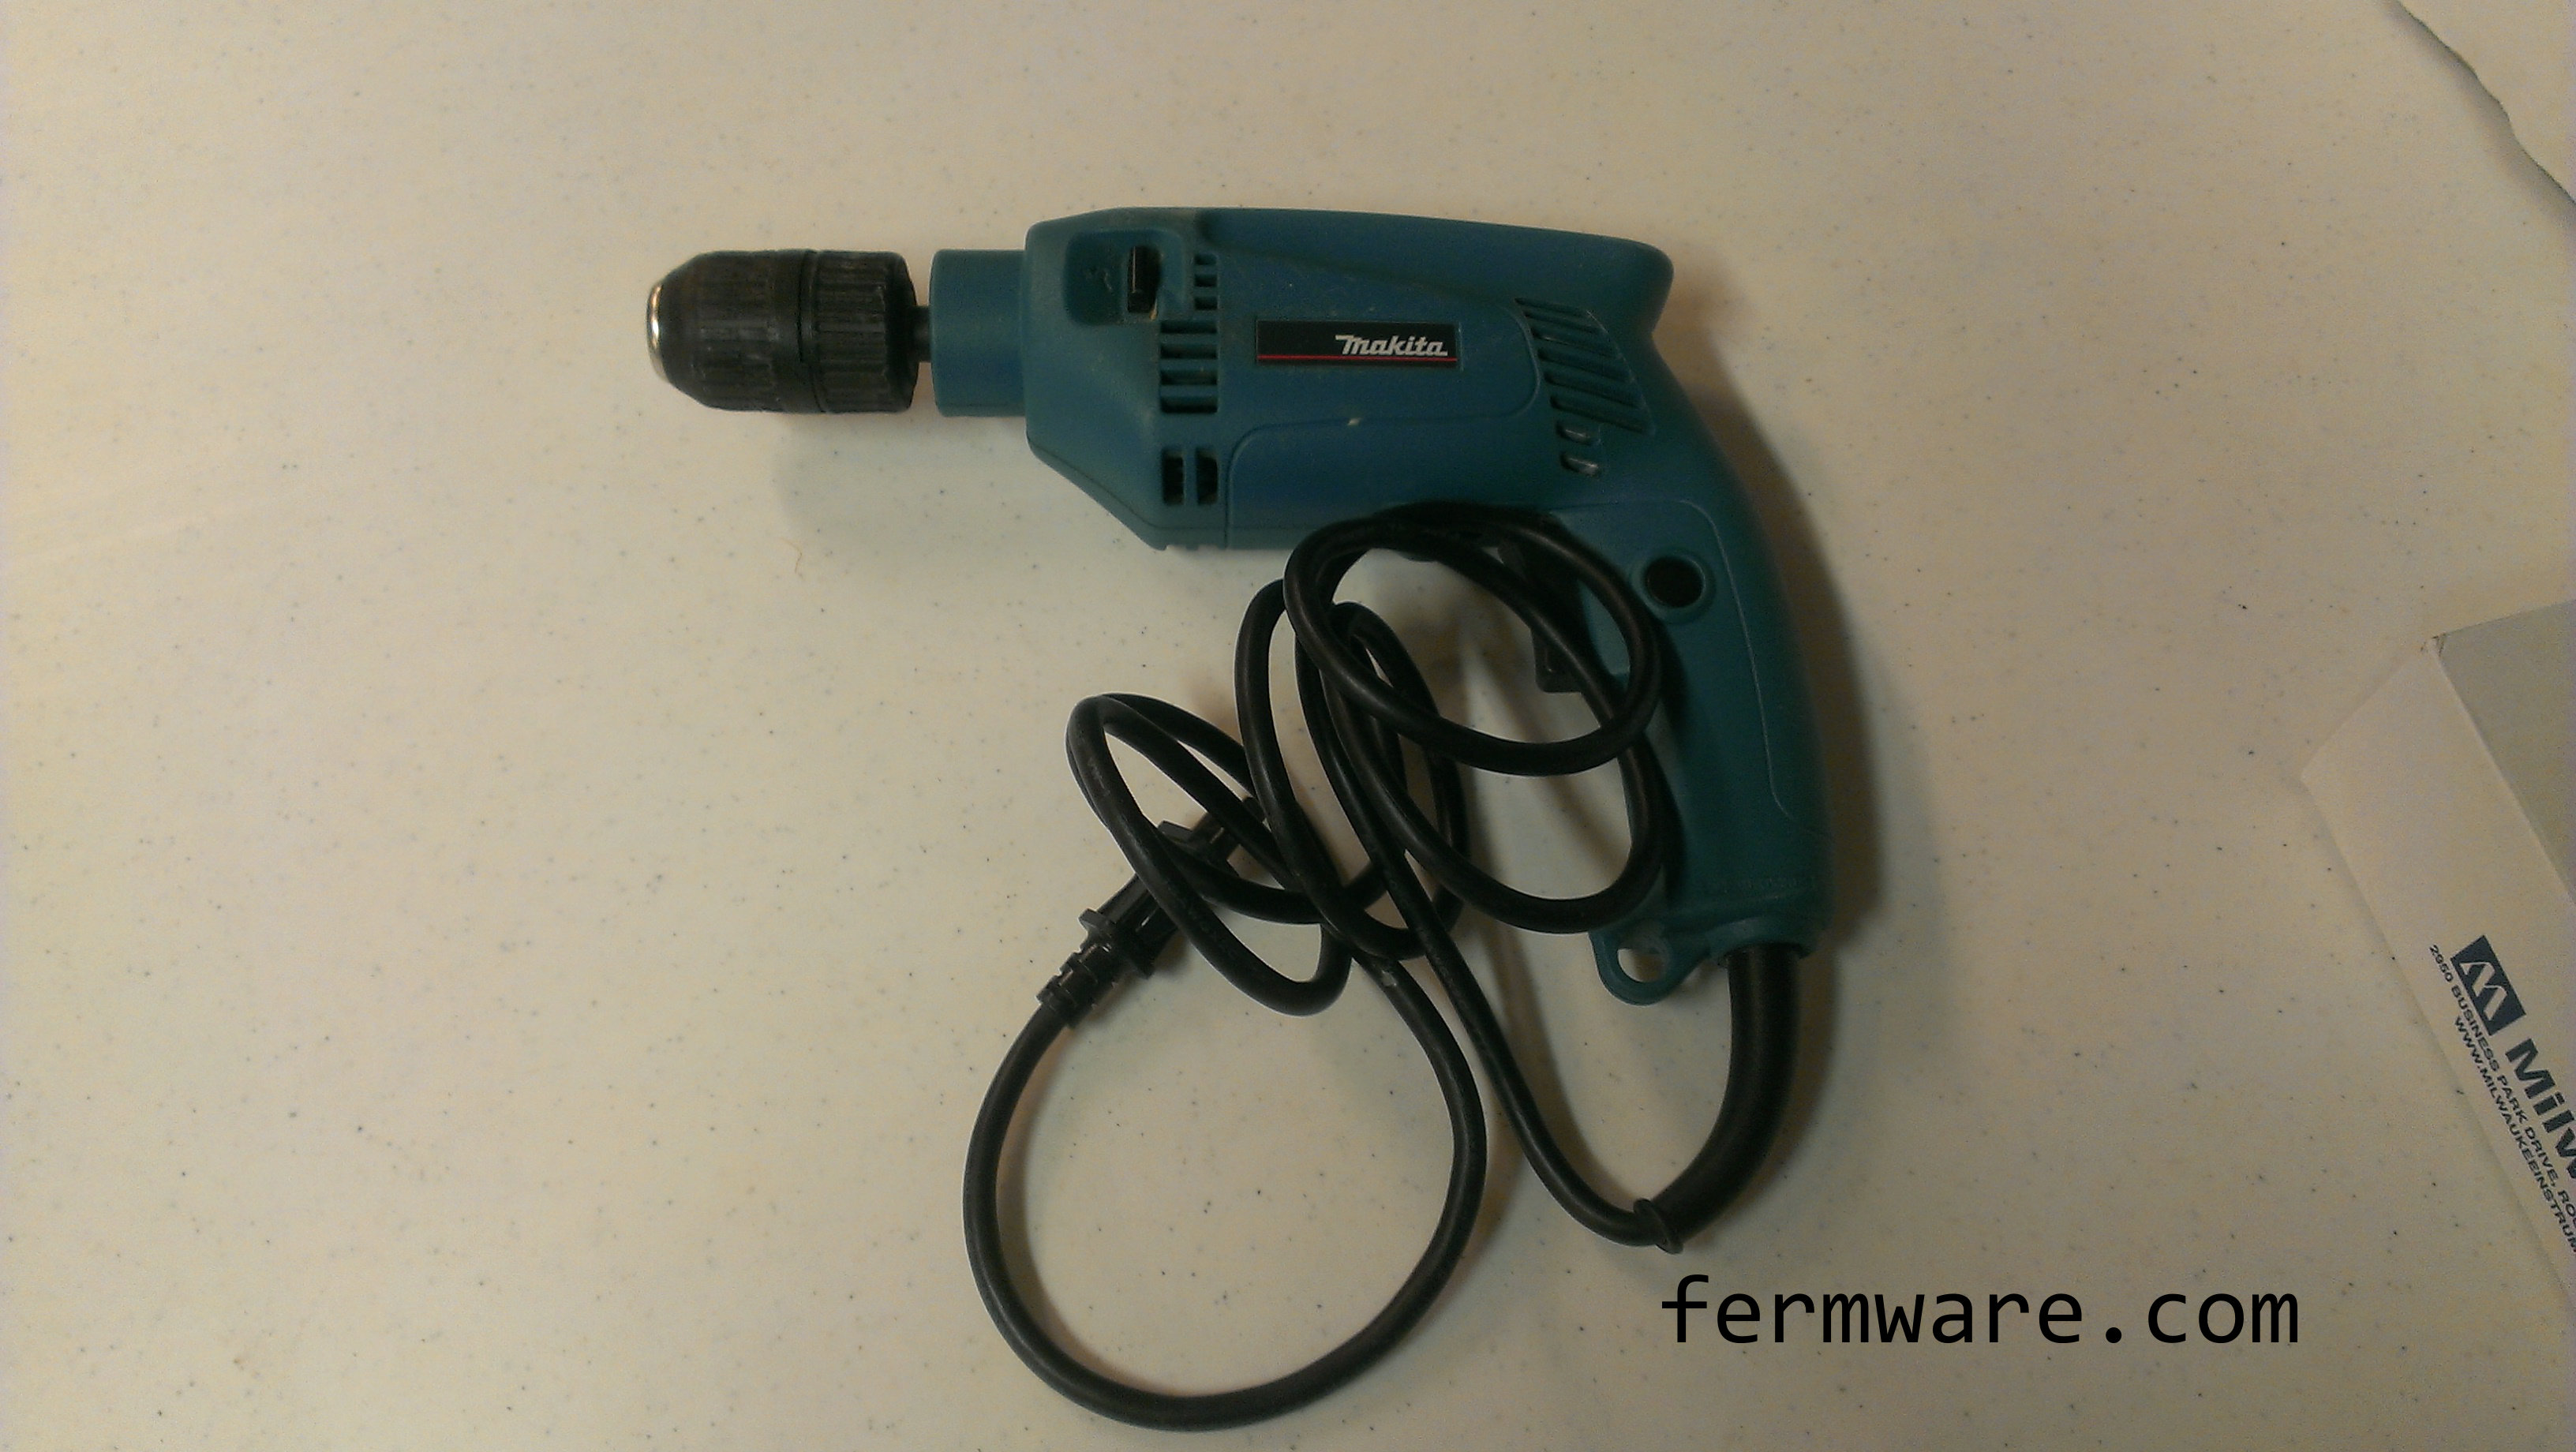
Drill with 3/16″ drill bit, maybe a 3/8″ or 1/2″ for starter holes for saw
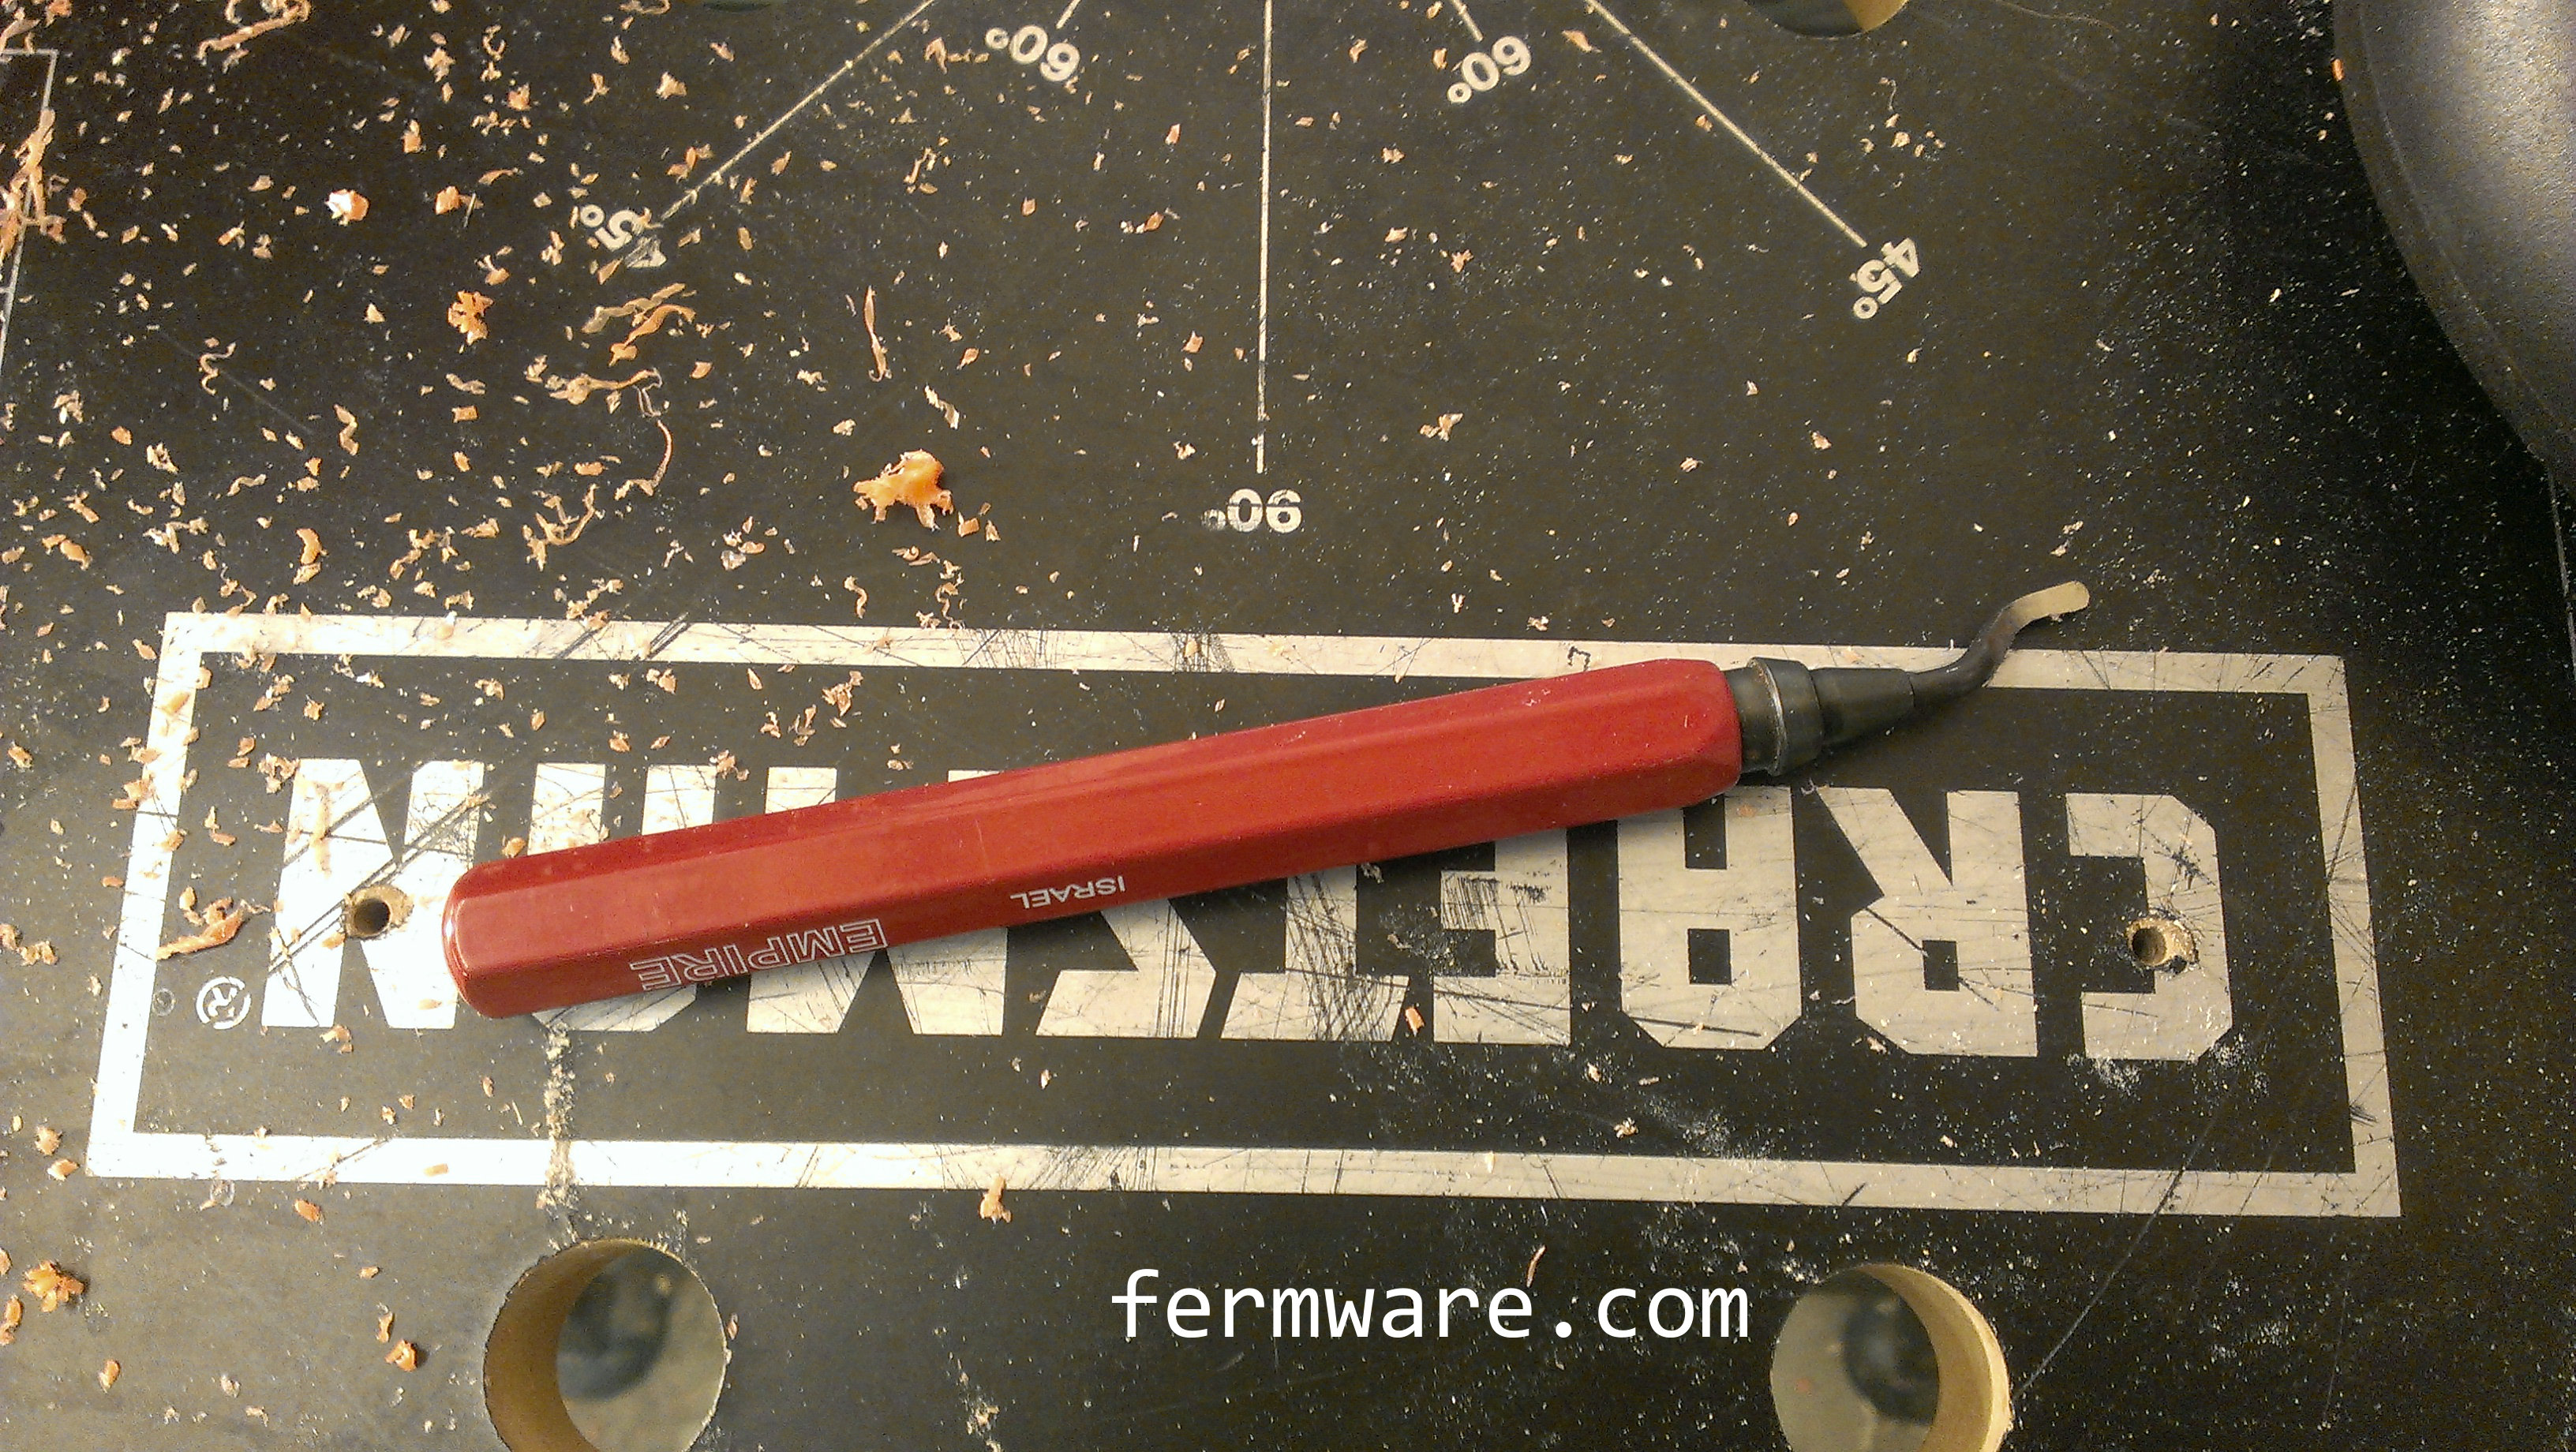
Deburring tool (optional)
Transfer punch (optional)
*All of the drawings and templates will be relocated to a final location after all of the posts are complete.
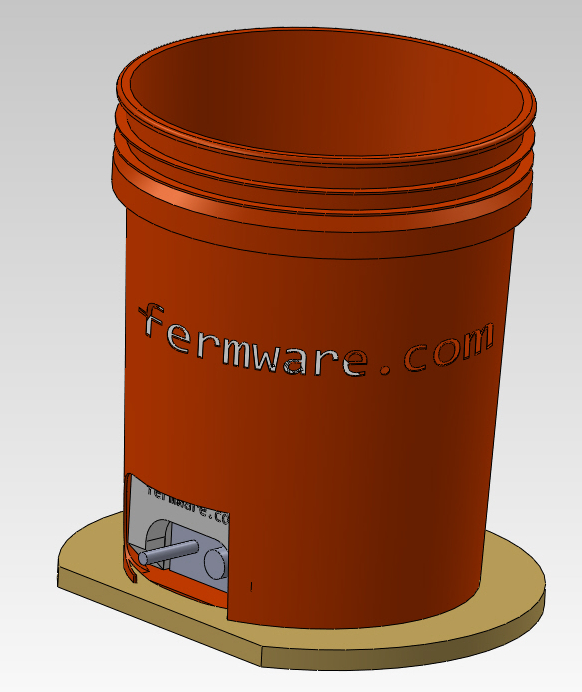
What we’re building here:
Video of the process:
COMING SOON!
How to do it:
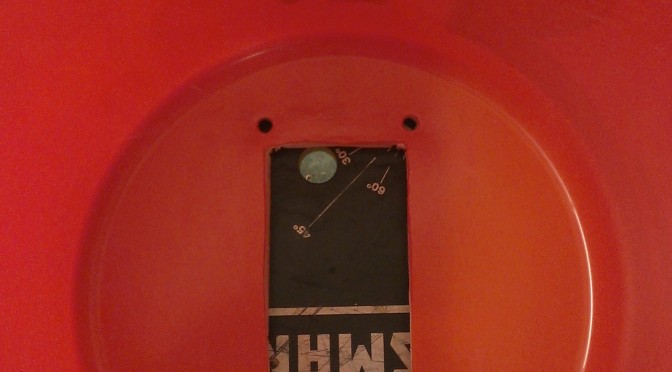
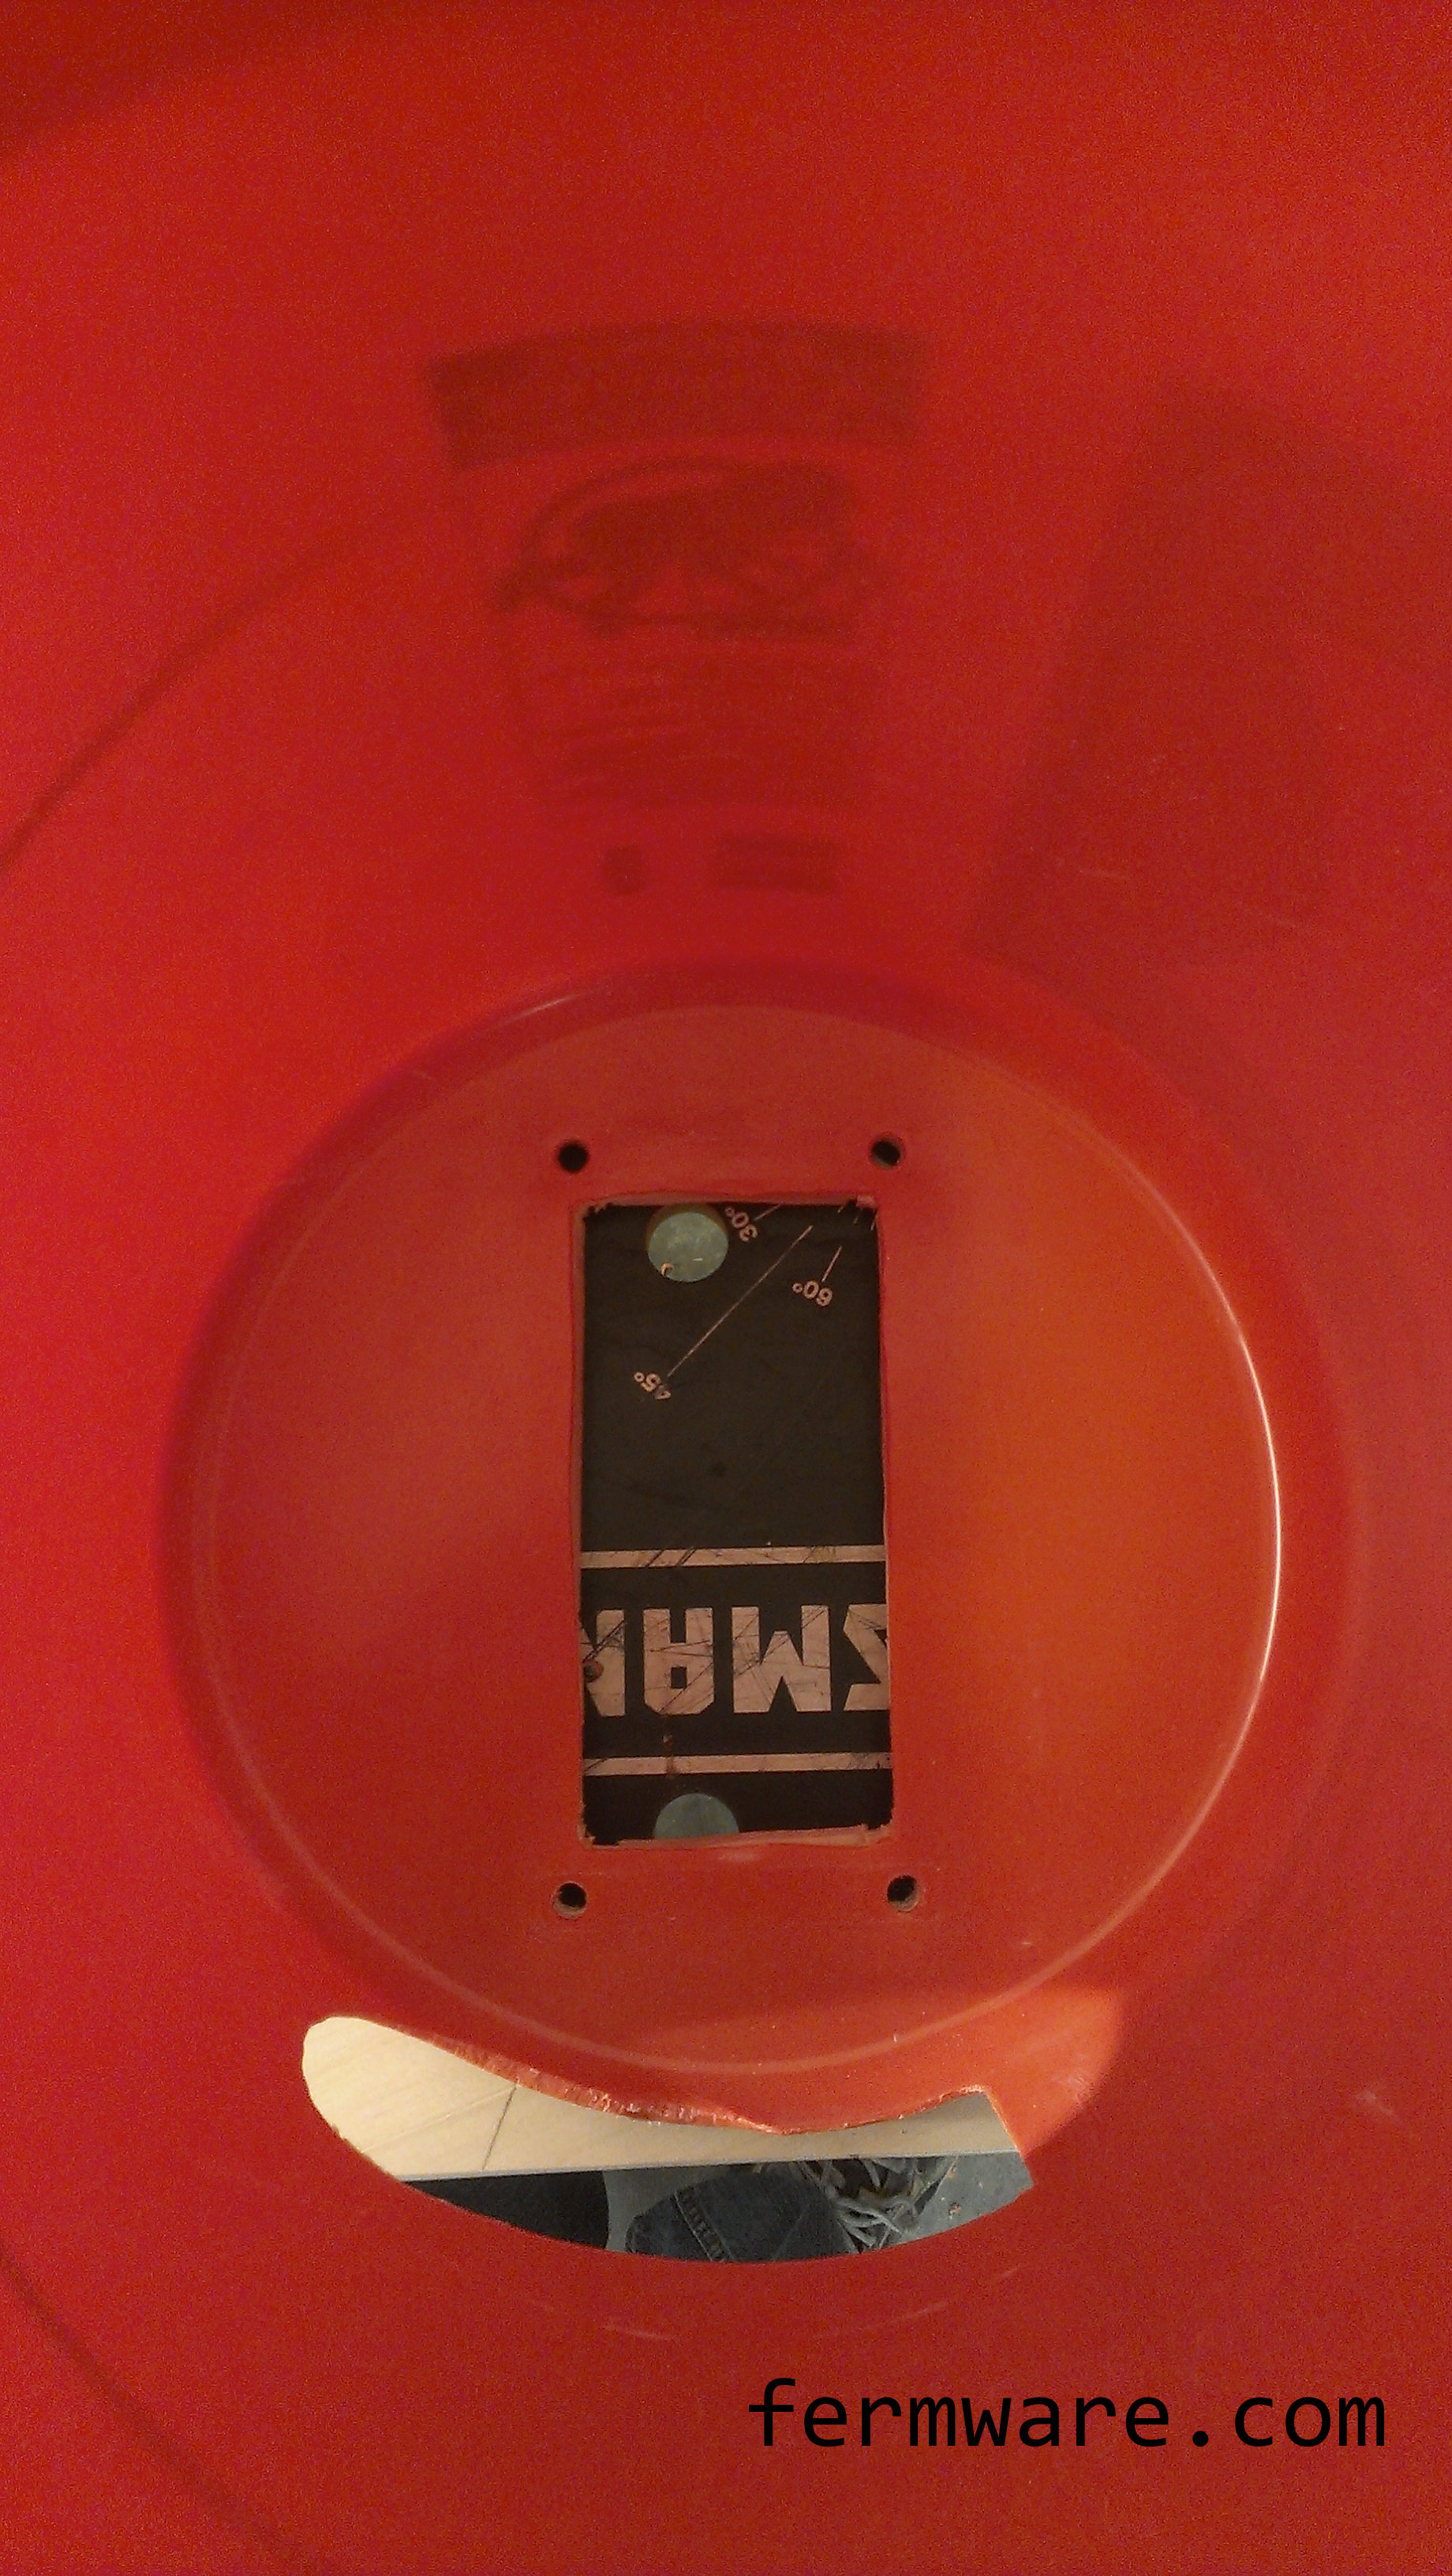
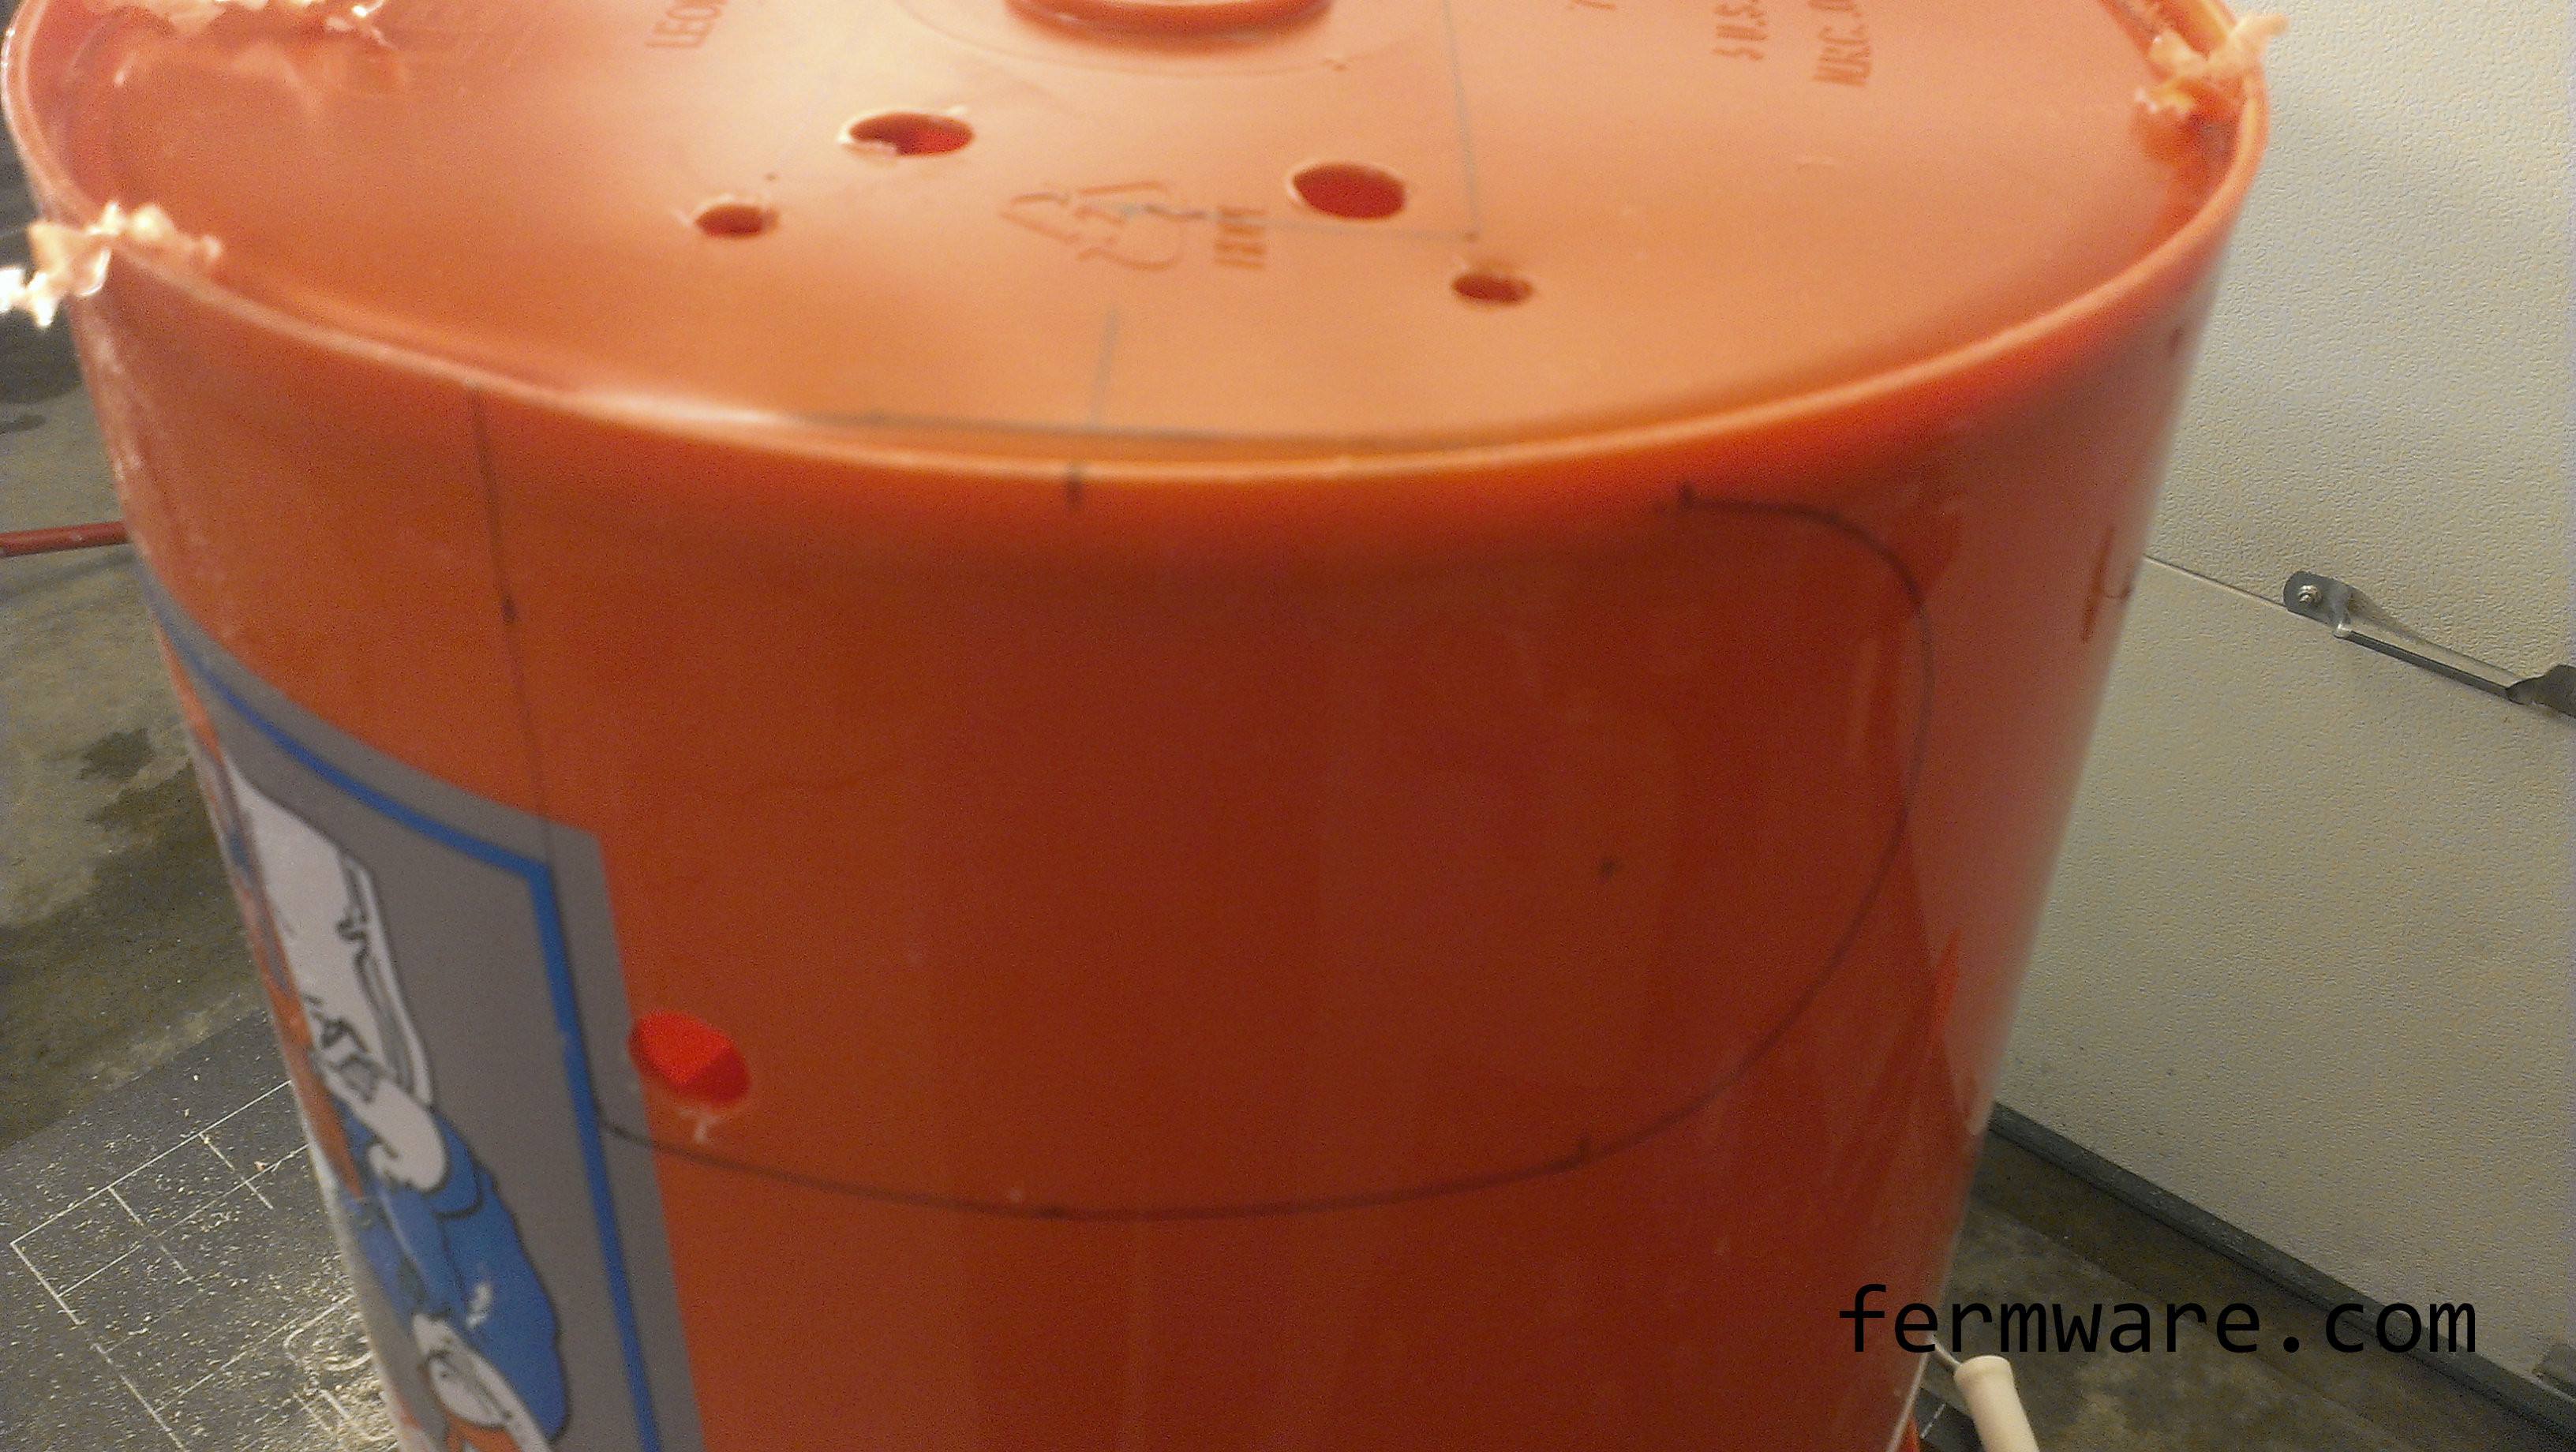
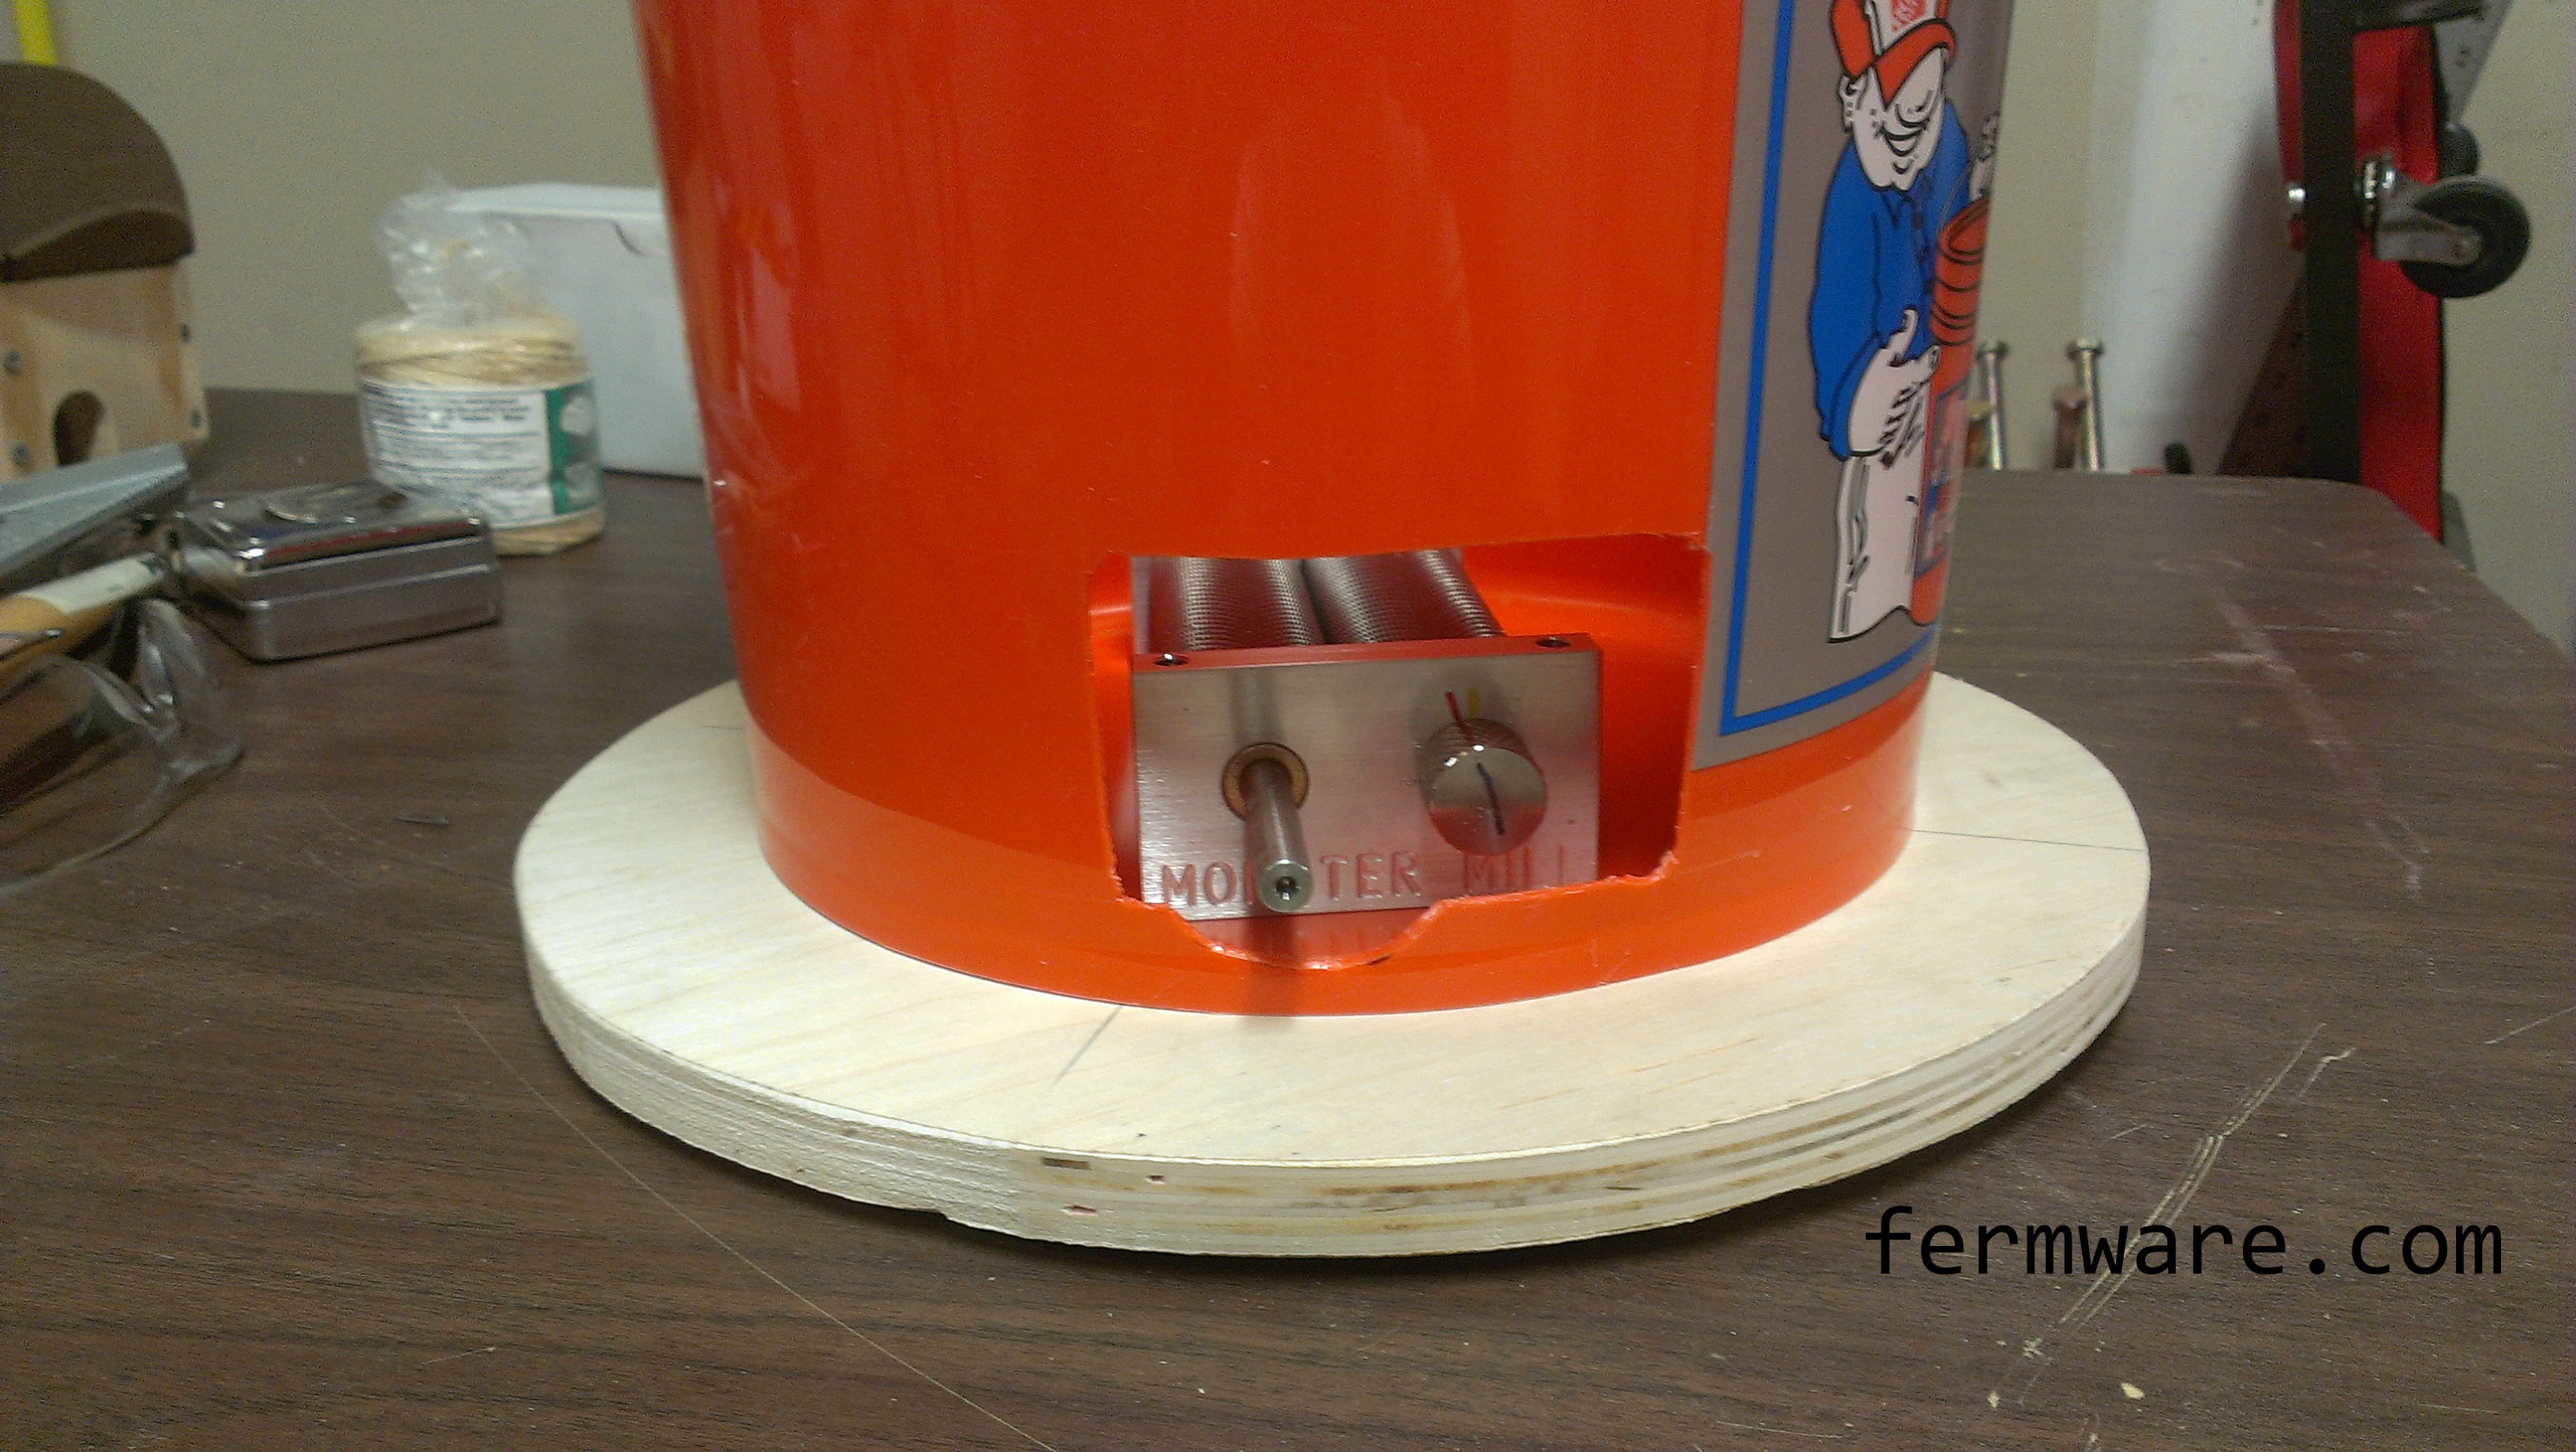
First, print out the window template. You’ll want to cut out the very center in order to line it up with the center on the bottom of the bucket.
If you have a transfer punch, you know what to do. If you don’t, just transfer the pattern to the bottom of the bucket in order to be able to cut out the large rectangular window and drill the 4 holes.
You’ll want to make sure that you align the side window with the window on the bottom of the bucket. As you can see, I’ve traced all the lines out with a permanent marker.
Just inside of the lines, I’ve drilled some larger holes that are big enough to get the blade of my jigsaw through the plastic to get started.
Mark out the side window and drill a starter hole here as well.
Once you’ve got all your holes marked, go ahead and start cutting.
A WORD OF CAUTION!:
Cutting this bucket with a jigsaw is not exactly fun, safe or appropriate. Be extremely careful and keep your hand away from the blade at all times. If you have a way to secure the bucket while you are cutting, please do so. Alternately, you may have some other better way to cut the bucket.
When you are done, you can use a deburring tool to clean up all of the edges you cut and drilled.
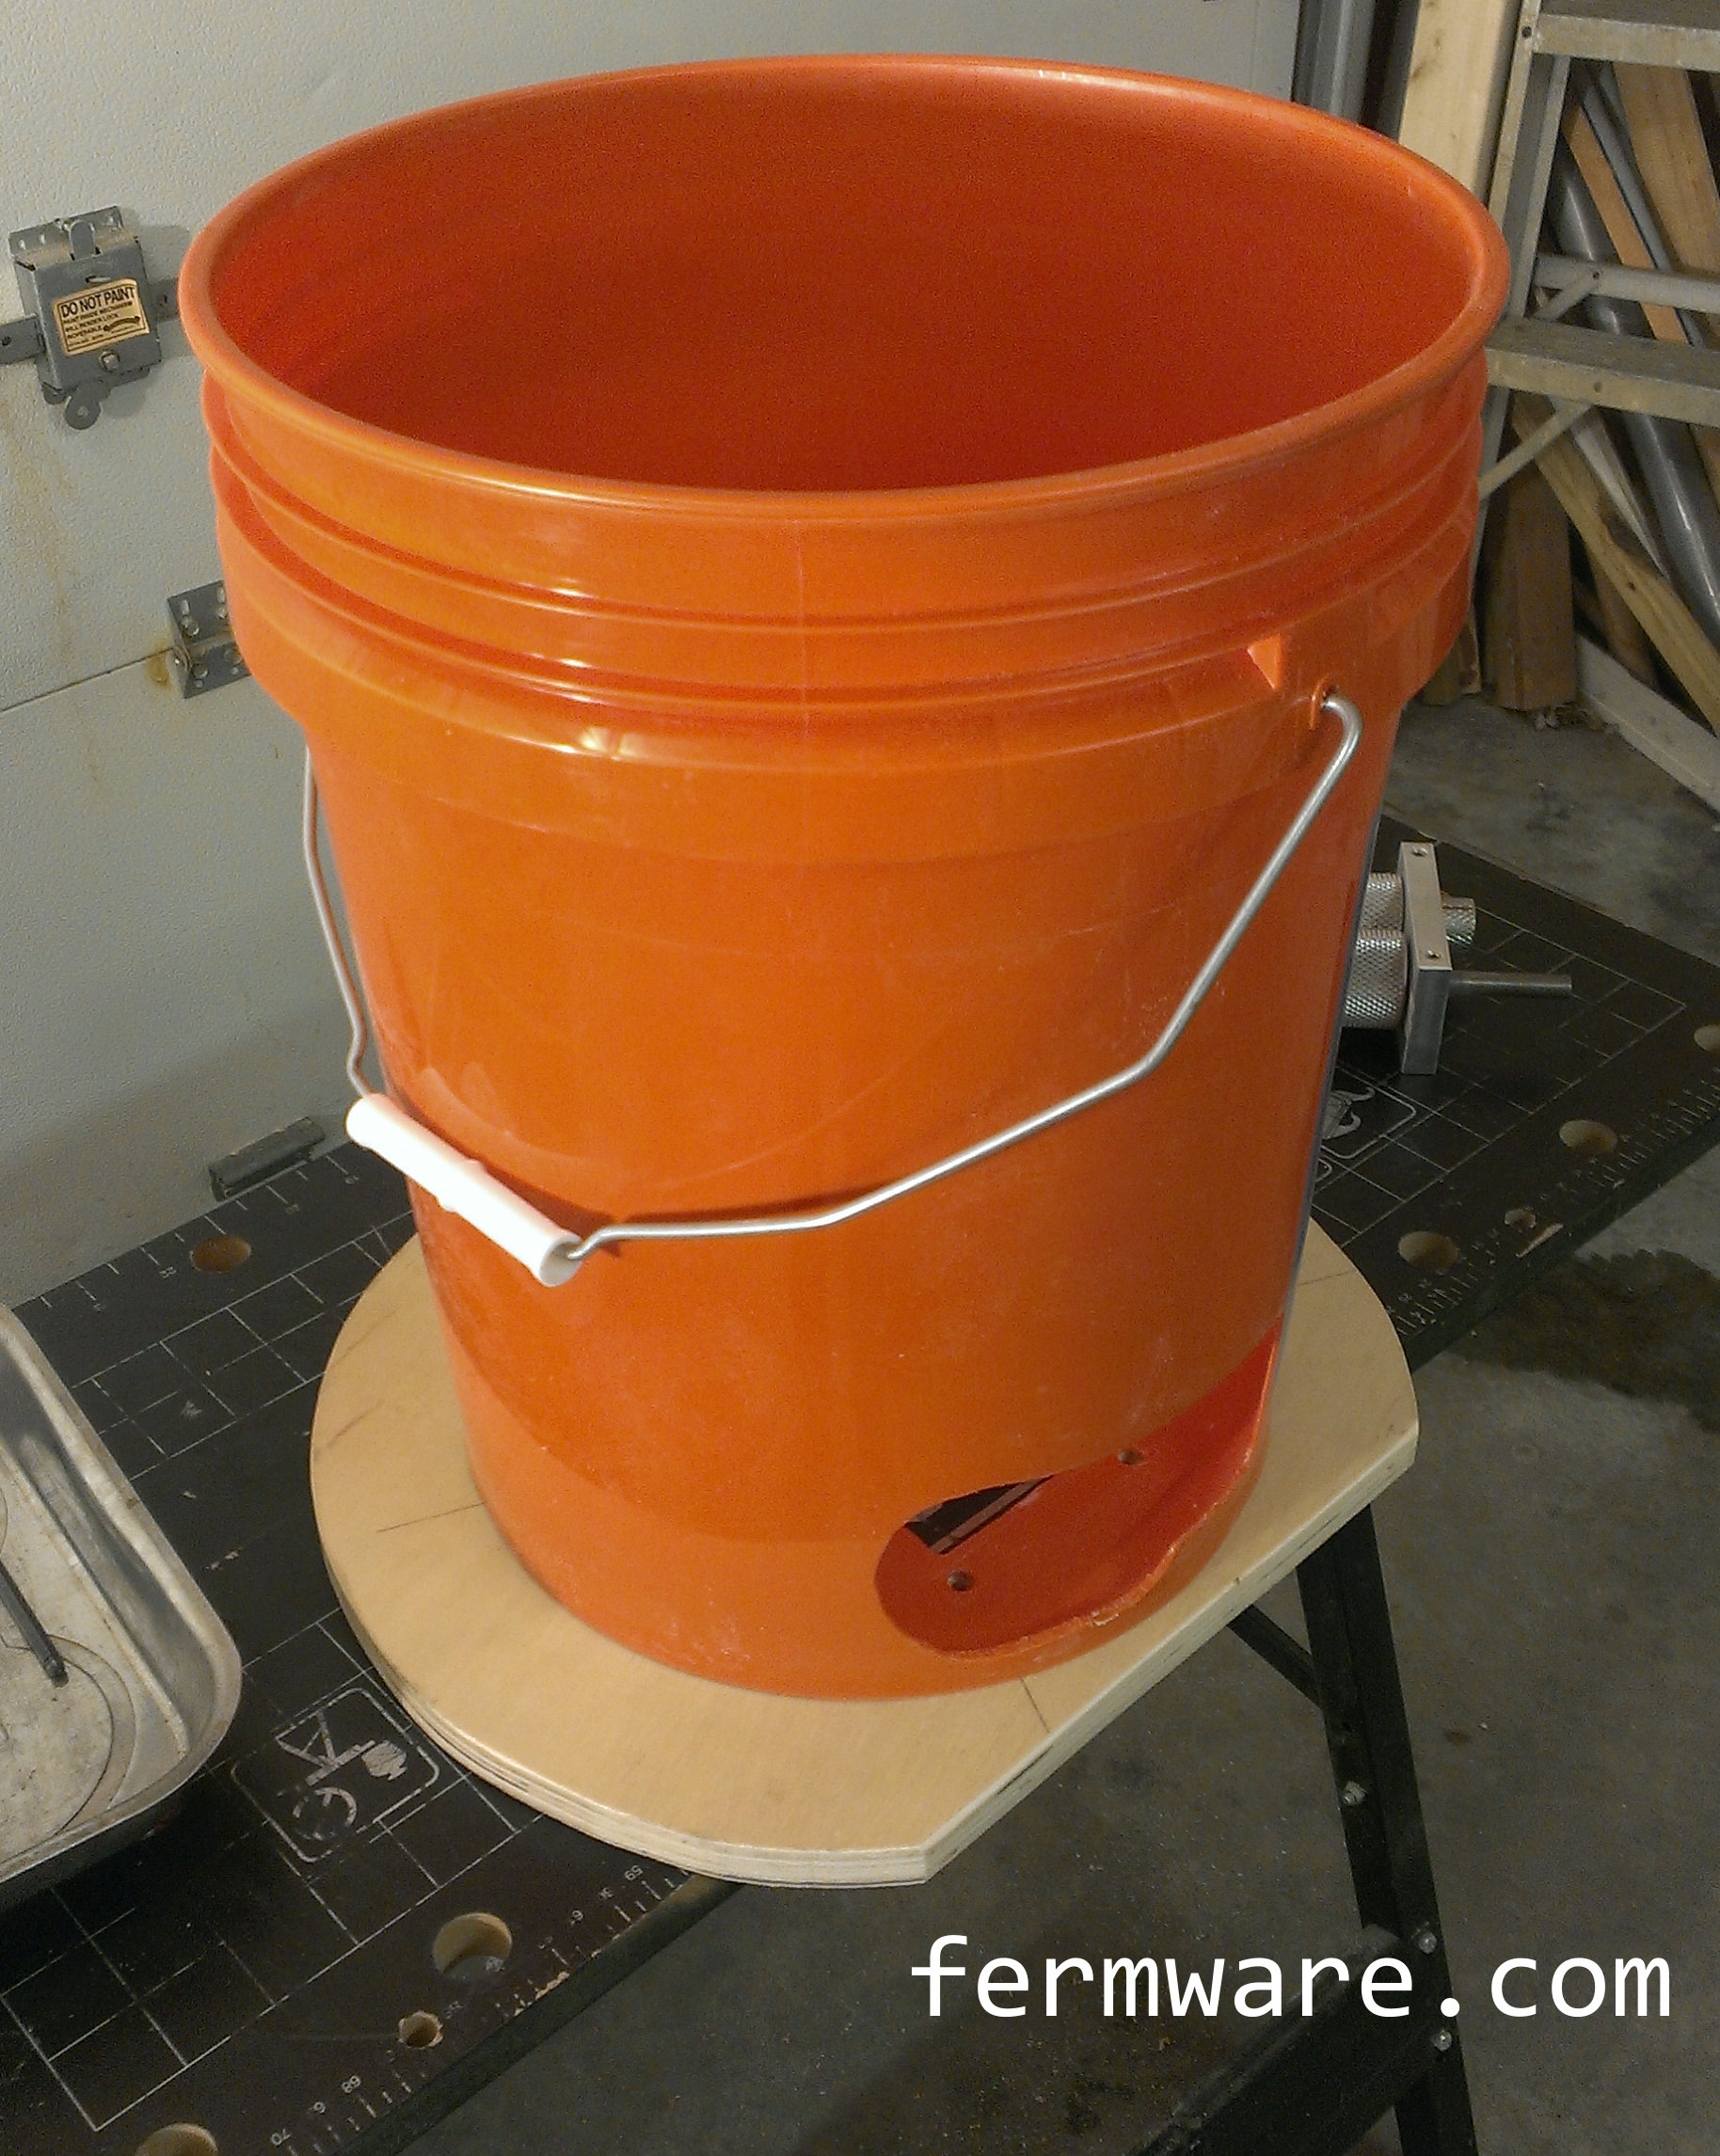
If you are brewing all-grain and want to gain consistency with your efficiency and want to save money in the long run, you should be milling your own grain (assuming you are buying some grains in bulk). Most grain mills can be purchased without a hopper, which in my opinion is a good thing, because I was not satisfied with most of the hopper designs I have seen.
Less than $20 in materials for the hopper assembly. The cost will most likely be less, especially since you probably have scraps of material around your garage that can be used. You’ll also need some mounting hardware that is readily available.
Components:
Home Depot Homer Bucket (approx $3)
You may want a lid, which will set you back another $1-2
5/8″ plywood, big enough for 14″ diameter. You can go thinner or thicker. Use scrap wood or find a 24″x24″ square for maybe $10 at the hardware store. I used some nice birch, but only because I had it around.
4x 1/4-20 x 0.75″ length stainless socket head cap screws or hex head
4x washers for 1/4″ bolts ($1-$5 for screws and washers depending on where you shop) *You don’t have to use stainless for the screws or washers, I just got stainless so they didn’t rust while being stored outside in the garage.
2x 1/4-20 x 1/2″ long Cup Point Set Screws (to replace the thumb screws on the Monster Mill).
Of course you are probably pretty thrifty, so review the steps laid out and you may have a preference for another tool to get each task done!
Discussion:
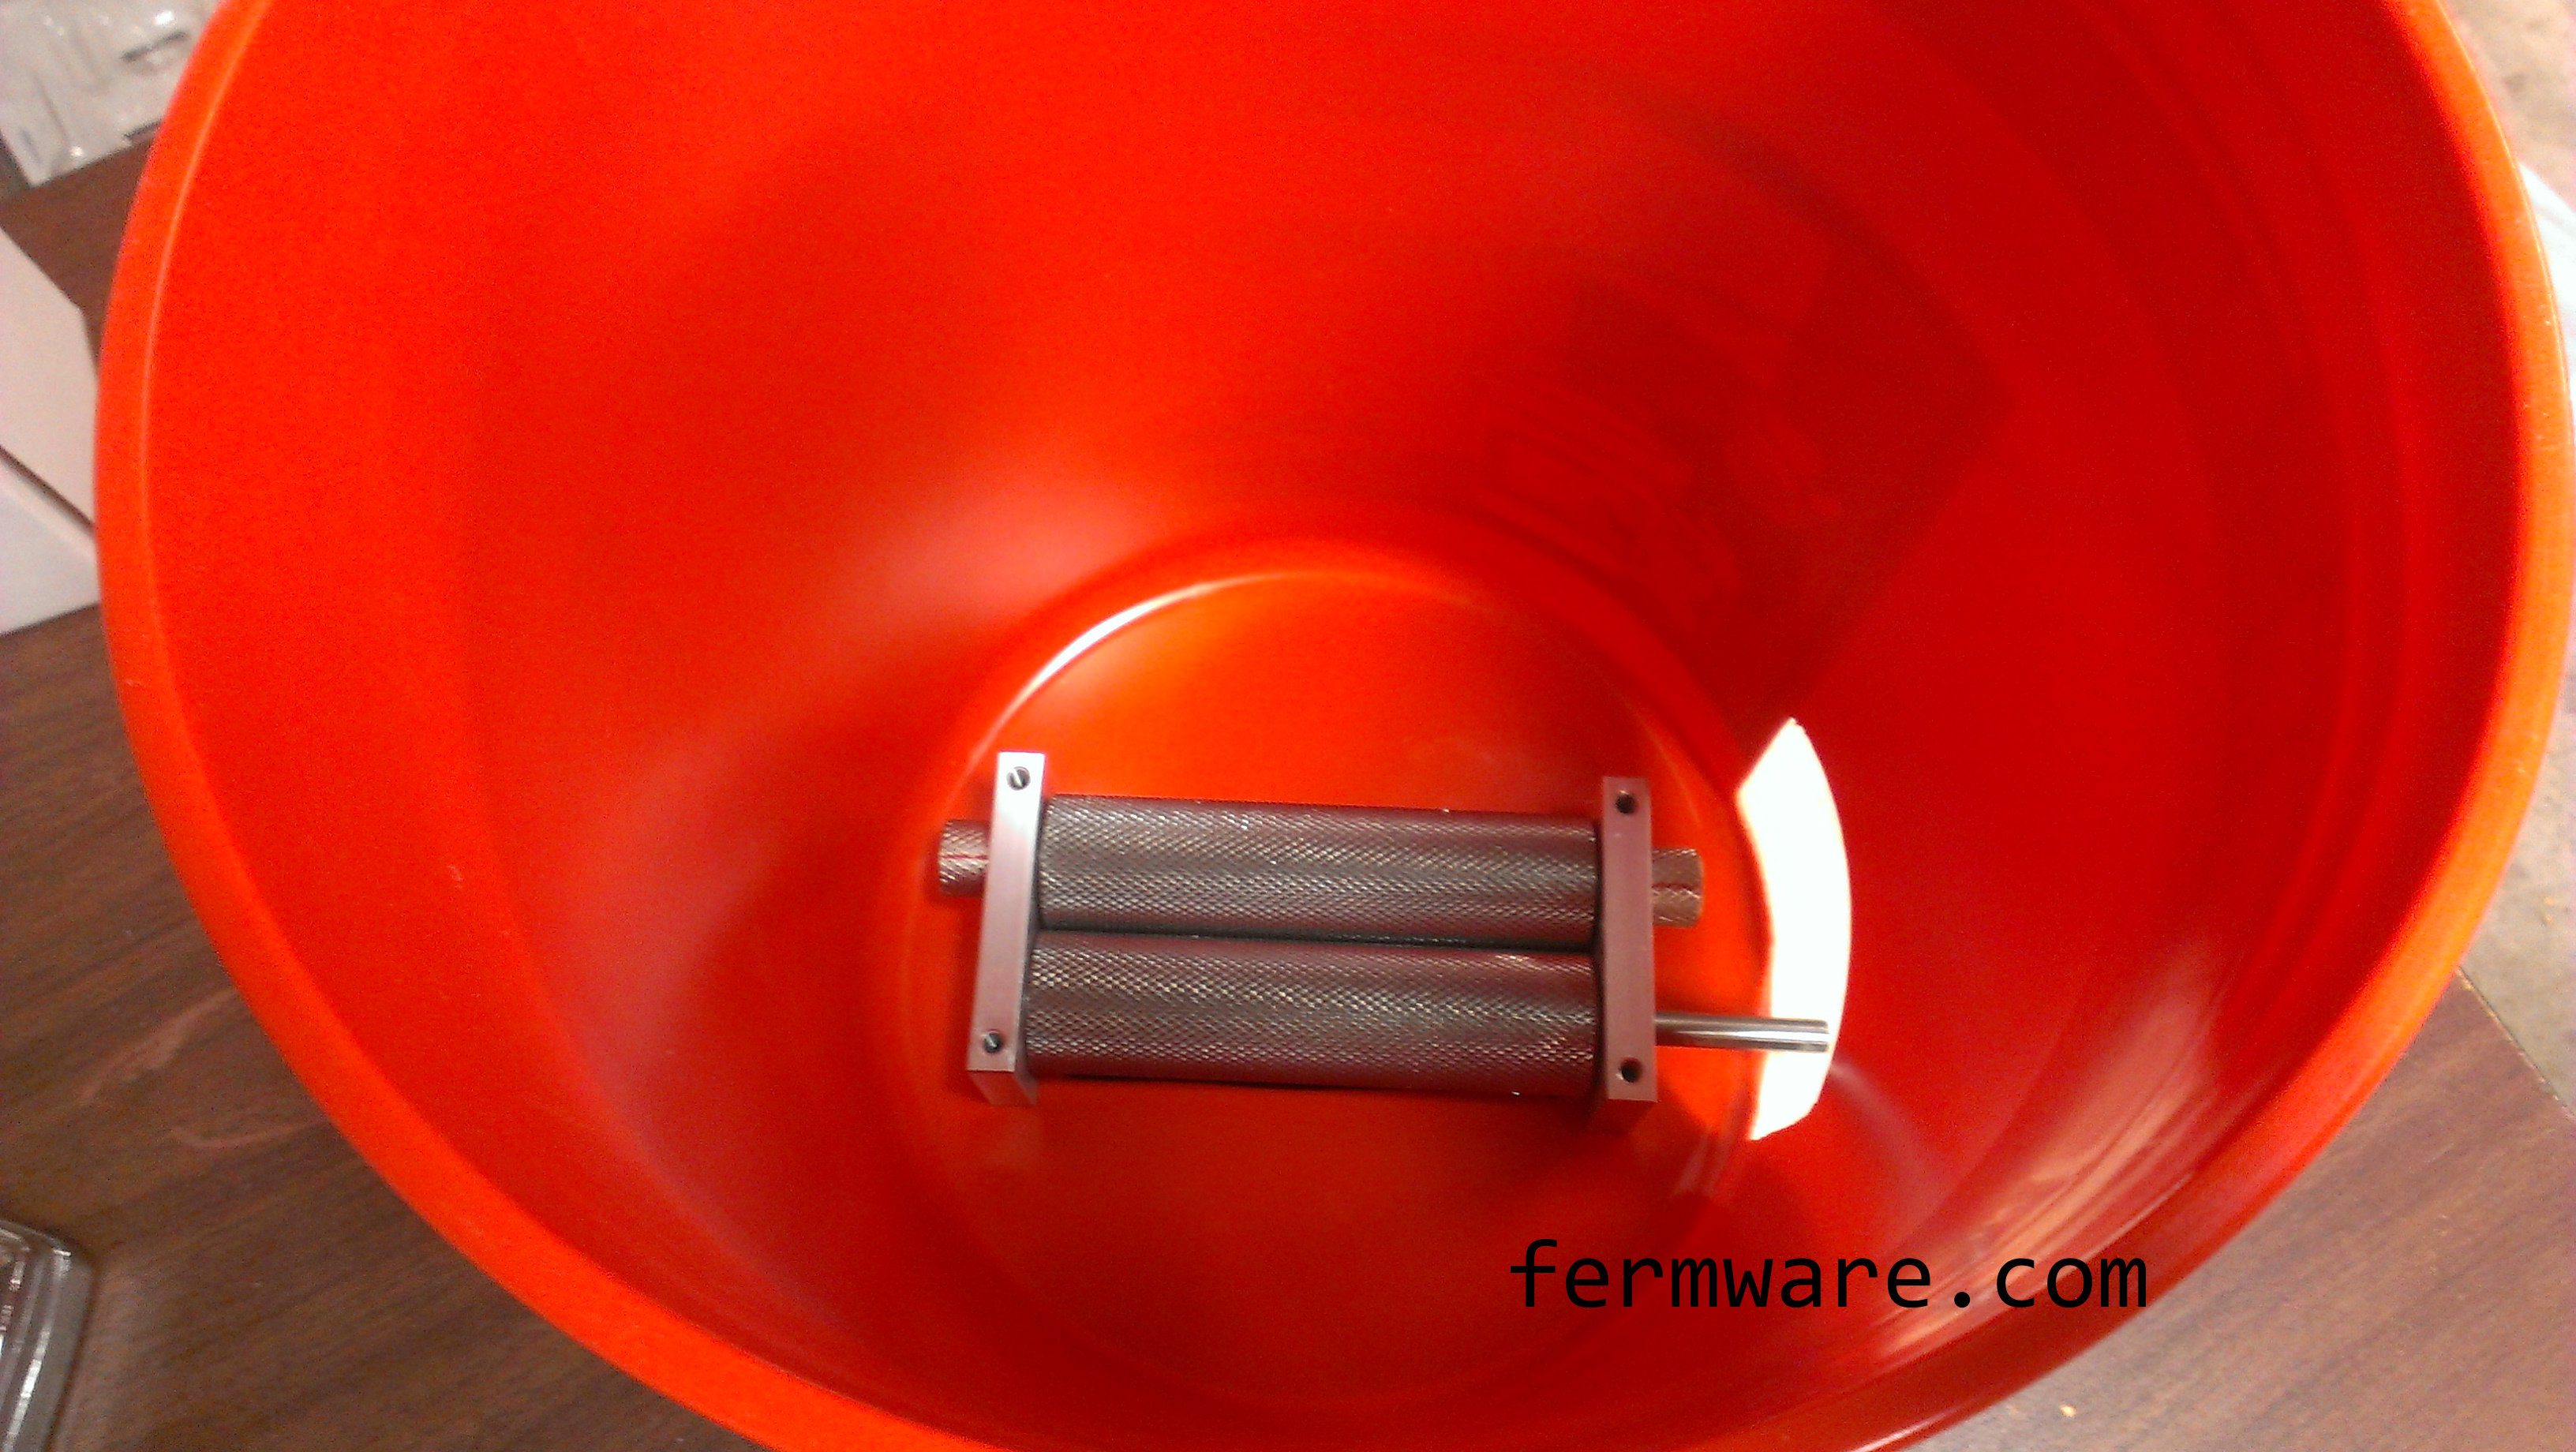
This is a guide to my hopper design using the Monster Mill MM-2 and an Home Depot orange Homer’s bucket. The MM-2 is a great mill, but I did make a few easy modifications that I’ll cover in another post**. This concept could be applied to other mills, but the design would obviously change a little.
I thought I could cover this project in just one post, but it has become clear that it will be a multi-post instruction guide. I will keep this as the master post to keep modifying and add links to the subsequent posts as they are available. The final post will include a package of downloadable CAD files that can be printed and used as cut-out templates.
**Please note: Monster Brewing now has a version 2.0 of the MM-2 that partially addresses some of the modifications that I had made to mine. If you don’t have version 2.0, you’ll want to replace the thumb screws with the set screws I mentioned in the components.
Here are the advantages of this hopper:
Uses a commonly available bucket
When you are done, you can put a lid on the bucket and have it all self-contained
Low dust design while milling
Design utilizes the entire roller area, instead of just a small section like with funnel based hoppers
With the mill inside the bucket, it allows the bucket to sit flat and gives more stability
Allows for using a power drill to drive it
Holds an entire grain bill for most 5 gallon batches (19-20 lbs)
Mills that grain in just under 2 minutes*
Low cost
No shaking involved to get grain to rollers
How it works:
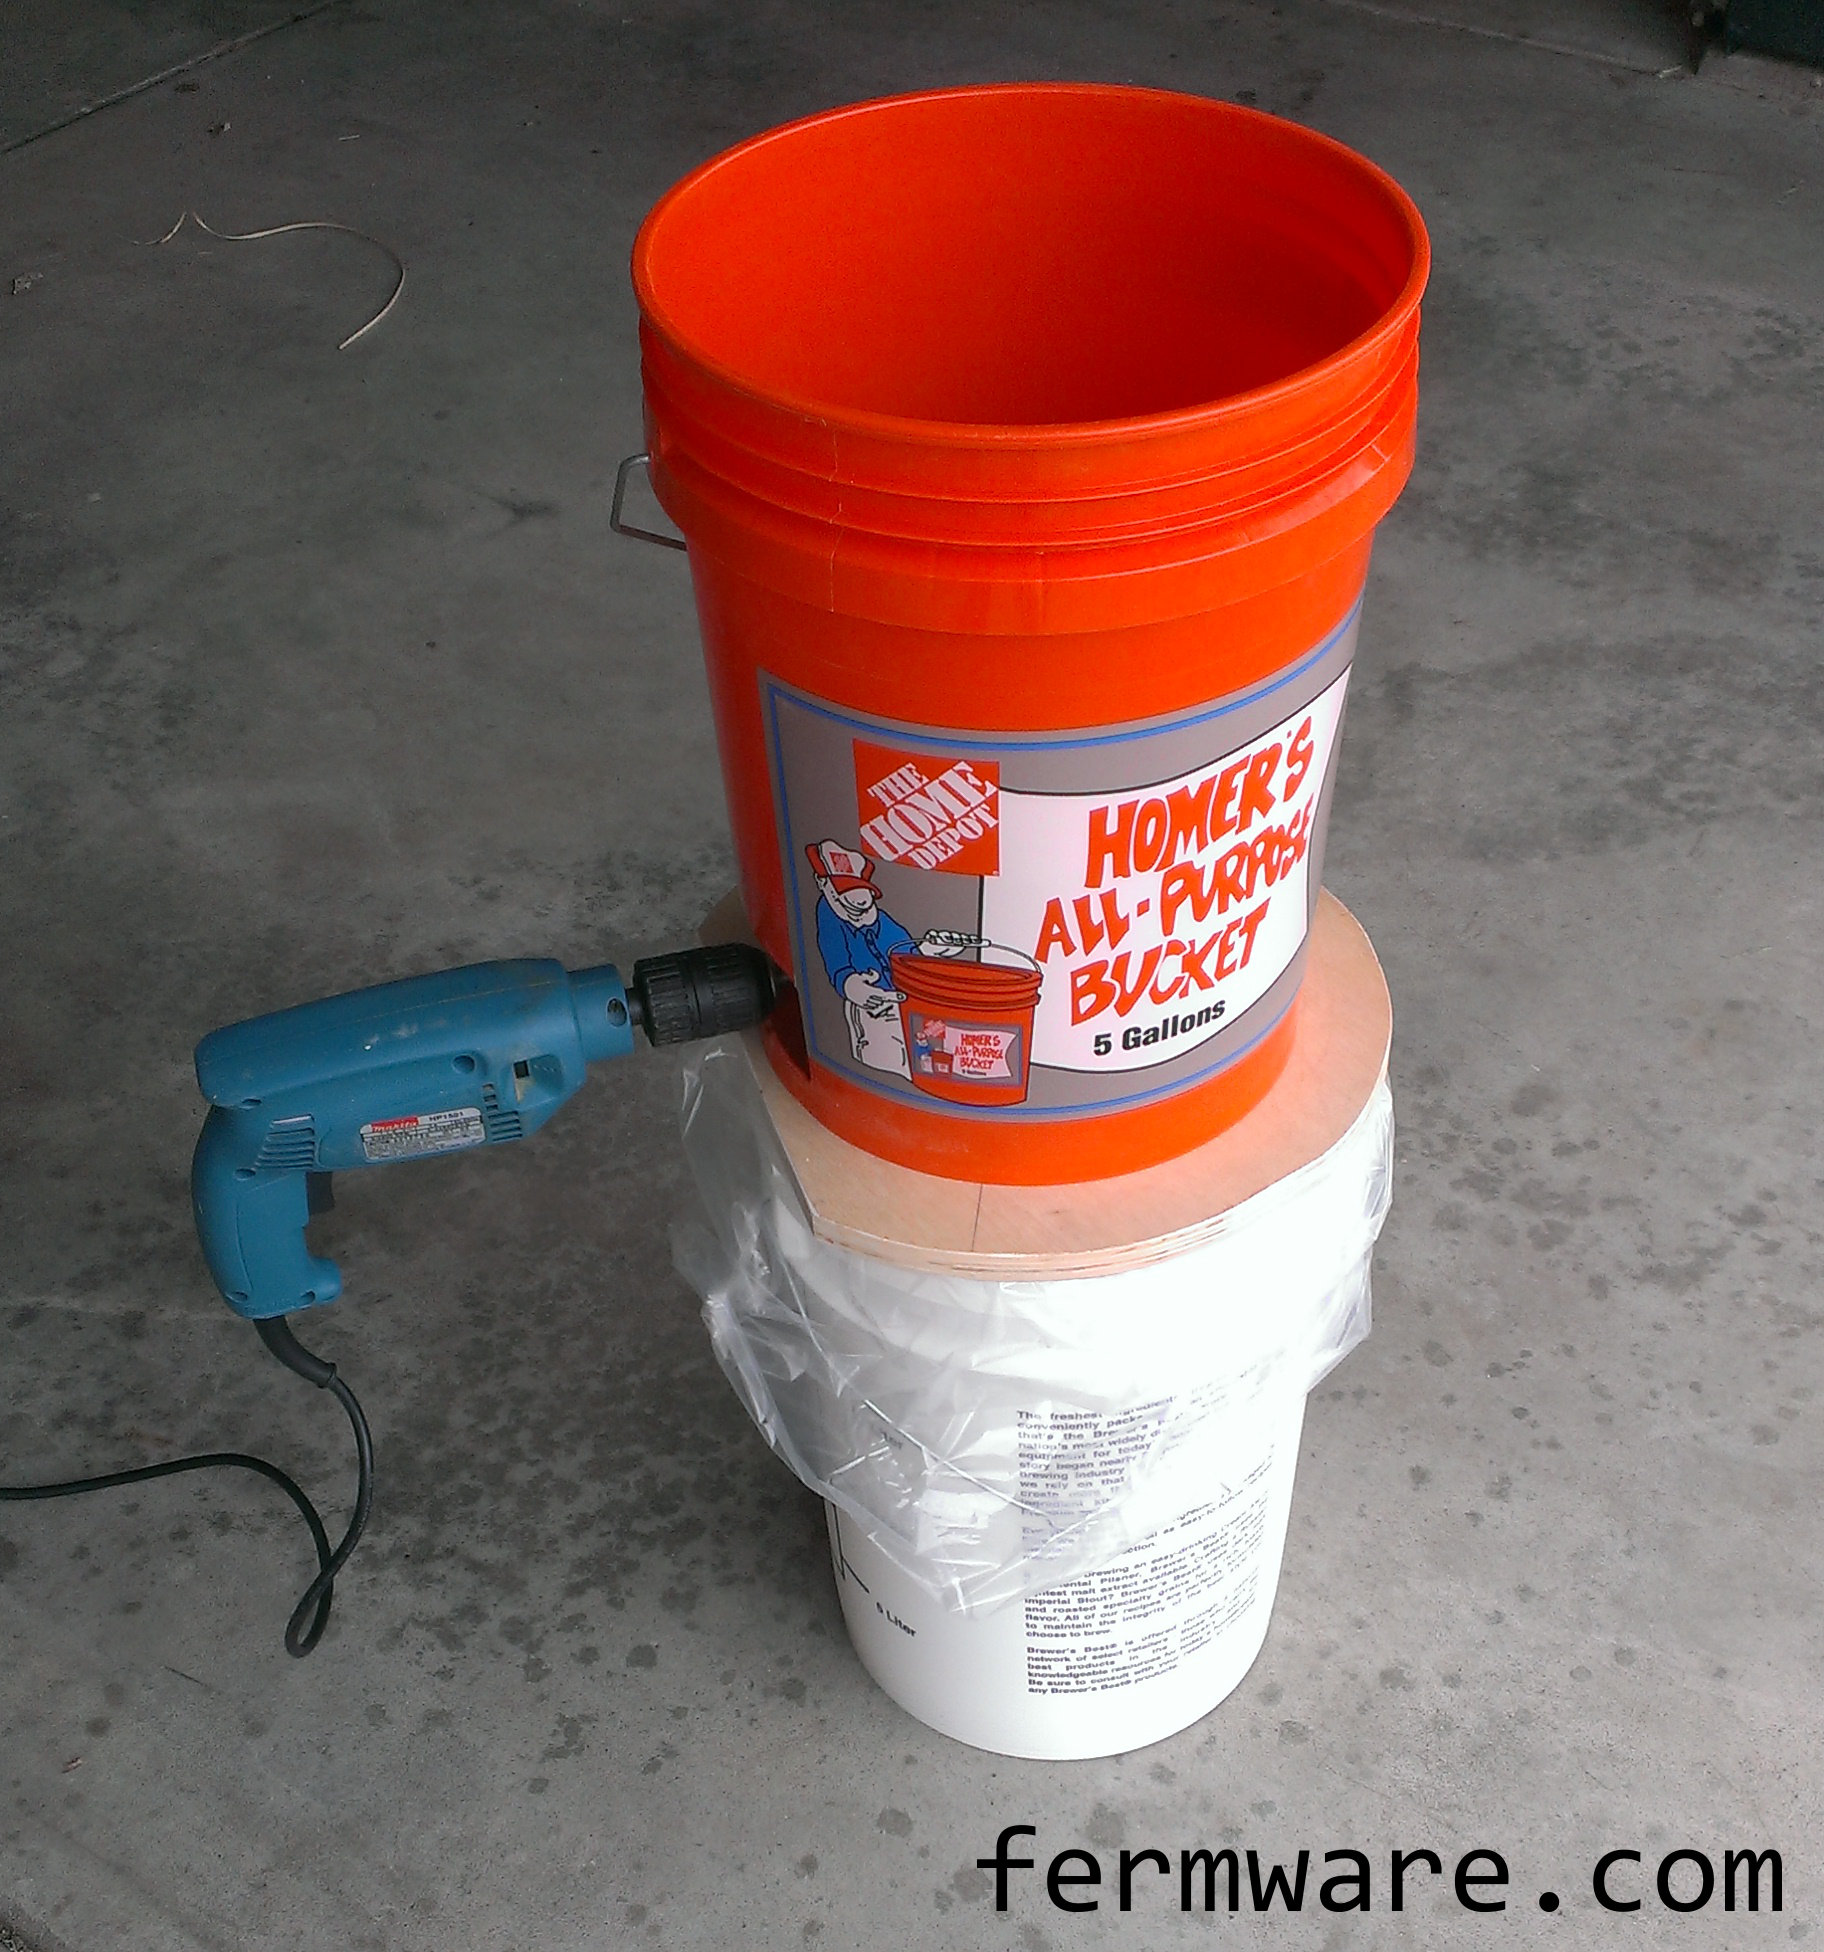
Get a fermenting bucket or another HD/Lowe’s bucket as the receiving bucket
Place hopper assembly on top of the bucket and connect your drill*
Pour grain into the hopper and get milling
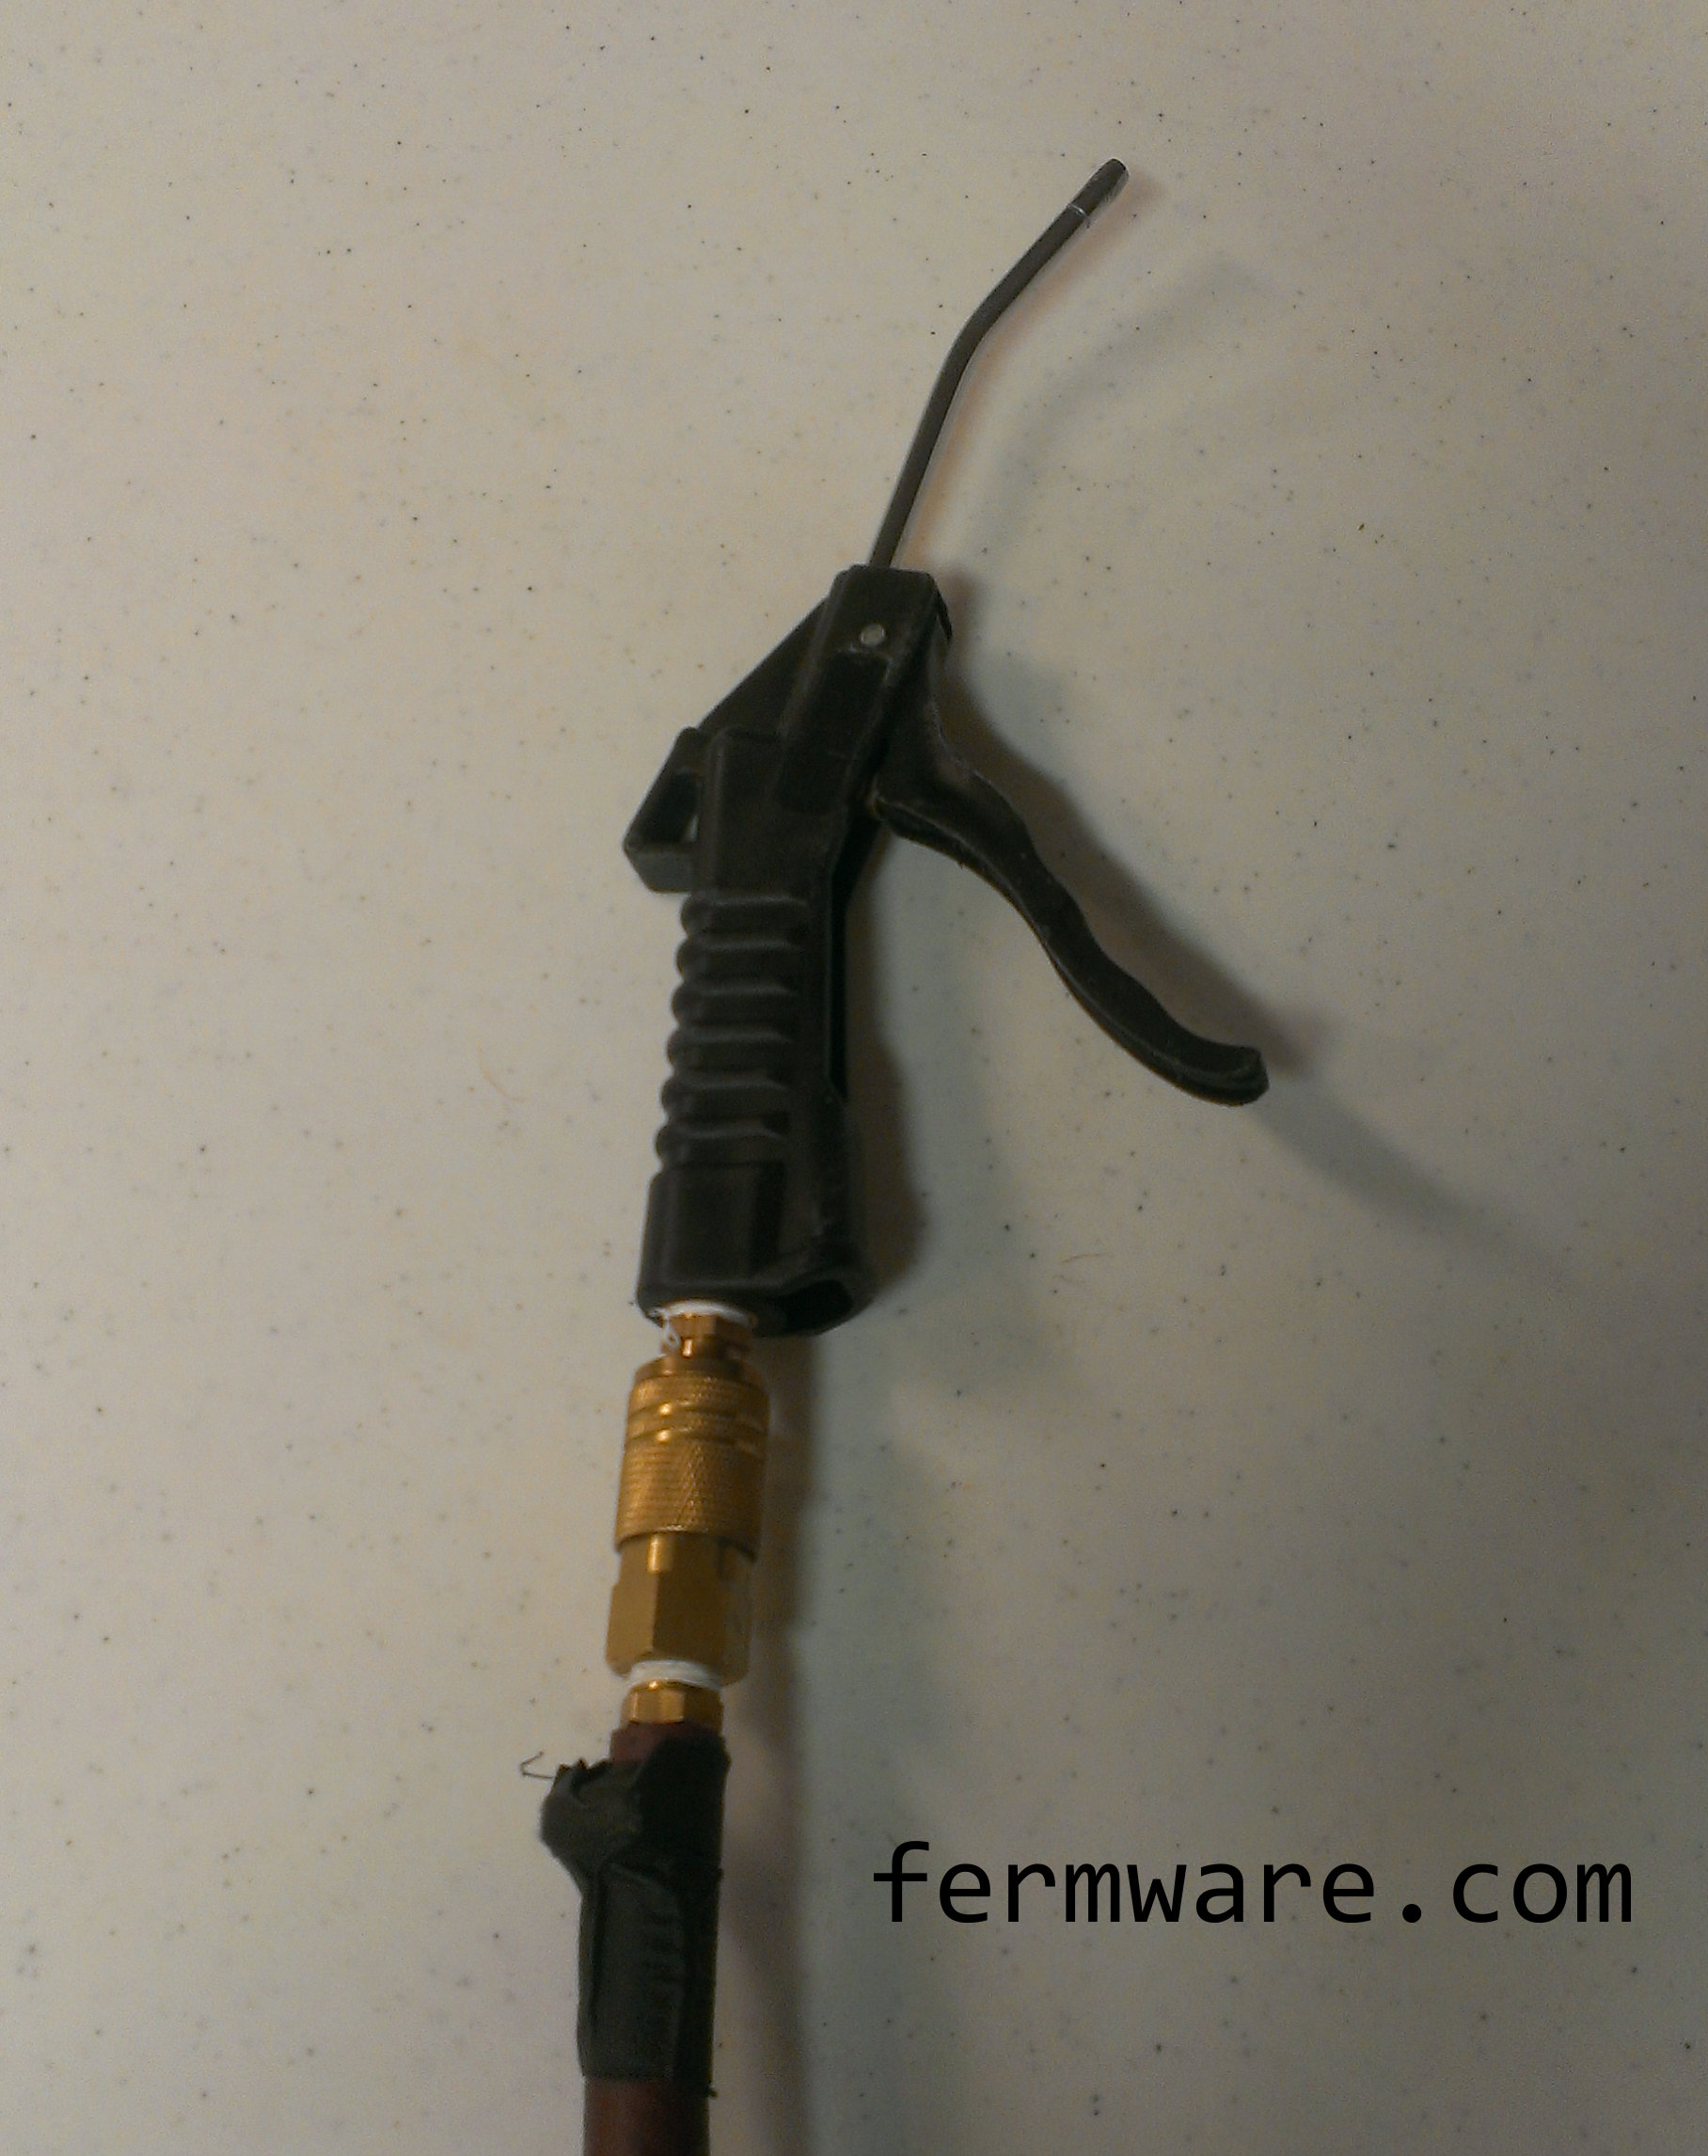
For clean up, I usually just use my shop air and blow all of the dust and uncrushed grain out. OUTSIDE OF COURSE! AND CLOSE YOUR EYES!
*Drill Power:
I personally chose a corded drill due to the higher torque they generally have. My only corded drill however was a Makita hammer drill and it is definitely overkill, but I used it on normal drill mode. DO NOT USE HAMMER DRILL MODE! The speed of this drill is pretty fast, so when I mill, I pretty much have to modulate it to the lowest speed possible. I can’t tell you exactly what that speed is in RPM, but it is the slowest I can go without stalling the motor.
Action Sequence:
Here is my Homer Hopper in action. This particular batch was for my Rye PA and consisted of 17.66 pounds which took 94 seconds (5.3 seconds / pound)
Since I utilize the BIAB technique and don’t have to worry about stuck sparges, I use a smaller gap of 0.035″.
Cleanup of the hopper is simple. Especially if you have compressed air.
I’ll be breaking the construction into a few posts:
All files have a 2″x2″ square on the print so that when you print out on paper, you can measure to make sure your printer was printing to scale and at the correct aspect ratio.
The intention in making these files downloadable and free is for people to make this themselves or modify/improve the design to suit them.
This download is available through the Creative Commons Attribution-Non-Commercial license.
If you are interested in this for commercial purposes (i.e. you want to make money on my effort), I’m flattered, but please contact me first.
Be excellent to everyone!
Click on the download icon to agree to these terms and enjoy!
An easy way to store your keezer / kegerator under a shelf
Difficulty: *
*Due to the potential of needing help to lift the keezer onto the dolly
Time Required:
one morning or afternoon, plus overnight if gluing the base is required
Background:
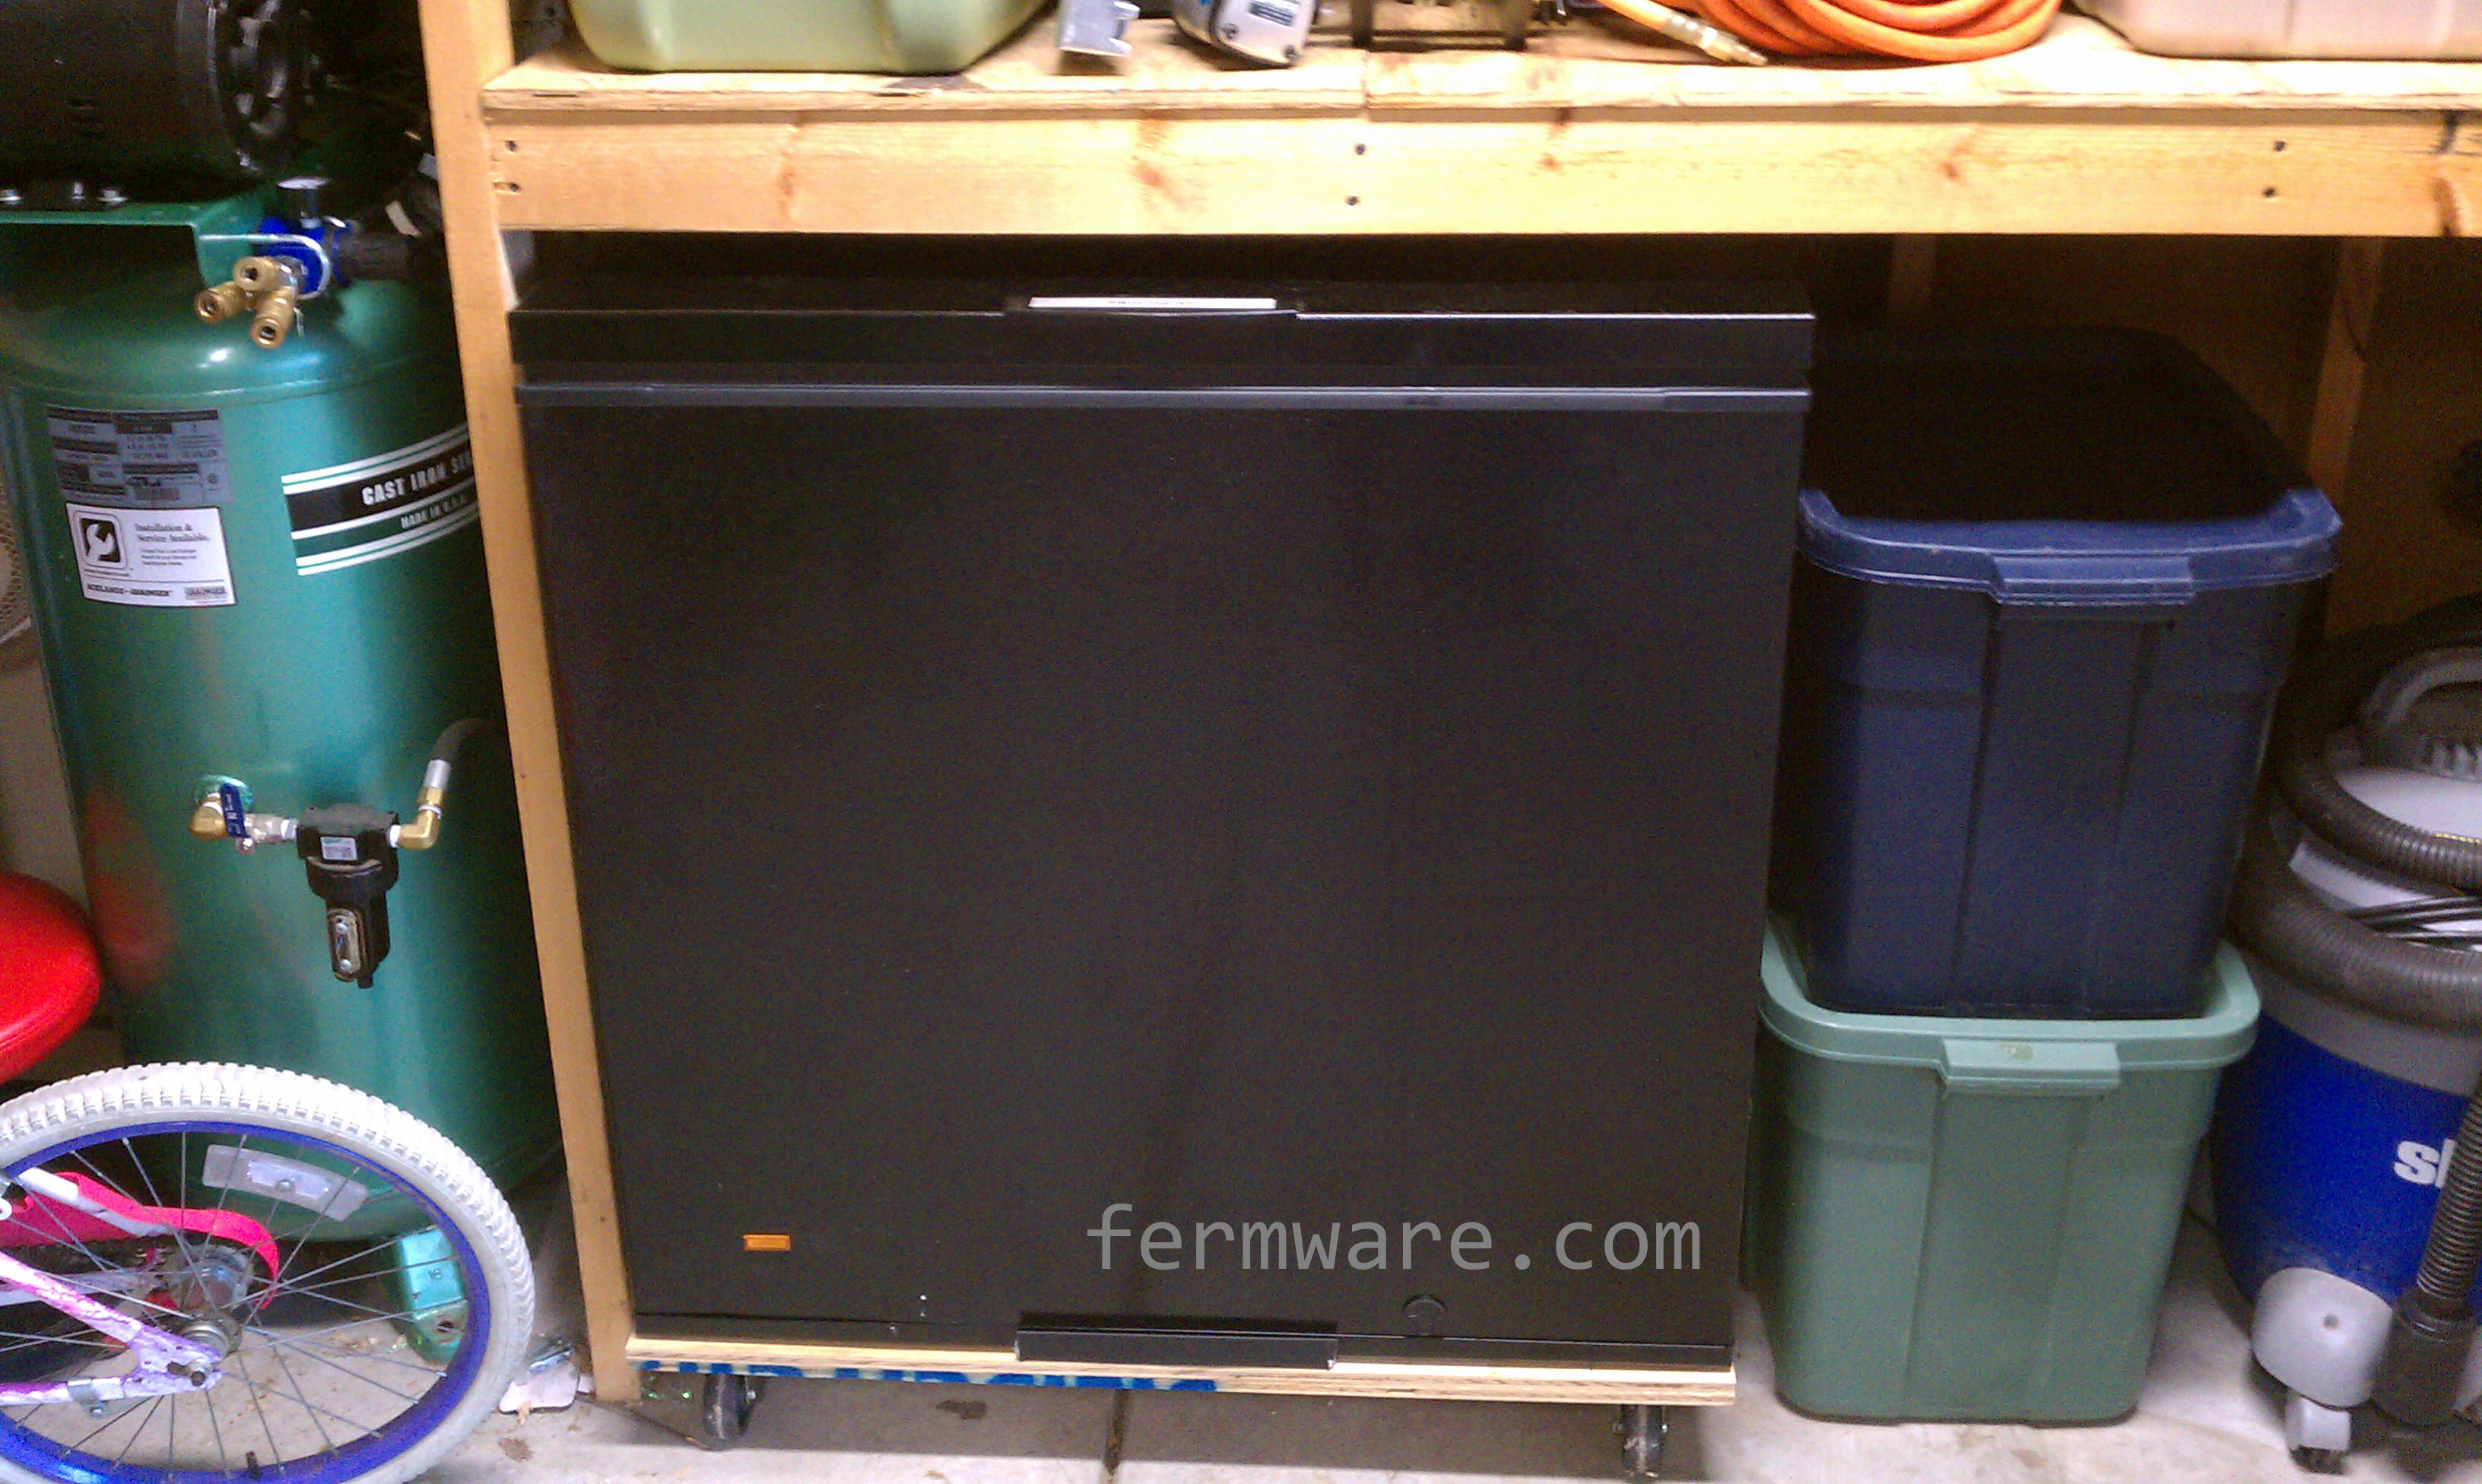
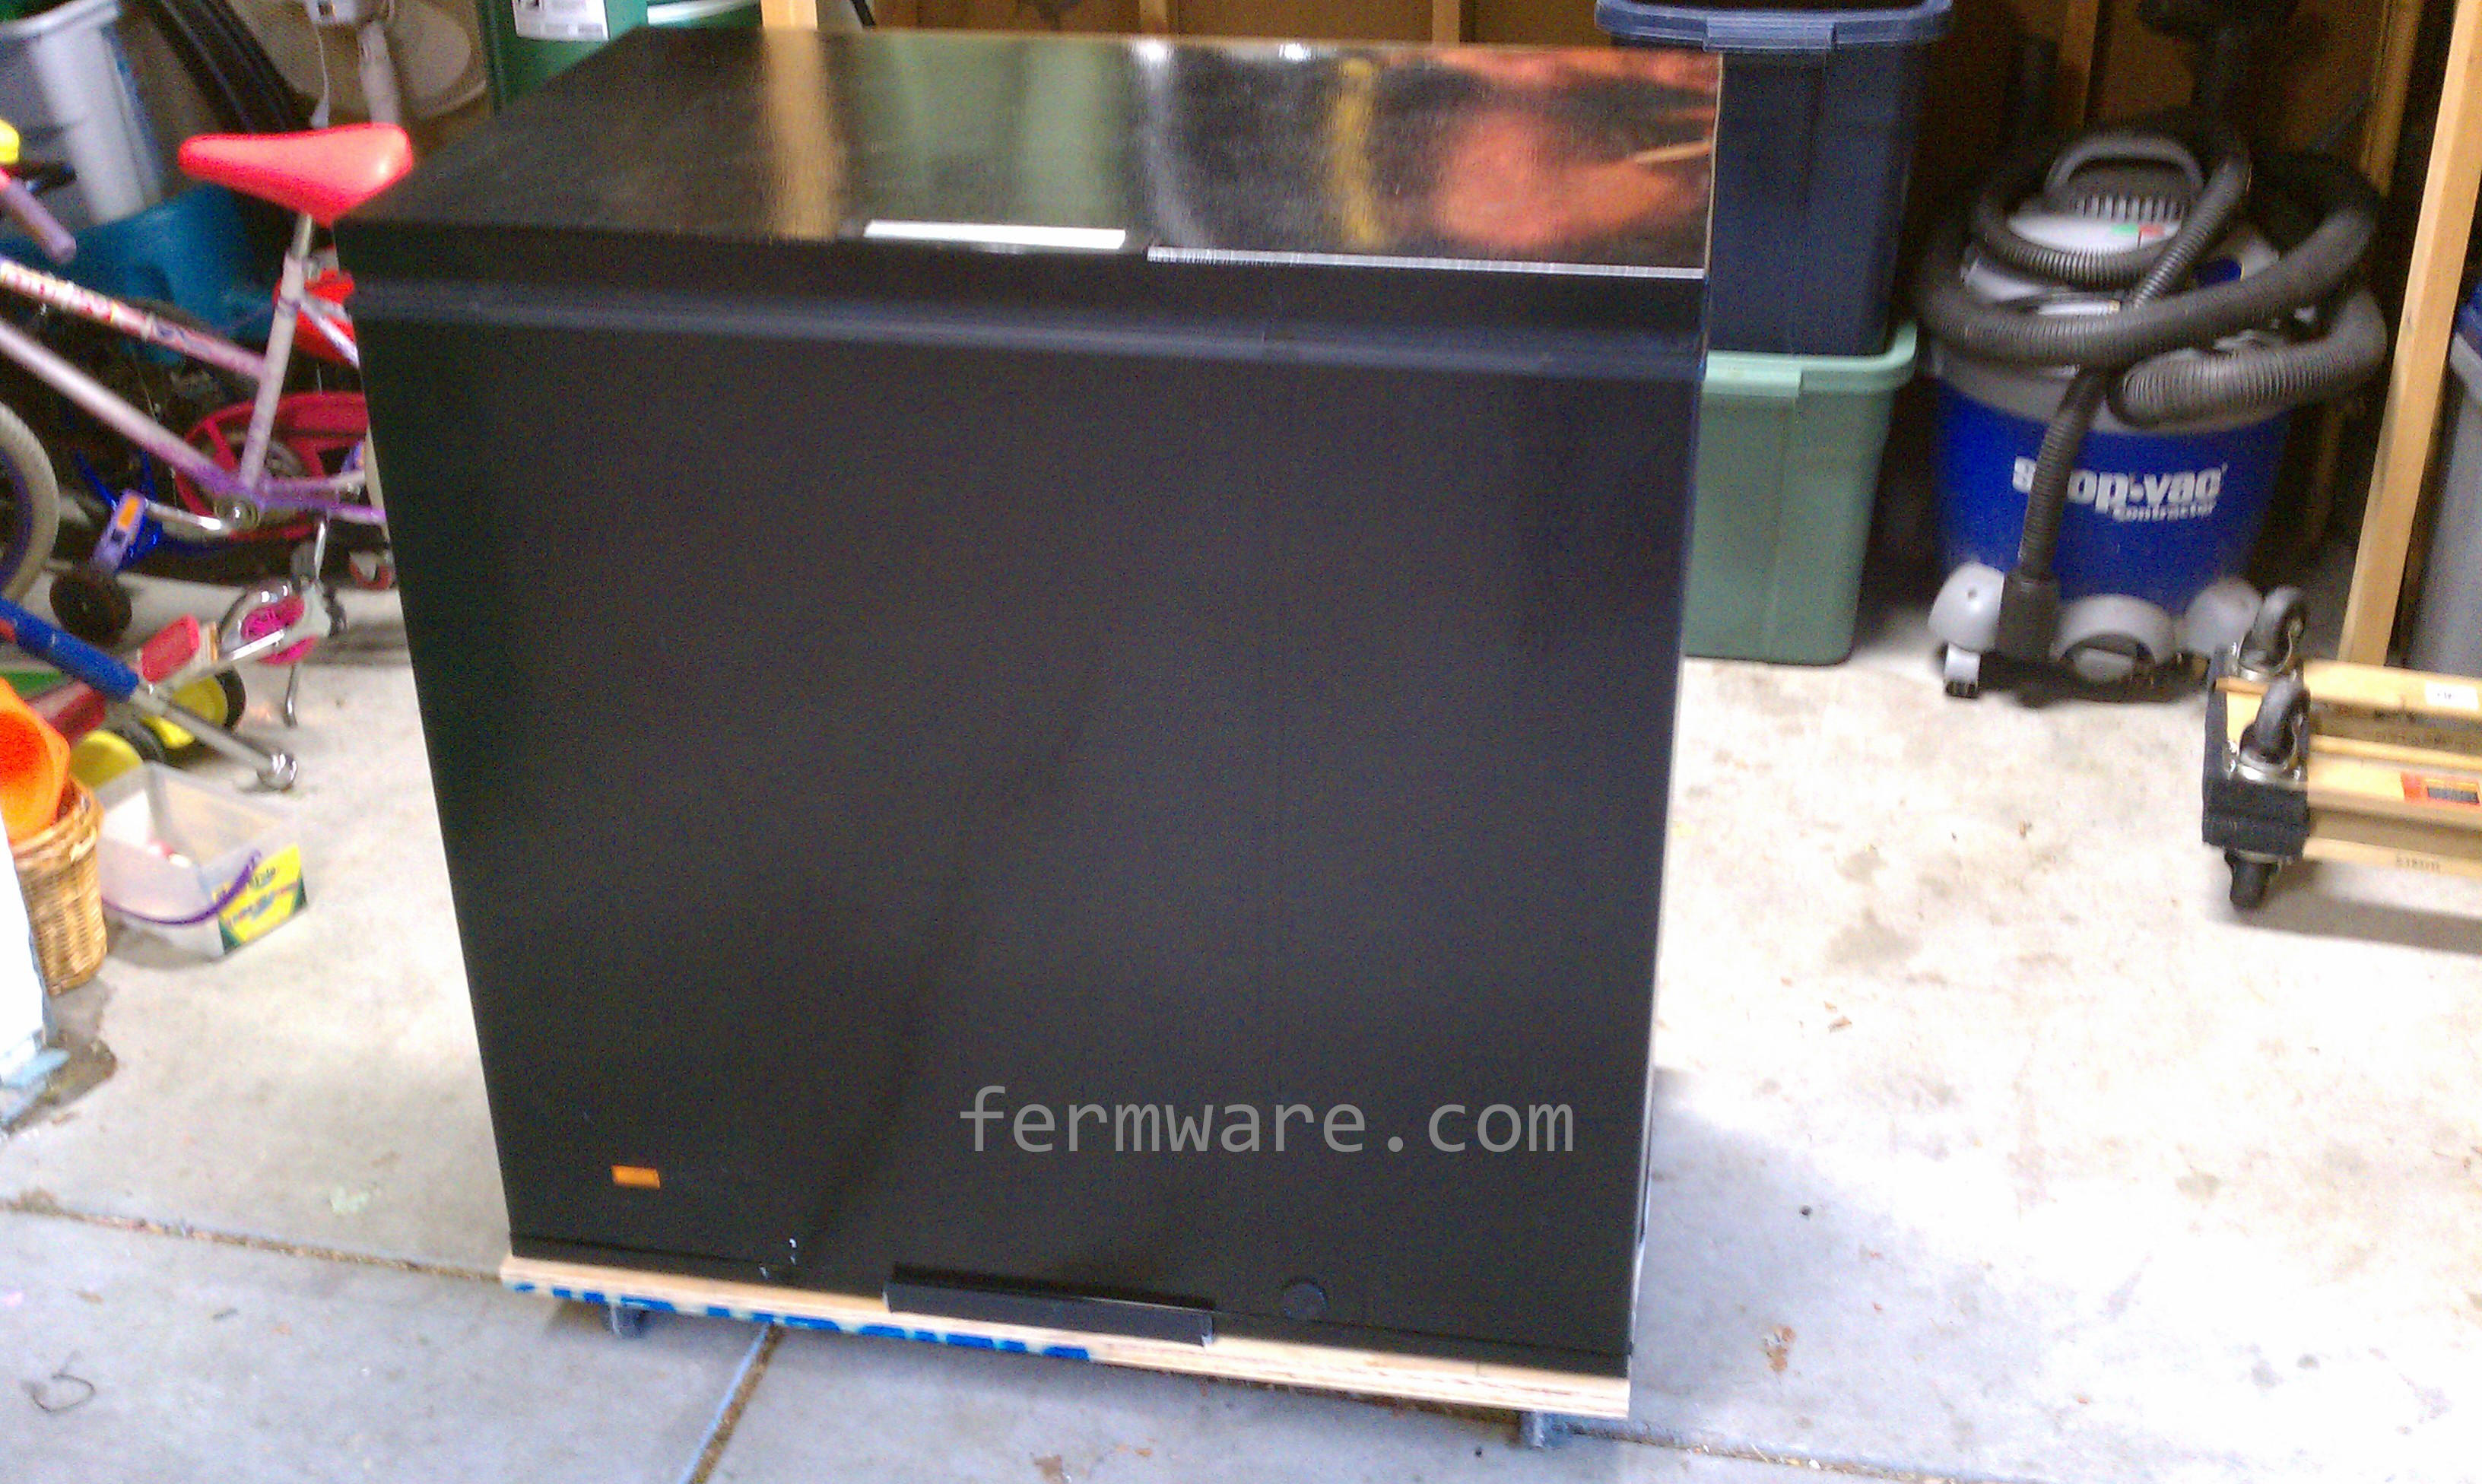
As I mentioned in my About: This Blog page, I have limited space for my equipment and the Keezer is no small piece of equipment. It certainly wouldn’t go with the decor of the house and I also didn’t want it to be in easy reach of the kids. Not that they would be drinking it, but I would be concerned they would think it was funny to squirt pressurized beer at will. In my opinion, having the chest freezer sitting on the garage floor with nothing above it was a waste of air space. My ultimate solution was to build a keezer dolly that would allow me to have easy access, but could easily be rolled under a shelf in the garage. It also makes it easy to clean behind it, rolling it to the edge of the garage when defrosting or draining the moisture buildup and is just all around convenient. I’ve had it for 2+ years and it has been great. I’ve also had no issues with it being in the garage and it’s on an outside wall.
My keezer happily in it’s place under a shelf in the garage.
Important note: This would not be wise for a vertical freezer or refrigerator. It could easily tip when moving. This would not be good. Those typically have some wheels anyway.
Affiliate Links
Parts Required:
Casters, carriage bolts and nuts/washers
You could buy a moving dolly for the parts (potentially inexpensive way to get casters and bolts)
I usually pull 20% off coupons from my Road & Track and Car and Driver magazines
Size / Type
Big enough to roll over separations in the floor
Small enough to not raise the keezer too high
Unless you plan on rolling it into the yard (later post blog, stay tuned…)
Choose solid rubber wheels. The air filled tires have more resistance on flat surfaces
The wheels from the Harbor Freight dolly I used are 3″ in diameter and with the casters are about 3.5″ tall
Plywood sheet
About 1″ larger than your keezer on all sides
To use the same bolts from the dolly, make your platform the same thickness of the dolly (more on that later)
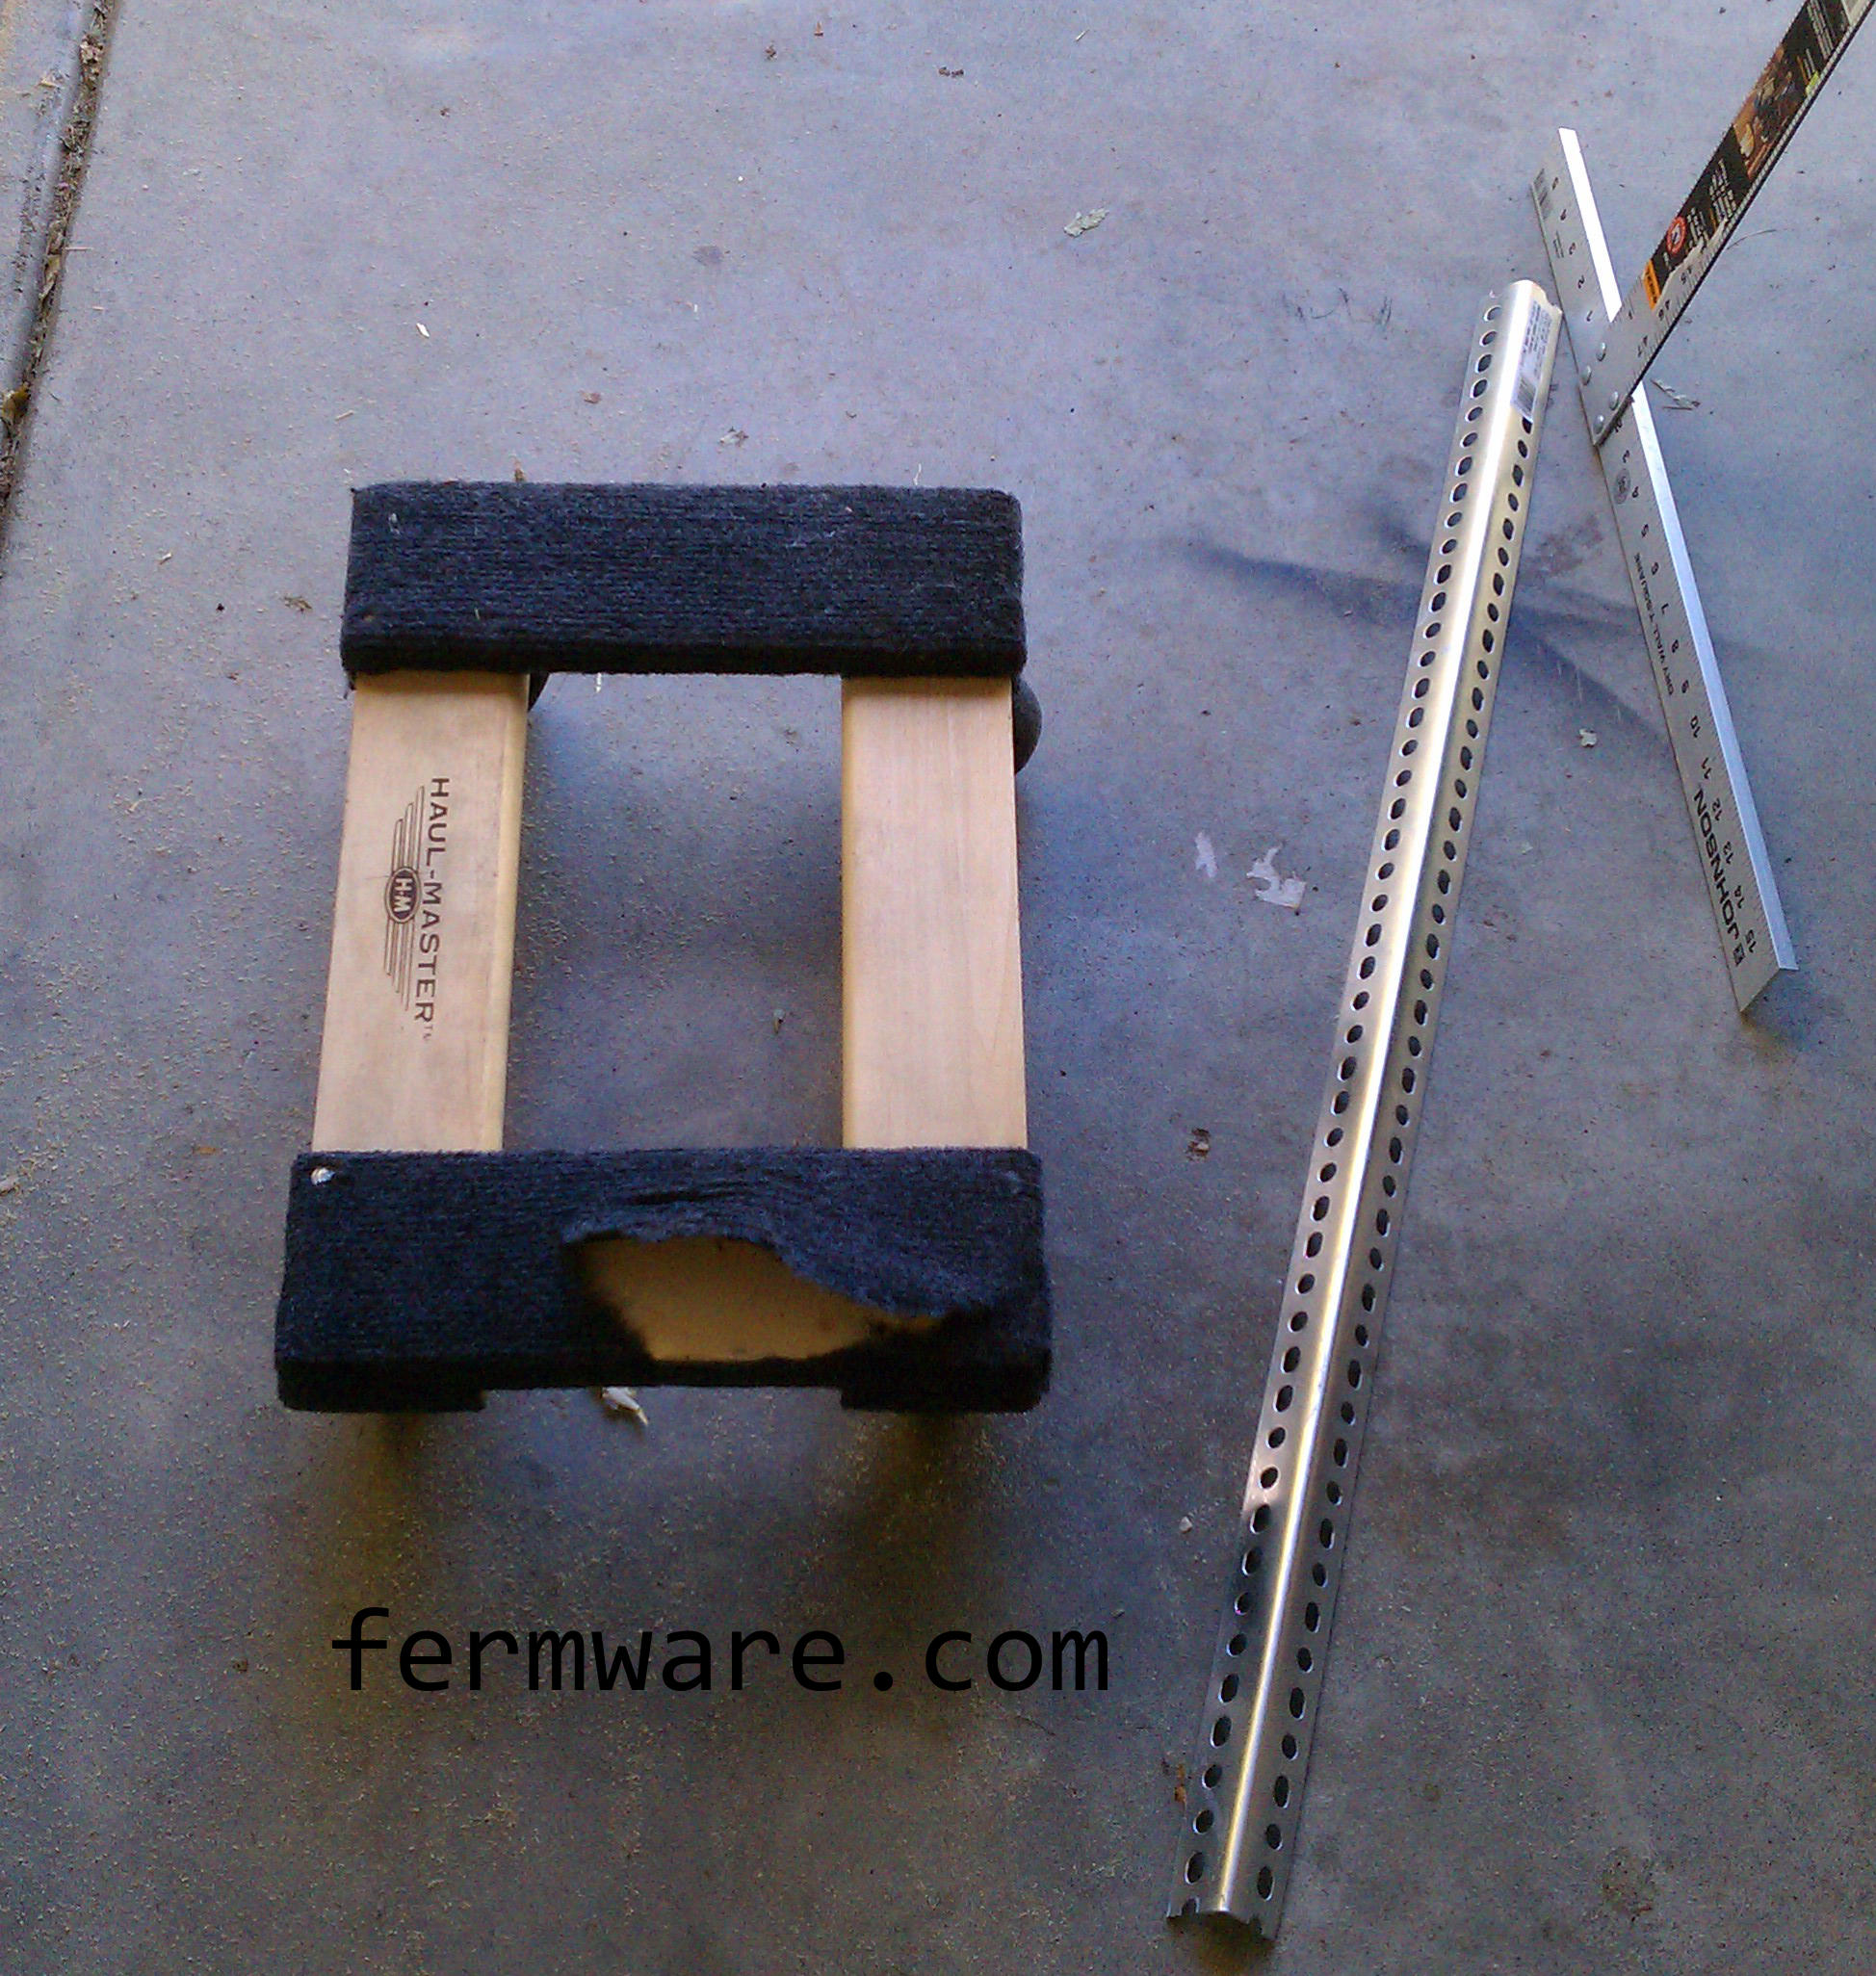
Some type of L-channel (AKA angle iron or L bracket) to help retain the keezer on the dolly
I used some leftover channel from my garage door opener installation 10 years ago (I knew it would come in handy at some point!)
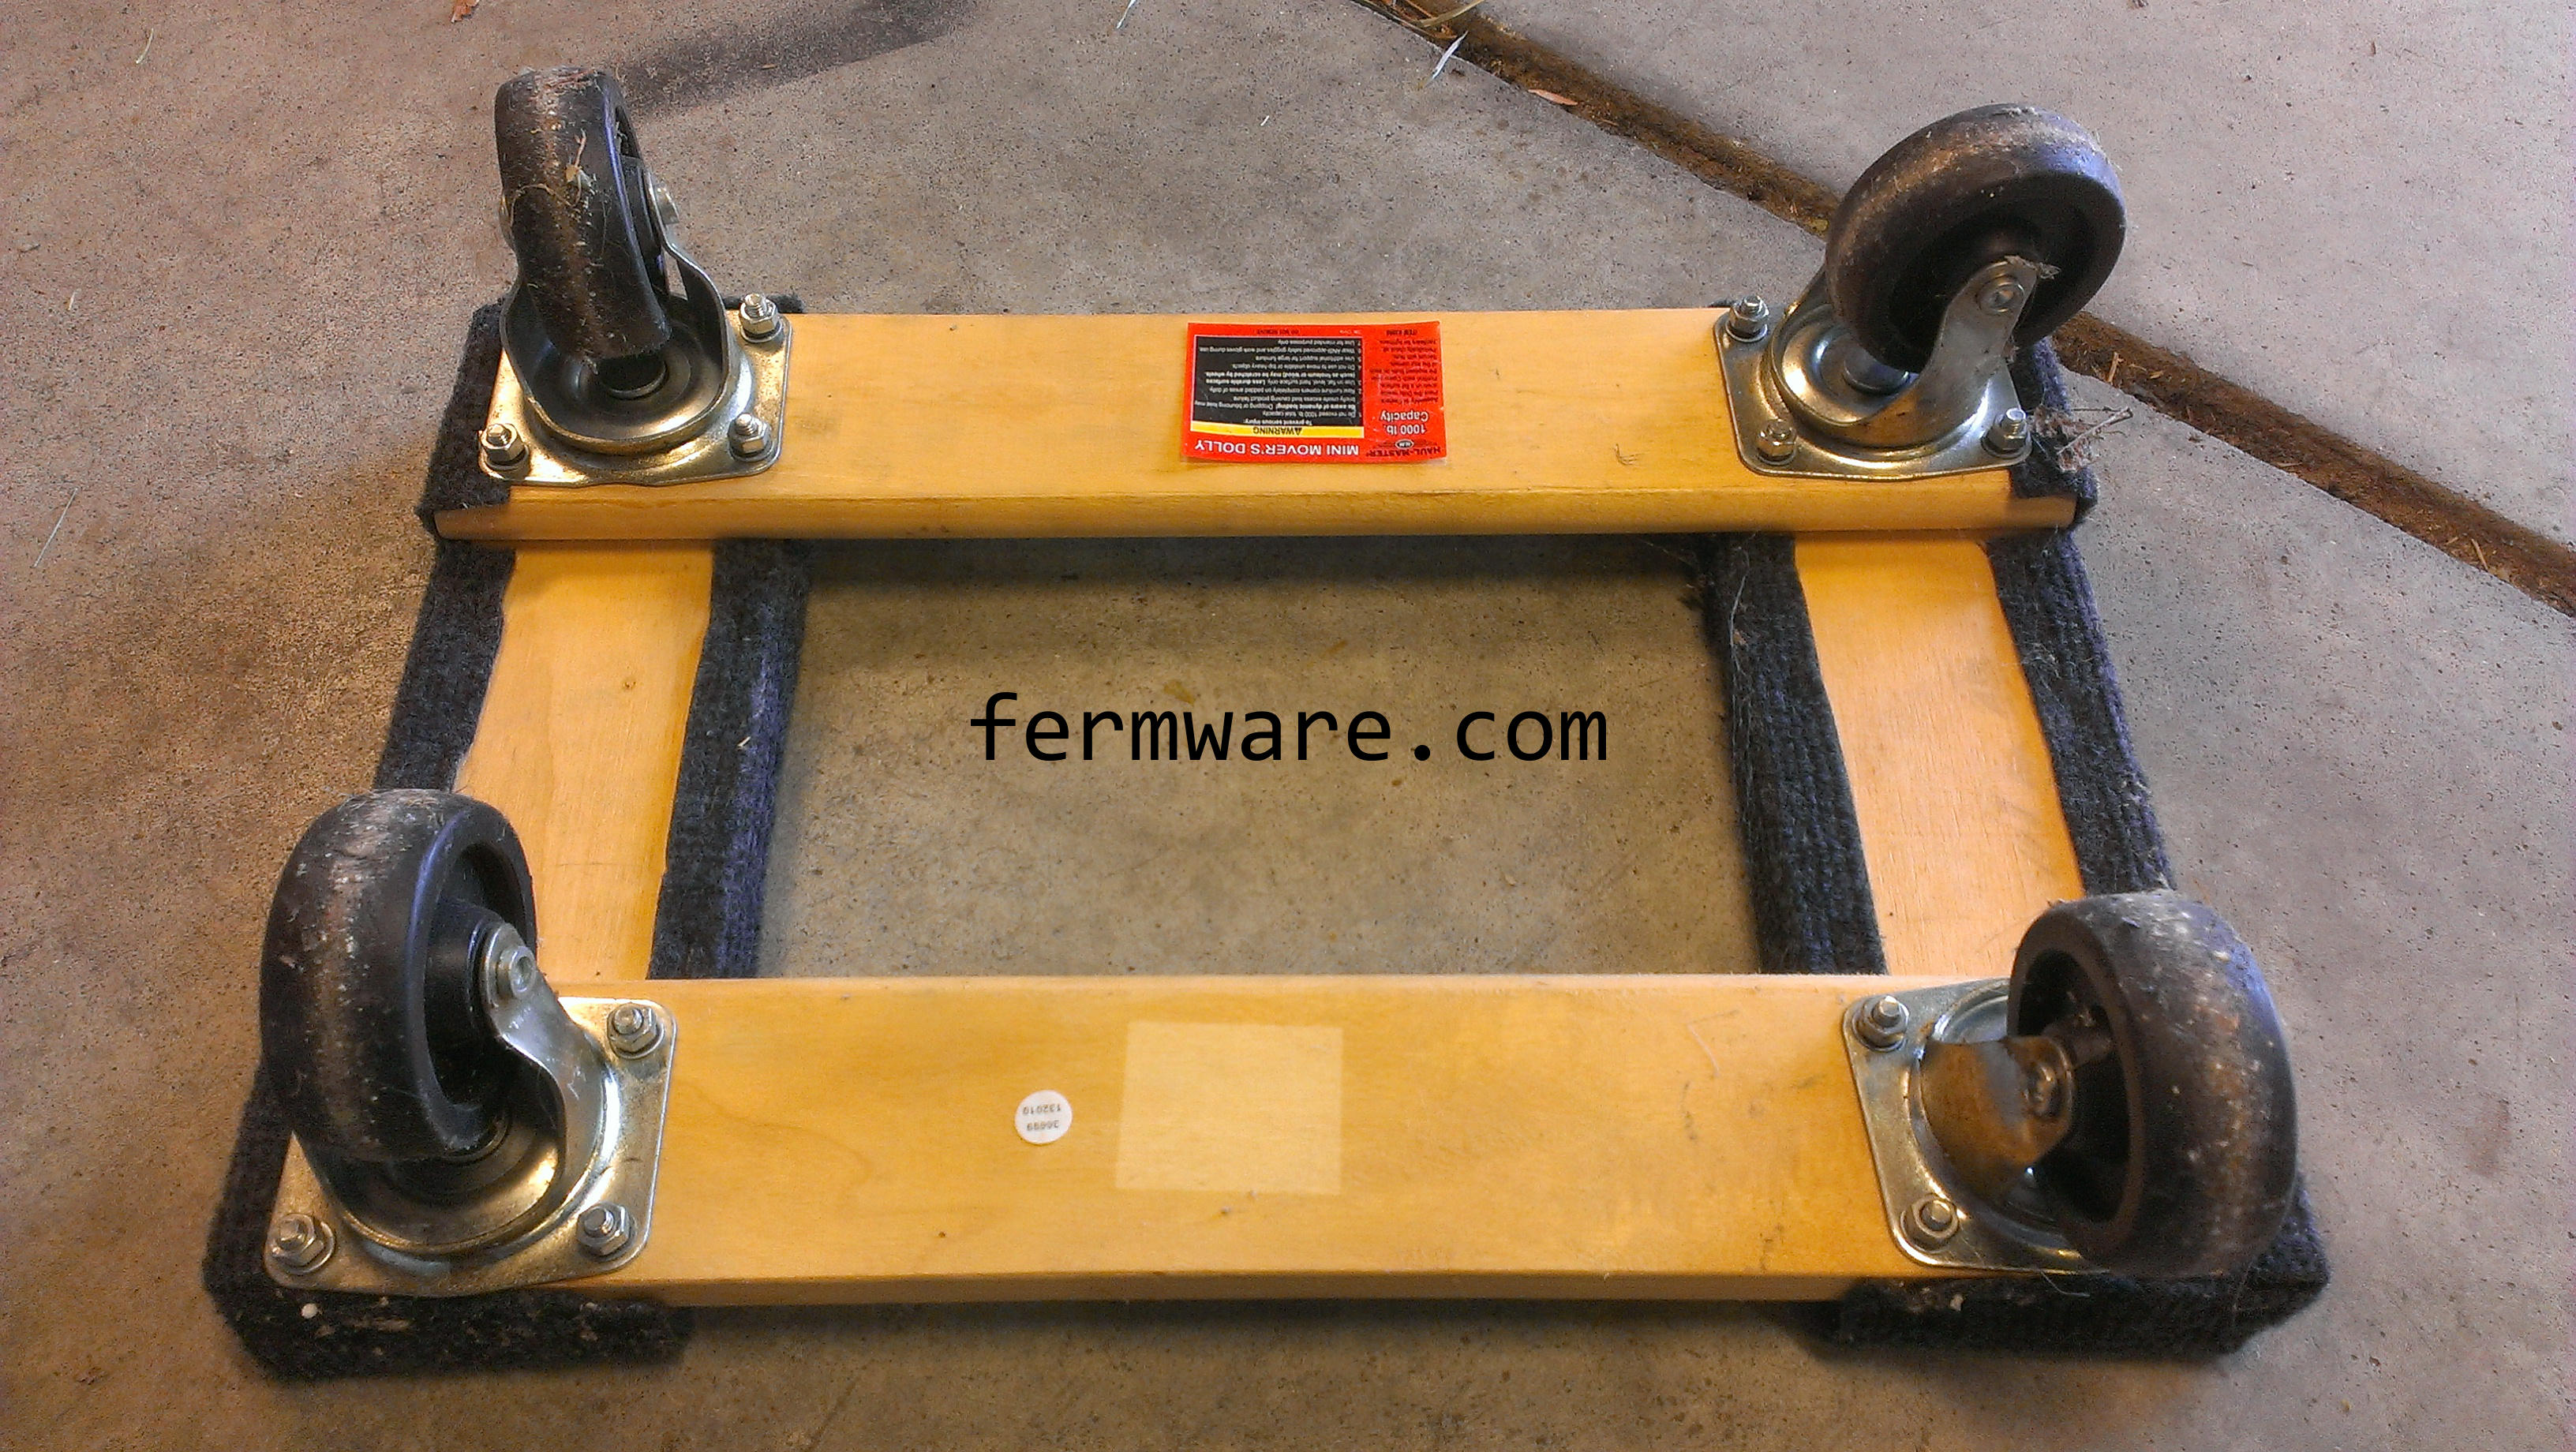
Donor moving dolly and L Channel
The Build:
Disassemble the dolly to remove the casters (skip to the next step if you just bought them)
loosen the bolts on the underside that attach the casters to the frame
If you are using the Harbor Freight dolly or a similar one, you can cut the carpet coating with a knife and peel it off
push through or hammer the carriage bolts out the other side
measure the thickness of the dolly’s frame (important for the building of the platform)
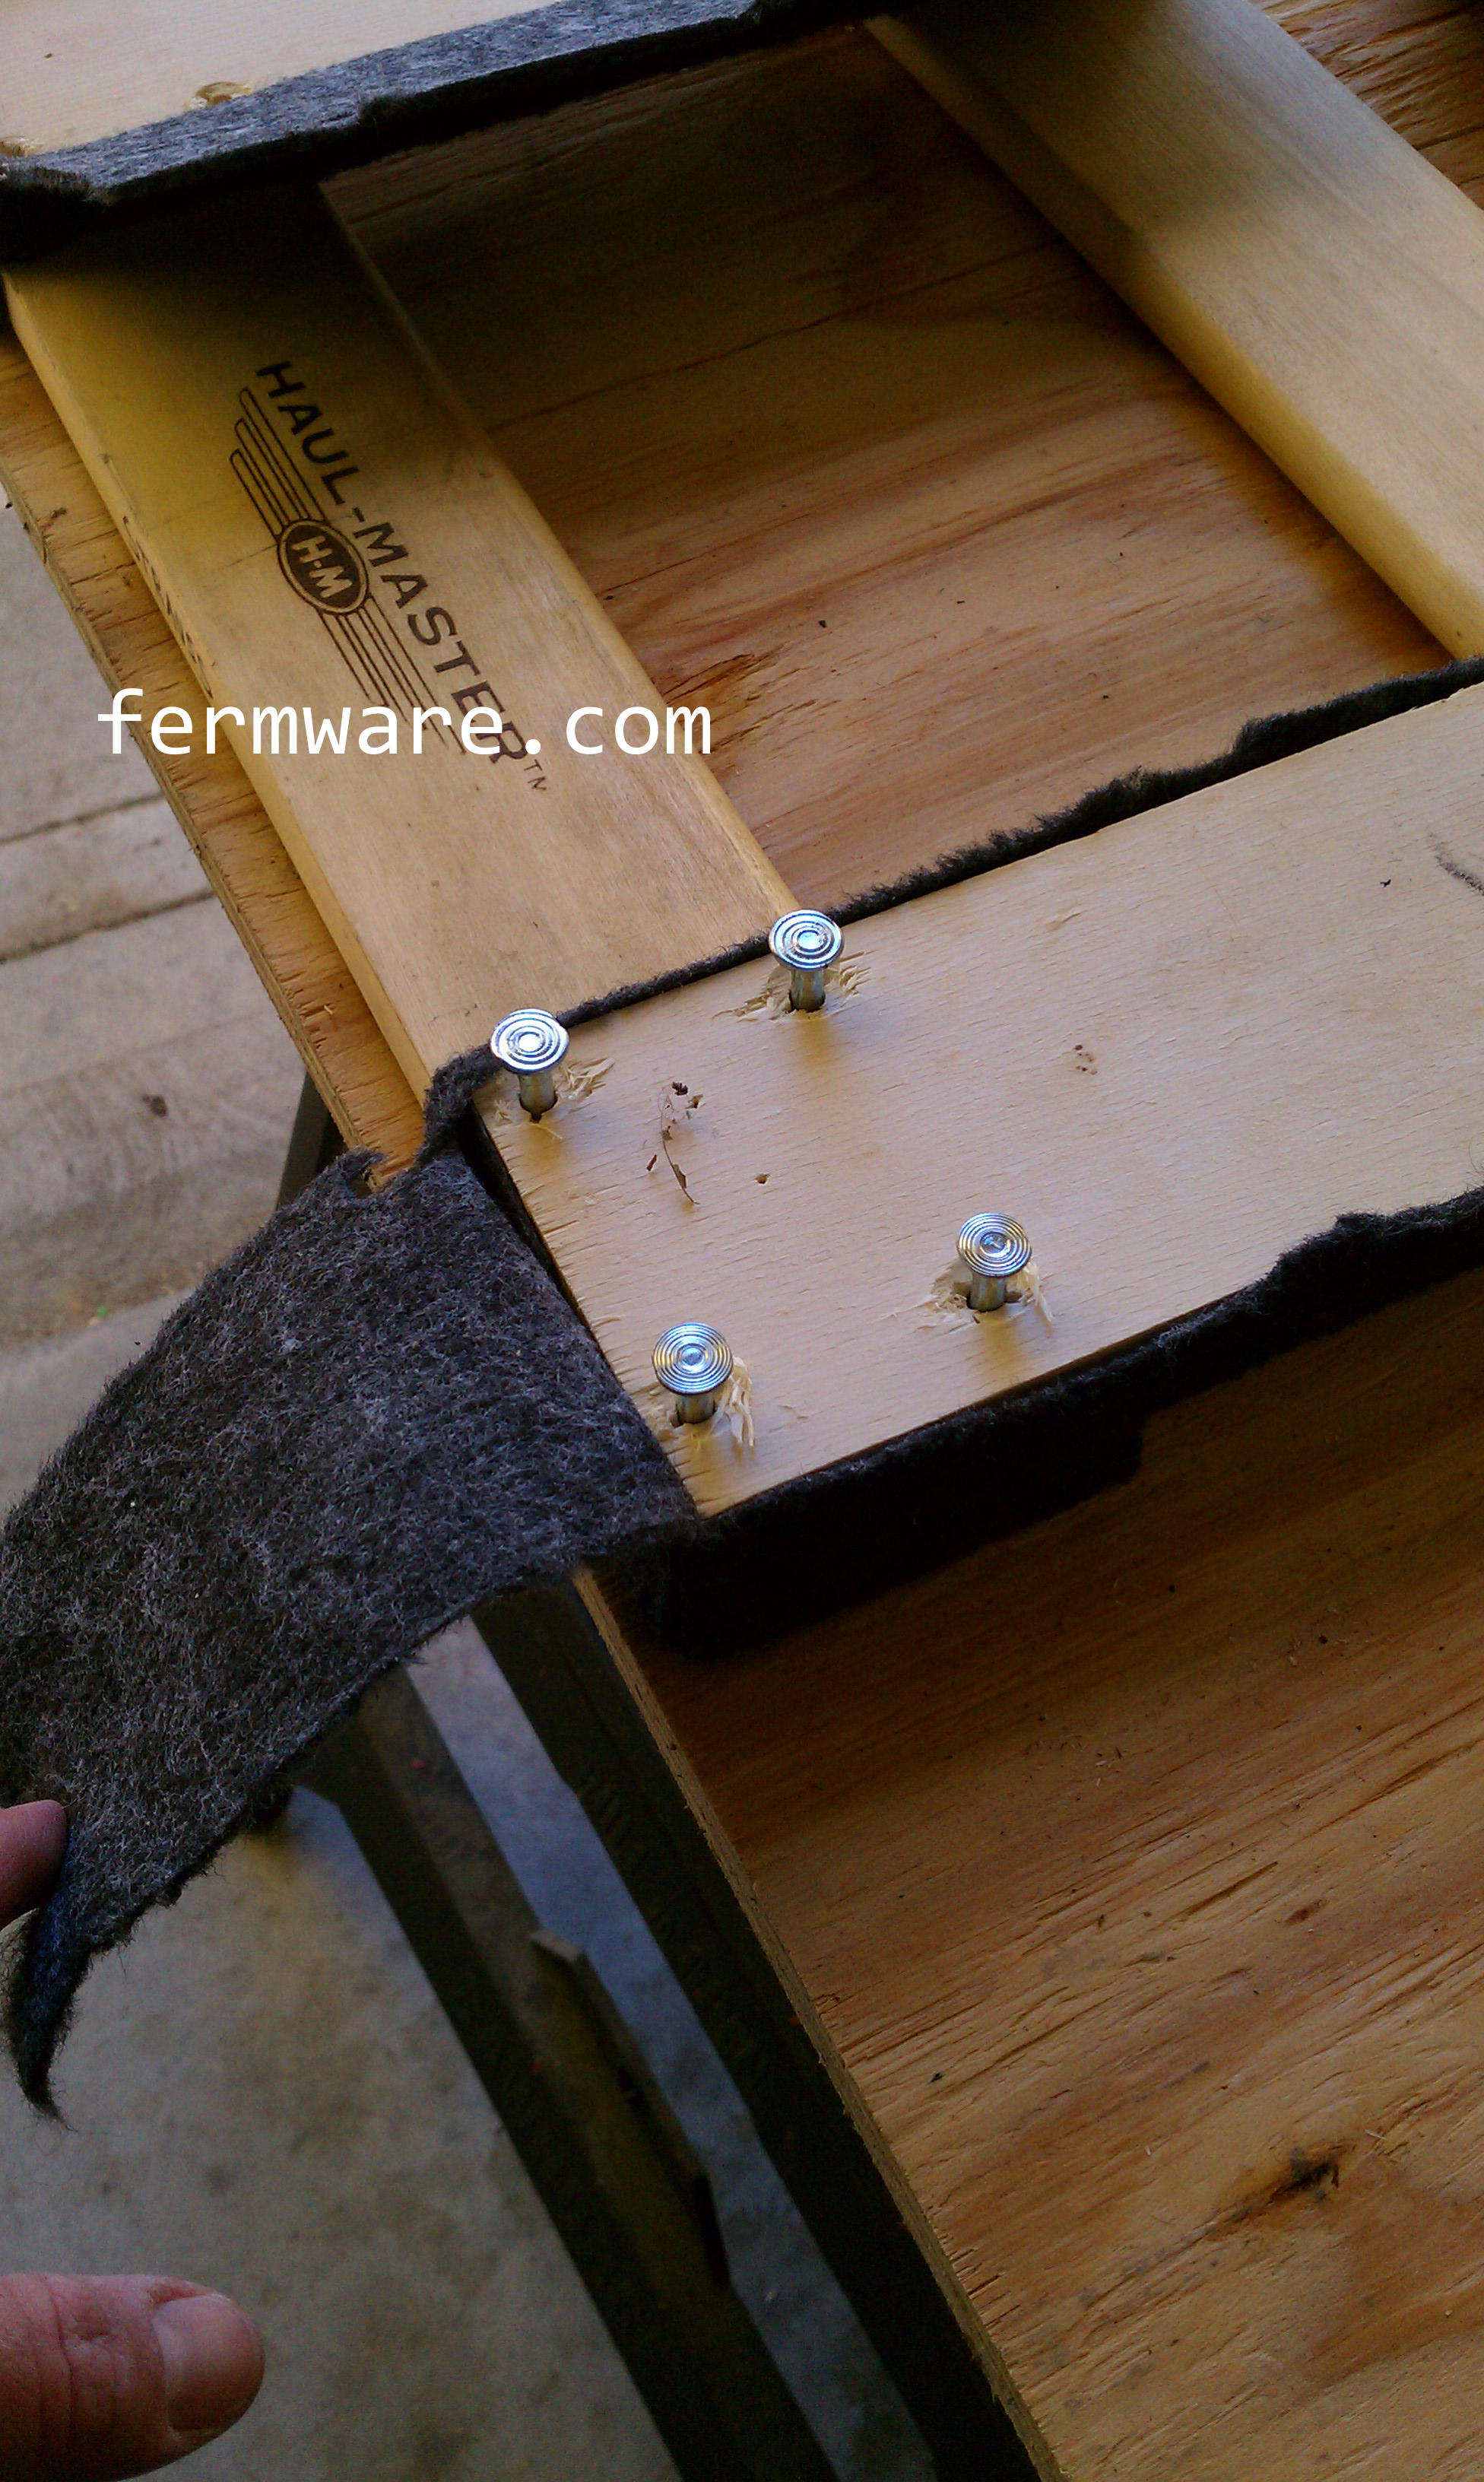
Build the Platform
Dimensions
It should be slightly larger than the maximum plan area (top view) of the keezer
This is so that the first thing that runs into walls is the base, not the handles or hinges
The sides can be close, but I would overshoot by 1/4″ or so
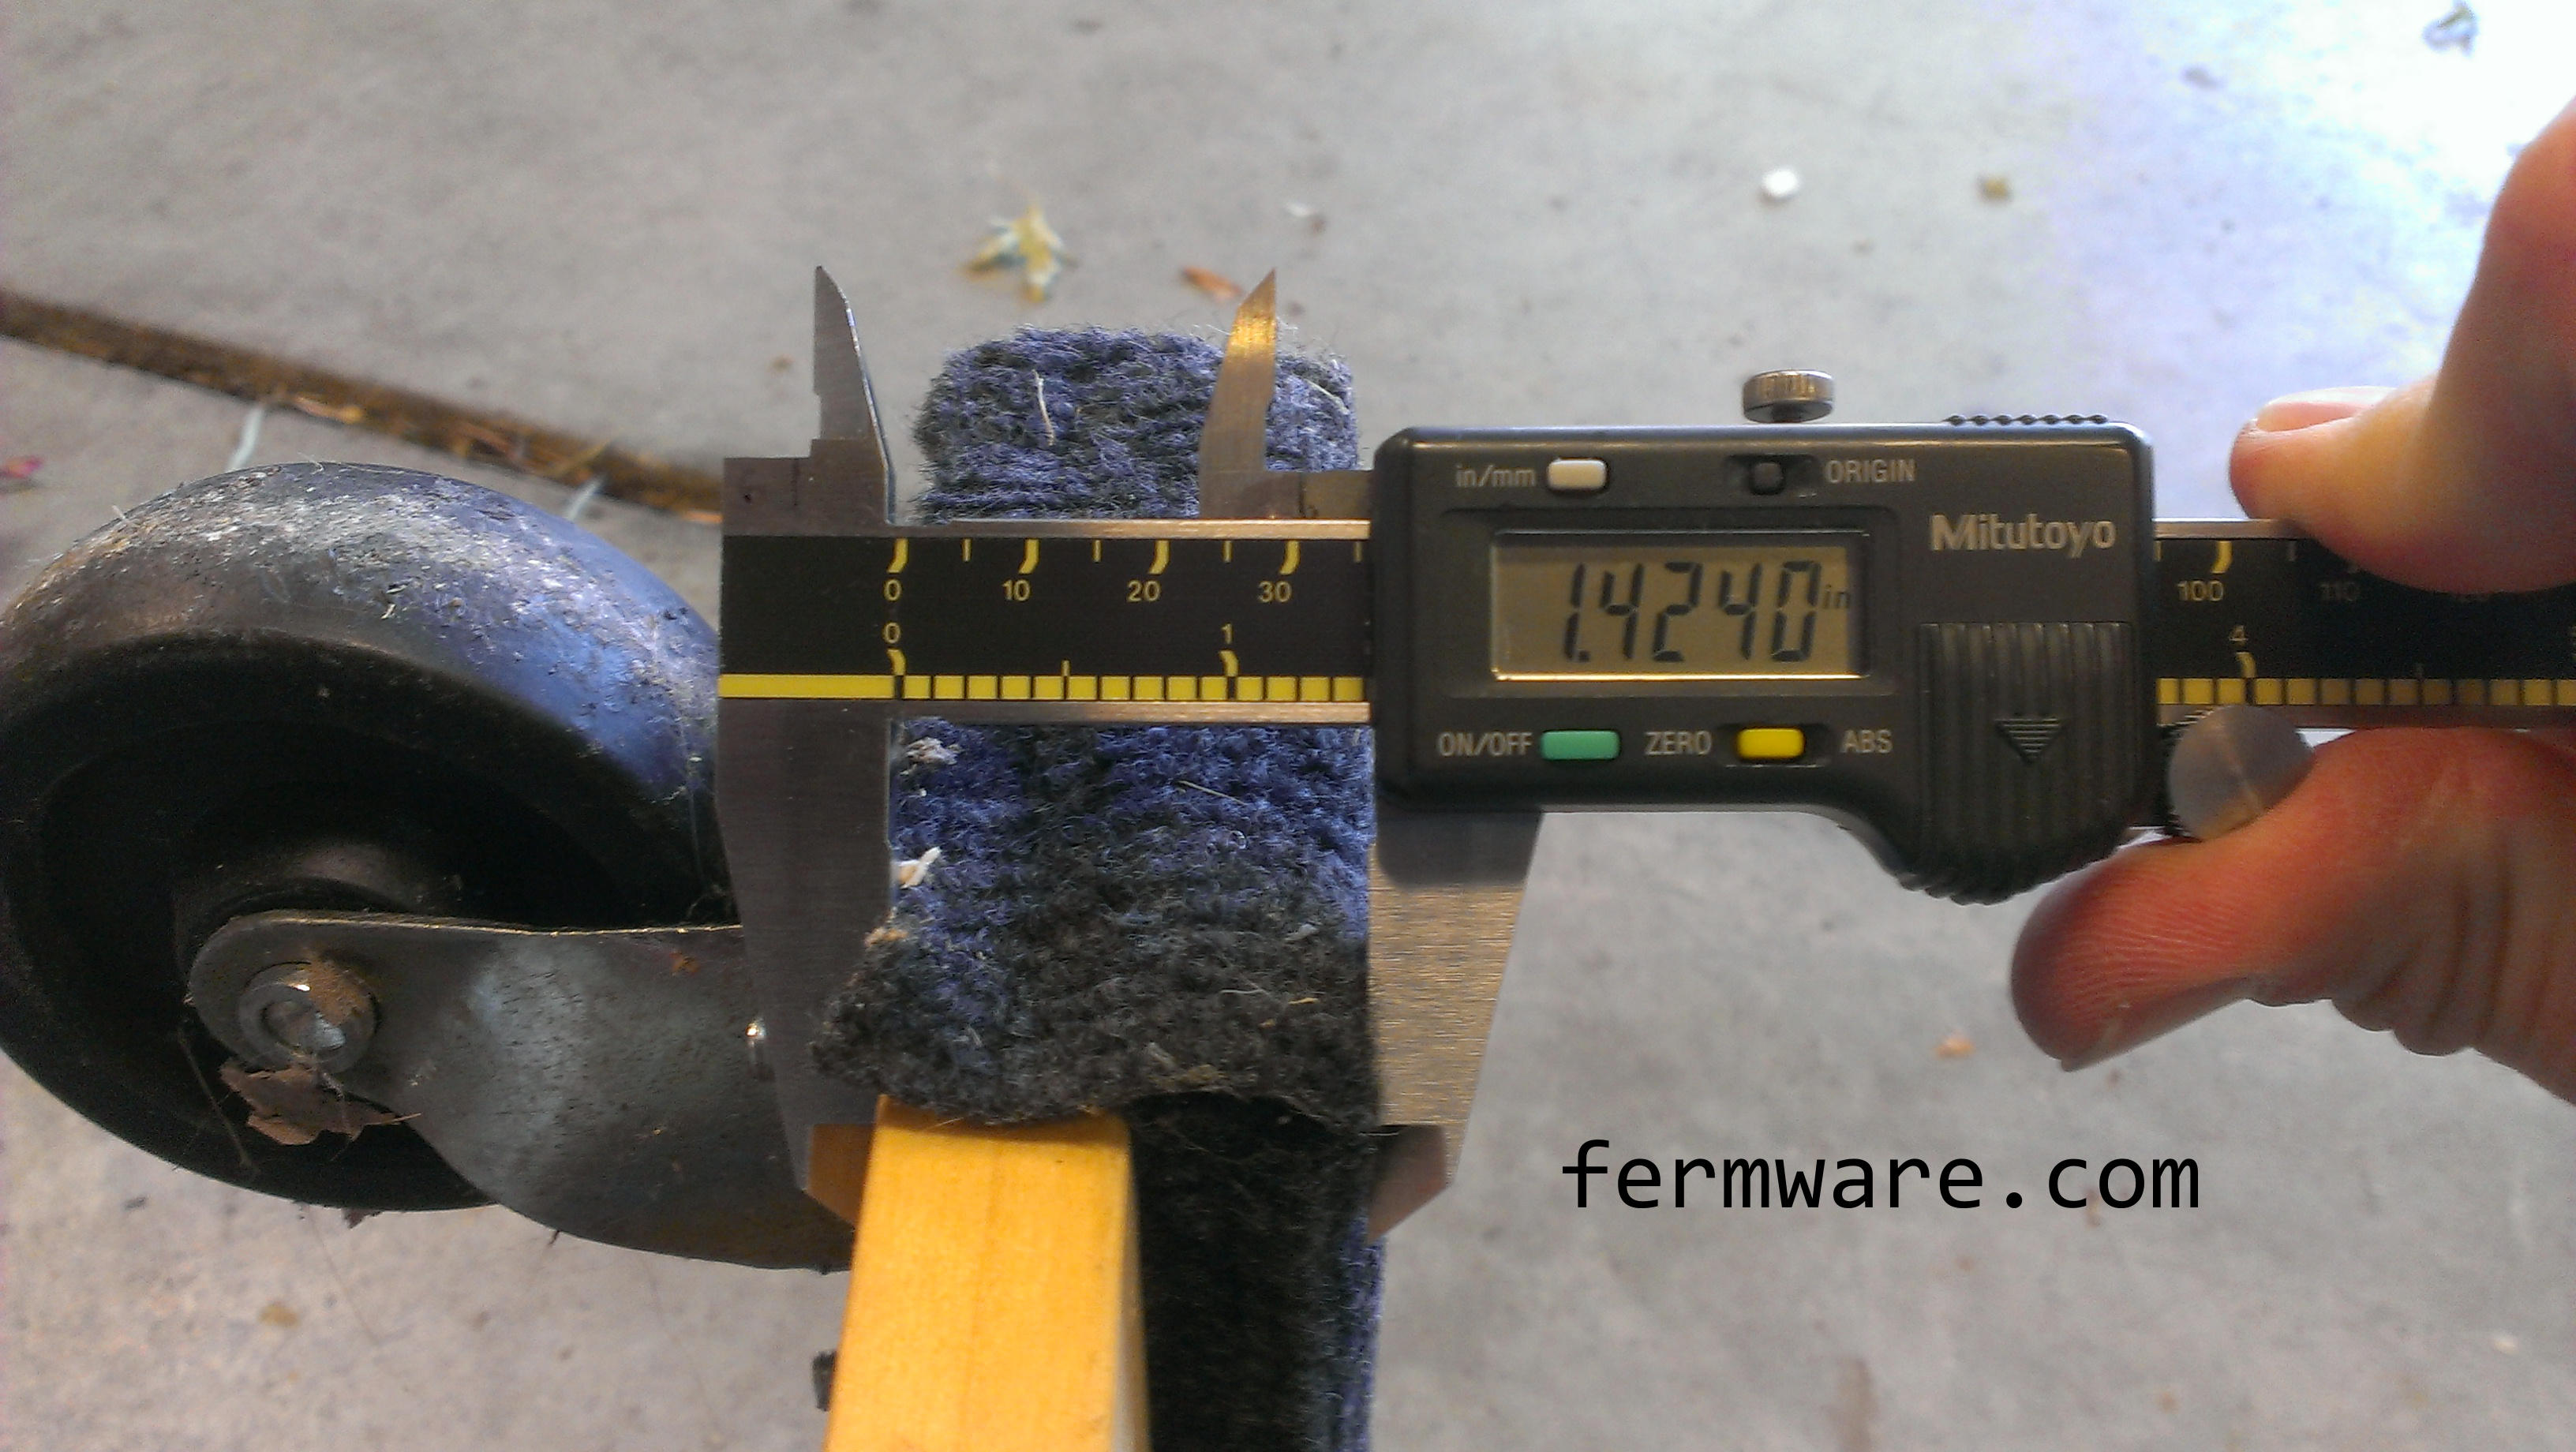
Thickness
If you take a look at the carriage bolts, you’ll notice that they probably aren’t fully threaded
You want to match the thickness of the platform with the bolts
Too thin: There will be too much thread extending out
It could potentially block rotation of the casters
If this is unavoidable, you could cut them after assembly with a hack saw or your favorite rotary tool
Too thick: You won’t get enough thread engagement to secure the casters
I simply doubled up the available plywood I had
cut 2 sheets the same size
put some wood glue between them
set something heavy on top and let them sit overnight
Attach the casters
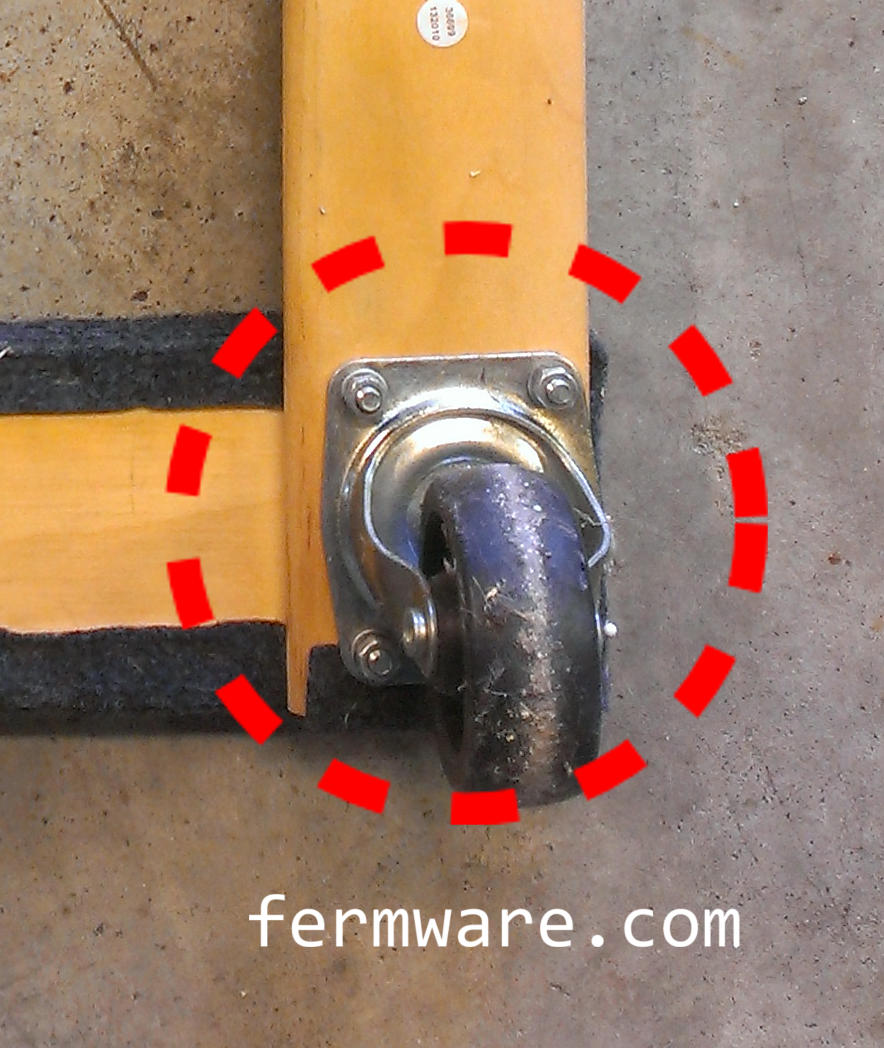
Choose the location of the casters
Be sure to allow room on each edge for the wheel to rotate 360 degrees without swinging beyond the extents of the platform
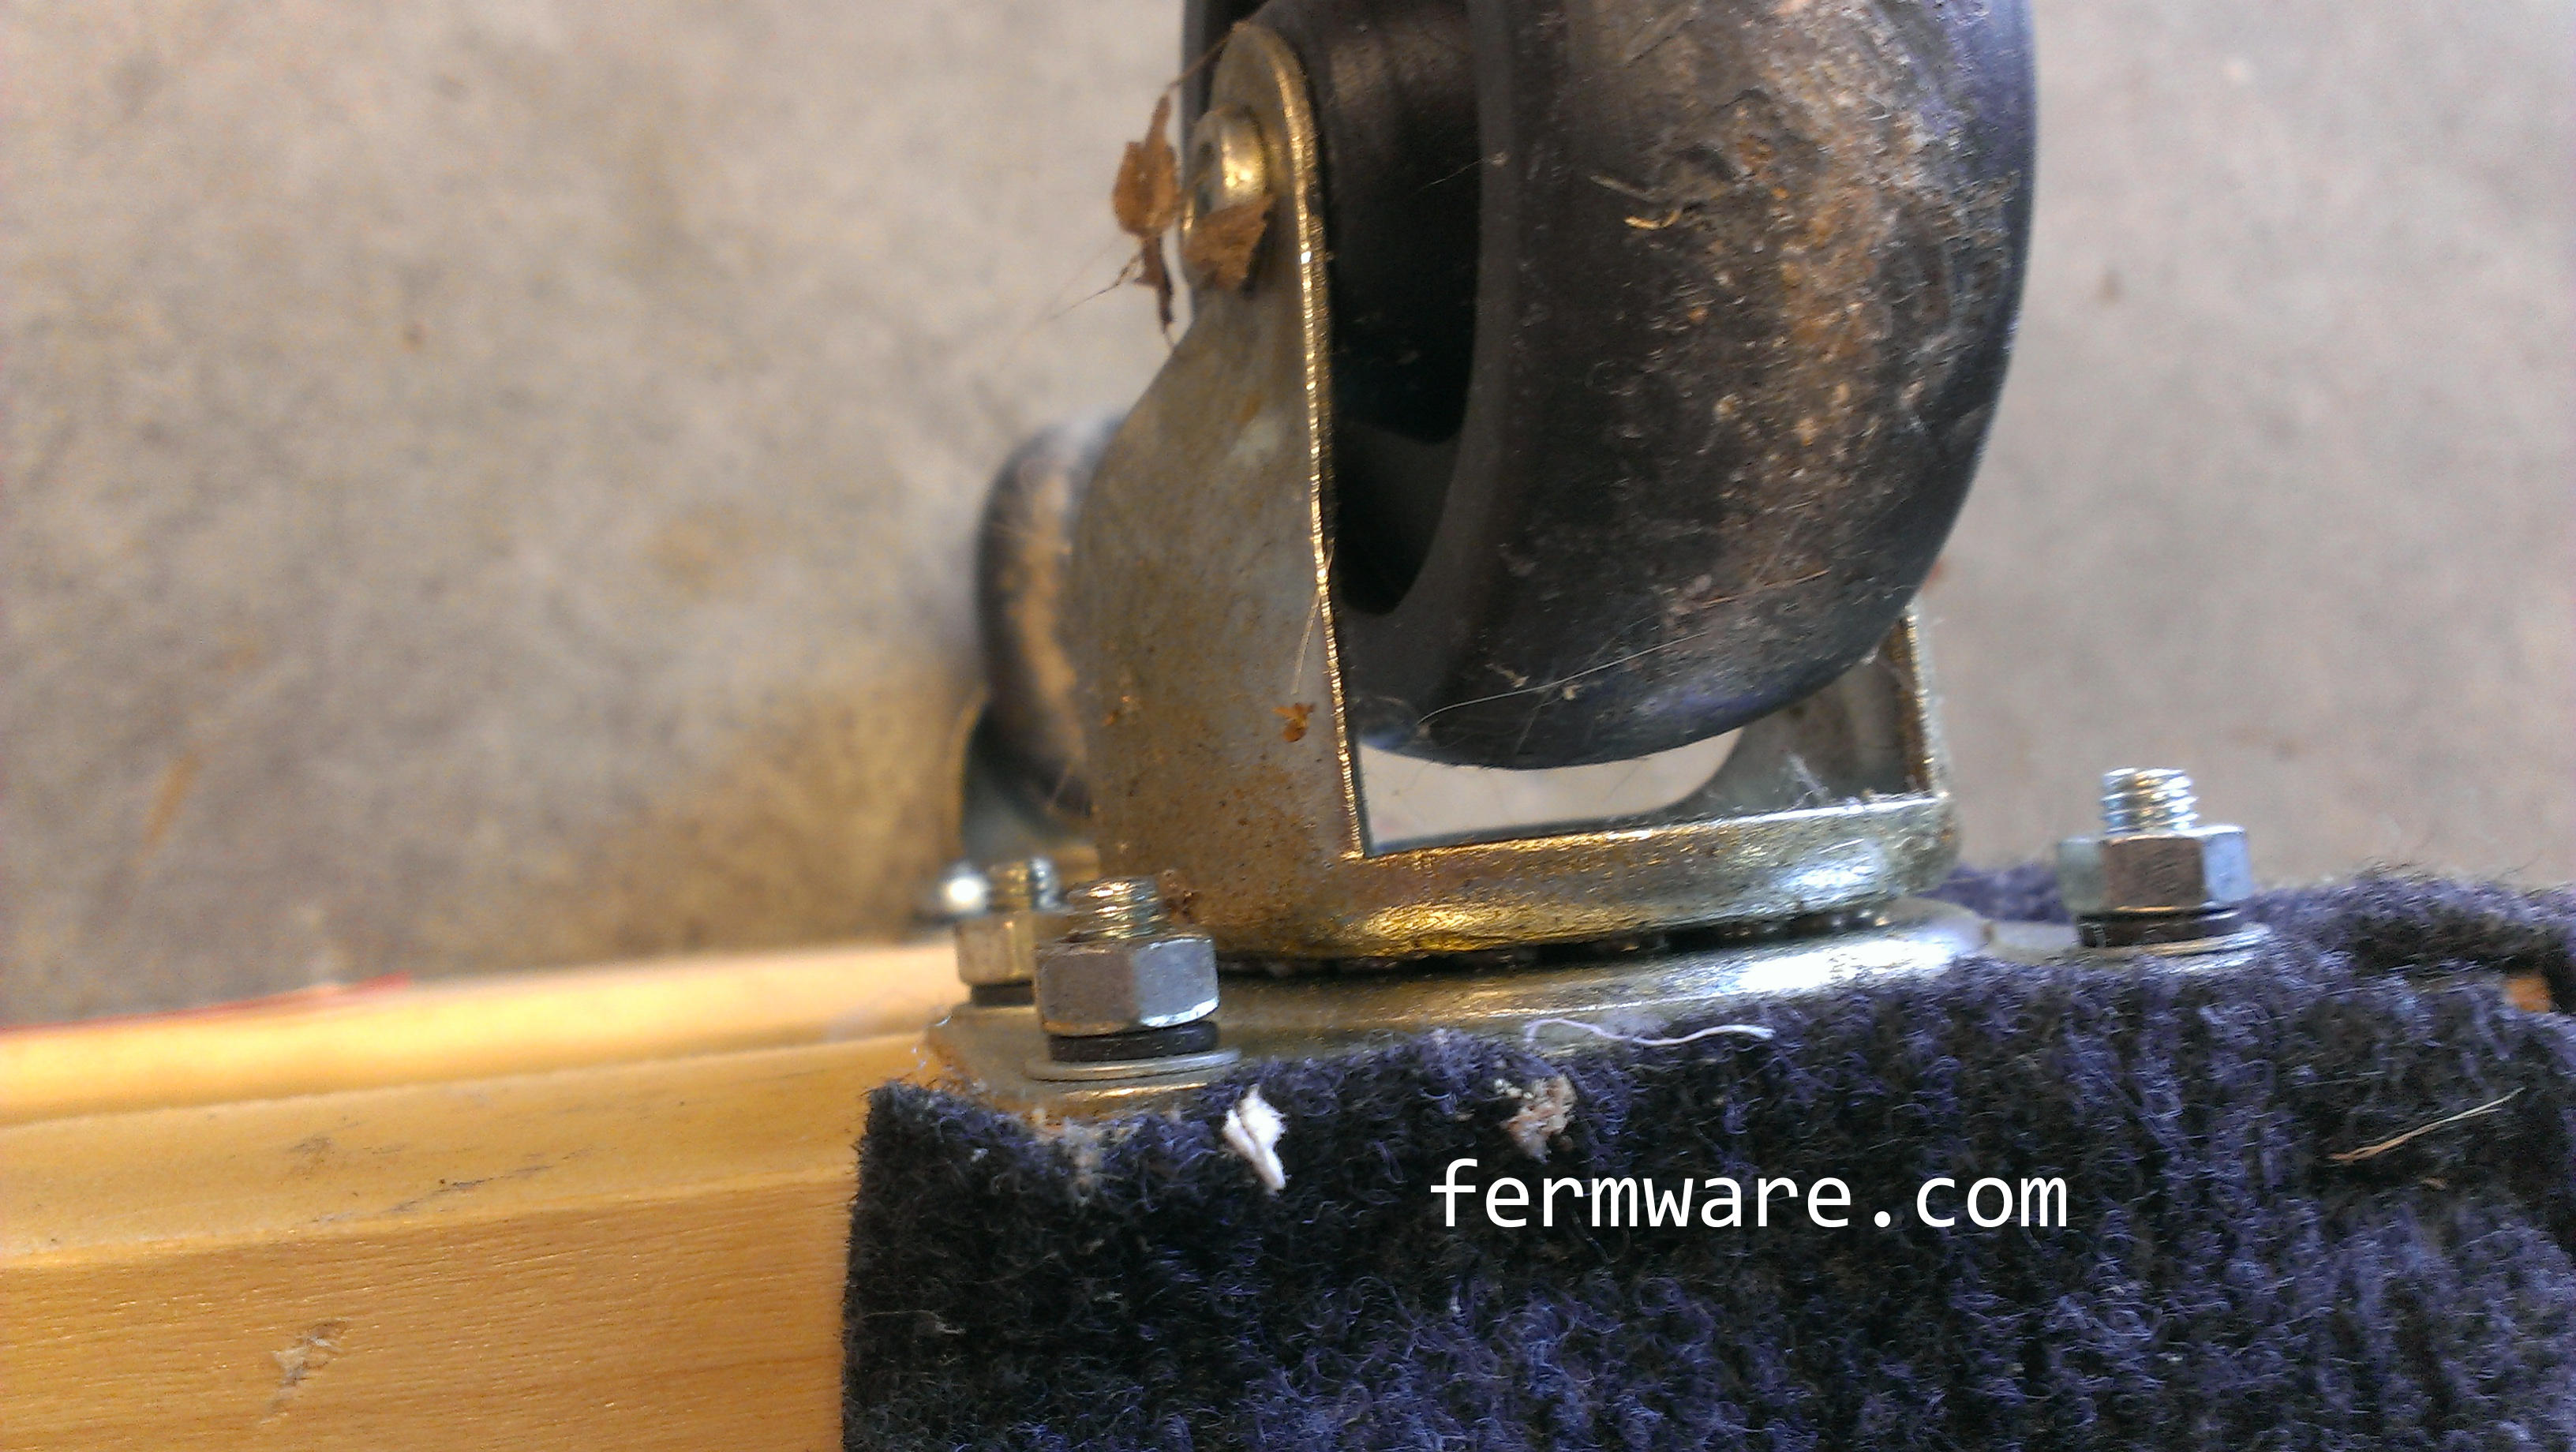
Note how in the picture below, the wheel can extend beyond the frame when swiveled. I didn’t want mine to protrude.
Rotation of caster wheel
Mark the holes and centers
Drill the holes with enough clearance for the carriage bolts
Go slightly oversize on the holes to allow for slop in your drilling and make it less frustrating to assemble
Put the carriage bolts through the holes (you may need to lightly tap them in with a hammer)
Secure on the other side with the nuts
Don’t go so tight that you pull the carriage bolts through the wood
If you have nyloc nuts, you should be ok to re-use them
The moving dolly I used had split lock washers
Optional: I always have loctite on hand, go ahead and use a drop of low strength on each nut if you want
Retaining Pieces
These are to make sure that if the keezer slips on the platform, you won’t push it off the edge when moving it
you don’t need much length, just enough to catch the keezer on all four sides
I just cut the piece I had into 4 lengths
A hacksaw or cutoff wheel will do
If you want to be really cool, you could get some nuts and bolts to secure them
I just used some short drywall screws at opposite sides of the outer slots to secure them
Optional: I covered them with black gaffers tape to match the keezer and make it look nicer
If you don’t know what gaffers tape is, get some
It mostly does the same thing as duct tape
Doesn’t leave residue that duct tape does
I use it throughout my fermentation process for labels that can be removed and placed on the next vessel in the process. Works for me all the way through kegging.
Finish it up
You could paint it if you wanted
Go con / recruit a neighbor / friend to help you lift your keezer up onto the platform