Homer Hopper Part 5 – Hopper Panels
Difficulty: 
Time Required:
One morning or afternoon (For the entire project)
Background:
This is part 5 in the series documenting how to create your own Homer Hopper. If you haven’t seen the introduction yet, please check it out. In this post, we’ll be making the hopper panels.
Posts for this project:
Introduction
Part 2: Bucket Modifications
Part 3: Wooden Base
Part 4: Mill Box
Part 5: Funnel Panels (this post)
Part 6: Final Assembly
Part 7: CAD Drawings
Affiliate Links
Tools required:
*You’ll want a bench top unit so you can hold the hopper assembly with both hands while you shape it to fit in the bucket.
Material recommended:
1/8″ Hardboard
The bare minimum size you would need is a sheet that is 9.5″ x 19″, but you’ll be safe with a sheet that is roughly 12″ x 24″. I’ll show a picture on how to lay out your cuts to make the best use of the material.
You’ll also want some wood glue.
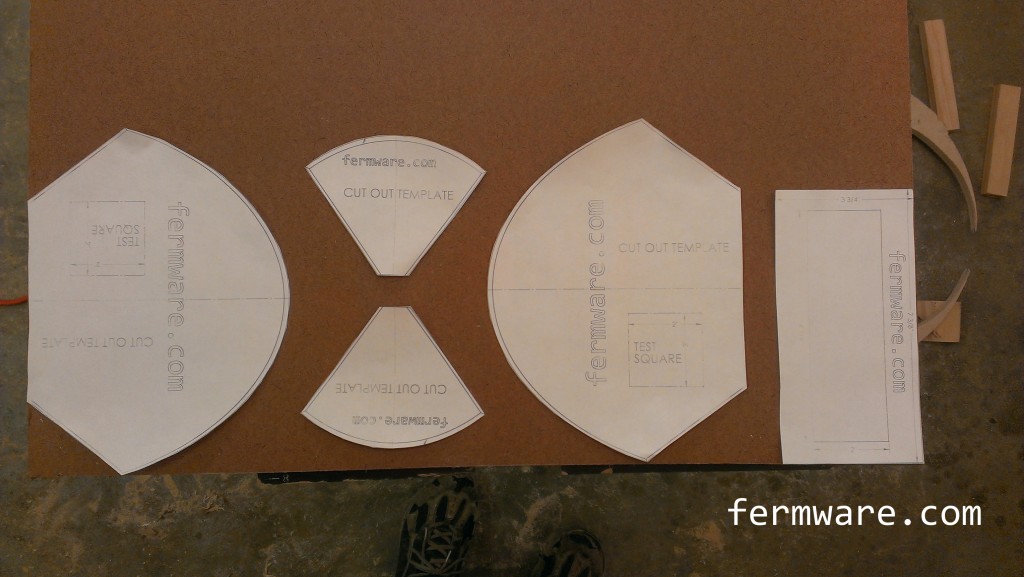
The templates you’ll need to print out for this step are:
- funnel_panel_front (2x)
- funnel_panel_side (2x)
- grain_shield (1x)
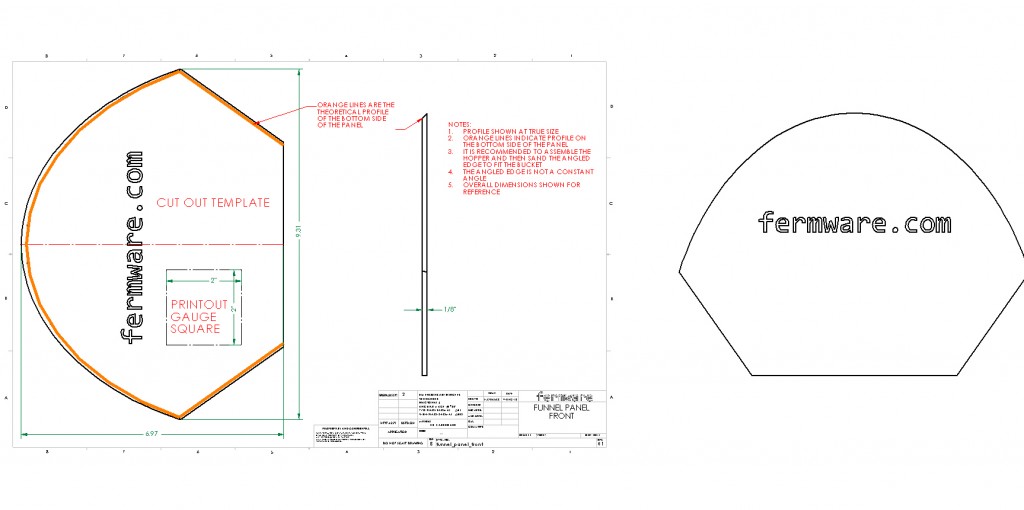
You’ll notice the orange lines on the prints. These are the theoretical profile for the bottom side of the panel. Once assembled, you’ll be sanding these edges to fit your exact bucket. You’ll find out at final assembly that not all buckets are created equal. Cut out all of the panels at the maximum outside profile. REMEMBER, it’s much easier to remove material than to add!
What we’re building here:
Video of the process:
COMING SOON!
How to do it:
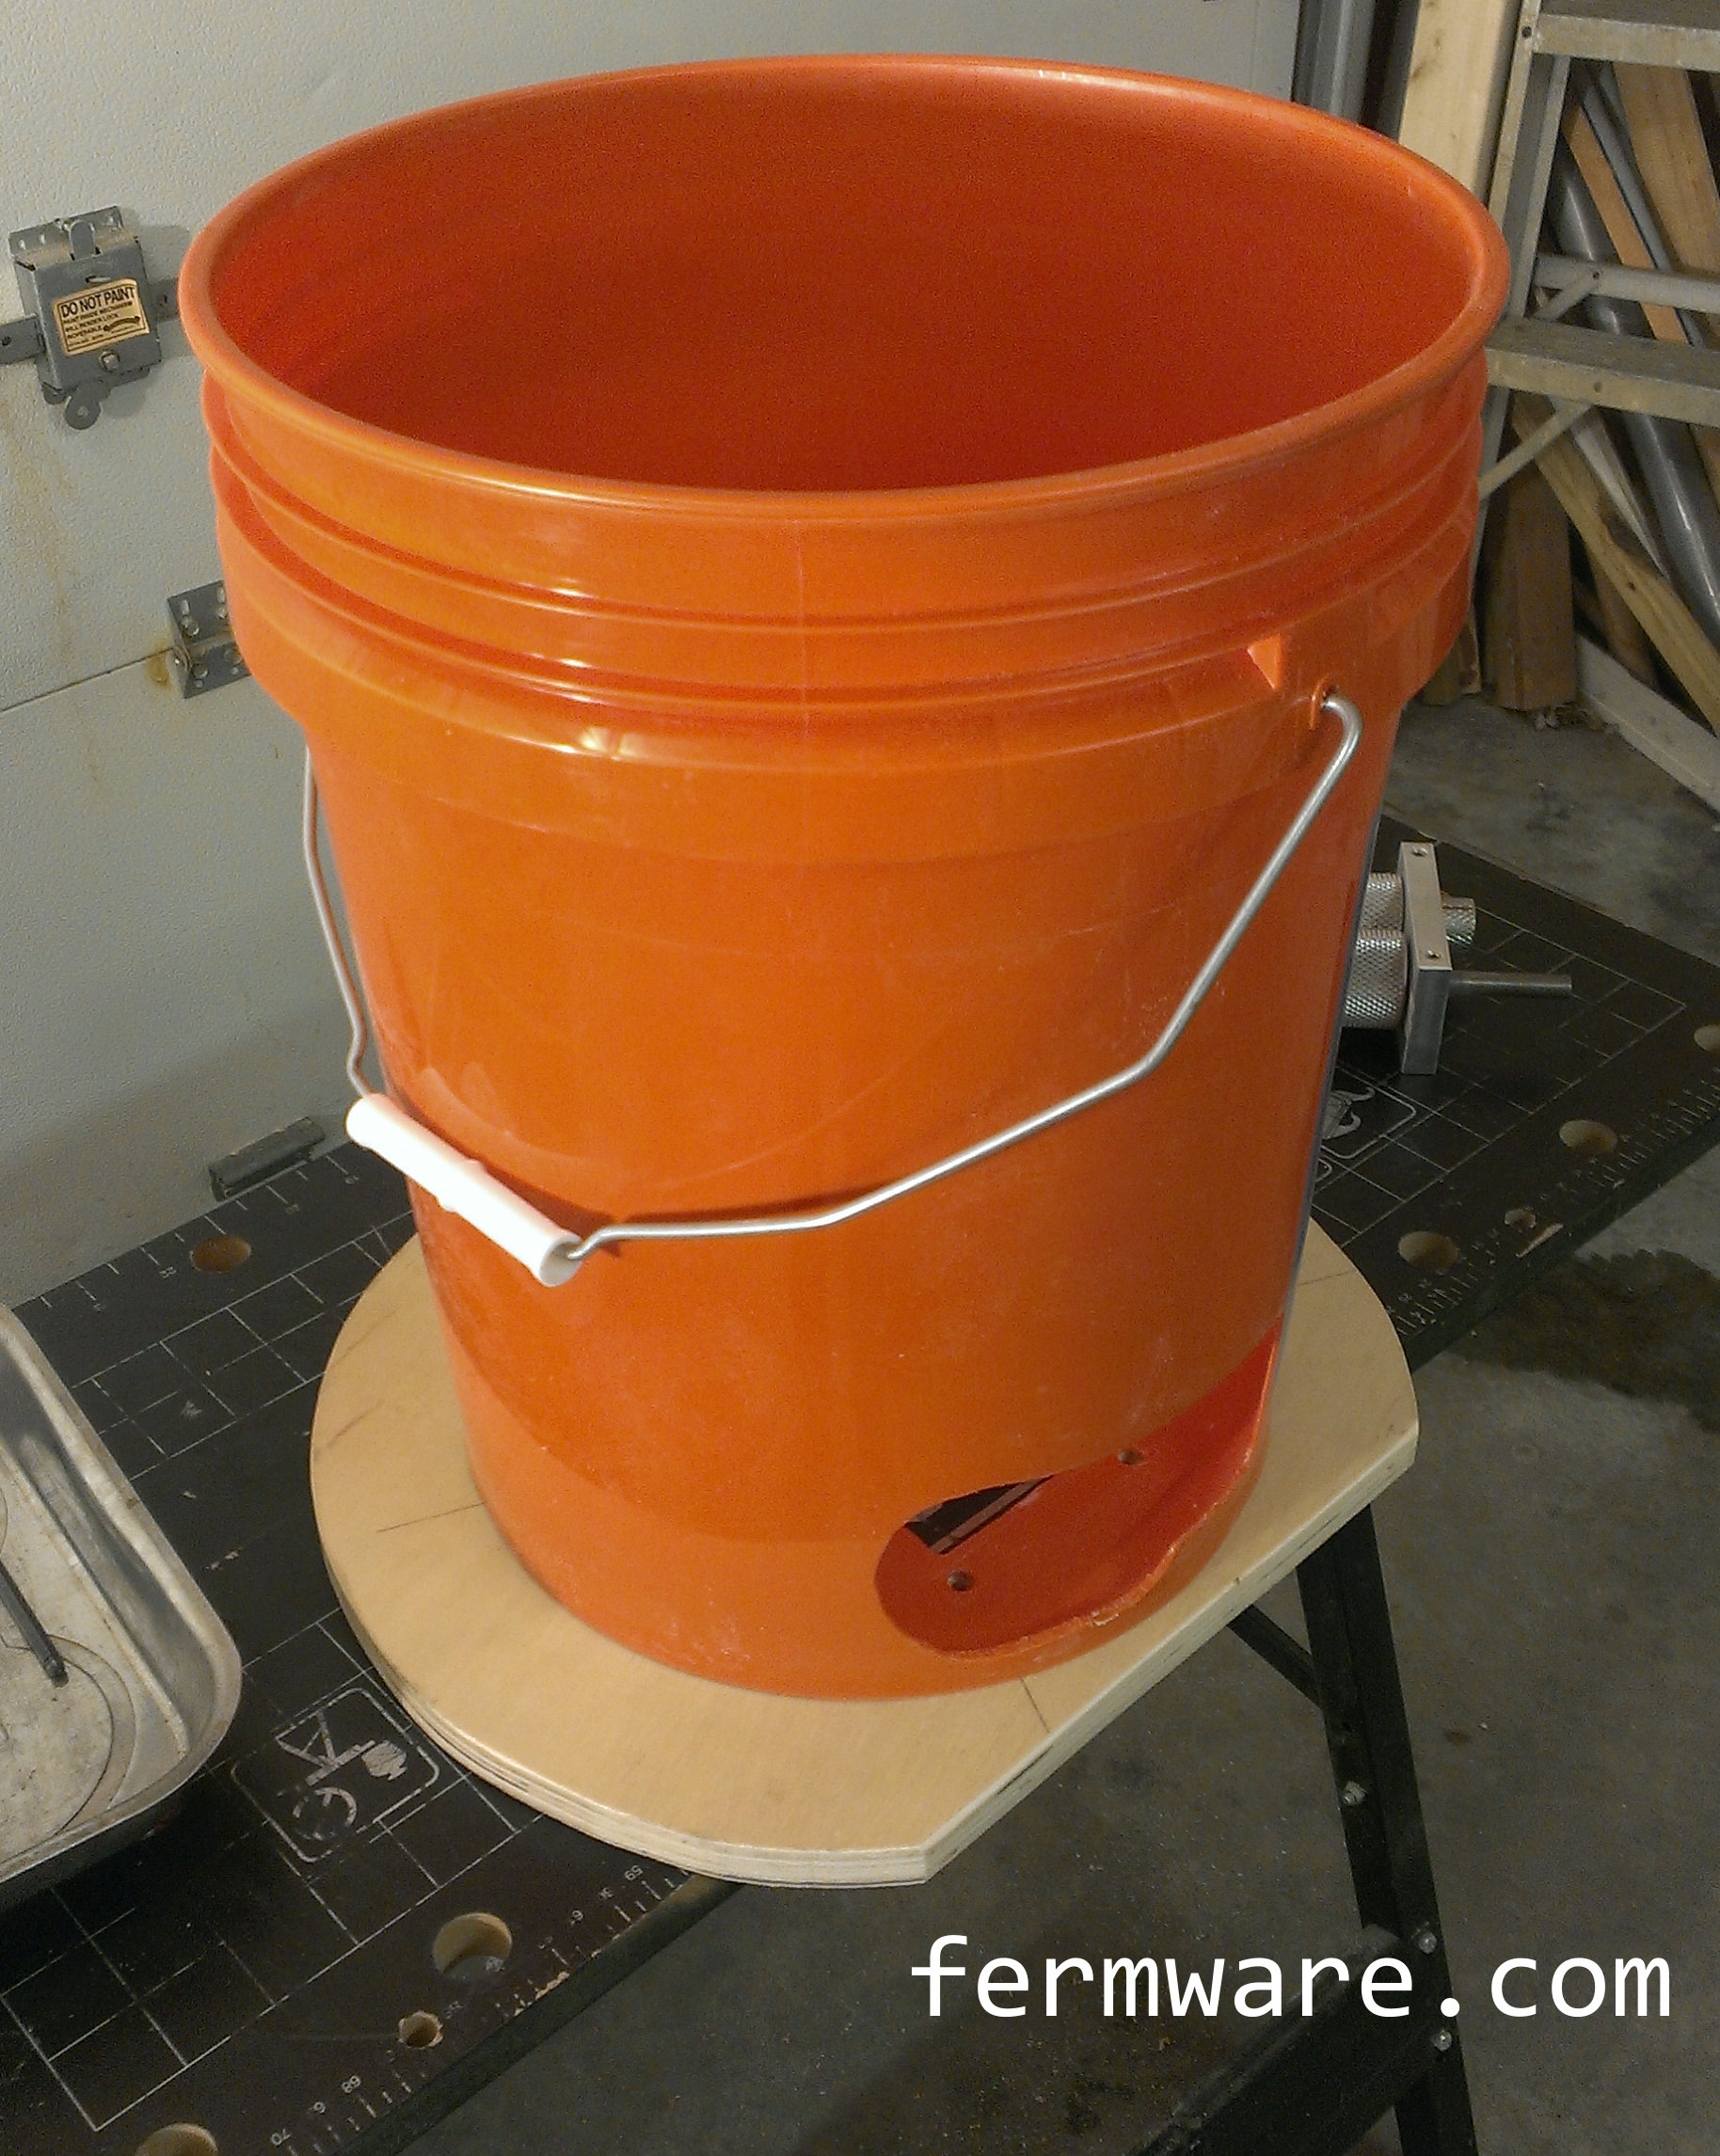
Prepare the panels
First, take your cut out templates and lay them out on your board. Below I’ve shown how to make the best use of your material, either densely packed or loosely. As I mentioned before, if you pack them densely, you can get away with a piece of material that is 9.5″ x 19″, but if you want to give yourself room, just go with 12″ x 24″.

Once you have your panels laid out, go ahead and trace them on the board and cut them out with your jigsaw.
How the panels work
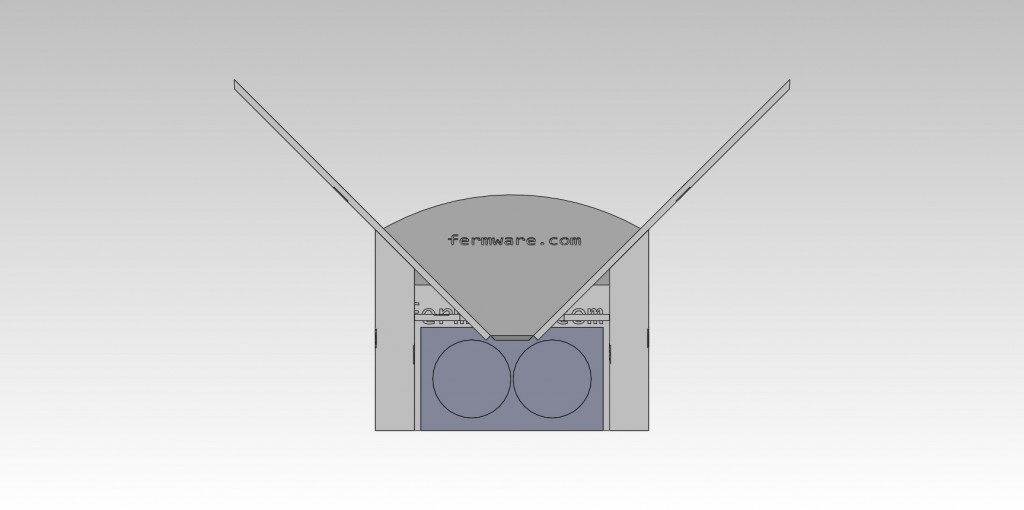
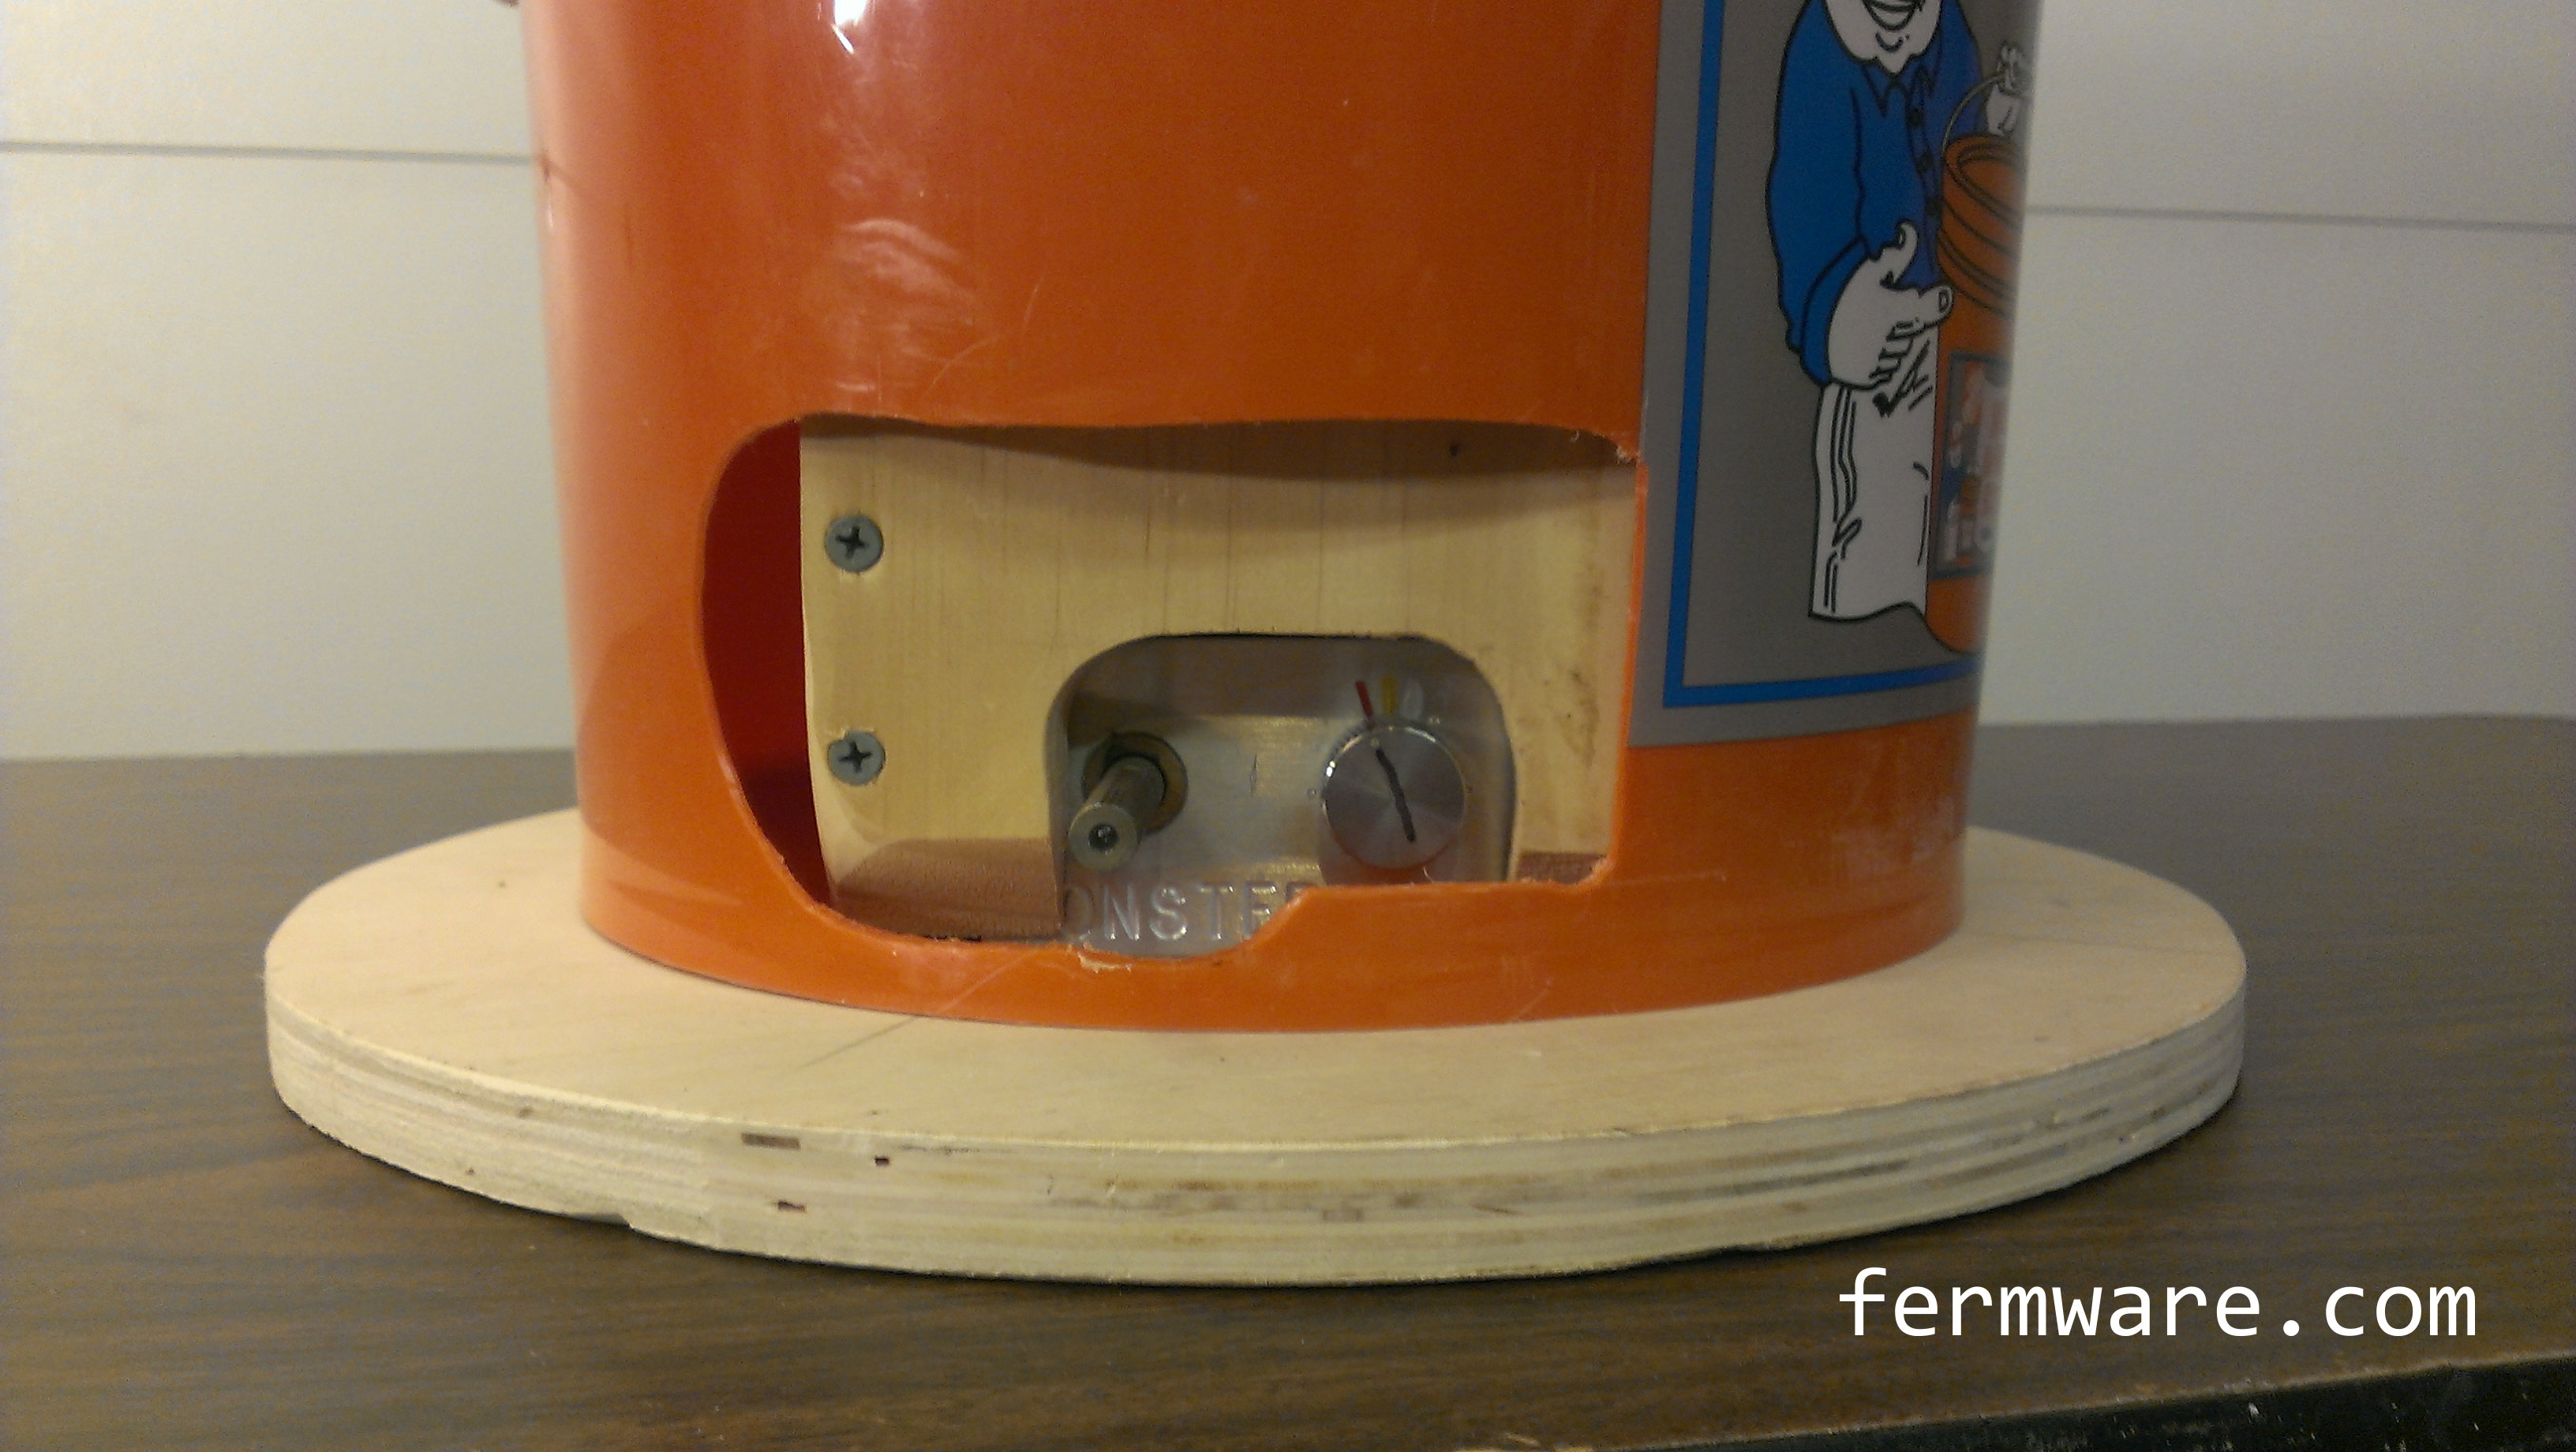
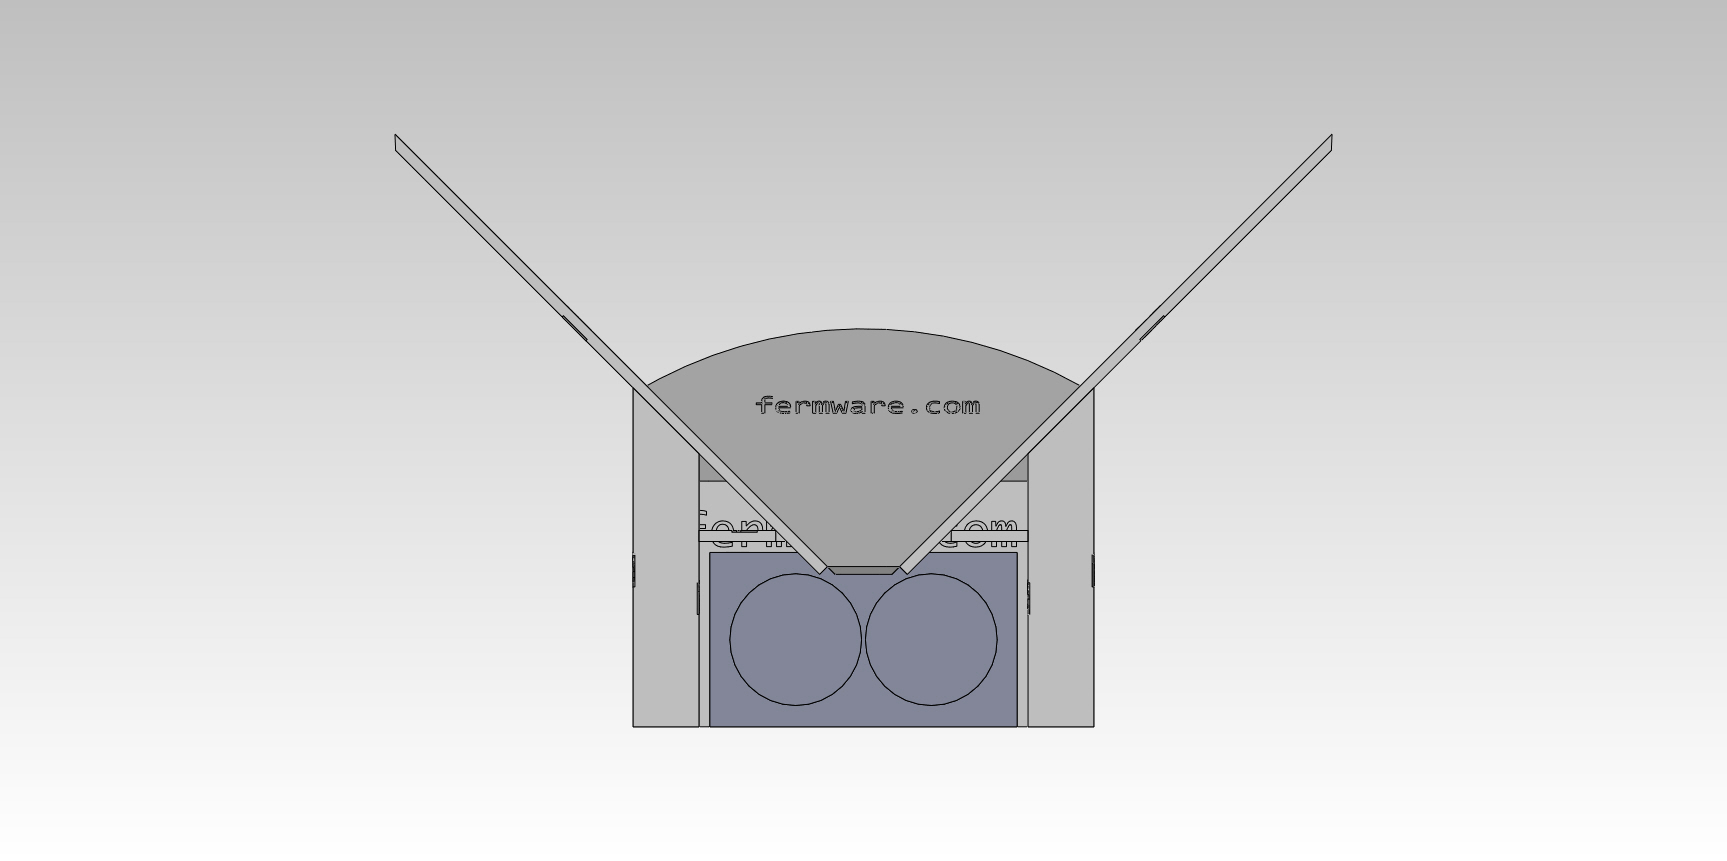
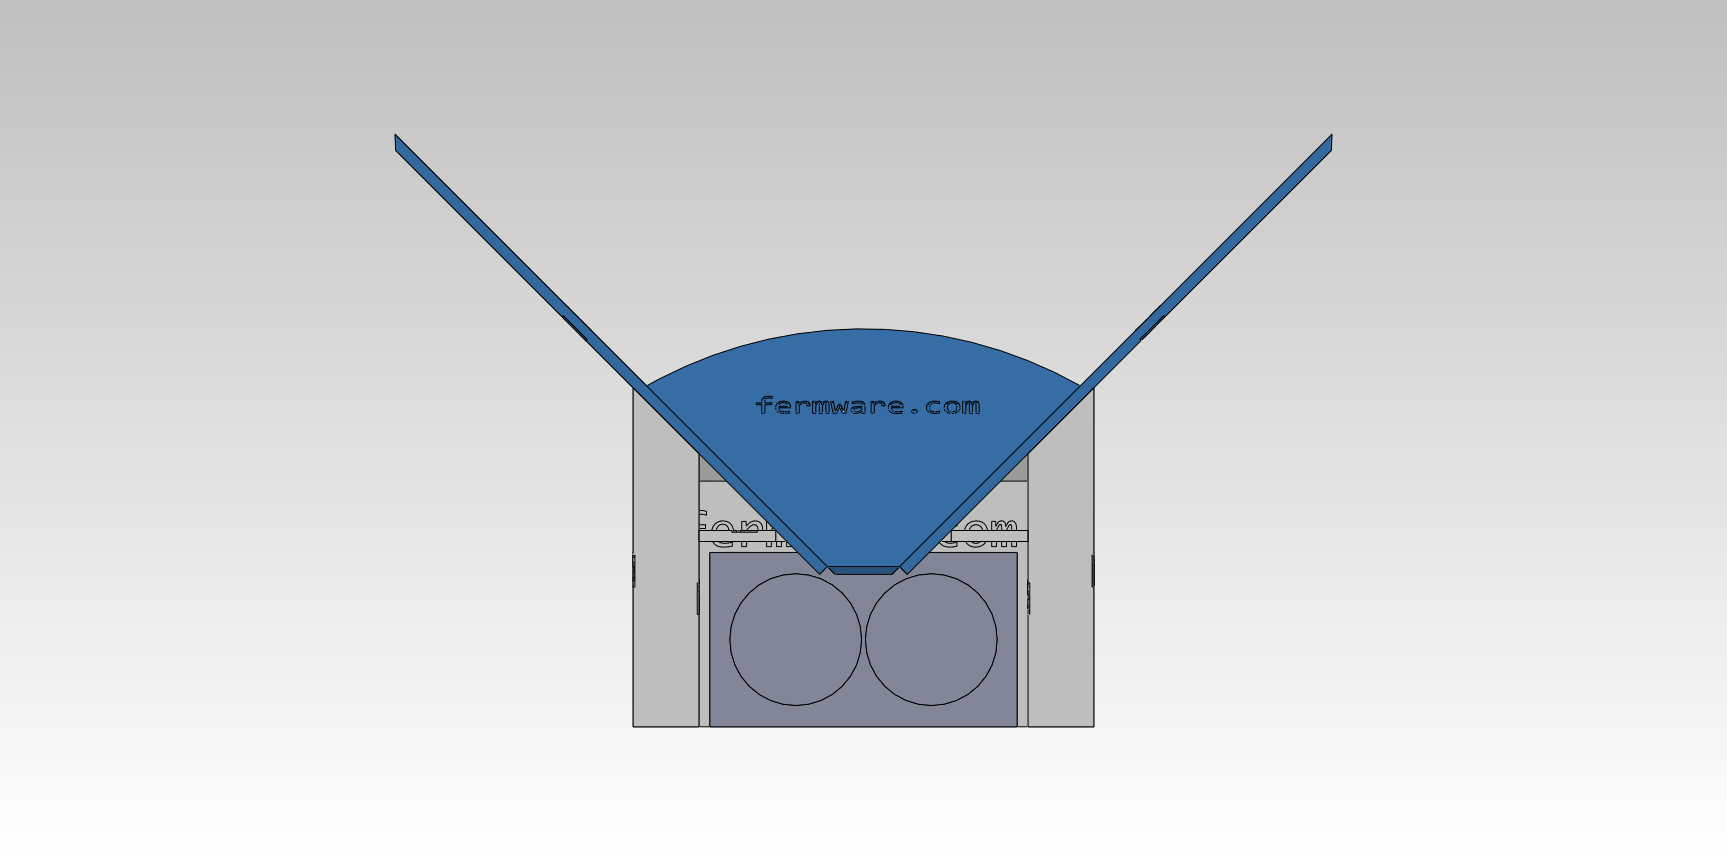
The panels have been sized so that they feed the grain in between the rollers and ideally would sit just below the top of the rollers. There is also a grain shield that reduces the amount of grain not making it through the rollers. Why is this not a perfect fit on the mill? I wanted to allow sufficient clearance to allow for misalignment and make removing the hopper assembly fairly easy.
Cut and fit the panels

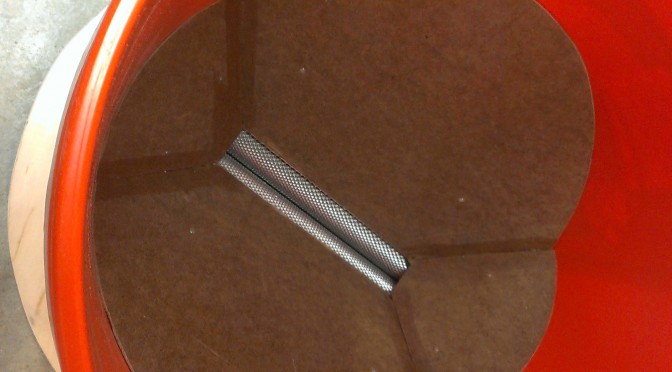
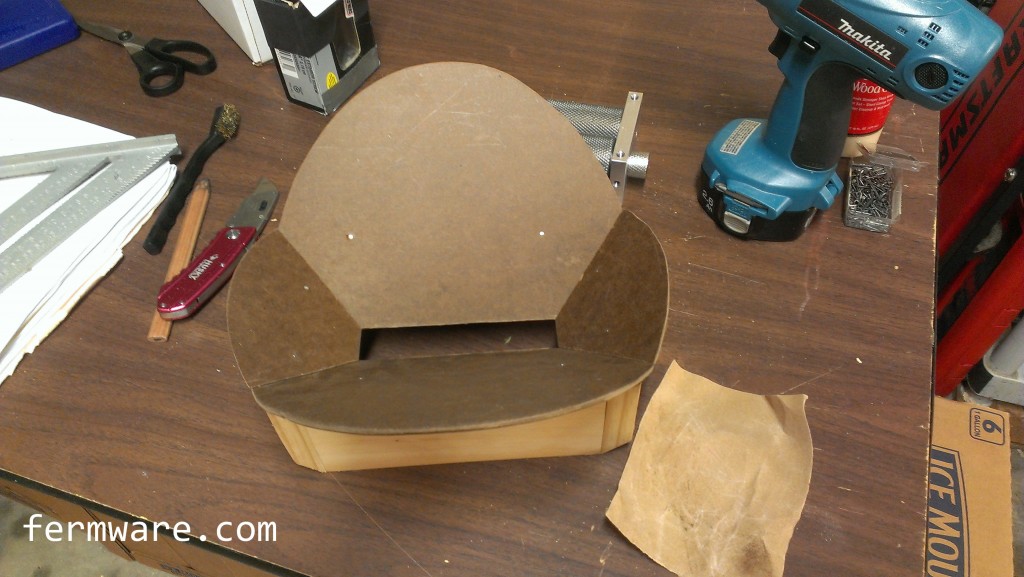
Front and side panels
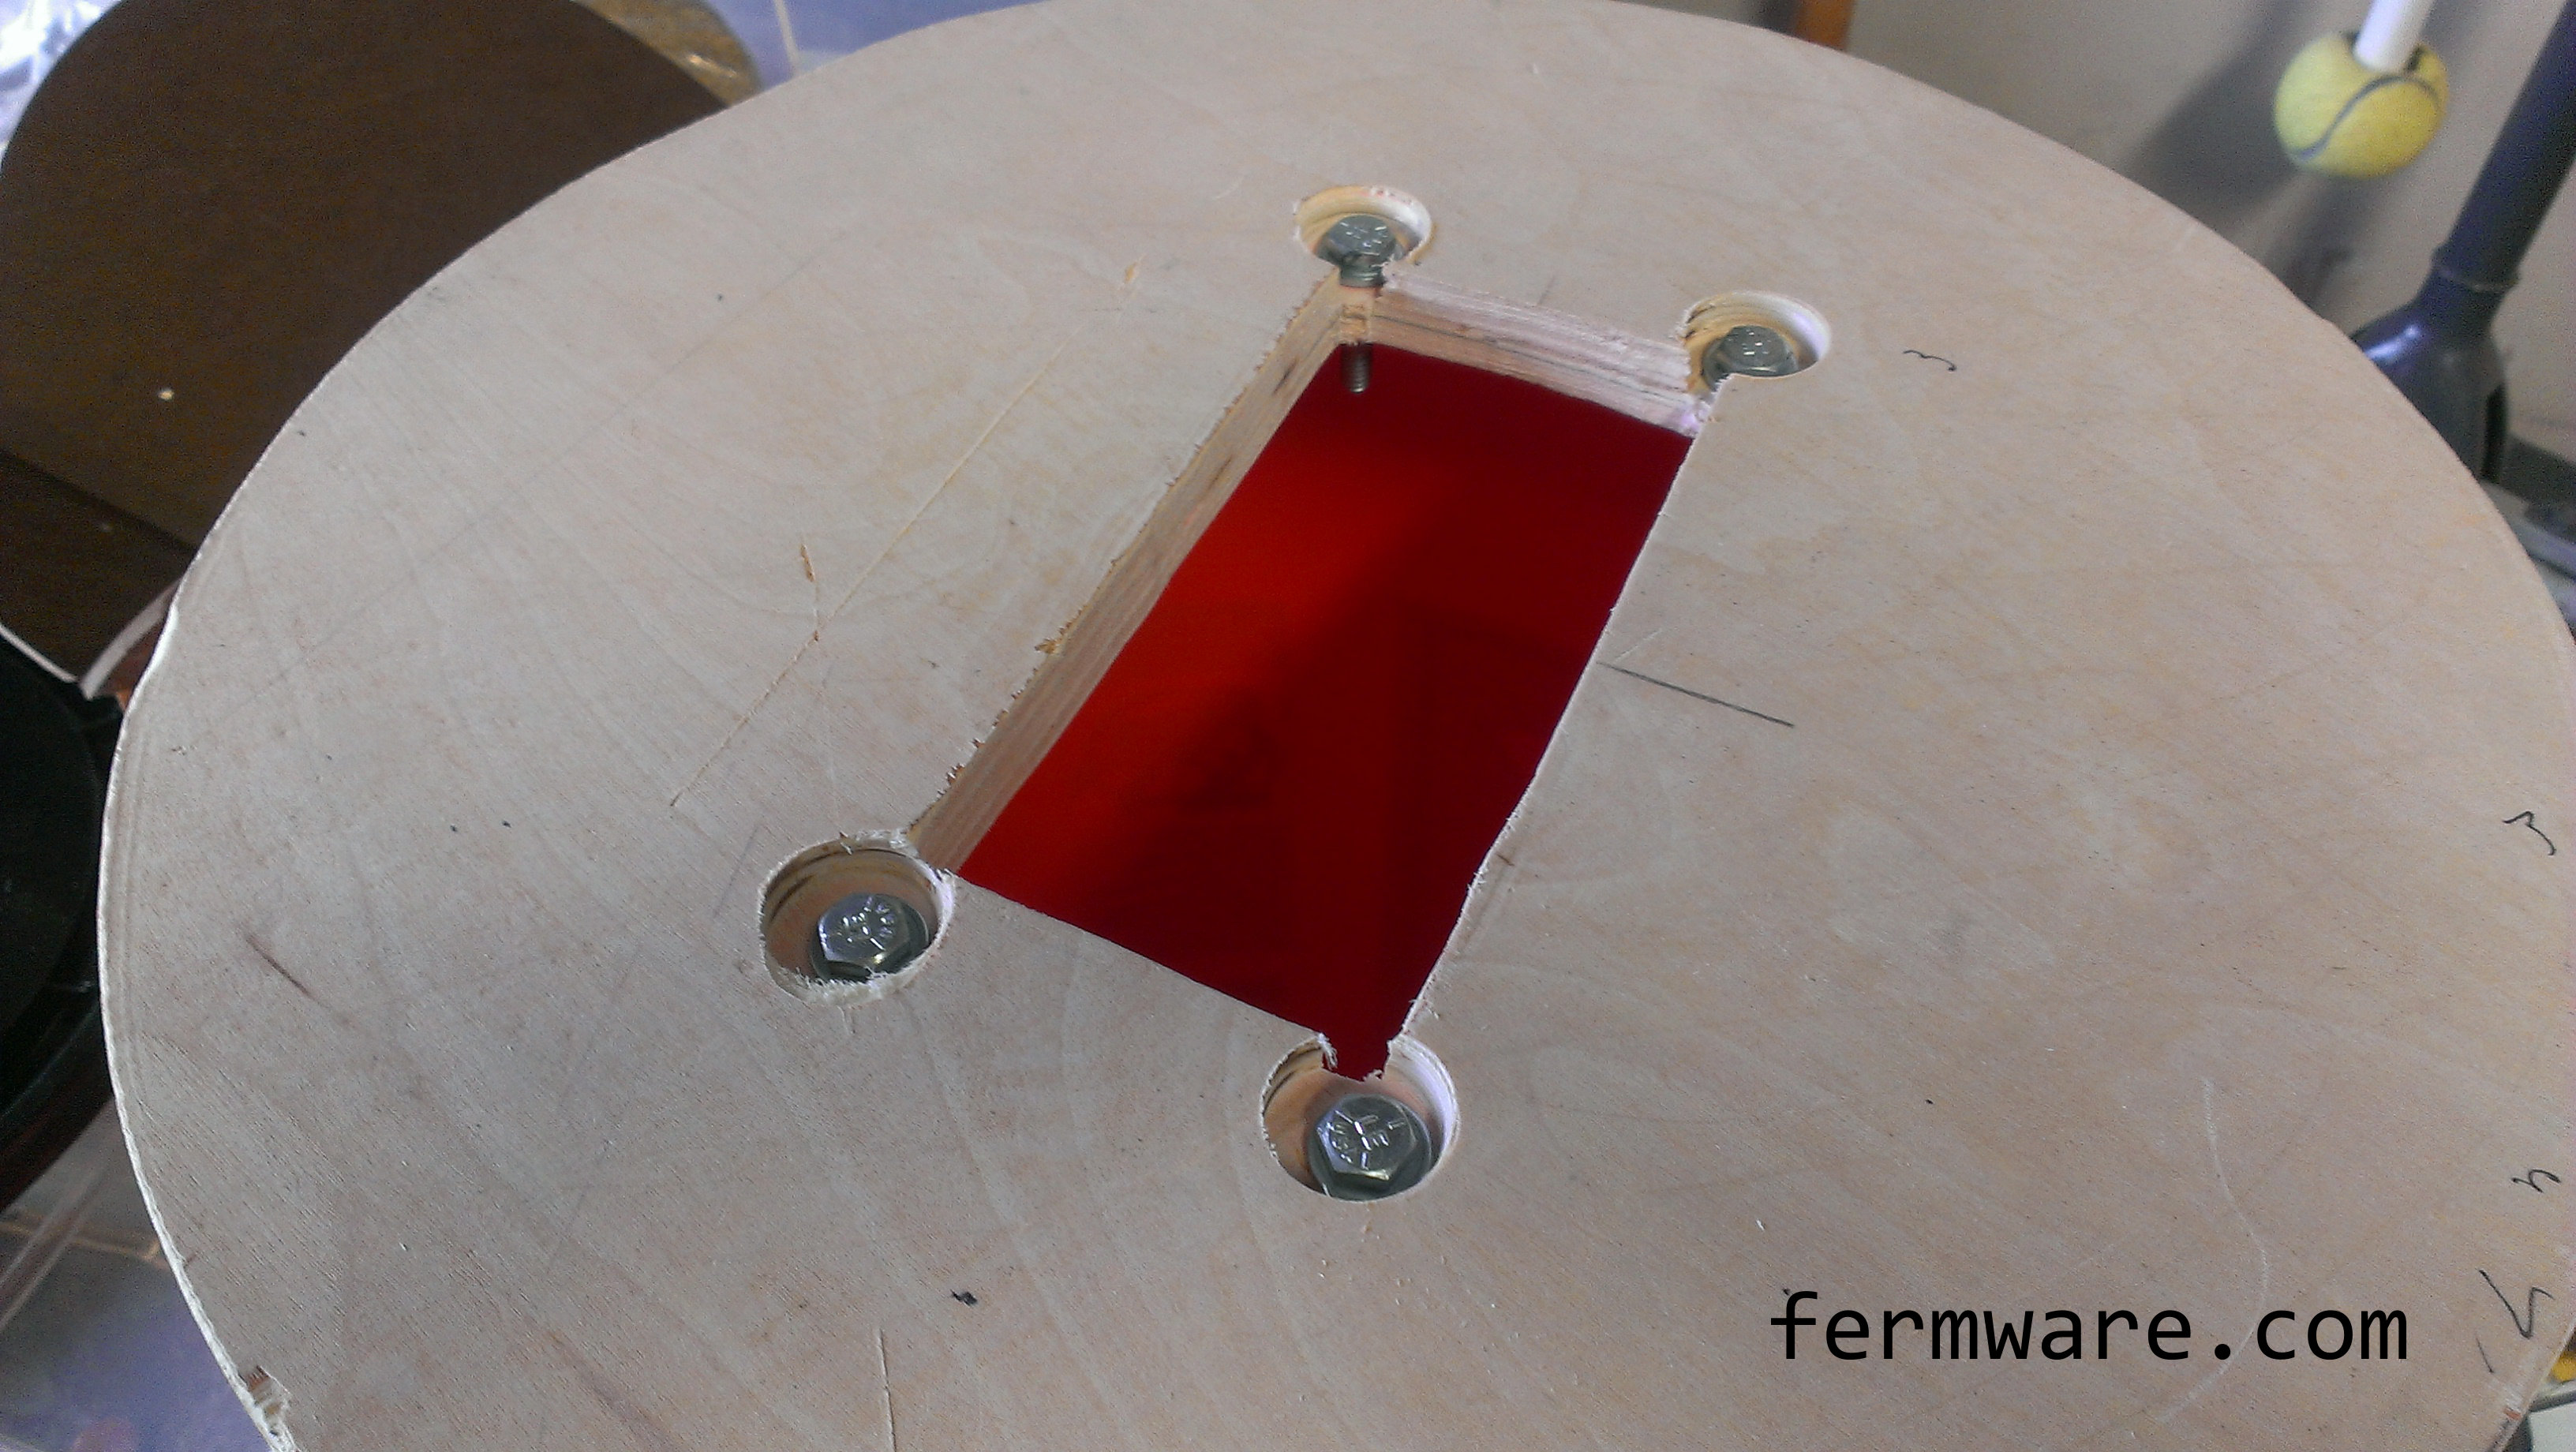
First focus on these panels highlighted above. This is one of the most time consuming parts of this build. You’ll want to have your mill sitting on your work surface and then place the mill box on top of it so you can get an accurate placement of both components while you fit the panels.
This image is repeated again to show that you should go ahead and put a slight angle on the edges where the orange lines are for all of the hopper funnel pieces. I would start with something like 60 degrees. You can remove more as you test fit the pieces. It will probably end up somewhere between 45 and 60 degrees. This is where your belt sander will come in handy.
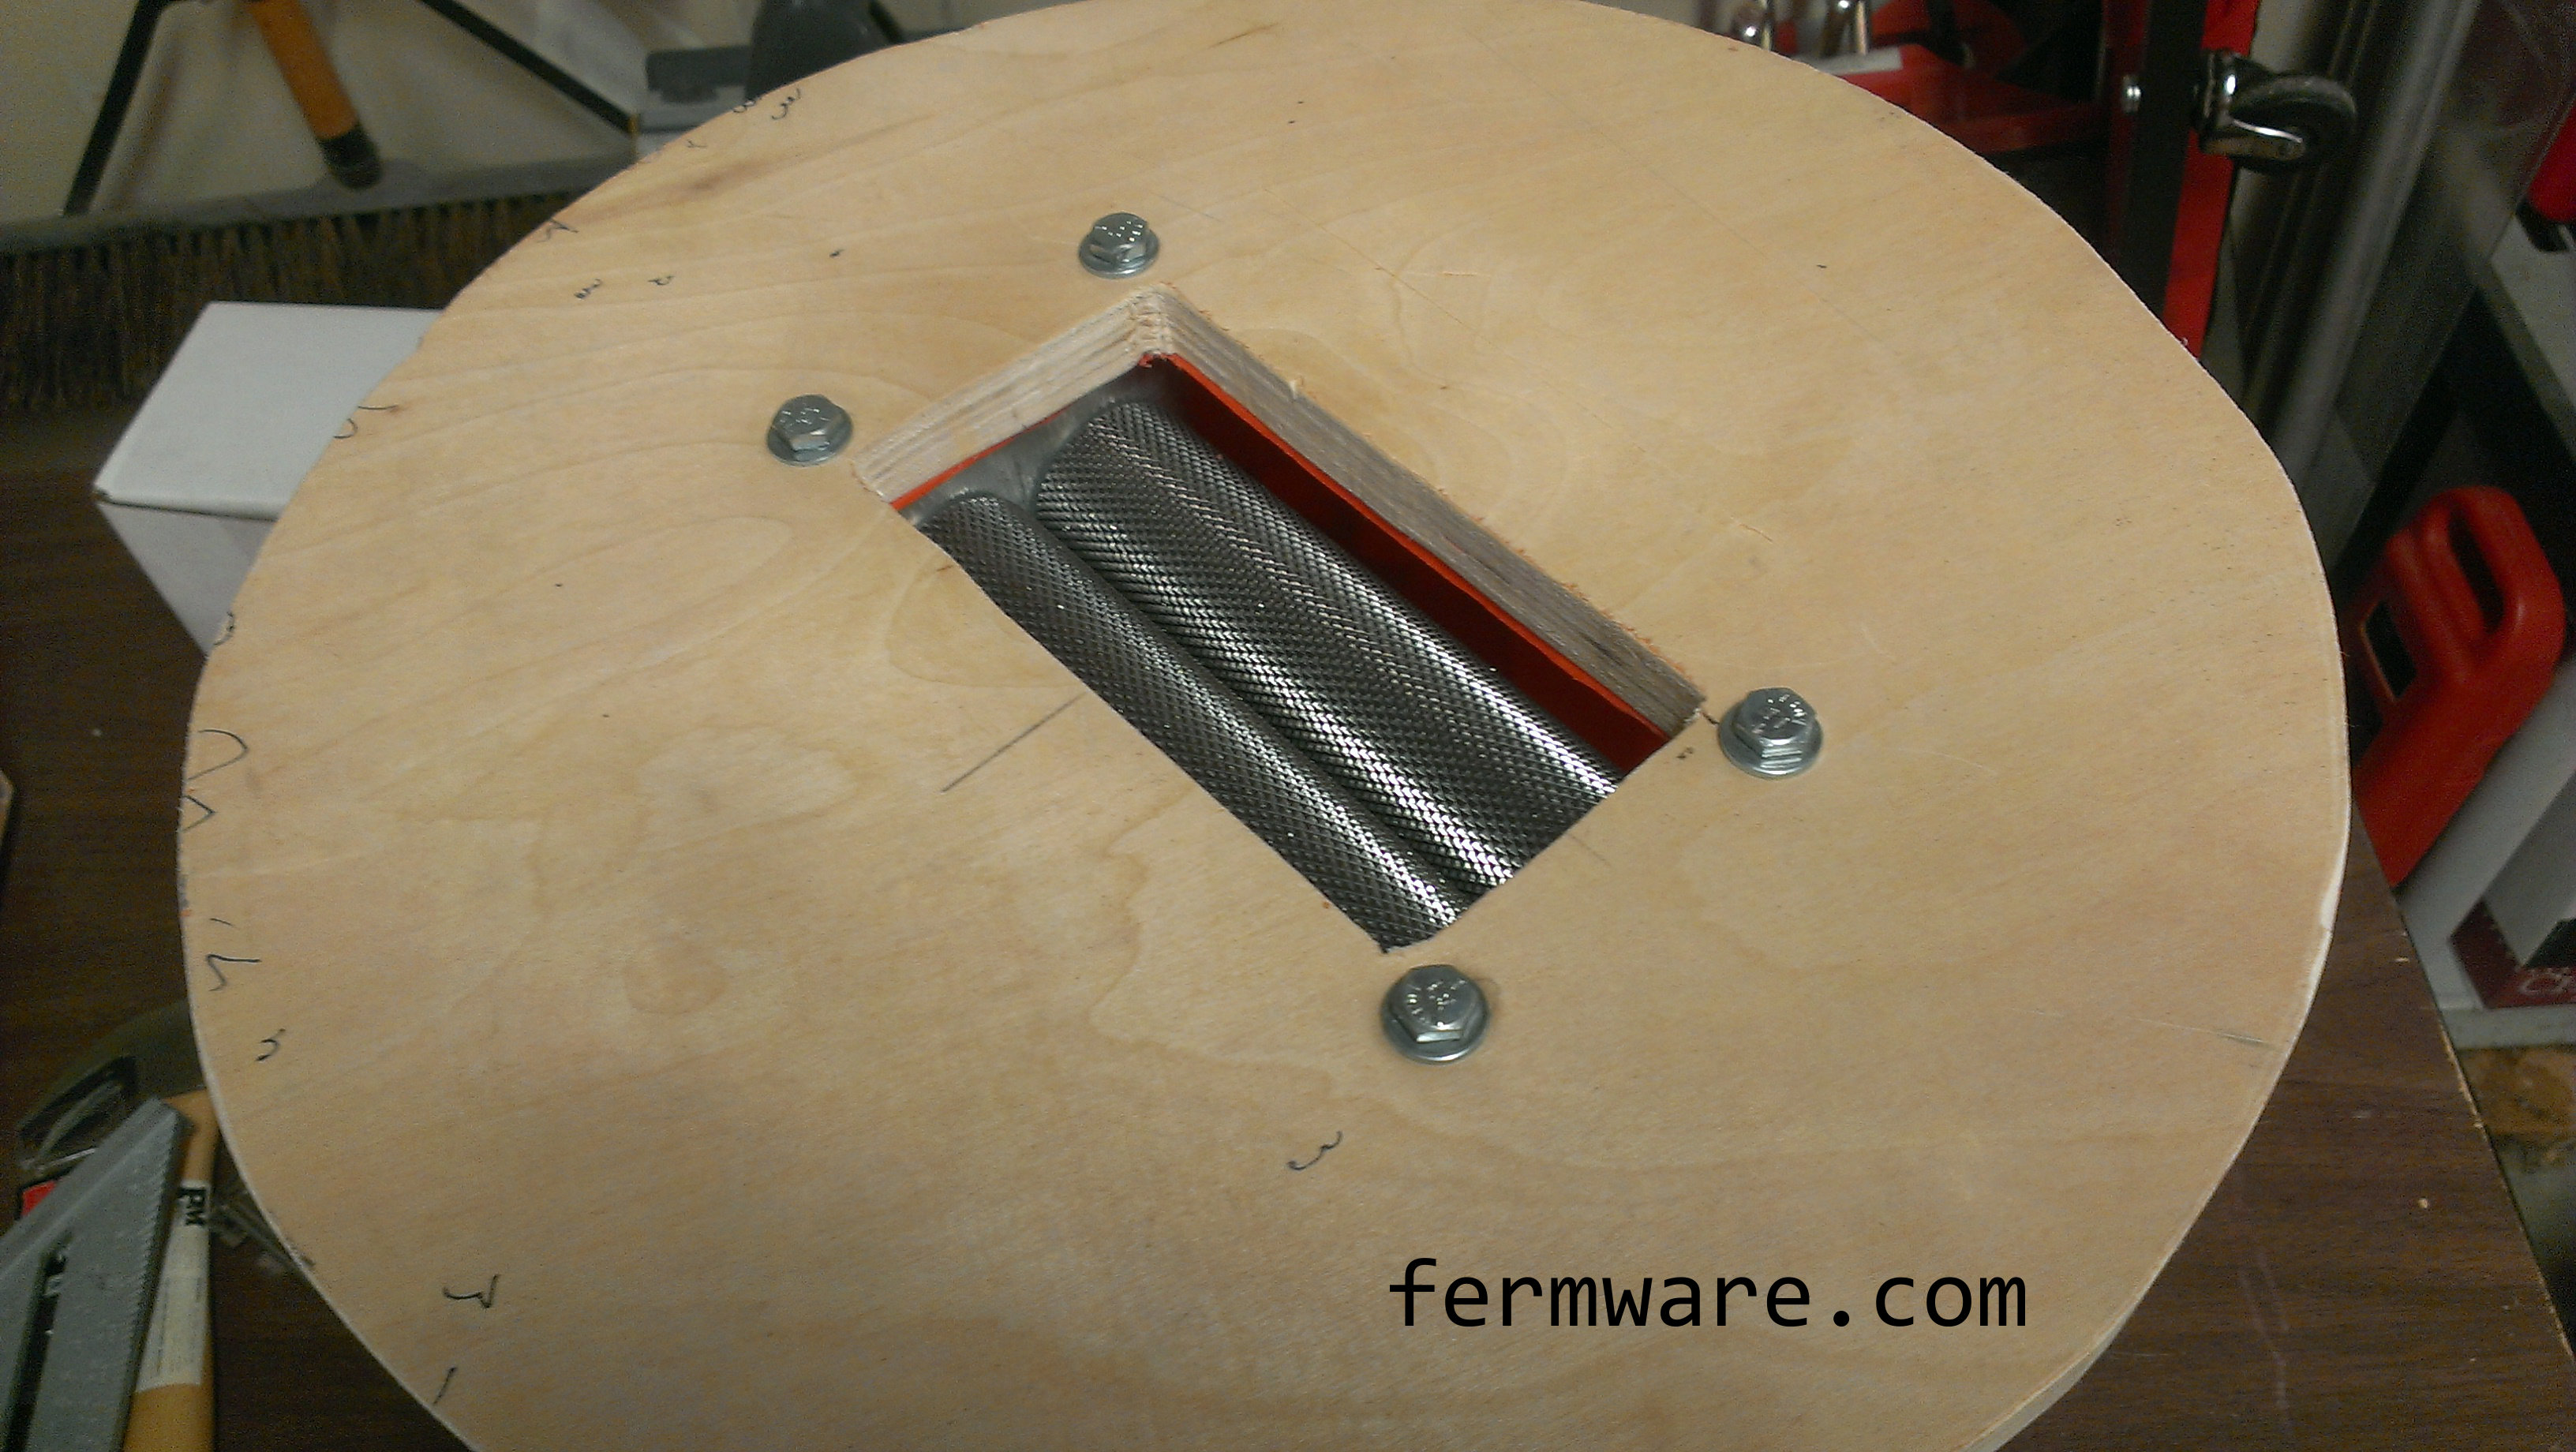
Next, try to set all four panels in place so that they fit properly with each other. You’ll probably need to start making some fine adjustments here by sanding more on the edges.
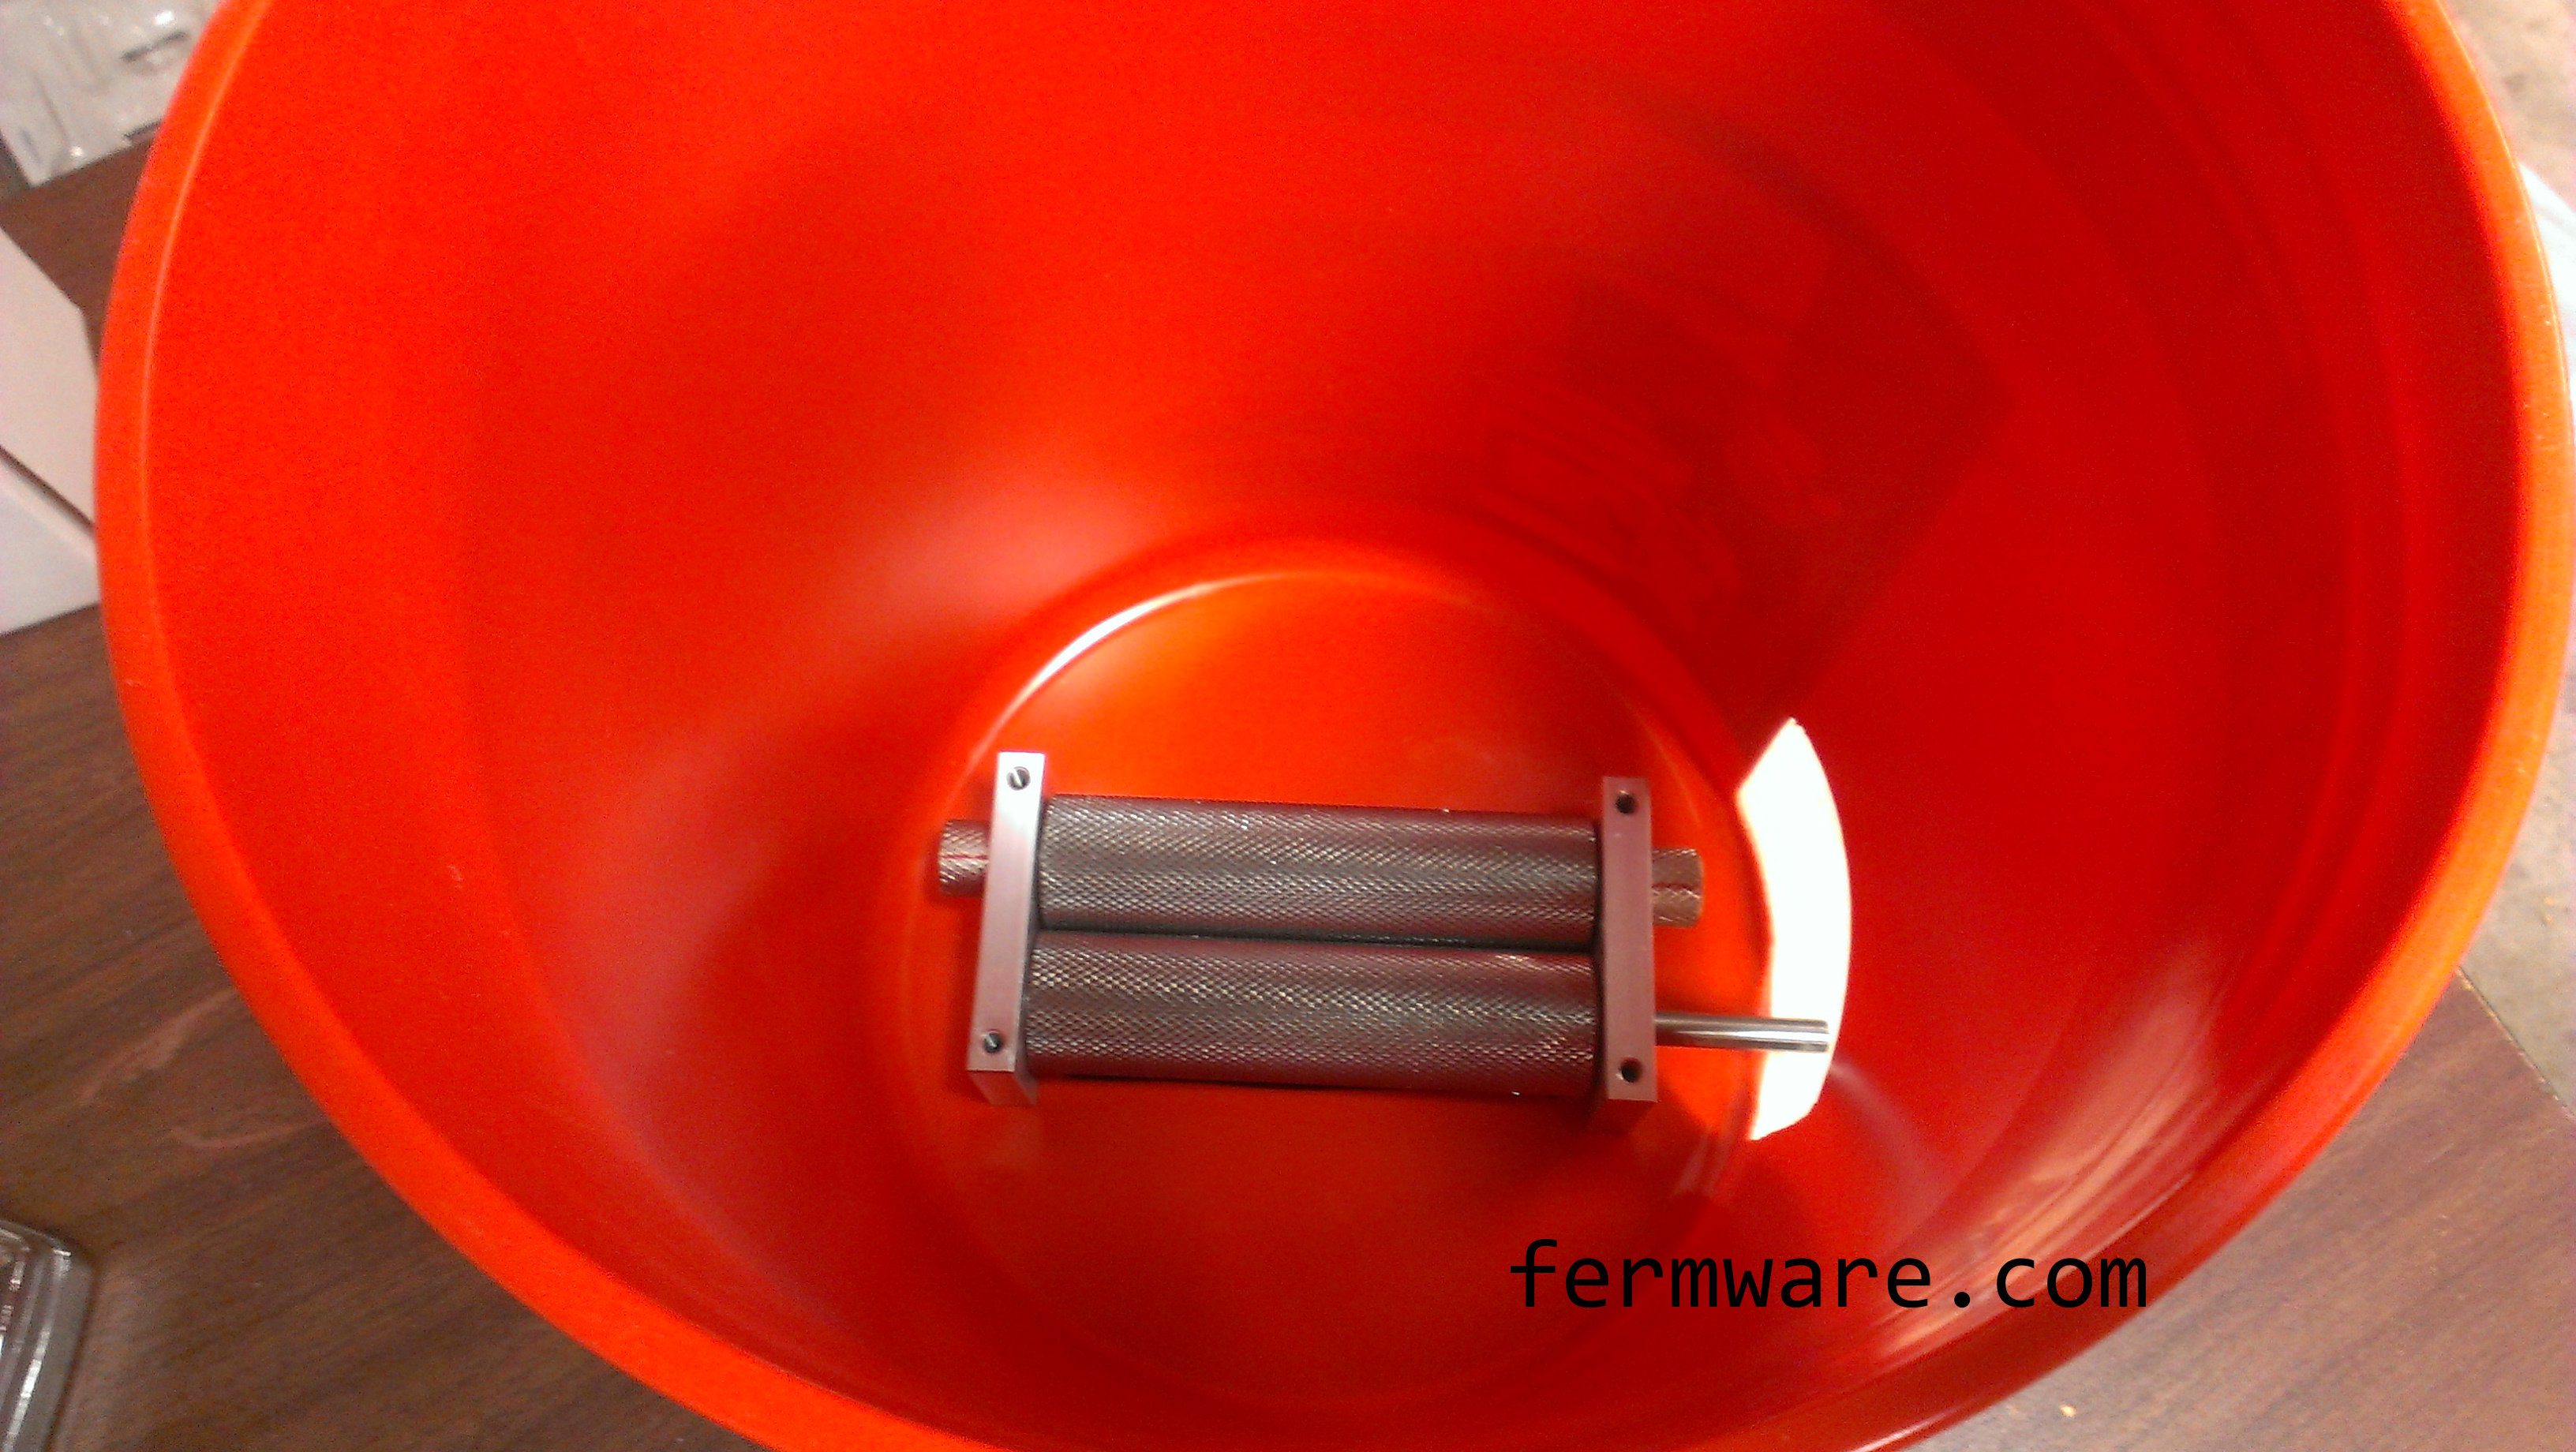
Once all of the panels fit nicely with each other, you’ll want to provide clearance for the rollers. Go ahead and put your roller mill inside the mill box. Hold the panels in place and spin the rollers. If you hear or feel the roller rubbing on the panel, just take that edge to the belt sander until you have sufficient clearance. You don’t need a paper thin gap, just enough so that when the hopper assembly is misaligned, it doesn’t rub. And in use the rollers will clearance any material that doesn’t need to be there anyway. Plus, you could use a little extra fiber in your diet.
Once the fit of the panels is to your liking, you will be ready to secure them in place. I used a bit of wood glue and then tacked them in place with some small tack nails. You can leave the nails in or remove them. Or if you are really patient, go without nails, support the panels and let it sit overnight for the glue to dry.
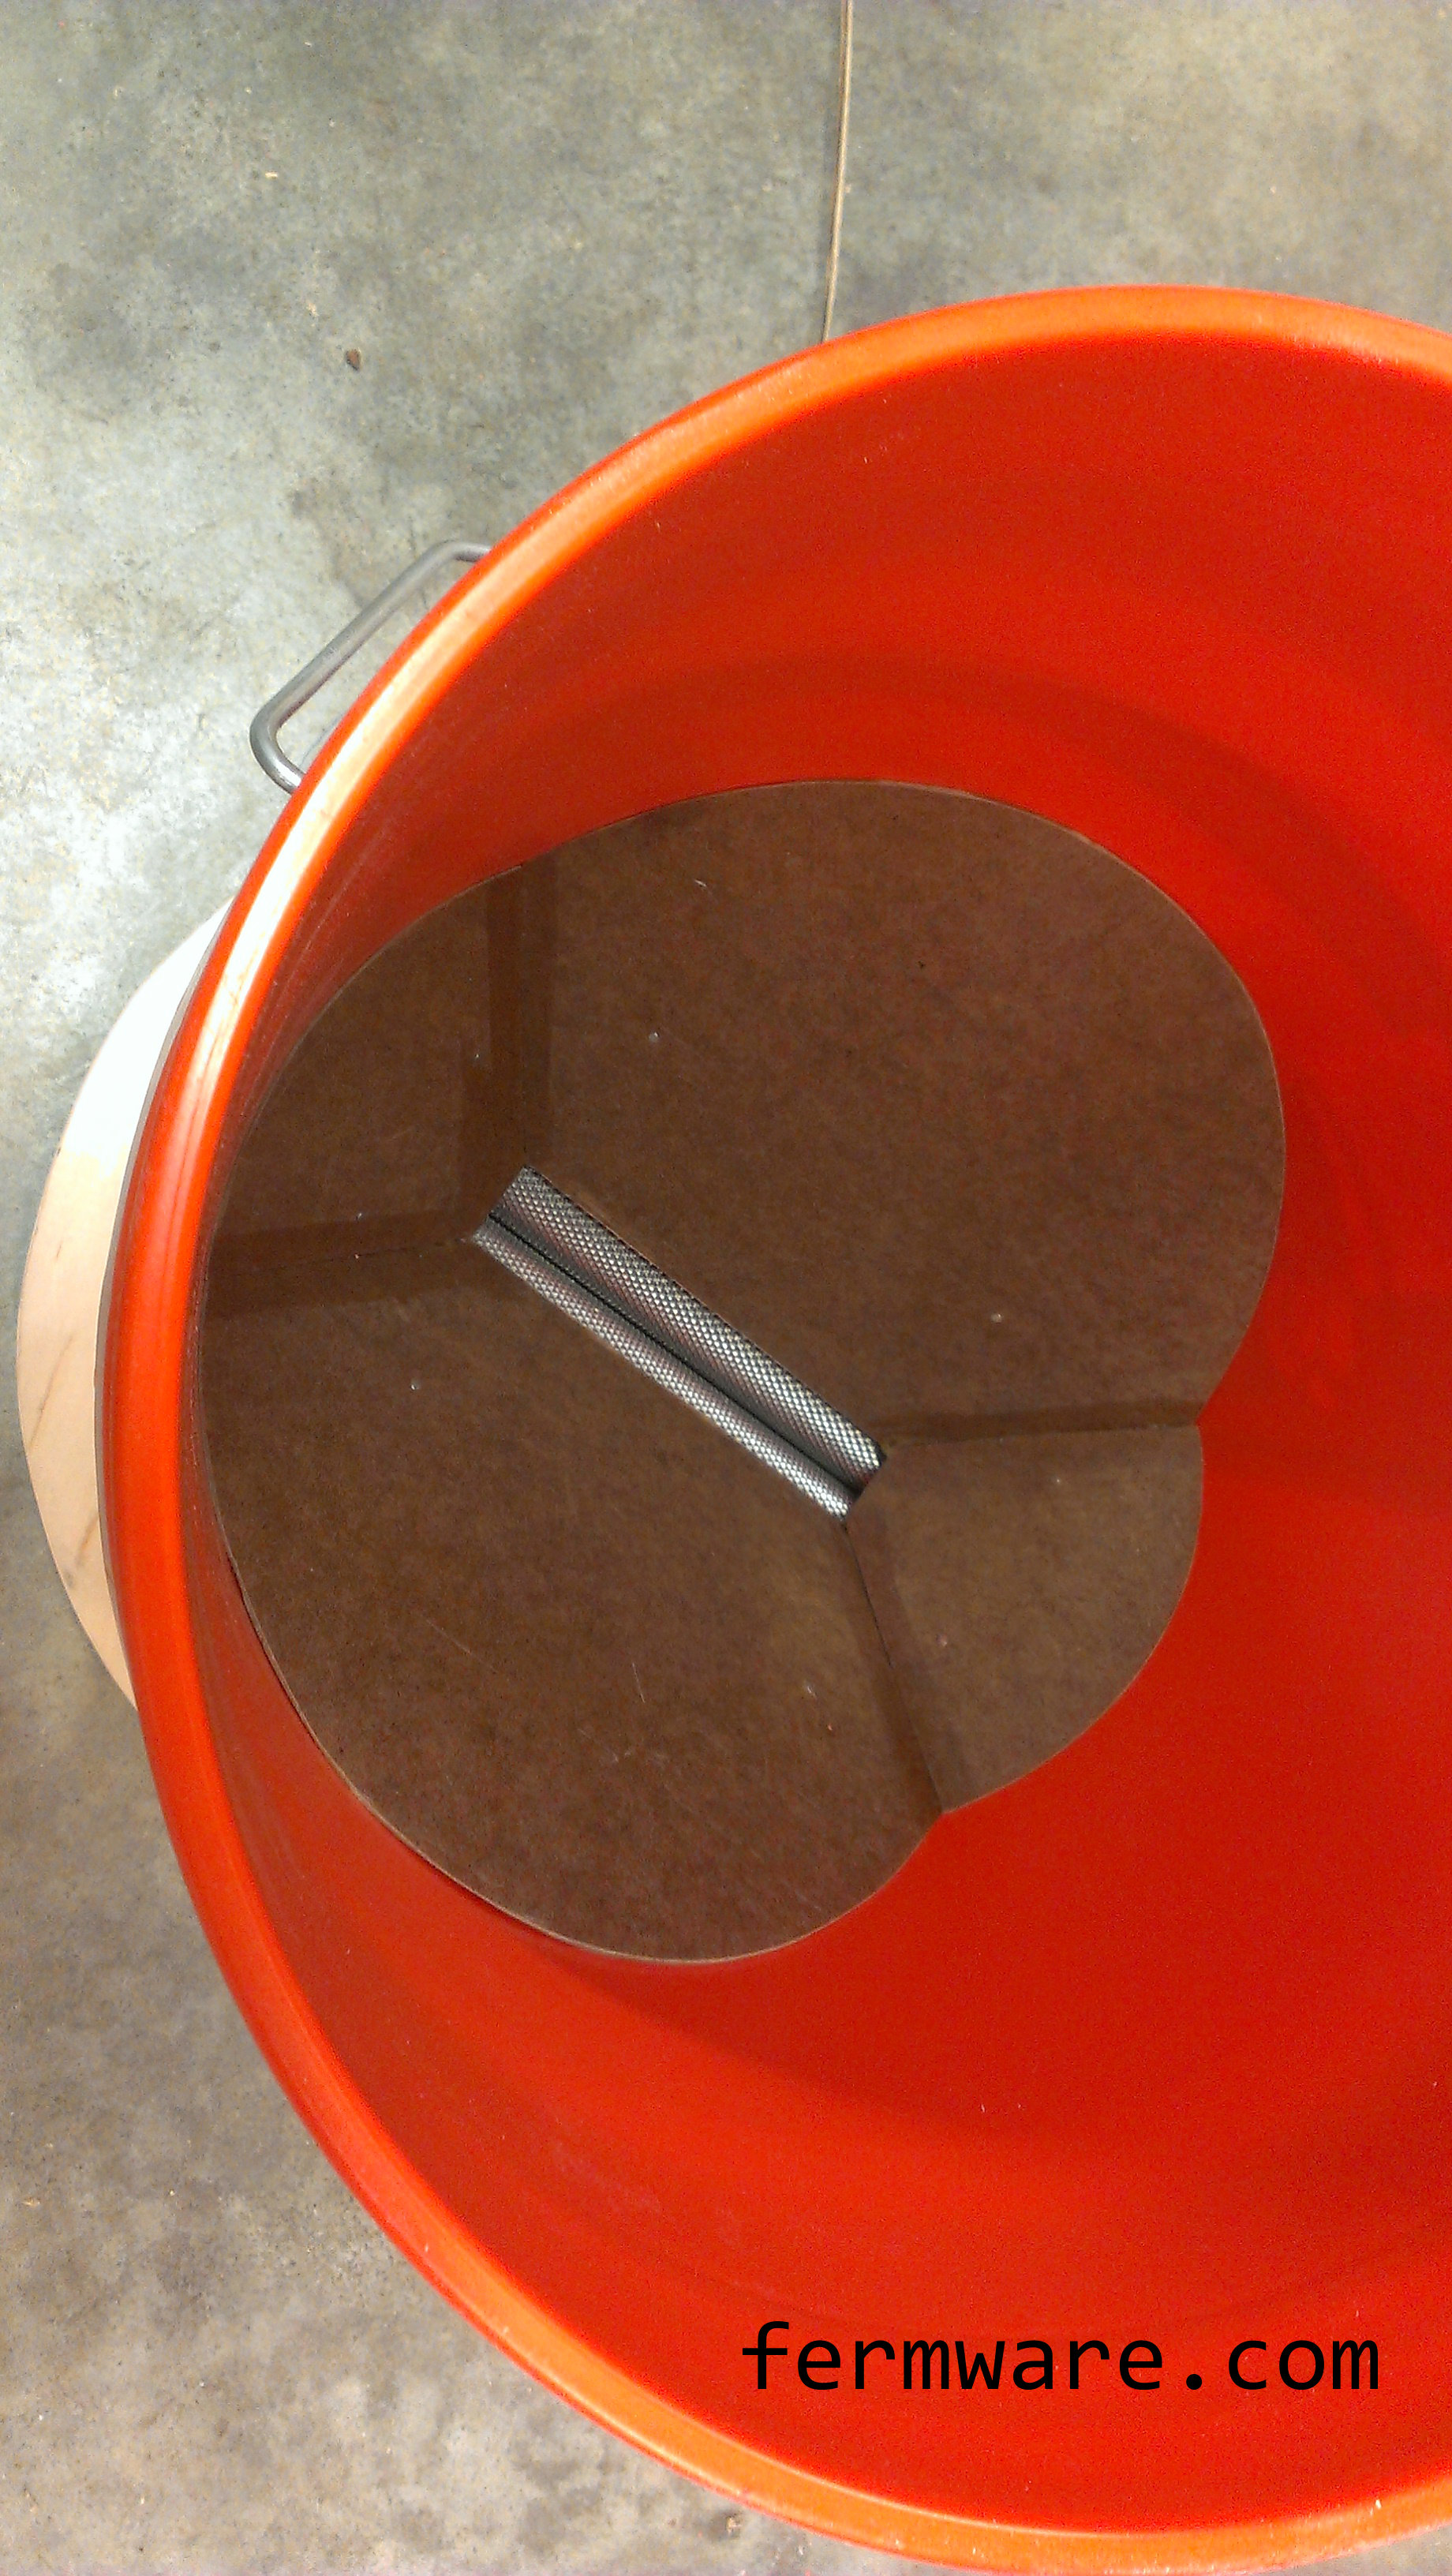
Grain Shield
This one is a little quicker to fit. Simply keep sanding it until it drops in like the picture below.

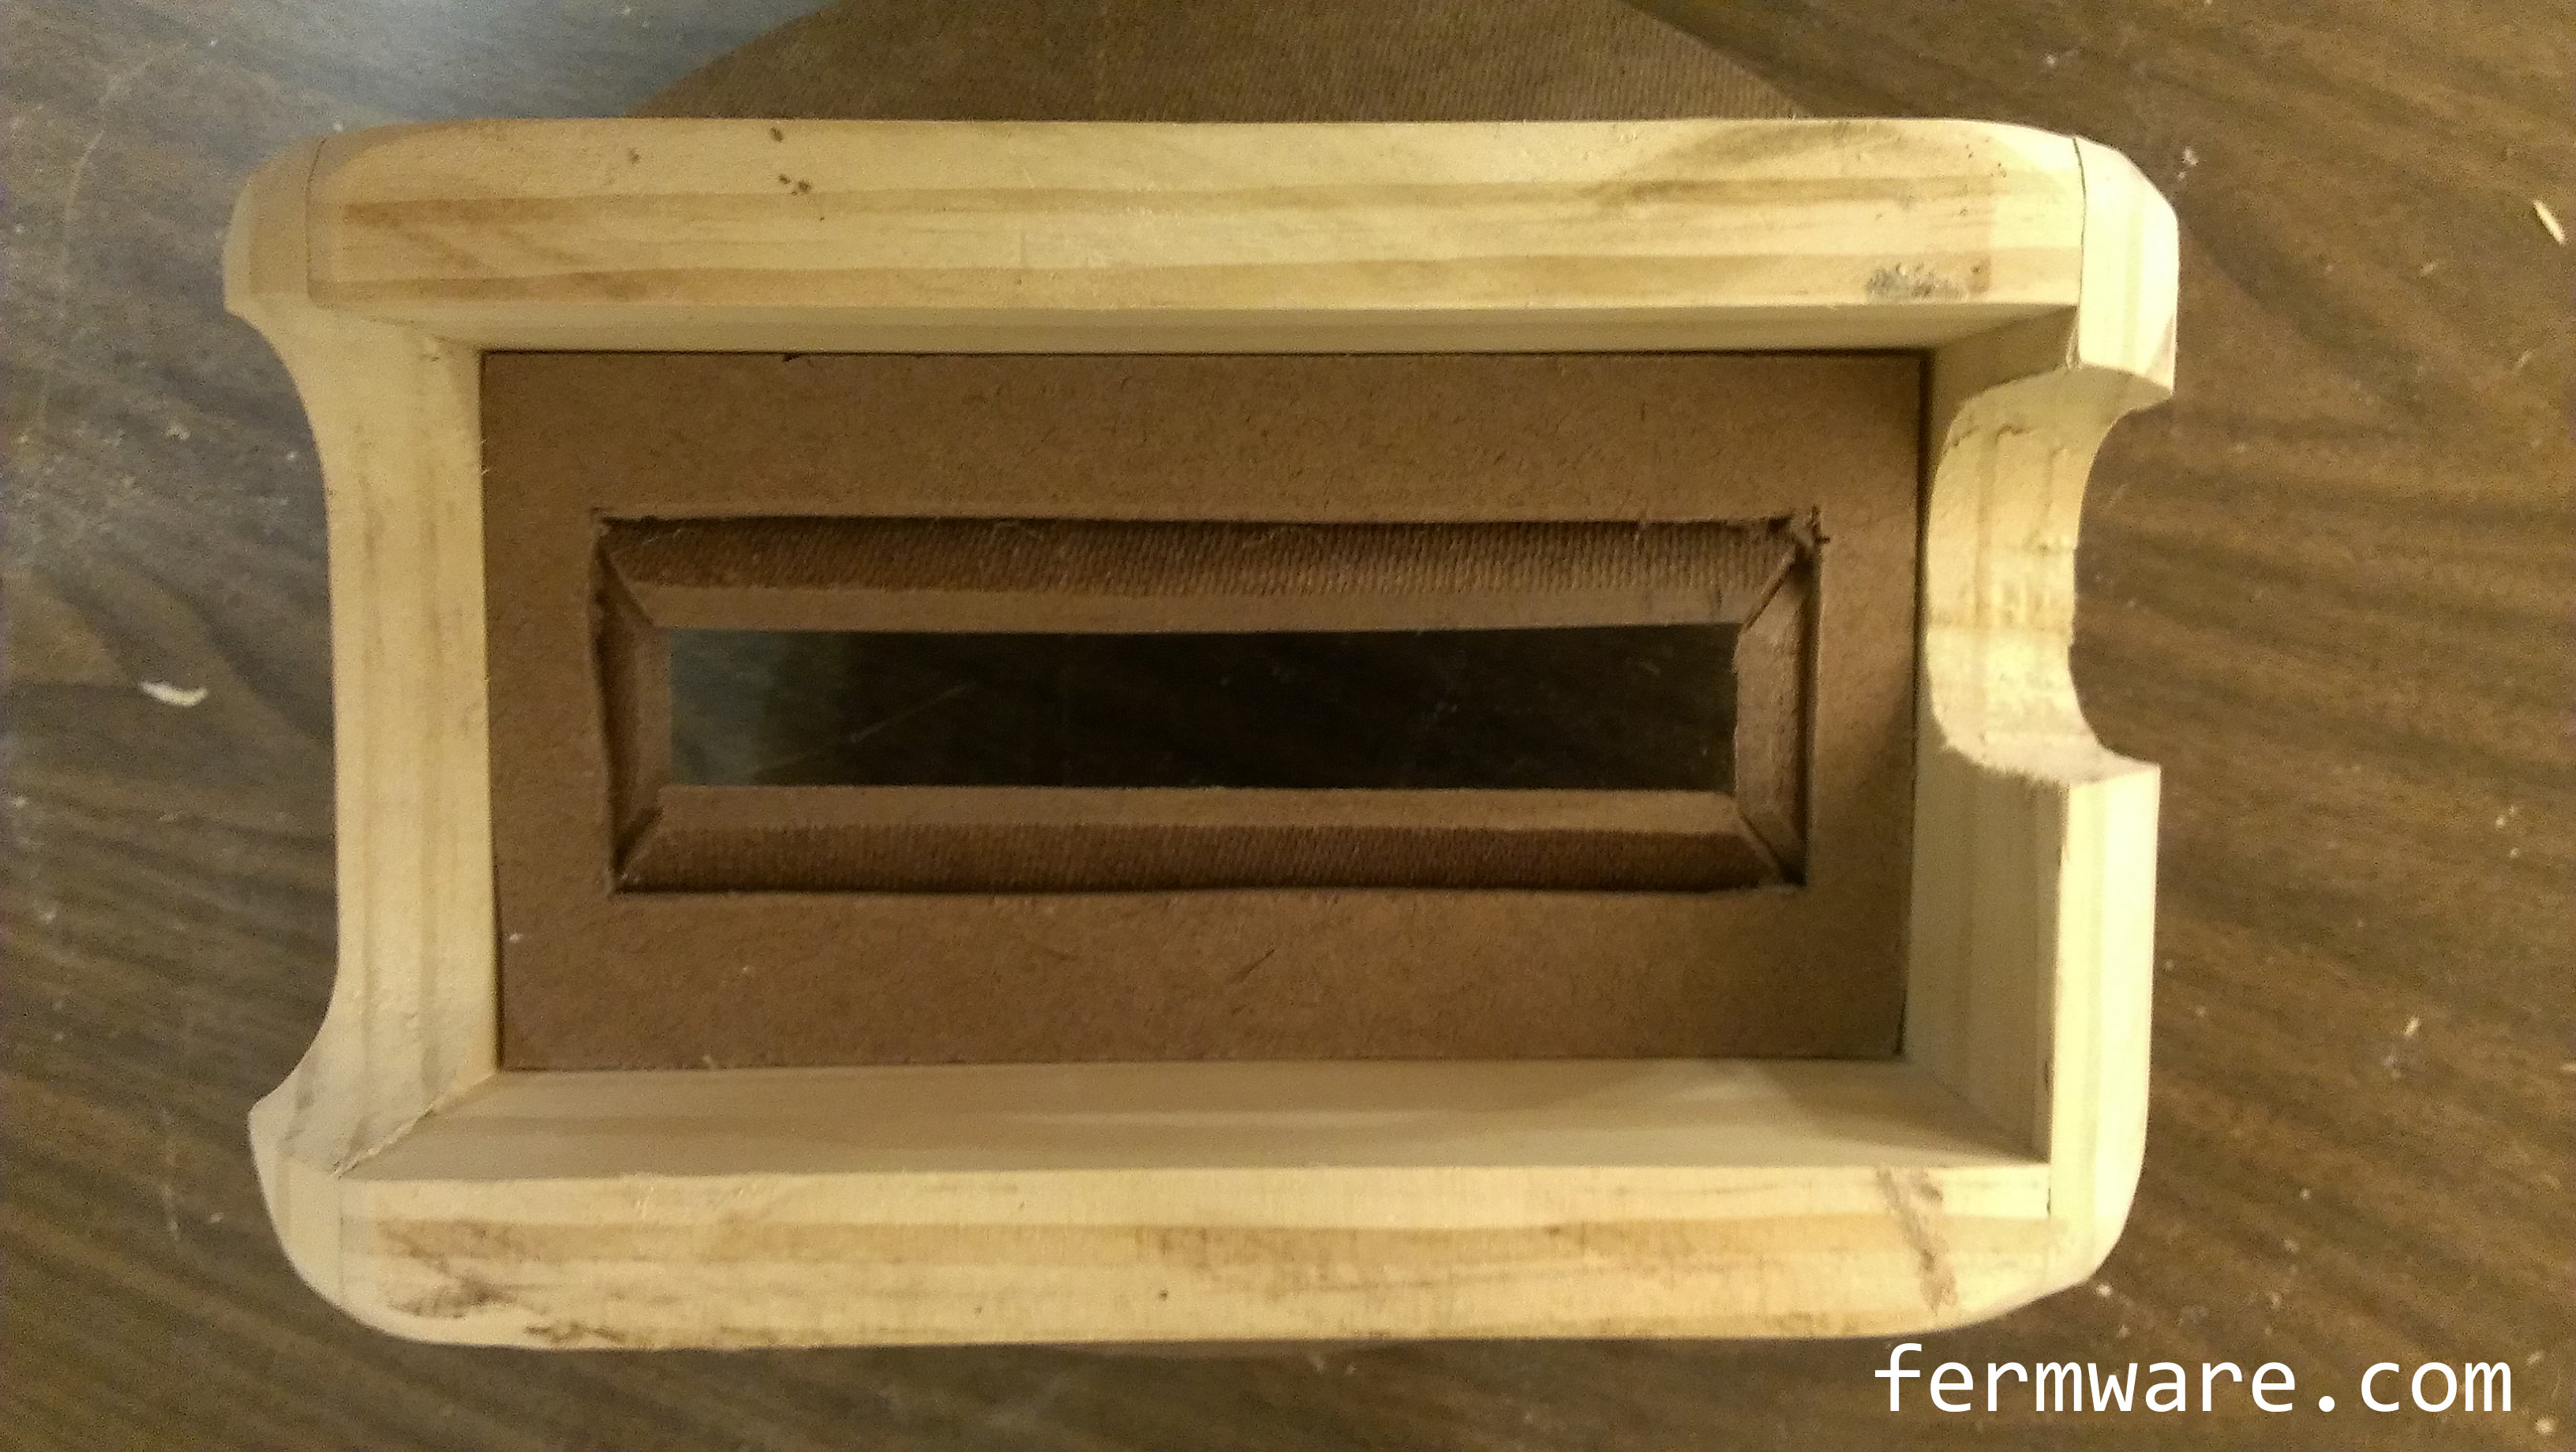
Don’t glue this one in just yet. We still need to shape the upper panels to fit in the bucket and also the mill box corners. Yes, I know this picture already shows them shaped.
Up next…
Final Assembly and fit to bucket
Missed a post?
Introduction
Part 2: Bucket Modifications
Part 3: Wooden Base
Part 4: Mill Box
Part 5: Funnel Panels (this post)
Part 6: Final Assembly
Part 7: CAD Drawings
Thanks for your interest in this project!
All files have a 2″x2″ square on the print so that when you print out on paper, you can measure to make sure your printer was printing to scale and at the correct aspect ratio.
The intention in making these files downloadable and free is for people to make this themselves or modify/improve the design to suit them.
This download is available through the Creative Commons Attribution-Non-Commercial license.
If you are interested in this for commercial purposes (i.e. you want to make money on my effort), I’m flattered, but please contact me first.
Be excellent to everyone!
Click on the download icon to agree to these terms and enjoy!
[wpdm_package id=’781′]